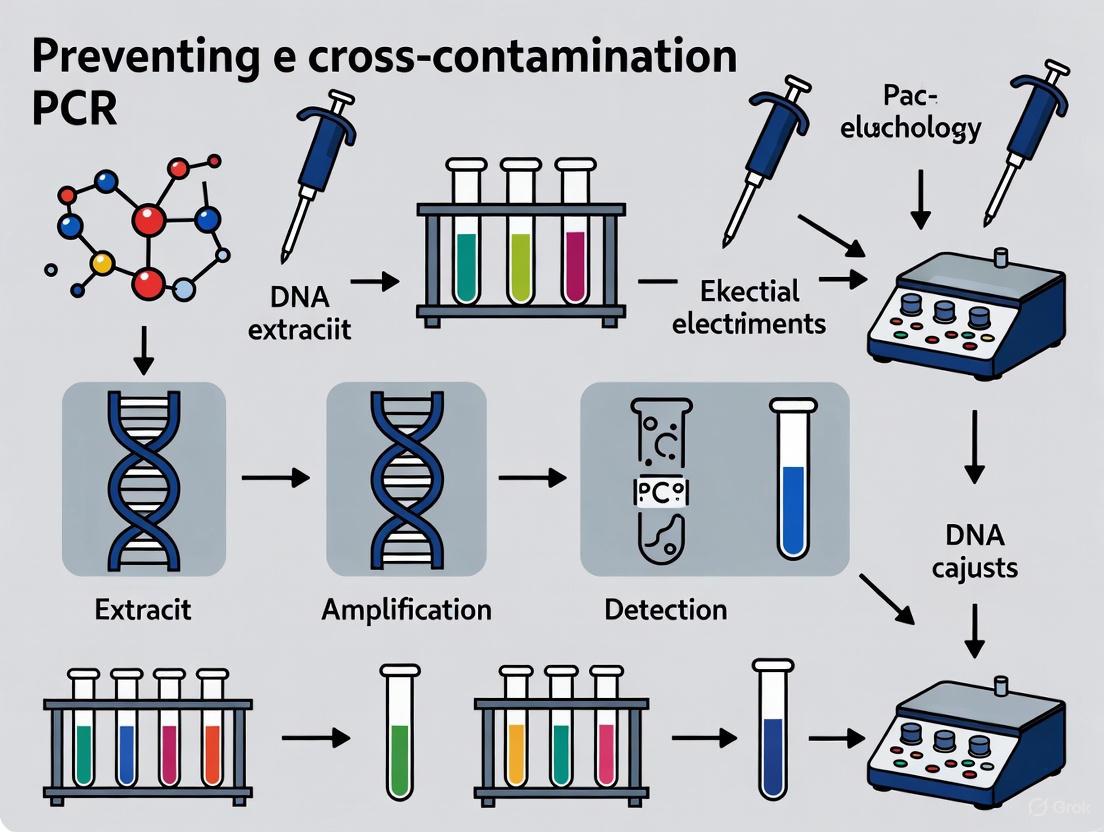
Strategic Approaches to Minimize Cross-Contamination in Parasitology PCR: A Guide for Reliable Diagnostics and Research
Cross-contamination in parasitology PCR poses a significant threat to diagnostic accuracy and research integrity, potentially leading to false positives and compromised results.
Strategic Approaches to Minimize Cross-Contamination in Parasitology PCR: A Guide for Reliable Diagnostics and Research
Abstract
Cross-contamination in parasitology PCR poses a significant threat to diagnostic accuracy and research integrity, potentially leading to false positives and compromised results. This article provides a comprehensive framework for researchers and scientists to systematically address this challenge. It covers the foundational principles of contamination routes, explores innovative methodological solutions like Suppression/competition PCR and single-tube nested PCR, details rigorous troubleshooting and decontamination protocols, and evaluates validation strategies through comparative performance data. By integrating these elements, the content aims to equip professionals with the knowledge to implement robust, contamination-free PCR workflows, thereby enhancing the reliability of parasite detection in clinical, environmental, and food safety contexts.
Understanding the Sources and Risks of PCR Contamination in Parasitology
In the field of parasitology PCR research, the exquisite sensitivity of molecular amplification assays is a double-edged sword. While it enables the detection of low-abundance pathogens, it also makes these techniques highly susceptible to cross-contamination, which can compromise the integrity of experimental results and diagnostic accuracy. Cross-contamination refers to the unintentional transfer of nucleic acids—whether from aerosols, amplicons (PCR products), or sample carryover—between specimens, reagents, or equipment. In parasitology, where accurate detection of protozoans and helminths is crucial for both individual patient care and public health interventions, controlling this phenomenon is not merely a best practice but a fundamental requirement for reliable science [1] [2] [3]. This guide provides troubleshooting and best practices to help researchers minimize these risks.
Defining the Contaminants
In a PCR laboratory, cross-contamination generally manifests in three primary forms:
- Aerosols: Created during routine laboratory procedures such as pipetting, opening tube lids, or centrifuging. These microscopic droplets can contain nucleic acids from samples or amplicons and settle on surfaces, equipment, or into open reagents [4].
- Amplicons: These are the amplified DNA products of PCR reactions. They are present in extremely high concentrations in post-amplification tubes and plates, making them the most potent source of contamination for subsequent reactions [4] [2].
- Sample Carryover: The physical transfer of material from one sample to another during handling, often via contaminated gloves, pipettes, or work surfaces [5] [6].
Experimental Evidence and Quantification
Understanding the magnitude of contamination risk is vital. One study systematically investigated carryover contamination in an amplicon sequencing (AMP-Seq) workflow for SARS-CoV-2, providing quantitative data on contamination levels from various sources [4].
Table 1: Quantitative Impact of Different Contamination Sources in an Amplicon Sequencing Workflow
| Contamination Source | Experimental Setup | Resulting Contamination Level (T Value*) |
|---|---|---|
| Aerosols | NFS water placed in lab rooms for 1 day | 0.32% - 0.36% |
| Reagents | Using a contaminated PCR master mix | Mean of 9.18% |
| Pipettes (without filter tips) | Library construction in a general laboratory | Mean of 1.28% |
| Combined Controls | Use of filter tips + standardized lab | Mean of 0.43% |
| Advanced Control (ccAMP-Seq) | Filter tips + dUTP/UDG + DNA spike-ins | At least 22-fold lower than AMP-Seq |
T Value: The ratio of reads mapped to the target pathogen versus total qualifying reads [4].
This data demonstrates that reagents and equipment can be significant, quantifiable sources of contamination, sometimes exceeding the signal from actual low-level samples. The study successfully developed a carryover contamination-controlled workflow (ccAMP-Seq) that reduced contamination levels by at least 22-fold and achieved a detection limit as low as one copy per reaction [4].
Best Practices for a Contamination-Controlled Laboratory
Preventing cross-contamination requires a systematic approach encompassing laboratory design, workflow, and disciplined practices.
Laboratory Design and Workflow
The most effective strategy is physical separation. Establish a unidirectional workflow that moves from clean pre-amplification areas to dirty post-amplification areas, with no backtracking [2].
The following diagram illustrates the ideal laboratory setup and workflow to prevent cross-contamination.
Figure 1: Ideal unidirectional workflow for a PCR laboratory to prevent cross-contamination.
The American Association of Veterinary Laboratory Diagnosticians (AAVLD) recommends five essential workspaces [2]:
- Clean Reagent Preparation Area: Dedicated to preparing master mixes and controls. No pathogens or nucleic acids should be handled here.
- Specimen Preparation Area: For processing samples and extracting nucleic acids. This should contain a biological safety cabinet.
- Nucleic Acid Addition Area: A separate dead-air box or cabinet for adding extracted nucleic acid to the master mix.
- Nucleic Acid Amplification Area: Houses the thermocyclers. Keep tubes and plates closed.
- Post-Amplification Area: Dedicated to analyzing PCR products (e.g., gel electrophoresis). This area must be well-separated from all pre-amplification areas.
Key Research Reagent Solutions
Utilizing the right reagents and consumables is a critical line of defense against contamination.
Table 2: Essential Reagents and Materials for Contamination Control
| Item | Function in Contamination Control |
|---|---|
| dUTP/Uracil DNA Glycosylase (UDG) | A enzymatic system that degrades carryover amplicons from previous PCRs. PCR reactions are set up with dUTP instead of dTTP. In subsequent reactions, UDG cleaves any uracil-containing contaminating DNA before PCR begins, preventing its amplification. It is inactivated during the first denaturation step [4]. |
| Synthetic DNA Spike-Ins | Synthetic DNA fragments with the same primer-binding regions as the target but different internal sequences. Added to samples, they compete with any potential contaminants for primers and polymerase. They also help quantify the target and ensure that samples with very low viral loads generate sufficient material for sequencing [4]. |
| Hot-Start DNA Polymerases | Polymerases that remain inactive at room temperature, preventing non-specific amplification and primer-dimer formation during reaction setup, which can be a source of false positives and reduced efficiency [7] [8]. |
| Filter Pipette Tips | Create a physical barrier within the pipette shaft to prevent aerosol contamination from entering and contaminating the pipette itself [4] [5]. |
| 10% Bleach (Sodium Hypochlorite) | A common and effective decontaminant that degrades nucleic acids on work surfaces. A 1:10 dilution of household bleach (final concentration ~0.5-0.55%) with a contact time of 2-10 minutes is recommended [2]. |
Troubleshooting Guide: Identifying and Resolving Contamination
This FAQ section addresses common problems and their solutions.
Q: My negative controls are showing positive results. What is the most likely cause and how can I address it?
A: Amplicon carryover is the prime suspect. Immediate actions include:
- Decontaminate: Thoroughly clean all work surfaces, equipment (including pipette exteriors), and safety cabinets with a 10% bleach solution, followed by ethanol or water to prevent corrosion [2] [5].
- Replace Reagents: Prepare fresh aliquots of all reagents, especially water, buffers, and primers. Test new lots of reagents if the problem persists [8].
- Implement UDG/dUTP: Incorporate the dUTP/UDG system into your PCR protocol to enzymatically destroy future carryover amplicons [4].
- Review Practices: Ensure the use of filter tips and dedicated lab coats/PPE for each area. Verify that the unidirectional workflow is being strictly followed [2] [5].
Q: I am getting inconsistent results between replicates, or my PCR fails unexpectedly. Could contamination be a factor?
A: Yes, random contamination from aerosols or reagents can cause inconsistency. Furthermore, PCR inhibitors carried over from sample processing can cause false negatives or low yield, which may be mistaken for contamination issues [4] [9].
- Check for Inhibitors: Use an internal control that is co-amplified with your target to detect the presence of PCR inhibitors [1] [2].
- Purify Template DNA: Re-purify your DNA template using alcohol precipitation or a commercial cleanup kit to remove salts, proteins, or other inhibitors [7] [8].
- Assess Reagents: Test new batches of critical reagents, as nuclease contamination can degrade your template or primers [8].
Q: How can I be sure my new assay is not generating false positives due to contamination?
A: Rigorous controls are non-negotiable.
- No-Template Controls (NTCs): Include multiple NTCs (nuclease-free water) in every run to monitor for amplicon or reagent contamination [4] [2].
- Negative Control: Include a biological sample known to be negative for the target parasite.
- Positive Control: Use a weak positive control to ensure the assay's sensitivity remains high and to detect the presence of inhibitors that might cause false negatives.
The Future: Digital PCR and Contamination Control
While real-time PCR (qPCR) is a workhorse in parasitology, digital PCR (dPCR) offers inherent advantages for contamination control. By partitioning a sample into thousands of individual reactions, dPCR minimizes the impact of contaminants and inhibitors, as they are unlikely to be present in the majority of partitions [9]. This makes dPCR particularly robust for detecting low-abundance parasites in complex sample matrices and can provide an additional layer of confidence in results where contamination is a persistent concern [9].
In the field of parasitology, molecular diagnostics like Polymerase Chain Reaction (PCR) have become cornerstone techniques for their sensitivity and specificity in detecting parasitic infections. However, the consequences of inaccurate results—both false positives and false negatives—extend far beyond simple diagnostic error, potentially impacting patient outcomes, research validity, and public health initiatives. False positives in clinical parasitology may lead to unnecessary treatments, increased healthcare costs, and patient anxiety, while false negatives can result in untreated chronic infections, ongoing transmission, and severe health complications, particularly in immunocompromised individuals. Within research settings, these inaccuracies can compromise study findings, lead to erroneous conclusions, and misdirect future scientific inquiries. This technical support center addresses the critical need for minimizing diagnostic errors in parasitology PCR, providing troubleshooting guidance and standardized protocols to enhance the reliability of molecular diagnostics for researchers, scientists, and drug development professionals working within this specialized field.
Understanding False Positives and False Negatives in Molecular Diagnostics
Definitions and Core Concepts
In parasitology PCR diagnostics, a false positive occurs when the test incorrectly indicates the presence of a parasite that is truly absent, while a false negative occurs when the test fails to detect a parasite that is actually present. The reliability of any diagnostic method is measured by its sensitivity (ability to correctly identify true positives) and specificity (ability to correctly identify true negatives). These metrics are particularly crucial in parasitology, where many parasitic infections have low pathogen loads in clinical samples and can be challenging to detect.
The fundamental principle of PCR—extreme sensitivity—is both its greatest strength and most significant vulnerability. As noted in the StatPearls overview on PCR, "Extreme sensitivity allows detection of even minimal contamination in DNA or RNA samples, which may produce inaccurate results" [10]. This heightened sensitivity means that even minute levels of cross-contamination can generate false positive signals, while various inhibitors present in fecal samples or other biological materials can lead to false negatives by interfering with the amplification process.
Multiple technical factors contribute to diagnostic inaccuracies in parasitology PCR. For false positives, the primary sources include:
- Carryover contamination: Amplified DNA from previous PCR reactions contaminating new reactions
- Cross-contamination: Between samples during processing or DNA extraction
- Non-specific amplification: Primers binding to non-target sequences
- Inadequate controls: Failure to include proper negative controls to detect contamination
For false negatives, contributing factors include:
- PCR inhibitors: Substances in fecal samples that interfere with DNA polymerization
- Suboptimal DNA extraction: Inefficient breaking of thick-walled parasite (oo)cysts [11]
- Primer-design issues: Poorly designed primers that fail to bind effectively to target sequences
- Low parasite load: Samples with minimal numbers of parasites below the detection threshold
The thick walls of parasite (oo)cysts present a particular challenge for DNA extraction, potentially leading to false negatives if not properly addressed during sample preparation [11]. Additionally, the "high density of PCR inhibitors in stool samples" creates further obstacles for reliable amplification [11].
Troubleshooting Guides: Identifying and Resolving Common PCR Issues
FAQ: Addressing Critical Challenges in Parasitology PCR
Q1: Our parasitology PCR assays are consistently detecting low levels of contamination in negative controls. What systematic approaches can we implement to identify and eliminate the source?
A: Consistent contamination in negative controls indicates a systematic issue in your workflow. First, implement spatial separation of pre- and post-amplification areas with dedicated equipment for each zone [10]. Introduce UV irradiation of workspaces and reagents (except enzymes and primers) before reactions are set up. Utilize uracil-N-glycosylase (UNG) treatment in your master mix to degrade carryover amplicons from previous reactions. Perform environmental monitoring by placing open reaction tubes around your workspace during setup, then closing and amplifying them to identify contamination hotspots. Most critically, always include multiple negative controls (extraction controls and no-template controls) to pinpoint where contamination enters your process.
Q2: We're experiencing inconsistent detection of low-abundance parasites in fecal samples, despite optimized primer design. What strategies could improve sensitivity?
A: The challenge likely stems from PCR inhibitors in fecal samples or inefficient DNA extraction from thick-walled parasites. Implement an inhibition control by spiking samples with a known quantity of exogenous DNA and monitoring its amplification [12]. For DNA extraction, incorporate mechanical disruption methods like bead-beating to break resilient parasite cysts and oocysts [12]. Consider adopting automated extraction systems like the Microlab Nimbus or QIAsymphony, which show improved consistency in parasitology applications [11] [12]. For challenging samples with abundant non-target DNA, novel methods like Suppression/Competition PCR can preferentially reduce amplification of unwanted DNA, improving detection of low-abundance parasites by over 60% [13].
Q3: How can we validate a new in-house parasitology PCR assay without a commercial gold standard available?
A: Implement a composite reference standard approach using multiple diagnostic methods. For example, combine microscopy, culture (where available), serology, and clinical findings to establish a "true" positive/negative status for validation samples [14]. Participate in external quality assessment schemes like the Helminth External Molecular Quality Assessment Scheme (HEMQAS) to benchmark your assay's performance [12]. Finally, perform analytical validation including limit of detection studies with serial dilutions of positive control material, and specificity testing against a panel of common commensals and related parasites to check for cross-reactivity.
Q4: What are the most effective methods to control for inhibition in difficult sample matrices like fecal samples?
A: The most robust approach is incorporating an internal control—either exogenous (spiked into each sample) or endogenous (amplification of a ubiquitous host gene)—to identify inhibited reactions [12]. For quantitative applications, monitor amplification efficiency through standard curves; significant deviations may indicate inhibition. Practical solutions include sample dilution (which reduces inhibitor concentration), use of inhibitor-resistant polymerases, addition of bovine serum albumin (BSA) to bind inhibitors [12], and incorporating polyvinylpolypyrrolidone (PVPP) during extraction to adsorb polyphenolic compounds [12].
Advanced Technical Solutions for Complex Problems
Q5: Our multiplex PCR for gastrointestinal parasites shows variable performance across different parasite targets. How can we optimize this?
A: Multiplex assays present particular challenges due to competing amplification efficiencies. First, verify that primer concentrations are balanced for each target—this often requires empirical optimization beyond the manufacturer's recommendations. Check for thermodynamic compatibility between primer sets to avoid primer-dimer formations that consume reagents. Implement a temperature gradient during validation to identify optimal annealing conditions that work for all targets simultaneously. Consider partitioning targets by abundance, as low-abundance parasites may require primer concentrations 2-3 times higher than high-abundance targets for equivalent sensitivity. For commercial multiplex assays like the Allplex GI-Parasite Assay, follow manufacturer guidelines for thermal cycling but validate with known positive controls for each target [11].
Q6: What quality control framework should we establish for longitudinal parasitology studies where monitoring treatment efficacy is critical?
A: For longitudinal studies, implement a rigorous quality control system including: (1) batch testing of samples with inter-assay controls to monitor performance over time, (2) standard curves with known parasite DNA concentrations for quantitative applications, (3) blinded re-testing of a random subset of samples (至少 10%) to assess reproducibility, and (4) external quality assessment participation where available [12]. For treatment monitoring studies, ensure proper sample collection timing relative to drug administration, as too-early collection may miss parasite clearance. The use of quantitative PCR with precise Cq value tracking provides more sensitive monitoring of parasite load reduction than qualitative methods [12].
Experimental Protocols for Error Minimization
Protocol: Implementation of Suppression/Competition PCR for Reduced Off-Target Amplification
Background: Traditional parasitology metabarcoding often struggles with overwhelming amplification of non-target DNA (e.g., host, fungal, or plant material) that can obscure detection of low-abundance parasites [13]. Suppression/Competition PCR addresses this by selectively reducing amplification of unwanted sequences.
Table 1: Reagents for Suppression/Competition PCR Protocol
| Reagent | Function | Volume per Reaction | Notes |
|---|---|---|---|
| Template DNA | Target amplification | 2-5 μL | Adjust based on concentration |
| Suppression Primers | Compete with non-target sequences | 0.5-2 μM | Designed against abundant non-targets |
| Target-Specific Primers | Amplify parasite DNA | 0.1-0.5 μM | Lower concentration than standard PCR |
| dNTP Mix | Nucleotide source | 200 μM each | Standard concentration |
| Thermostable Polymerase | DNA amplification | 1-2 units | High-fidelity enzyme recommended |
| MgCl₂ | Cofactor for polymerase | 1.5-3 mM | Optimize concentration |
| PCR Buffer | Reaction environment | 1X | Manufacturer-specific |
Methodology:
- Suppression Primer Design: Design primers complementary to the most abundant non-target sequences in your sample type (e.g., fungal 18S rRNA for fecal samples). These should have similar melting temperatures to your target primers but higher concentration in the reaction [13].
- Reaction Setup: Prepare master mix with suppression primers at higher concentrations (0.5-2 μM) than target-specific primers (0.1-0.5 μM). This creates competition for polymerase binding.
- Thermal Cycling: Use a modified cycling protocol with an extended annealing time (45-60 seconds) to enhance competition between primers. A typical protocol: 95°C for 3 min; 35-40 cycles of 95°C for 30s, 55-60°C for 45s, 72°C for 60s; final extension 72°C for 5 min.
- Validation: Compare with standard PCR using known positive samples to verify maintained sensitivity for target parasites while demonstrating reduced non-target amplification.
Application Notes: This method has demonstrated reduction of fungal and plant reads by over 99% in ungulate fecal samples, enabling sequences from parasitic taxa to comprise an average of over 98% of total reads compared to an initial 36% [13]. The technique is particularly valuable for metabarcoding approaches using nanopore sequencing of the 18S rRNA gene for parasite detection [13].
Protocol: Comprehensive DNA Extraction from Difficult Fecal Samples
Background: Efficient DNA extraction from thick-walled parasite cysts and oocysts while removing PCR inhibitors is critical for accurate diagnosis [11]. This protocol combines mechanical and chemical lysis for maximal recovery.
Table 2: Research Reagent Solutions for Fecal DNA Extraction
| Reagent/Equipment | Function | Specifications/Alternatives |
|---|---|---|
| Precellys Soil grinding SK38 beads | Mechanical disruption of cysts | 0.1-0.5mm diameter; alternative: glass beads |
| STAR buffer | Lysis and stabilization | Commercial buffer; alternative: ASL buffer |
| Polyvinylpolypyrrolidone (PVPP) | Inhibitor binding | Particularly effective for polyphenolics |
| Bovine Serum Albumin (BSA) | Binds inhibitors in PCR | Molecular biology grade, PCR-tested |
| MagNA Pure system | Automated nucleic acid extraction | Alternatives: QIAsymphony, manual silica columns |
| Proteinase K | Protein digestion | >30 U/mg activity, molecular grade |
Methodology:
- Sample Preparation: Transfer 100-150 mg feces to a 2 mL tube containing grinding beads and 1.25 mL STAR buffer [12].
- Mechanical Disruption: Homogenize in a tissue homogenizer (e.g., Precellys 24) at 5500 rpm for 10s, followed by 60s incubation, and repeat [12].
- Inhibitor Removal: Add 2% PVPP to the suspension, vortex, and incubate at room temperature for 5 minutes [12].
- Centrifugation: Centrifuge at 14,000 rpm for 60s to pellet debris.
- DNA Extraction: Transfer 200 μL supernatant to an automated extraction system (e.g., MagNA Pure LC/96) using the DNA and Viral NA small volume kit [12].
- Quality Assessment: Measure DNA concentration and purity (A260/280 ratio ~1.8-2.0). Test extractability by amplifying a conserved gene.
Application Notes: This protocol has been successfully implemented for detection of various parasites including Strongyloides stercoralis, with sensitivity improvements over conventional microscopy [12]. For samples with particularly resistant parasite forms (e.g., Cryptosporidium oocysts), incorporate a freeze-thaw step (liquid nitrogen for 2 min followed by 65°C for 5 min, repeated 3x) before mechanical disruption.
Data Presentation: Performance Metrics of Molecular Diagnostics in Parasitology
Comparative Performance of Commercial PCR Assays
Table 3: Diagnostic Performance of Commercial PCR Assays for Intestinal Protozoa
| Assay Name | Target Parasites | Sensitivity (%) | Specificity (%) | Sample Size | Reference Method |
|---|---|---|---|---|---|
| Allplex GI-Parasite Assay | Giardia duodenalis | 100 | 99.2 | 368 samples | Microscopy, antigen testing [11] |
| Allplex GI-Parasite Assay | Entamoeba histolytica | 100 | 100 | 368 samples | Microscopy, antigen testing [11] |
| Allplex GI-Parasite Assay | Cryptosporidium spp. | 100 | 99.7 | 368 samples | Microscopy, antigen testing [11] |
| Allplex GI-Parasite Assay | Dientamoeba fragilis | 97.2 | 100 | 368 samples | Microscopy [11] |
| G-DiaParaTrio | Giardia intestinalis | 92 | 100 | 185 samples | Microscopy, ELISA [15] |
| G-DiaParaTrio | Cryptosporidium parvum/hominis | 96 | 100 | 185 samples | Microscopy, ELISA [15] |
| G-DiaParaTrio | Entamoeba histolytica | 100 | 100 | 185 samples | Microscopy, ELISA [15] |
Impact of Sample Type on Diagnostic Sensitivity
Table 4: Sensitivity of qPCR for Leishmaniasis Diagnosis by Sample Type
| Sample Type | Leishmaniasis Form | Sensitivity Range (%) | Specificity Range (%) | Optimal Molecular Targets |
|---|---|---|---|---|
| Invasive samples (bone marrow, spleen) | Visceral | >90 | >90 | kDNA, 18S rRNA [14] |
| Non-invasive samples (blood, urine) | Visceral | <90 | >85 | kDNA minicircles [14] |
| Skin biopsies | Cutaneous | >90 | >90 | kDNA, ITS1 [14] |
| Skin scrapings | Cutaneous | 70-90 | >85 | kDNA minicircles [14] |
| Blood | Post-kala-azar dermal | Variable (40-85) | >85 | kDNA minicircles [14] |
Visualization of Workflows and Methodologies
Diagnostic Pathway for Accurate Parasite Detection
Diagram 1: Comprehensive diagnostic pathway for accurate parasite detection via PCR, highlighting critical quality control checkpoints.
Suppression/Competition PCR Mechanism
Diagram 2: Mechanism of Suppression/Competition PCR showing how strategic primer competition reduces non-target amplification.
The critical consequences of false positives and false negatives in parasitology PCR extend beyond individual diagnostic accuracy to impact patient outcomes, research validity, and public health decisions. By implementing the systematic troubleshooting approaches, optimized protocols, and rigorous quality control measures outlined in this technical support center, researchers and diagnosticians can significantly enhance the reliability of their molecular assays. The integration of novel techniques like Suppression/Competition PCR, combined with standardized workflows and comprehensive control strategies, provides a pathway to minimize diagnostic errors and their associated repercussions. As the field continues to evolve, commitment to these best practices will be essential for advancing both clinical parasitology and research applications, ultimately leading to more accurate detection, better patient management, and more robust scientific discoveries.
FAQs: Identifying and Understanding Contamination
1. What are the most common sources of contamination in parasitology PCR? Contamination primarily stems from two sources: cross-contamination between samples, reagents, and equipment, and carry-over contamination from amplified PCR products (amplicons) from previous reactions [16]. In parasitology, the initial sample itself (e.g., water, soil, or feces) can be a significant source, as these environments are often heavily contaminated with parasite eggs, cysts, or oocysts, as seen in studies from Armenia, Brazil, and Thailand [17] [18] [19].
2. How can I tell if my PCR reaction is contaminated? The most reliable method is to use a Negative Template Control (NTC) or Negative Control. This reaction contains all PCR components except the template DNA. If amplification occurs in the NTC, it confirms the presence of contamination [16] [20]. The pattern of amplification (e.g., consistent Ct values across NTCs vs. random Ct values) can help identify the contamination source, such as a contaminated reagent or aerosolized amplicons in the lab environment [20].
3. What are the consequences of PCR contamination? The impacts are severe and can compromise your entire study:
- False Positive Results: Contaminating DNA can lead to incorrectly identifying the presence of a parasite that is not actually in the sample [16]. This is critical in diagnostic and surveillance work.
- Reduced Sensitivity: Contamination can dilute the target DNA, making it harder to detect low-abundance parasites [16].
- Misleading Data and Wasted Resources: Contamination can invalidate experimental results, leading to wasted time, reagents, and effort.
4. Beyond the bench, what are environmental sources of contamination in parasitology studies? Fieldwork and sample collection introduce unique contamination risks. Studies show that soil and water sources can be heavily contaminated with parasitic elements. For example, research in Brazil found gastrointestinal parasites in over 90% of sampled public areas [19], and a study in Thailand detected parasites in raw vegetables and school soils [18]. This underscores the need for rigorous decontamination of sample containers and external surfaces before processing in the lab.
Troubleshooting Guide: Preventing and Managing Contamination
Pre-Amplification: Sample and Reagent Preparation
Problem: Suspected contamination from sample collection or DNA extraction. Solution:
- Use Disposable Equipment: Employ single-use, sterile items like punches, tweezers, or blades for sample collection to prevent cross-contamination between samples [16].
- Decontaminate Surfaces: Meticulously clean work surfaces with a freshly prepared 10% bleach solution (sodium hypochlorite) before and after work, followed by wiping with 70% ethanol [20] [16].
- Change Gloves Frequently: Always wear gloves and change them regularly, especially after handling potential contaminants or moving between workstations [16] [20].
Problem: Contamination of stock reagents leading to widespread experimental failure. Solution:
- Aliquot Reagents: Upon receipt, divide all reagents (master mixes, primers, water) into single-use volumes to avoid repeatedly freezing and thawing stock solutions and exposing them to potential contamination [16] [20].
- Dedicated Equipment and Areas: Use separate micropipettes, tip boxes, and lab coats for reagent preparation, sample preparation, and PCR setup. Maintain a unidirectional workflow [16].
Amplification and Post-Amplification
Problem: Carry-over contamination from amplified PCR products. Solution:
- Physical Separation: The most effective strategy is to have physically separated, dedicated rooms for pre-PCR (reagent prep, sample setup) and post-PCR (amplification, product analysis) activities. These areas should have entirely separate equipment, lab coats, and consumables [20] [16].
- Unidirectional Workflow: Personnel should never move from a post-PCR area to a pre-PCR area without changing personal protective equipment. One-way workflow is critical [20].
- Use UNG Enzyme: Incorporate uracil-N-glycosylase (UNG) into your qPCR master mix. This enzyme degrades PCR products from previous reactions that contain uracil (dUTP) instead of thymine (dTTP), effectively neutralizing carry-over contamination before the new amplification begins [20].
- Careful Tube Handling: Open one PCR tube at a time and ensure liquid is at the bottom of the tube before opening to minimize aerosol generation. Always seal tubes properly [16].
General Best Practices and Incident Management
Problem: General lab practices leading to sporadic contamination. Solution:
- Use Filter Tips: Always use aerosol-resistant filter tips to prevent aerosols from entering and contaminating pipette shafts [16].
- Proper Pipetting Technique: Avoid rapid pipetting that can cause splashing or spraying. Use positive-displacement pipettes for highly sensitive work [20].
- Automate the Workflow: Consider using automated liquid handlers. These systems improve pipetting accuracy and, with closed systems, significantly reduce the risk of cross-contamination [21].
Problem: I've identified a contamination incident. What should I do now? Solution:
- Discard Contaminated Materials: Immediately dispose of all reagents and consumables suspected of contamination (master mixes, primers, opened tip boxes) [16].
- Decontaminate Thoroughly: Clean all work surfaces, equipment (especially centrifuges and vortexers), and pipettes with a fresh 10% bleach solution, followed by ethanol or water [20] [16].
- Launder Lab Coats: Wash lab coats from all affected areas [16].
- Investigate the Cause: Review your lab's procedures and workflow to identify the source of the breach and retrain staff if necessary [16].
The following table summarizes quantitative data on environmental parasite contamination from recent studies, highlighting the pervasive nature of parasites in the environment, which can be a source of lab contamination if samples are not handled properly.
Table 1: Prevalence of Parasite Contamination in Environmental Samples
| Location | Sample Type | Sample Size | Contamination Rate | Predominant Parasites Identified | Citation |
|---|---|---|---|---|---|
| Central Plateau, Brazil | Fecal samples from public squares/parks | 536 samples, 117 areas | 70.3% of samples, 91.5% of areas | Ancylostomatidae (56.5%), Dipylidium caninum (25.8%), Toxocara spp. (6.2%) [19] | [19] |
| Koh Yao, Thailand | Raw Vegetables | 131 samples | 2.3% of samples | Ascaris spp. eggs (1.5%), Hookworms (0.8%) [18] | [18] |
| Koh Yao, Thailand | School Soil | 141 samples from 13 schools | 29.8% of samples, 84.6% of schools | Toxocara spp. (found in 100% of contaminated samples) [18] | [18] |
| Armenia | Raw Water & Sediment | 26 samples | "High detection" & "substantial contamination" | Cryptosporidium and Giardia [17] | [17] |
The Scientist's Toolkit: Key Reagent Solutions
Table 2: Essential Research Reagents and Materials for Contamination Control
| Item | Function in Contamination Control | Key Details |
|---|---|---|
| UNG (Uracil-N-glycosylase) | Enzyme that degrades carry-over contamination from previous PCR products. | Added to the master mix; requires the use of dUTP instead of dTTP in PCR reactions [20]. |
| Sodium Hypochlorite (Bleach) | Effective chemical decontaminant for destroying DNA on surfaces and equipment. | Use a freshly prepared 10% solution for decontamination; unstable when stored diluted [20] [16]. |
| Ethanol (70%) | General disinfectant for cleaning work surfaces and equipment. | Often used after bleach to wipe down surfaces [20]. |
| Aerosol-Resistant Filter Tips | Prevent aerosols and liquids from entering and contaminating pipette shafts. | A physical barrier for cross-contamination prevention; essential for all sensitive liquid handling [16]. |
| dUTP | Deoxynucleotide used in place of dTTP. | Allows UNG enzyme to selectively target and destroy PCR products from previous reactions [20]. |
Experimental Workflow and Protocols
Detailed Protocol: Implementing a Contamination-Control Workflow
1. Laboratory Zoning and Workflow:
- Principle: Establish physically separated work areas to create a unidirectional workflow [20] [16].
- Procedure:
- Area 1: Reagent Preparation. A dedicated, clean room or hood for preparing and aliquoting master mixes, primers, and water. This area should be PCR product-free.
- Area 2: Sample Preparation. A separate room for DNA/RNA extraction from samples. This is where the highest risk of sample-to-sample cross-contamination exists.
- Area 3: Amplification and Post-Analysis. A dedicated room for placing prepared reactions into the thermocycler and for analyzing PCR products (e.g., gel electrophoresis). This area contains the highest concentration of PCR amplicons.
- Movement: Personnel must move from "clean" to "dirty" areas (Area 1 -> Area 2 -> Area 3) and never in reverse on the same day without a complete change of lab coat and gloves [20].
2. Routine Decontamination Procedure:
- For Surfaces: Prepare a 10% (v/v) solution of sodium hypochlorite bleach fresh weekly. Apply to work surfaces, let sit for 10-15 minutes, then wipe thoroughly with nuclease-free water or 70% ethanol to prevent corrosion [20].
- For Equipment: Regularly decontaminate centrifuges, vortexers, and pipette exteriors with 10% bleach and 70% ethanol. Pipette shafts should be cleaned according to the manufacturer's instructions [20].
Advanced Methodology: Utilizing Digital PCR (dPCR) for Enhanced Specificity
Digital PCR (dPCR), including droplet digital PCR (ddPCR), is a modern solution that can mitigate some issues related to inhibitors and quantification in parasitology [22].
- Principle: The sample is partitioned into thousands of individual reactions, so that a positive signal is a binary (yes/no) endpoint. This allows for absolute quantification without a standard curve and reduces the impact of PCR inhibitors, as they are diluted in the partitions [22].
- Application in Parasitology: dPCR is being used for sensitive detection and quantification of various parasites, including Echinococcus multilocularis, Toxoplasma gondii, Trichuris spp., and for detecting parasite environmental DNA (eDNA) in water and soil [22]. This high sensitivity allows for the use of tiny sample volumes, which is advantageous when dealing with limited sample material [22].
Visual Guide: Contamination Control Workflow
This diagram illustrates the critical concept of physical separation and unidirectional workflow in the lab to prevent contamination.
Diagram 1: Physical lab workflow to prevent amplicon carry-over. The strict one-way flow from clean to dirty areas is critical. Movement from post-amplification back to pre-amplification areas must be prohibited without rigorous decontamination [16] [20].
Diagram 2: Contamination detection and incident response workflow. Following a confirmed contamination event, a systematic process of discarding materials, decontaminating, and investigating the root cause is essential to resolve the issue [16] [20].
In parasitology PCR research, the extreme sensitivity of molecular techniques like real-time PCR is a double-edged sword. While it allows for the detection of as little as 0.1 parasite per gram of feces [23], this same sensitivity makes the workflow highly vulnerable to contamination, leading to false-positive results and invalid data [3] [20]. Cross-contamination poses a significant threat to experimental integrity, particularly when processing complex sample matrices such as feces, which can contain PCR inhibitors and a high diversity of non-target organisms [24]. This guide outlines the major contamination pathways and provides targeted troubleshooting strategies to uphold data fidelity in high-risk diagnostic environments.
Troubleshooting Guides
Guide 1: Identifying and Resolving PCR Contamination
Problem: You observe amplification in your No Template Control (NTC) wells, indicating contamination in your qPCR experiment.
Explanation: Contamination in qPCR is often caused by amplified DNA products (amplicons) from previous reactions. These can aerosolize when tubes are opened and contaminate reagents, equipment, or new reaction setups [20] [25]. Even tiny, invisible droplets can contain millions of DNA copies, which are then amplified in subsequent runs [20].
Step-by-Step Resolution:
Confirm the Source: First, determine if the contamination is systematic or sporadic.
- If all NTCs show amplification at similar cycle threshold (Ct) values, the contamination likely originates from a contaminated shared reagent (e.g., master mix, water) [20].
- If only some NTCs show amplification with varying Ct values, the cause is likely random environmental contamination, such as aerosolized amplicons in the lab environment [20].
Immediate Action:
- Discard Reagents: Dispose of all open reagents, including master mixes, primers, and buffers. Use new, unopened aliquots [16] [25].
- Decontaminate Surfaces: Thoroughly clean all work surfaces, pipettes, centrifuges, and vortexers with a fresh 10% bleach solution (sodium hypochlorite), followed by wiping with de-ionized water. Bleach is effective at degrading DNA [20] [5].
- Replace Consumables: Open new bags of sterile PCR tubes and use fresh, unopened boxes of filter tips [25].
Long-Term Prevention: Implement and enforce strict laboratory practices:
- Physical Workflow Separation: Establish dedicated, separate areas for pre-PCR (reagent preparation, sample setup) and post-PCR (product analysis) activities. These areas should have dedicated equipment, lab coats, and supplies [20] [16].
- Use UNG Enzyme: Use a master mix containing uracil-N-glycosylase (UNG). This enzyme degrades any PCR products from previous reactions that contain uracil (dUTP) instead of thymine (dTTP), preventing their re-amplification [20].
- Aliquot Reagents: Divide all reagents into small, single-use aliquots to prevent widespread contamination of entire stocks [20] [25].
Guide 2: Managing Inappropriate Use of Faecal Occult Blood Tests (FOBT)
Problem: A fecal immunochemical test (FIT) used in a clinical setting returns a positive result, but subsequent colonoscopy finds no evidence of colorectal cancer (CRC) or pre-cancerous polyps.
Explanation: A false-positive FOBT result can occur if the test is misused. FOBTs are designed specifically for screening asymptomatic, average-risk individuals for CRC [26] [27]. Their use in inpatient settings or for evaluating patients with overt gastrointestinal symptoms (e.g., rectal bleeding, abdominal pain) is inappropriate and leads to inaccurate results [26]. In these cases, blood in the stool may come from benign sources like hemorrhoids or stomach ulcers, not cancer [27].
Step-by-Step Resolution:
- Review Clinical Context: Adhere to established guidelines. FOBT should only be used for routine screening of asymptomatic adults, typically starting at age 45 [26] [27]. It is not a diagnostic tool for symptomatic patients.
- Confirm Test Type: Understand the test's limitations. The table below compares the two main types of FOBT.
| Test Characteristic | Guaiac-based FOBT (gFOBT) | Fecal Immunochemical Test (FIT) |
|---|---|---|
| Detection Method | Detects the peroxidase activity of heme | Antibodies specific for human hemoglobin |
| Dietary Restrictions | Required (avoid red meat, certain vegetables) [26] [27] | Not required [26] [27] |
| Medication Restrictions | Required (avoid NSAIDs, vitamin C) [26] | Generally not required [26] |
| Sensitivity for CRC | ~50-70% [26] | ~70-85% [26] |
| Specificity for CRC | ~85-95% [26] | ~90-95% [26] |
- Follow Up Appropriately: For a positive FOBT result in an appropriate screening context, the standard follow-up procedure is a colonoscopy to visualize the colon and identify the source of bleeding [26] [27].
Frequently Asked Questions (FAQs)
FAQ 1: What is the single most important practice to prevent PCR contamination? The most critical practice is the physical separation of pre-PCR and post-PCR areas [20] [16]. This, combined with the consistent use of dedicated equipment, lab coats, and supplies for each area, creates a barrier that prevents amplified DNA products from entering your clean reagent and sample preparation spaces.
FAQ 2: How can I tell if my negative control result is a sign of a major problem? Amplification in a single No Template Control (NTC) is always a cause for concern and indicates contamination. You should investigate and not use the data from that run. If the amplification curve in the NTC is late (high Ct value) and irregular, it may indicate a low-level contaminant. If it is early (low Ct) and robust, it suggests a significant contamination event that requires immediate corrective action [20] [25].
FAQ 3: We process many stool samples. How can we improve the reliability of our parasitology PCR? Beyond physical separation, implement the following:
- Use Filter Tips: Always use aerosol-resistant filter tips to prevent cross-contamination via pipettes [16] [5].
- Systematic Workflow: Follow a one-way workflow from sample reception to DNA extraction to PCR setup and finally to analysis. Do not return to a clean area after handling amplified products [20].
- UNG Treatment: Incorporate uracil-N-glycosylase (UNG) into your qPCR protocol to chemically destroy carryover contamination from previous amplifications [20].
FAQ 4: Why is FIT now preferred over gFOBT for colorectal cancer screening? The fecal immunochemical test (FIT) is preferred because it is more sensitive for detecting colorectal cancer, does not require dietary or medication restrictions, and is specific for human blood, thereby reducing false-positive results [26] [27].
FAQ 5: Our lab is small and we cannot have separate rooms. How can we minimize contamination risk? You can create logical separation within a single room:
- Use dedicated bench spaces at maximum distance from each other.
- Use separate, clearly labeled micropipettes and equipment for pre- and post-PCR work.
- Perform pre-PCR work in a PCR workstation or hood, if available.
- Maintain a strict one-way workflow and clean all surfaces meticulously before and after pre-PCR setup [16].
Workflow Visualization
The following diagram illustrates a robust sample testing workflow designed to minimize contamination risks by enforcing a one-way path and physical separation of key processes.
Research Reagent Solutions
The table below lists key reagents and materials essential for conducting reliable, contamination-controlled PCR in parasitology research.
| Item | Function in the Workflow | Key Consideration for Contamination Control |
|---|---|---|
| Aerosol-Resistant Filter Tips | Prevents aerosols from entering and contaminating pipette shafts during liquid handling. | A primary defense against cross-contamination between samples [16] [5]. |
| UNG-containing Master Mix | Enzymatically degrades carryover PCR products from previous reactions that contain uracil. | Critical for preventing false positives from amplicon contamination; requires use of dUTP in PCR [20]. |
| Bleach Solution (10%) | A chemical decontaminant used to clean work surfaces and equipment. | Freshly prepared bleach effectively degrades DNA and should be used for routine cleaning [20] [5]. |
| Dedicated Lab Coats & Gloves | Personal protective equipment (PPE) worn during specific stages of the workflow. | Lab coats and gloves used in the post-amplification area must not be worn in the pre-PCR area [20] [25]. |
| Aliquoted Reagents | Small, single-use volumes of primers, nucleotides, and buffers. | Prevents the contamination of an entire reagent stock and reduces repeated freeze-thaw cycles [20] [16]. |
Implementing Proactive Techniques and Assay Designs to Suppress Contamination
This technical support guide provides detailed protocols and FAQs to help researchers minimize cross-contamination in parasitology PCR research through optimized laboratory workflow and unidirectional traffic systems.
Frequently Asked Questions (FAQs)
1. What is the most critical element of lab design for preventing PCR contamination? The most critical element is the physical separation of pre-PCR and post-PCR activities into distinct rooms or areas [28] [29]. This physical barrier is fundamental to preventing amplicons (amplified DNA) from contaminating your reagents, samples, and master mixes. A unidirectional workflow, moving only from clean (pre-PCR) to dirty (post-PCR) areas, must be enforced [16] [30].
2. How can we implement a unidirectional workflow if lab space is limited? Even in a single room, you can establish a unidirectional workflow using separate, dedicated compartments or benches for each stage (reagent prep, sample prep, amplification, and analysis) [29]. If separate compartments are not feasible, a strict timetable where pre-PCR and post-PCR procedures are performed at different times of the day can be an effective alternative [29].
3. What is the single most important practice for detecting contamination? The consistent and correct use of a Negative Template Control (NTC), also known as a no template control, is essential [28] [16] [30]. This control, which contains all PCR components except the template DNA, should never show amplification. If it does, it signals contamination in your reagents, consumables, or environment [28].
4. Which surfaces and equipment are most prone to contamination and require frequent decontamination? Centrifuges, vortexes, pipettes, and bench tops are common touch points prone to contamination [28] [30]. All work surfaces, including fridge handles, should be decontaminated regularly before and after PCR work [28].
5. Beyond lab layout, what personal practices are crucial?
- Frequently changing gloves, especially when moving between work areas or if splashing is suspected [28] [30].
- Using aerosol-resistant filter pipette tips to prevent aerosol contamination of pipette shafts [16].
- Aliquoting all reagents into single-use amounts to avoid contaminating entire stocks [16] [30].
Troubleshooting Guide: Contamination Issues
| Problem & Symptoms | Possible Causes | Recommended Solutions |
|---|---|---|
| False Positive in NTCAmplification in negative control wells. | • Amplicon carryover from post-PCR area [16].• Contaminated reagents (primers, master mix, water) [30]. | • Replace all suspect reagents [16].• Decontaminate surfaces with 10-15% fresh bleach solution [28] [30].• Review and enforce unidirectional workflow [28]. |
| Low Sensitivity/ YieldWeak or no target amplification. | • Contamination with non-target DNA diluting reagents [16].• Degraded template or reagents from nuclease contamination [7]. | • Use new, aliquoted reagents [16].• Re-purify template DNA [7].• Prepare reaction mixes in a UV-equipped laminar flow hood [31]. |
| Non-Specific Bands/ PeaksMultiple unexpected products in electrophoresis. | • Cross-contamination between samples during pipetting [28].• Contaminated pipettes or equipment [16]. | • Improve pipetting technique; avoid splashing [28].• Use filter tips and dedicated pre-PCR pipettes [16].• Clean equipment with 70% ethanol or 10% bleach [30]. |
Experimental Protocol: Laboratory Decontamination
Methodology for Surface and Equipment Decontamination to Mitigate DNA Contamination
Principle: A freshly prepared sodium hypochlorite (bleach) solution is effective at degrading DNA, thereby neutralizing contaminating DNA templates and amplicons on laboratory surfaces and equipment [28] [30].
Reagents:
- Household bleach (typically 5-8% sodium hypochlorite).
- Deionized (DI) water.
- 70% Ethanol.
Procedure:
- Prepare Decontamination Solution Daily: Dilute bleach to a 10% (v/v) solution in DI water to achieve a final concentration of 0.5-1% sodium hypochlorite [28] [30].
- Apply Solution: Liberally apply the fresh bleach solution to all work surfaces, equipment exteriors (including pipettes, centrifuges, vortexers), and touch points (e.g., fridge handles). Use paper towels to ensure the surface is thoroughly wetted and remains wet for 10-15 minutes [28] [30].
- Remove Residue: After the contact time, use a DI water-dampened paper towel to wipe down the surfaces and remove any bleach residue [28].
- Final Rinse (Optional): To quickly dry the surface and remove any final traces, wipe the area with a paper towel dampened with 70% ethanol [28].
- Waste Disposal: Dispose of all used paper towels and gloves as chemical waste according to your institution's safety protocols.
Research Reagent Solutions
| Item | Function / Explanation |
|---|---|
| Aerosol-Resistant Filter Tips | Pipette tips with an internal barrier to prevent aerosols and liquids from contaminating the pipette shaft, a common source of cross-contamination [16]. |
| 10-15% Bleach Solution | A freshly diluted solution of sodium hypochlorite is the recommended chemical for surface and equipment decontamination, as it effectively degrades DNA [28] [30]. |
| UNG (Uracil-N-Glycosylase) | An enzyme used in qPCR master mixes to prevent carryover contamination from previous PCR amplifications. It degrades any uracil-containing DNA (from prior dUTP-containing reactions) before the new PCR cycle begins [30]. |
| Molecular Grade Water | Nuclease-free, DNA-free water used to prepare all reagents and reaction mixes to ensure no enzymatic degradation or exogenous DNA contamination [7]. |
| Laminar Flow Hood (HEPA/ULPA) | Provides an ISO Class 5 clean workspace for preparing reagents and master mixes by supplying particulate-free air, protecting samples from environmental contamination [29] [31]. |
Laboratory Design Specifications
Table: Minimum Recommended Room Specifications for a Molecular Pathology Laboratory [29]
| Room / Area | Primary Function | Key Equipment & Consumables | Environmental Control |
|---|---|---|---|
| Reagent Preparation | Preparation & aliquoting of PCR master mixes. | Pipettes, tips, tubes, microcentrifuge, vortex [28]. | Positive air pressure; UV light for decontamination [29]. |
| Sample Preparation | Nucleic acid extraction & template addition. | Dedicated pipettes, biosafety cabinet, centrifuge, DNA/RNA purification kits [28] [29]. | Positive air pressure [29]. |
| Amplification (PCR) | Thermal cycling for DNA amplification. | Thermal cyclers [29]. | Physical separation from pre-PCR areas [28]. |
| Post-PCR Analysis | Analysis of amplicons (e.g., gel electrophoresis). | Electrophoresis equipment, plate readers, sequencers [28] [29]. | Negative air pressure [29]. |
Workflow and Decontamination Procedures
Diagram 1: Unidirectional laboratory workflow for contamination prevention.
Diagram 2: Decision pathway for laboratory decontamination procedures.
In the sensitive field of parasitology PCR research, false-positive results due to cross-contamination pose a significant threat to diagnostic accuracy and experimental integrity. This technical support center provides targeted guidance on implementing two primary defense strategies: an enzymatic guard using Uracil-DNA-Glycosylase (UNG) and robust chemical decontamination protocols. These methods are essential for laboratories aiming to produce reliable, reproducible results in the detection of parasitic pathogens.
The Scientist's Toolkit: Research Reagent Solutions
The table below outlines key reagents for implementing the UNG carry-over prevention system in your PCR workflow.
Table 1: Essential Reagents for UNG-based Carry-over Prevention
| Reagent | Function | Key Considerations |
|---|---|---|
| Uracil-DNA-Glycosylase (UNG) | Enzymatically cleaves uracil bases from the DNA backbone, destroying contaminating uracil-containing PCR products from previous reactions [32] [33]. | Heat-labile; is inactivated during the initial PCR denaturation step [32]. |
| Deoxyuridine Triphosphate (dUTP) | Incorporated into newly synthesized PCR products in place of dTTP, making them susceptible to future UNG digestion [32] [34]. | Must be used in a mixture with a small amount of dTTP (e.g., 175µM dUTP + 25µM dTTP) for consistent, robust amplification [34]. |
| Hot-Start DNA Polymerase | A modified polymerase that is inactive at room temperature, preventing non-specific amplification and primer-dimer formation during reaction setup [7] [35]. | Reduces false positives that are not due to carry-over contamination. Use in conjunction with UNG for comprehensive protection [33]. |
Experimental Protocols & Methodologies
Detailed Protocol: Incorporating the UNG/dUTP System
This protocol is adapted for use with common PCR master mixes, such as those containing GoTaq DNA Polymerase [34].
1. Reaction Mixture Assembly:
- Prepare a PCR master mix on ice, containing the following components per 50µL reaction:
- 10 µL of 5X Reaction Buffer
- 0.25 µL of DNA Polymerase
- 5 µL of a dNTP mix containing dATP, dCTP, and dGTP (each at 2mM)
- 4.3 µL of 2mM dUTP and 0.7 µL of 2mM dTTP (resulting in final concentrations of 175µM dUTP and 25µM dTTP) [34].
- 1 µL of forward and reverse primer mix (typically 50µM)
- 1 U of Uracil-DNA-Glycosylase (UNG)
- Nuclease-free water to volume
- Add template DNA and mix thoroughly.
2. UNG Incubation and PCR Amplification:
- UNG Decontamination Step: Incubate the fully assembled reaction at 25–37°C for 10 minutes [32] [34]. During this step, UNG will actively cleave uracil bases from any contaminating PCR products, rendering them unamplifiable.
- Polymerase Activation & UNG Inactivation: Transfer the reaction tube to a thermocycler and run a standard PCR protocol, beginning with a 95°C denaturation step for 2–10 minutes. The high temperature simultaneously inactivates the UNG enzyme and activates the hot-start DNA polymerase, allowing the new amplification to proceed [32].
Detailed Protocol: Surface Decontamination with Sodium Hypochlorite (Bleach)
For routine cleaning of workstations, pipettes, and equipment to destroy contaminating DNA [36].
1. Solution Preparation:
- Prepare a 10% (v/v) dilution of standard household bleach (e.g., Clorox, which contains ~5.84% available chlorine) in clean water [36]. For harder water, use purer water (e.g., distilled or nuclease-free) to prevent rapid chlorine decomposition.
- Store the dilution in an opaque spray bottle at room temperature and make a fresh batch every 1–2 weeks [36].
2. Decontamination Procedure:
- Generously spray all work surfaces and equipment with the 10% bleach solution.
- Allow the bleach to sit for 15–30 minutes to ensure complete reaction with and nicking of contaminating DNA [36].
- Wipe down the surfaces and thoroughly rinse with water or wipe with a wet cloth to remove corrosive bleach residues [36].
- Perform this decontamination before and after each PCR session and as part of a weekly cleaning routine.
Troubleshooting Guides & FAQs
Frequently Asked Questions (FAQs)
Q1: Our lab already uses separate pre- and post-PCR rooms. Is the UNG method still necessary? Yes, it is a critical additional layer of defense. Physical separation reduces but does not eliminate the risk of aerosol-borne amplicon contamination. The UNG/dUTP system acts as a "chemical fume hood" within the reaction tube itself, destroying any contaminants that may enter the mix, thereby providing fail-safe protection [32] [35].
Q2: Why is our amplification inconsistent when we substitute dTTP entirely with dUTP? Some DNA polymerases require trace amounts of thymine for optimal efficiency. If you experience weak or failed amplification with 100% dUTP, include a small amount of dTTP in the nucleotide mix. A validated ratio is 175µM dUTP to 25µM dTTP, which ensures efficient dUTP incorporation while maintaining strong amplification [34].
Q3: We followed the UNG protocol but are still getting false positives. What is the most likely cause? The most probable cause is contamination of your reagents, primers, or template samples with natural, thymine-containing DNA. The UNG system only degrades uracil-containing DNA. You must investigate other sources of contamination:
- Reagent Contamination: Use a no-template control (NTC) to check your reagents.
- Cross-Contamination: Review your sample handling techniques and ensure unidirectional workflow.
- Surface Contamination: Intensify your surface decontamination regimen with 10% bleach, as hydrochloric acid (HCl) has been shown to be less effective [36].
Q4: For surface decontamination, why is bleach recommended over hydrochloric acid (HCl)? Studies have demonstrated that a 10% bleach solution causes extensive nicking in DNA, rendering it unamplifiable, whereas even a 5-minute exposure to 2N HCl may not prevent PCR detection of the same DNA fragment. Bleach is therefore the more reliable and effective chemical decontaminant for PCR laboratories [36].
Troubleshooting Guide
Table 2: Troubleshooting Common UNG and Contamination Issues
| Problem | Possible Cause | Recommended Solution |
|---|---|---|
| No or weak amplification after implementing UNG/dUTP | 1. Excessive UNG activity degrading new product.2. Polymerase inhibition by 100% dUTP. | 1. Ensure the initial PCR denaturation step is hot/long enough to fully inactivate UNG [32].2. Use a dUTP:dTTP mixture (e.g., 175:25 µM) instead of 100% dUTP [34]. |
| False positives persist with UNG | Contamination from natural (thymine-containing) DNA. | 1. Implement rigorous bleach-based surface decontamination [36].2. Use dedicated equipment and lab coats for pre-PCR work [35].3. Include a no-template control to identify reagent contamination [33]. |
| High background or nonspecific bands | Non-specific priming not addressed by UNG. | 1. Use a hot-start DNA polymerase [7].2. Optimize Mg2+ concentration and annealing temperature [7].3. Consider touchdown PCR to enhance specificity [35]. |
| Inconsistent decontamination with bleach | Old or improperly stored bleach solution. | Dilute bleach fresh weekly using pure water and store in an opaque bottle at room temperature to maintain potency [36]. |
Workflow Visualization
Diagram 1: UNG enzymatic guard workflow for preventing carry-over contamination.
Frequently Asked Questions (FAQs)
FAQ 1: What is the core principle behind suppression PCR?
Suppression PCR, often utilizing blocker strands (also known as clamps), is a method designed to minimize the amplification of unwanted DNA sequences. Its core principle is a dual mechanism of energetic and kinetic biasing. The blocker strands, which are complementary to the unwanted template, bind to it more stably and rapidly than the primer. This both energetically destabilizes the mishybridized primer complex and sculpts a kinetic barrier, effectively preventing the polymerase from initiating amplification on the incorrect template [37].
FAQ 2: In what scenarios is this technique particularly valuable in parasitology research?
This technique is critical in parasitology diagnostics and research for several key scenarios:
- Eliminating Genomic DNA Contamination in RNA samples: When performing RT-PCR to measure mRNA expression from parasites or host cells, contaminating genomic DNA can lead to false positive signals and an overestimation of mRNA levels. Suppression methods can selectively remove this DNA [38].
- Improving Specificity in Complex Samples: Parasitic stool samples contain a complex mixture of DNA from the parasite, host, and other gut microbes. Blocker strands can be designed to suppress the amplification of abundant non-target DNA, thereby improving the sensitivity and specificity for detecting low-abundance parasitic DNA [1].
- Distinguishing Between Highly Similar Species: It can be used to suppress amplification of a non-target parasite species that has a very similar genetic sequence to the target species, ensuring accurate identification [1].
FAQ 3: Besides suppression assays, what are other critical practices to minimize false positives?
A robust strategy to minimize false positives extends beyond assay design to include meticulous laboratory practice:
- Physical Separation of Workspaces: Maintain distinct pre-PCR and post-PCR areas with a strict unidirectional workflow to prevent amplicons from contaminating new reactions [28] [16] [39].
- Use of Controls: Always include a negative control (No Template Control, NTC) to monitor for contamination in reagents and the environment [28] [16].
- Meticulous Laboratory Technique: Use filter tips, change gloves frequently, and employ proper aseptic cleaning techniques with reagents like diluted bleach to decontaminate surfaces [28] [16].
Troubleshooting Guide
The following table outlines common issues encountered when implementing suppression PCR and their solutions.
| Problem | Potential Cause | Recommended Solution |
|---|---|---|
| No Target Amplification | Blocker strand is also inhibiting the desired primer binding. | Redesign blocker sequence to ensure perfect complementarity only to the unwanted template. Check for over-stabilization of the blocker-template complex [37]. |
| Incomplete Suppression | Blocker concentration is too low, or its binding is not competitive enough. | Optimize the concentration of the blocker strand. Consider using modified nucleic acids (e.g., LNA) in the blocker to increase its binding affinity and specificity [37]. |
| High Ct Values / Low Sensitivity | Overuse of compaction agents affecting RNA; low template quality. | When using compaction agents like spermidine to remove gDNA from RNA, titrate the concentration (e.g., 500 µM) to find a balance between DNA removal and RNA recovery [38]. Verify template quality and concentration [40]. |
| Non-Specific Amplification | Suboptimal annealing temperature; primer-dimer formation. | Re-optimize the PCR annealing temperature. The use of blockers can broaden the viable annealing temperature range, but a temperature that is too low can still permit off-target binding [37] [40]. |
| Inconsistent Replicates | Pipetting errors or uneven sealing of reaction vessels. | Verify pipette calibration and pipetting technique. Ensure plates or tubes are sealed evenly and properly to prevent evaporation and concentration differences across replicates [41] [40]. |
Experimental Protocol: Using Compaction Agents for DNA Removal in RNA Samples
This protocol details a method for selectively precipitating contaminating genomic DNA from RNA samples using spermidine, a compaction agent, prior to RT-PCR [38].
1. Principle Compaction agents are small cationic molecules that bind to double-stranded nucleic acids, driven by electrostatic interactions, causing them to precipitate out of solution. Certain agents, like spermidine, show a strong selectivity for DNA over RNA, allowing for the removal of gDNA contaminants from RNA samples without the use of hazardous enzymes like DNase I [38].
2. Reagents and Materials
- RNA sample (with suspected gDNA contamination)
- Spermidine (trivalent, chloride salt) stock solution
- Tris Buffer (10 mM, pH 8.0)
- NaCl
- Nuclease-free water and microfuge tubes
- Microcentrifuge
- Spectrophotometer or fluorometer for nucleic acid quantification
3. Procedure 1. Prepare Reaction Mix: In a 1.5 mL microfuge tube, combine the following for a total volume of 50 µL: * RNA sample (e.g., 100 ng) * 10 mM Tris Buffer, pH 8.0 * NaCl to a final concentration of 50 mM (optional, can be optimized). * Spermidine to a final concentration of 500 µM. 2. Precipitate Contaminants: Vortex the mixture for 5-10 seconds and incubate at room temperature for 30 minutes. 3. Pellet Precipitate: Centrifuge the tube at 13,500 × g for 20 minutes at room temperature. 4. Recover Supernatant: Carefully transfer the supernatant (which contains the RNA) to a new, clean tube. The pellet contains the compacted gDNA and other precipitated contaminants. 5. Proceed with RT-PCR: Use a portion of the supernatant (e.g., 9 µL) directly in your downstream RT-PCR reaction.
4. Key Considerations
- The concentration of spermidine and salt (NaCl) can be optimized for specific sample types.
- It is crucial to include controls (e.g., a sample without spermidine) to assess the efficiency of DNA removal and the recovery of RNA.
- This method is rapid, nuclease-free, and cost-effective compared to DNase I treatment.
Workflow and Mechanism Visualization
Diagram 1: Molecular Mechanism of Blocker Strands
Diagram 2: Laboratory Workflow for Contamination Control
Research Reagent Solutions
The following table lists key reagents and materials essential for implementing robust suppression PCR and contamination control protocols.
| Item | Function | Key Specification / Note |
|---|---|---|
| LNA-Modified Blocker Strands | Synthetic oligonucleotides with increased binding affinity to block unwanted templates. | Locked Nucleic Acid (LNA) bases enhance specificity and stability of hybridization [37]. |
| Compaction Agents (e.g., Spermidine) | Selective precipitation of double-stranded genomic DNA from RNA samples. | Trivalent cations; concentration must be optimized for DNA-selectivity (e.g., 500 µM) [38]. |
| PCR-Grade Water | A nuclease-free liquid medium for preparing reaction mixes. | Purified, sterilized, and filtered to prevent introduction of nucleases or DNA contaminants [39]. |
| Nuclease-Free Tubes/Plates | Reaction vessels to prevent degradation of nucleic acids and reagents. | Manufactured in a clean-room environment; certified to be free of nucleases and human DNA [41]. |
| Optically Clear Seals | Sealing films for qPCR plates to prevent cross-contamination and evaporation. | Ensure seals are optically clear to minimize distortion of fluorescence signals in qPCR [41]. |
| DNase I (for comparison) | Enzyme that digests DNA to remove genomic DNA contamination. | Requires careful inactivation/removal post-digestion to avoid damaging cDNA in RT-PCR [38]. |
Frequently Asked Questions
What is a single-tube nested PCR and how does it reduce cross-contamination? Single-tube nested PCR is an advanced molecular technique that performs two consecutive PCR amplifications in a single, closed tube. It uses two sets of primers (external and internal) with different annealing temperatures to amplify a specific DNA fragment with极高的灵敏度和特异性 [42]. This method drastically reduces cross-contamination risks compared to traditional two-tube nested PCR because the tube remains sealed throughout the entire process, preventing the introduction of amplicons from the first amplification into the laboratory environment [42]. This is particularly crucial in parasitology research, where false positives can significantly impact research outcomes and diagnostic accuracy.
How does High-Resolution Melting (HRM) analysis complement closed-tube systems? HRM analysis is a post-PCR method that characterizes PCR products based on their melting behavior in a closed-tube format [43]. After amplification, the DNA is gradually denatured while monitoring fluorescence, generating a unique melting profile for the amplicon. This allows for mutation scanning, sequence matching, and genotyping without ever opening the PCR tube [43]. When combined with single-tube nested PCR, it creates a completely closed-tube workflow from amplification to analysis, providing an powerful tool for identifying genetic variations in parasites while maintaining the highest level of contamination control.
What are the key advantages of implementing closed-tube systems in parasitology research?
- Minimized Contamination: The closed-tube approach prevents amplicon carryover, a major source of false positives in PCR-based parasitology studies [31]
- Enhanced Sensitivity: Single-tube nested PCR can detect very low pathogen loads, crucial for identifying subclinical parasitic infections [42] [44]
- Superior Specificity: The dual-primer system and HRM analysis provide confirmation of target amplification, reducing false positives from non-specific binding [44]
- Workflow Efficiency: Eliminating transfer steps between amplification rounds saves time and reduces hands-on technician time [42]
Experimental Protocols
Detailed Single-Tube Nested PCR Protocol
- Prepare a master mix containing all required components:
- Template DNA: 1-2 μL (1-1000 ng)
- External primers: 0.5 μL each (final concentration 0.2 μM)
- Internal primers: 0.5 μL each (final concentration 0.2 μM)
- dNTP mixture: 0.5 μL (final concentration 200 μM each dNTP)
- 10× PCR buffer: 2.5 μL
- MgCl₂: 1.5-2.0 μL (final concentration 1.5-2.0 mM)
- Taq DNA polymerase: 0.25 μL (1.25 U)
- Sterile ultrapure water: to 25 μL total volume
Thermal Cycling Conditions [42] [44]:
- Initial Denaturation: 94°C for 2 minutes
- First Amplification Round (15-30 cycles):
- Denaturation: 94°C for 30 seconds
- Annealing: Higher temperature (e.g., 68°C) for 30 seconds (optimized for external primers)
- Extension: 72°C for 1 minute per kb
- Second Amplification Round (15-30 cycles):
- Denaturation: 94°C for 30 seconds
- Annealing: Lower temperature (e.g., 46°C) for 30 seconds (optimized for internal primers)
- Extension: 72°C for 1 minute per kb
- Final Extension: 72°C for 5-10 minutes
- Hold: 4°C until analysis
Post-PCR Processing:
- Transfer PCR plates directly from thermal cycler to HRM instrument
- Set heating protocol to denature samples at 95°C for 1 minute
- Cool rapidly to appropriate temperature (e.g., 40°C) for 1 minute
- Perform gradual heating with high data acquisition (0.1-0.2°C increments) through the melting transition
- Analyze melting curves using instrument software for sequence variation detection
Troubleshooting Guides
Common Single-Tube Nested PCR Issues and Solutions
| Problem | Possible Causes | Recommended Solutions |
|---|---|---|
| No amplification product | Inhibitors in template DNA, suboptimal primer design, incorrect thermal cycling conditions | Re-purify template DNA to remove inhibitors [7]; Verify primer specificity and design [45]; Optimize Mg²⁺ concentration (0.5-5.0 mM) [46]; Validate thermal cycler calibration [46] |
| Non-specific amplification | Primer annealing temperature too low, excess primers or DNA polymerase, contamination | Increase annealing temperature stepwise in 1-2°C increments [7] [46]; Optimize primer concentrations (0.1-1 μM) [7]; Use hot-start DNA polymerase [46]; Implement physical separation of pre-and post-PCR areas [31] |
| Poor sensitivity | Insufficient cycle numbers, low template quality, inefficient primers | Increase number of cycles (up to 35-40) [7]; Assess DNA template quality by gel electrophoresis [7]; Redesign internal primers to avoid secondary structures [45] |
| Inconsistent results between replicates | Improper mixing of reagents, pipetting errors, nuclease contamination | Mix reaction components thoroughly before aliquoting [45]; Use calibrated pipettes and consistent technique; Prepare fresh reagents and use new tubes [46] |
Common HRM Analysis Issues and Solutions
| Problem | Possible Causes | Recommended Solutions |
|---|---|---|
| Poor melting curve shape | Low DNA concentration, incomplete PCR amplification, inappropriate saturating dye concentration | Optimize PCR to generate robust amplification; Verify appropriate product concentration; Ensure correct dye concentration in reaction mix [43] |
| High sample-to-sample variation | Inconsistent sample loading, temperature gradients across plate, plate sealing issues | Use precise pipetting techniques; Allow instrument to equilibrate; Ensure proper plate sealing; Normalize data using software controls [43] |
| Inability to distinguish variants | Low data acquisition rate, small amplicon size, insufficient sequence difference | Increase data acquisition density; Design amplicons with adequate length (80-300 bp) encompassing variant sites; Include known controls for comparison [43] |
Quantitative Performance Data
Table: Comparison of PCR Methods for Pathogen Detection [42]
| Method | Sensitivity with Pure Culture | Detection in Symptomatic Samples | Detection in Asymptomatic Samples |
|---|---|---|---|
| Standard PCR | Moderate | 55% | 17% |
| Two-tube nested PCR | High | 71% | 20% |
| Single-tube nested PCR | Very High | 78% | 25% |
Table: Single-Tube Nested PCR Performance Across Sample Types [42]
| Sample Type | Successful Detection | Key Considerations |
|---|---|---|
| Plant material (various hosts) | High (83 samples) | Effective even with common PCR inhibitors |
| Asymptomatic plant material | 25% (of 251 samples) | Superior to other PCR methods for latent detection |
| Clinical specimens (TB) | 89% (pulmonary), 42% (extrapulmonary) | Varies with bacterial load and inhibitors [47] |
Workflow Visualization
Closed-Tube Workflow for Contamination Prevention
Research Reagent Solutions
Essential Materials for Closed-Tube PCR/HRM Experiments
Table: Key Reagents and Their Functions in Closed-Tube Systems
| Reagent/Material | Function | Application Notes |
|---|---|---|
| Hot-start DNA polymerase | Catalyzes DNA synthesis; hot-start prevents non-specific amplification | Select enzymes with high processivity for complex templates [7] |
| Primers (external & internal) | Target sequence recognition with nested specificity | External primers: higher Tm (68°C); Internal primers: lower Tm (46°C) [42] [44] |
| Saturating DNA dyes | Fluorescent detection for HRM analysis | Must be appropriate for high-resolution melting (e.g., LCGreen, SYTO9) [43] |
| dNTP mixture | Building blocks for DNA synthesis | Use balanced equimolar concentrations (200 μM each) [45] |
| Magnesium chloride | Cofactor for DNA polymerase | Optimize concentration (1.5-5.0 mM); affects specificity and yield [45] |
| PCR additives (DMSO, BSA) | Enhance amplification of difficult templates | DMSO (1-10%) for GC-rich targets; BSA (10-100 μg/mL) to counter inhibitors [45] |
| Laminar flow hood | Provides sterile workspace for reaction setup | Essential for preventing contamination during master mix preparation [31] |
| Aerosol-resistant pipette tips | Prevent cross-contamination between samples | Use throughout procedure, especially when handling concentrated DNA [31] |
Advanced Contamination Control Strategies
Laboratory Design for Parasitology PCR
Implementing closed-tube systems requires complementary laboratory practices to maximize contamination control:
- Physical Separation: Maintain distinct areas for pre-PCR (reagent preparation), amplification (thermal cycler placement), and post-PCR analysis (HRM instrumentation) [31]
- Unidirectional Workflow: Ensure personnel movement follows a one-way path from clean to dirty areas without backtracking [31]
- Dedicated Equipment: Assign specific pipettes, lab coats, and supplies to each area with color-coding [31]
- Systematic Decontamination: Implement regular cleaning protocols using DNA-degrading agents (e.g., UV irradiation, DNA-Zap) for surfaces and equipment [31]
Technical Considerations for Parasite Detection
When applying closed-tube systems to parasitology research:
- Inhibitor Management: Parasite samples often contain PCR inhibitors; use internal controls to detect inhibition and incorporate inhibitor removal steps during DNA extraction [42]
- Low Parasite Load Sensitivity: Single-tube nested PCR is particularly valuable for detecting scant parasites in blood, tissue, or fecal samples [44]
- Strain Differentiation: HRM analysis enables discrimination of parasite strains and detection of drug resistance mutations without sequencing [43]
- Validation: Always include appropriate controls (negative, positive, and no-template) to validate results and detect any potential contamination events [46]
FAQs on Complex Sample Processing
What makes berries a particularly challenging matrix for parasite DNA detection?
Berries are a challenging matrix due to their high surface-to-weight ratio and soft, succulent flesh, which can make parasites difficult to remove and can harbor PCR inhibitors. They are often consumed raw, and washing them thoroughly without affecting quality is difficult. Contamination can occur at multiple points from farm-to-fork, including from contaminated irrigation water, animal and human feces, and handling during harvesting. Parasite transmission stages are robust and can survive from contamination in the field through harvesting, packaging, and sale until consumption [48]. Furthermore, berries can contain organic PCR inhibitors such as polysaccharides, polyphenols, and pectin, which can interfere with the enzymatic reactions in PCR [49].
Why is fecal DNA extraction so prone to PCR inhibition, and how can this be mitigated?
Fecal material contains a wide range of potent PCR inhibitors, including complex organic compounds like bilirubin and bile salts, inorganic ions, and bacterial debris. These substances can co-purify with nucleic acids and inhibit DNA polymerases. Mitigation strategies include:
- Dilution: A 10- to 100-fold dilution of the DNA template can sufficiently dilute the inhibitor [49].
- Re-purification: Using silica-column-based clean-up kits or ethanol precipitation to remove impurities [7] [50].
- Specialized Polymerases: Using DNA polymerases with high processivity and tolerance to inhibitors, which are specially formulated for complex samples [7] [49].
What are the most critical steps to prevent cross-contamination in parasitology PCR?
The most critical step is the physical separation of pre- and post-PCR areas. Key practices include [49]:
- Dedicated Workspaces: Establish physically separated "pre-PCR" and "post-PCR" areas with dedicated equipment, lab coats, and pipettes with aerosol-filter tips.
- Meticulous Workflow: Never bring reagents or equipment from the post-PCR area back to the pre-PCR area.
- Aliquoting Reagents: Store reagents in small, single-use aliquots.
- Negative Controls: Always include a no-template control to check for contamination.
- Decontamination: Regularly clean workstations and pipettes with 10% bleach or UV irradiation [49].
Troubleshooting Guides
Table 1: Troubleshooting PCR Inhibition from Complex Matrices
| Observation | Possible Cause | Recommended Solution |
|---|---|---|
| No amplification in sample PCR, but positive control works | PCR inhibitors co-purified with DNA (e.g., polyphenols, polysaccharides, humic acids) | Dilute DNA template 10-100 fold; Repurify DNA using a clean-up kit; Use an inhibitor-tolerant polymerase [7] [50] [49] |
| Faint or weak bands | Partial inhibition of the polymerase; Insufficient DNA | Dilute template to reduce inhibitors; Increase amount of DNA polymerase; Increase number of PCR cycles [7] [49] |
| Smearing on gel | Organic inhibitors (e.g., polysaccharides) mimicking DNA; Overcycling | Use a polymerase formulated for complex templates; Reduce number of PCR cycles; Re-amplify from a gel plug [49] |
| Inconsistent results between replicates | Non-homogeneous sample; uneven distribution of inhibitors | Ensure sample powdering (berries) or homogenization (feces) is thorough; Mix reagent stocks thoroughly before use [7] [51] |
Table 2: Troubleshooting Specific to Fecal and Berry DNA Extraction
| Issue | Sample-Specific Consideration | Protocol Adjustment |
|---|---|---|
| Low DNA yield from berries | Rigid plant cell walls not adequately lysed | Incorporate a mechanical lysis step (bead beating); Extend lysis incubation time; Optimize CTAB buffer concentration |
| High inhibitor carryover in fecal DNA | Incomplete removal of bilirubin, bile salts, or complex carbohydrates | Add an inhibitor removal wash step in purification; Use a specialized stool DNA extraction kit; Increase centrifugation speed/time in precipitation steps |
| Poor DNA integrity from berries | Endogenous enzymes degrade DNA during extraction | Perform extractions at lower temperatures; Include chelating agents; Use fresh or frozen samples and avoid repeated freeze-thaw cycles [7] |
| Non-specific amplification | Suboptimal primer annealing due to residual contaminants | Increase annealing temperature; Use hot-start DNA polymerase; Re-purify primers or DNA template [50] [49] |
Experimental Protocols
Protocol 1: Enhanced DNA Extraction from Berry Samples
Principle: This protocol combines mechanical disruption and chemical lysis to break down tough plant cell walls while mitigating the effects of common PCR inhibitors found in berries [49].
Reagents:
- Lysis Buffer (e.g., CTAB-based)
- Proteinase K
- Beta-mercaptoethanol
- Beads (e.g., zirconia/silica) for bead beating
- Chloroform:Isoamyl Alcohol (24:1)
- Isopropanol
- 70% Ethanol
- Inhibitor Removal Solution (optional)
Procedure:
- Homogenization: Weigh 2 g of frozen berry tissue. Add to a tube containing lysis buffer and beads. Homogenize using a bead beater for 2-3 minutes.
- Enzymatic Lysis: Add Proteinase K (and RNase A if needed) to the homogenate. Incubate at 56°C for 1-2 hours with agitation.
- Separation: Add an equal volume of chloroform:isoamyl alcohol, mix thoroughly, and centrifuge at >12,000 g for 5 minutes.
- Precipitation: Transfer the upper aqueous phase to a new tube. Add 0.7 volumes of isopropanol to precipitate DNA. Centrifuge at high speed to pellet DNA.
- Wash and Elute: Wash the DNA pellet with 70% ethanol, air-dry, and resuspend in molecular-grade water or TE buffer [7].
Protocol 2: Optimized PCR Setup for Inhibitor-Rich Samples
Principle: This protocol uses specialized polymerases and reaction component adjustments to overcome residual inhibitors that may persist after DNA extraction [7] [50] [49].
Reagents:
- Inhibitor-Tolerant or High-Fidelity DNA Polymerase (e.g., OneTaq, Terra PCR Direct)
- PCR Additives (e.g., GC Enhancer, BSA, DMSO)
- Mg2+ Solution (concentration optimized)
- dNTP Mix
- Primer Pairs
Procedure:
- Reaction Setup: Set up reactions on ice. Include a positive control and a no-template control.
- Component Adjustment:
- Polymerase: Use 1.5-2x the standard amount of a robust, inhibitor-tolerant polymerase.
- Additives: Include 1x GC Enhancer or 0.1 mg/mL BSA to the master mix.
- Mg2+: Optimize Mg2+ concentration in 0.2-1 mM increments if nonspecific products occur [50].
- Template: Use 2-5 µL of diluted (1:10) DNA template.
- Thermal Cycling:
- Initial Denaturation: 98°C for 2 minutes.
- Amplification (35-40 cycles): Denature at 98°C for 10 sec, Anneal at optimized temperature for 15 sec, Extend at 68°C for 30 sec/kb.
- Final Extension: 68°C for 5 minutes.
- Post-PCR Analysis: Run products on an agarose gel. If smearing occurs, consider re-amplifying a diluted primary product with nested primers [49].
Workflow Visualization
Sample Processing Workflow
Contamination Control Protocol
The Scientist's Toolkit
Table 3: Essential Reagents for Complex Sample PCR
| Reagent | Function & Rationale |
|---|---|
| Inhibitor-Tolerant DNA Polymerase (e.g., OneTaq, Terra PCR Direct) | Polymerases with high processivity can better withstand common organic and inorganic inhibitors found in feces and plants, preventing PCR failure [50] [49]. |
| PCR Additives (BSA, GC Enhancer) | Bovine Serum Albumin (BSA) can bind to and neutralize inhibitors like polyphenols and humic acids. GC enhancers help denature complex, GC-rich templates [7] [49]. |
| Mechanical Homogenization Beads | Zirconia or silica beads are essential for the thorough mechanical disruption of tough berry cell walls and fungal/parasite cysts, ensuring complete lysis [51]. |
| DNA Clean-up Kits (Silica-column based) | These kits are critical for removing salts, proteins, and organic contaminants after initial extraction, significantly reducing inhibitor carryover [50]. |
| Hot-Start DNA Polymerase | This enzyme remains inactive at room temperature, preventing non-specific priming and primer-dimer formation during reaction setup, which improves assay specificity and sensitivity [7] [50]. |
Practical Strategies for Decontamination, Inhibition Management, and Process Control
Frequently Asked Questions (FAQs)
FAQ 1: What is the single most important practice to prevent PCR contamination in the laboratory? The most critical practice is the physical separation of pre- and post-amplification areas. You should establish a unidirectional workflow where personnel and materials move from "clean" areas (for mastermix preparation and nucleic acid extraction) to "dirty" areas (for amplification and product analysis) without backtracking. Each area must have dedicated equipment, lab coats, gloves, and consumables to prevent amplicon carryover into sensitive reactions [52] [20].
FAQ 2: Which decontamination agent is most effective for destroying amplified DNA, and what are its limitations? A fresh 10% sodium hypochlorite (bleach) solution is highly effective for destroying amplified DNA [52]. It requires a minimum contact time of 10 minutes to be effective [52]. However, bleach is corrosive and can damage equipment with repeated use; for sensitive equipment like pipettes, centrifuges, and vortexers, 70% ethanol followed by UV irradiation is a suitable alternative [52] [20]. Commercially available DNA-destroying decontaminants validated for this purpose can also be used [52].
FAQ 3: How can I monitor my experiments for potential contamination? The primary method is to include a full set of controls in every run [16] [20]. The No Template Control (NTC) is essential—it contains all PCR components except the DNA template. Amplification in the NTC indicates contamination. You should also include well-characterized positive and negative controls to monitor assay performance and specificity [52].
FAQ 4: Beyond spatial separation, what personal practices reduce contamination risk? Key personal practices include [16] [52] [20]:
- Always wearing gloves and changing them frequently, especially when moving between workstations or after a suspected spill.
- Using aerosol-resistant filter tips for all pipetting steps.
- Centrifuging all tubes briefly before opening them to avoid aerosol generation.
- Opening only one tube at a time and keeping tubes capped when not in use.
- aliquoting all reagents to avoid repeated freeze-thaw cycles and contaminating master stocks.
Troubleshooting Guide
| Problem | Possible Cause | Recommended Solution |
|---|---|---|
| False Positive Results (Amplification in NTC) | Contaminated reagents or consumables [20] | Discard all suspected reagents. Prepare fresh aliquots from master stocks. Use new, uncontaminated tips and tubes [16]. |
| Carryover of amplified DNA from post-PCR area [20] | Reinforce unidirectional workflow. Decontaminate surfaces with 10% bleach or DNA-destroying solutions. Ensure dedicated lab coats and equipment for each area [52]. | |
| Contaminated equipment (pipettes, centrifuges) [52] | Decontaminate equipment according to manufacturer instructions. Use 70% ethanol followed by UV irradiation for metal/plastic parts not compatible with bleach [52]. | |
| Reduced Sensitivity / False Negatives | Residual bleach or ethanol on surfaces inhibiting PCR [52] | After using bleach, wipe surfaces with sterile water to remove residues. Ensure all surfaces and equipment are completely dry before use. |
| PCR inhibitors carried over from sample (e.g., from feces) [7] | Re-purify template DNA. Use DNA polymerases with high tolerance to inhibitors. Precipitate and wash DNA with 70% ethanol to remove salts [7]. | |
| Non-specific Amplification (e.g., Primer-dimers) | Suboptimal thermal cycling conditions [7] | Optimize annealing temperature. Increase it stepwise by 1–2°C. Use a hot-start DNA polymerase to prevent enzyme activity at room temperature [7]. |
| Excess magnesium or primers in reaction mix [7] | Optimize Mg2+ concentration. Lower primer concentrations, typically within the 0.1–1 µM range [7]. |
Experimental Protocols for Decontamination and Workflow
Protocol for Surface and Equipment Decontamination
This protocol outlines a two-step process for effective decontamination of work surfaces and equipment [52] [20].
Materials:
- Freshly prepared 10% sodium hypochlorite solution
- 70% ethanol
- Sterile distilled water
- UV lamp (if available, for enclosed spaces)
Method:
- Bleach Treatment: Apply 10% sodium hypochlorite to the surface. Ensure a contact time of at least 10 minutes.
- Rinsing (if needed): For surfaces that will contact reagents, wipe down with sterile water to remove any residual bleach that could inhibit PCR [52].
- Ethanol Treatment: Wipe the surface thoroughly with 70% ethanol.
- UV Irradiation: For enclosed spaces like biosafety cabinets, irradiate with UV light for 30 minutes for complete decontamination. Note: Remove all reagents before UV decontamination [52].
Protocol for Establishing a Unidirectional Workflow
This methodology describes the setup of a contamination-minimized laboratory workflow for parasitology PCR [52] [20].
Materials:
- Dedicated rooms or physically separated areas (at least four recommended)
- Dedicated sets of pipettes, tip boxes, tube racks, vortexes, centrifuges, lab coats, and gloves for each area
Method:
- Area 1: Reagent Aliquoting & Mastermix Preparation (Cleanest Area)
- Perform in a designated laminar flow cabinet with a UV light if possible.
- Prohibit the handling of samples or amplified products in this area.
- Clean the area with 70% ethanol before and after use, followed by UV irradiation [52].
Area 2: Nucleic Acid Extraction & Template Addition
- Use a separate set of dedicated equipment.
- Add the extracted DNA template to the mastermix in this area.
- Prohibit handling of PCR reagents and amplified products here.
Area 3: Amplification & Post-PCR Processing
Area 4: Product Analysis
- Perform gel electrophoresis and analysis in this dedicated "dirtiest" area.
- No other reagents or samples should be brought into this room.
Data Presentation
Table 1: Laboratory Decontamination Agents and Their Applications
| Decontamination Agent | Recommended Concentration | Contact Time | Primary Use | Key Considerations |
|---|---|---|---|---|
| Sodium Hypochlorite (Bleach) | 10% | 10 minutes or more [52] | Surface decontamination; effective against amplified DNA [52] [20] | Make fresh daily; corrosive to metals; wipe with sterile water after use on surfaces contacting reagents [52]. |
| Ethanol | 70% | Until dry [52] | General surface cleaning; equipment not compatible with bleach [52] | Less effective than bleach for destroying DNA; often used in conjunction with UV light for full decontamination [52]. |
| Ultraviolet (UV) Light | N/A | 30 minutes [52] | Decontamination of closed spaces (e.g., cabinets, hoods) and equipment [52] | Must be used in closed areas for safety and efficacy; do not expose reagents to UV light [52]. |
Table 2: Essential Research Reagent Solutions for Contamination Control
| Item | Function in Contamination Control |
|---|---|
| Aerosol-Resistant Filter Tips | Act as a barrier, preventing aerosols and liquid from entering the pipette shaft and cross-contaminating samples and reagents [16] [52]. |
| Uracil-N-Glycosylase (UNG) | An enzyme used in qPCR master mixes to enzymatically destroy carryover contamination from previous PCR products that contain uracil (dUTP), prior to thermocycling [20]. |
| Hot-Start DNA Polymerase | Reduces non-specific amplification and primer-dimer formation by remaining inactive until a high-temperature activation step, improving assay specificity and yield [7] [52]. |
| Molecular Grade Water | Used for preparing reagents and dilutions; certified to be free of nucleases and PCR inhibitors that could compromise reaction integrity [7]. |
| DNA-Destroying Surface Decontaminants | Commercial solutions validated to degrade DNA on surfaces and equipment; an alternative where sodium hypochlorite use is not feasible [52]. |
Workflow Visualization
PCR Lab Unidirectional Workflow
FAQs: Understanding Controls in Parasitology PCR
1. What is the purpose of a No-Template Control (NTC) in parasitology PCR? The No-Template Control (NTC) is a critical reaction that contains all the components of a PCR mix—such as master mix, primers, and water—except for the DNA template, which is replaced with nuclease-free water [20]. Its primary function is to detect DNA contamination in your reagents or environmental carryover. If amplification occurs in the NTC, it signals that one or more of your reagents are contaminated with target DNA, potentially leading to false-positive results in your experimental samples [20] [53].
2. How can an Internal Amplification Control (IAC) help diagnose PCR failure? An Internal Amplification Control (IAC) is a non-target DNA sequence co-amplified in the same reaction tube as your target parasite DNA. It controls for the presence of PCR inhibitors in the sample and verifies that the PCR conditions are efficient. For example, one study targeting Schistosoma mansoni used a sequence from the human β-actin gene as an IAC [54]. If the target signal is absent but the IAC also fails to amplify, it indicates a general PCR failure, likely due to inhibition or reaction setup issues. If the target is absent but the IAC amplifies correctly, it provides confidence that the result is a true negative [54].
3. What does different patterns of amplification in my NTCs indicate? The pattern of amplification in your NTC wells can help identify the source of contamination [20] [53]:
- Consistent amplification across all NTCs at similar Ct values: Suggests a systematic reagent contamination. One or more of your core reagents (e.g., master mix, primers, water) are contaminated.
- Random amplification in only some NTCs with varying Ct values: Points to sporadic, environmental contamination. This can occur from aerosolized DNA templates drifting into wells during plate setup, often due to improper technique or working in a contaminated environment.
4. What are the best practices for physically separating PCR processes to protect controls? Establishing separate, dedicated work areas is a fundamental best practice to prevent contamination [20] [16]. The laboratory workflow should move in a single direction:
- Pre-PCR Area (Reagent Preparation): A clean, dedicated space for preparing master mixes and aliquoting reagents. This area should contain dedicated equipment (pipettes, centrifuges, coolers) and consumables that never come into contact with DNA templates or amplified PCR products.
- Sample Preparation Area: A separate area for extracting nucleic acids from parasitological samples (e.g., feces, tissue). This area is a potential source of target DNA.
- Post-PCR Area: A physically separated room for analyzing PCR products (e.g., running gels, reading qPCR plates). Amplified DNA must be confined to this area.
Maintain a one-way workflow; personnel should not move from post-PCR areas back to pre-PCR areas on the same day without changing lab coats and gloves [20].
5. Which enzymatic methods can help prevent carryover contamination detected by the NTC? Uracil-N-Glycosylase (UNG) is a common enzymatic method to reduce carryover contamination from previous PCR amplifications [20]. It is often included in the master mix. The method requires using a dNTP mix where dTTP is replaced with dUTP. During amplification, all new PCR products incorporate uracil. Before the next PCR run, the UNG enzyme enzymatically degrades any uracil-containing contaminating DNA from earlier reactions. The enzyme is then inactivated during the high-temperature PCR cycling step, protecting the new, uracil-containing amplification products [20] [53].
Troubleshooting Guide: NTC and IAC Failures
Diagnosing Contamination from NTC Results
| Observation | Possible Cause | Recommended Corrective Actions |
|---|---|---|
| Consistent NTC amplification at similar Ct values [53] | Contaminated reagent (Master mix, primers, water) | 1. Discard all suspect reagent aliquots [16].2. Prepare fresh aliquots from stock solutions using clean techniques.3. Use new, uncontaminated consumables (filter tips, tubes) [16]. |
| Sporadic NTC amplification with variable Ct values [20] [53] | Aerosol or environmental contamination; poor technique | 1. Decontaminate workspaces and equipment with 10% fresh bleach solution, followed by 70% ethanol [20] [16].2. Review and improve pipetting technique; use aerosol-resistant filter tips [20].3. Centrifuge tubes briefly before opening to prevent aerosol release [16]. |
| Amplification in NTCs when using SYBR Green chemistry (identified by dissociation curve) [53] | Primer-dimer formation | 1. Optimize primer concentrations and annealing temperature.2. Redesign primers to minimize complementarity at the 3' ends. |
| No amplification in NTC | No DNA contamination detected | The experiment is free from detectable contamination. Proceed with data analysis. |
Addressing Internal Amplification Control (IAC) Failure
| Observation | Interpretation | Troubleshooting Steps |
|---|---|---|
| Target DNA amplifies, IAC does not | Valid result; PCR is successful. IAC may be outcompeted at high target concentrations. | This is often acceptable. If necessary, dilute the sample or re-optimize IAC/target primer concentrations. |
| Target DNA does not amplify, IAC does not amplify | General PCR failure or strong inhibition. | 1. Check the integrity of all PCR reagents and master mix.2. Re-extract DNA, using a kit with an inhibition removal step or dilute the DNA template [55].3. Include a known positive control to verify the PCR protocol. |
| Target DNA does not amplify, IAC amplifies normally | True negative for target parasite DNA. | The sample likely does not contain the target parasite DNA at a detectable level. Confidence in this negative result is high. |
Experimental Protocol: Implementing Controls for Parasitology PCR
Sample Processing and DNA Extraction with an IAC
Methodology for detecting Echinococcus multilocularis in fox feces (adapted from [55])
- Sample Inactivation: Begin with 3 g of fecal sample. For safety, samples may be subjected to bead-beating in a licensed pre-PCR containment lab.
- DNA Extraction with Inhibition Control: Extract DNA using a validated kit (e.g., QIAamp Fast DNA Stool Mini Kit) or a magnetic capture method for higher sensitivity. To monitor inhibition and extraction efficiency, a known quantity of an exogenous IAC DNA (e.g., a synthetic sequence or from a different organism not found in the samples) can be spiked into the lysis buffer at the beginning of the extraction protocol.
- Elution: Elute the purified DNA in a volume of 50-100 µL.
- Quality Check: Measure DNA concentration and purity (A260/A280 ratio) using a spectrophotometer. Store at -20 °C until PCR setup.
qPCR Setup with NTC and IAC
Reaction Composition for a Duplex Assay (adapted from [54])
The following table summarizes a duplex qPCR reaction designed to simultaneously detect a parasite target and an IAC.
Table: qPCR Master Mix for Duplex Detection of Target and IAC
| Component | Final Concentration | Function & Notes |
|---|---|---|
| 2x qPCR Master Mix | 1X | Contains DNA polymerase, dNTPs (consider dUTP for UNG system), buffer, salts. |
| Forward Primer (Target) | 0.3 µM | Specific to the parasite gene (e.g., 121 bp repeat for S. mansoni [54]). |
| Reverse Primer (Target) | 0.3 µM | |
| Probe (Target) | 0.25 µM | e.g., FAM-labeled, MGB-quenched hydrolysis probe. |
| Forward Primer (IAC) | 0.15 µM | Specific to the IAC sequence (e.g., human β-actin [54]). |
| Reverse Primer (IAC) | 0.15 µM | |
| Probe (IAC) | 0.25 µM | Must be detectable in a different channel (e.g., VIC/HEX/JOE-labeled). |
| Template DNA | 2-5 µL | Volume should not exceed 10% of total reaction. |
| Nuclease-free Water | To 20 µL |
Thermocycling Protocol:
- UNG Incubation (optional): 50 °C for 2 minutes (to degrade carryover contamination).
- Enzyme Activation: 95 °C for 10 minutes.
- Amplification (40-45 cycles):
- Denature: 95 °C for 15 seconds.
- Anneal/Extend: 60 °C for 60 seconds (acquire fluorescence).
- Cooling: 40 °C for 30 seconds.
Workflow Visualization for Contamination Control
The following diagram outlines a robust laboratory workflow designed to minimize cross-contamination by physically separating key processes.
The Scientist's Toolkit: Research Reagent Solutions
Table: Essential Reagents and Materials for Reliable PCR Controls
| Item | Function in Control & Contamination Management |
|---|---|
| Aerosol-Resistant Filter Pipette Tips | Creates a physical barrier preventing aerosols from contaminating the pipette shaft and subsequent samples. Essential for all liquid handling [20] [16]. |
| Uracil-DNA Glycosylase (UNG/Uracil-N-Glycosylase) | An enzymatic system to prevent carryover contamination from previous PCR runs by degrading uracil-containing DNA prior to amplification [20] [53]. |
| dUTP Mix | Used in place of dTTP during PCR to generate uracil-containing amplicons that are susceptible to degradation by UNG in subsequent reactions [20]. |
| IAC DNA Sequence | A known, non-target DNA sequence (e.g., synthetic oligo, cloned fragment, or housekeeping gene from a different species) used to monitor PCR inhibition and reaction efficiency [54]. |
| 10% Fresh Sodium Hypochlorite (Bleach) Solution | A potent decontaminant for destroying DNA on work surfaces and equipment. Must be prepared fresh regularly for maximum efficacy [20] [16]. |
| Nuclease-Free Water (Aliquoted) | The solvent of choice for preparing master mixes and NTCs. Aliquotting into single-use volumes prevents contamination of the entire stock [20] [16]. |
Troubleshooting Guides
Guide 1: Identifying and Diagnosing PCR Inhibition
Q1: How can I tell if my parasitology PCR is inhibited?
| Observation | Possible Indication of Inhibition | Recommended Diagnostic Action |
|---|---|---|
| Delayed Cq values or complete amplification failure in sample reactions. | Partial or complete inhibition of the polymerase. | Compare Cq values of samples to a positive control of known concentration. A significant and consistent delay in Cq values suggests inhibition [56]. |
| No amplification in positive control but successful amplification in diluted sample. | The undiluted sample contains inhibitors affecting the reaction. | Perform a dilution series (e.g., 1:2, 1:5, 1:10) of the sample template. Restoration of amplification in diluted samples is a key indicator of inhibition [57]. |
| Unexpected negative result in a sample expected to be positive. | Inhibitors may be causing false negatives. | Include an internal positive control (IPC) in the reaction. Amplification failure of the IPC confirms the presence of inhibitors [56]. |
| Low amplification efficiency or abnormal standard curve in qPCR. | Inhibitors are interfering with the reaction kinetics. | Calculate PCR efficiency from a standard curve. Efficiency significantly outside the ideal 90-110% range can indicate inhibition. |
Q2: What are the common sources of inhibitors in parasitology samples?
Parasitology samples are particularly challenging due to their complex nature. Common inhibitors include:
- Complex polysaccharides and lipids: Often found in fecal samples used for diagnosing intestinal parasites [57] [58].
- Phenolic compounds and humic acids: Common in environmental samples and can be introduced during DNA extraction [57] [59].
- Bile salts and hemoglobin: Frequently present in clinical samples [57].
- IgG: A known PCR inhibitor found in blood samples [57].
- Carryover reagents from DNA extraction: Such as SDS (Sodium Dodecyl Sulfate), which can inhibit Taq polymerase if not thoroughly removed [59].
Guide 2: Overcoming PCR Inhibition with Additives and Purification
Q3: Which additives can I use to overcome PCR inhibition?
The table below summarizes effective PCR additives, their mechanisms, and recommended use.
| Additive | Final Concentration | Mechanism of Action | Best for Overcoming These Inhibitors | Notes & Considerations |
|---|---|---|---|---|
| Bovine Serum Albumin (BSA) | 0.1 - 0.8 mg/mL | Binds to inhibitors (e.g., phenolic compounds, humics), preventing them from interacting with the DNA polymerase [57] [60] [59]. | General purpose; effective against a wide range of inhibitors in complex matrices like feces [57] [60]. | A cost-effective first-line additive. Can act as a co-enhancer when used with organic solvents like DMSO for GC-rich templates [60]. |
| T4 Gene 32 Protein (gp32) | 0.2 μg/μL | Binds to single-stranded nucleic acids, stabilizing the DNA and improving polymerase processivity. Also binds humic acids [57]. | Highly effective in complex wastewater and environmental samples; shown to be one of the most effective additives in comparative studies [57]. | Can significantly improve detection and recovery of viral targets in inhibited samples [57]. |
| Dimethyl Sulfoxide (DMSO) | 2 - 10% | Reduces secondary structure in DNA by lowering the melting temperature (Tm), particularly useful for GC-rich templates [57] [59]. | GC-rich templates; helps destabilize the DNA helix [57] [59]. | Can reduce Taq polymerase activity at higher concentrations. Optimal concentration must be determined empirically [59]. |
| Formamide | 1 - 5% | Binds to DNA grooves, destabilizing the double helix and lowering the melting temperature [57] [59]. | Can enhance specificity and aid in the amplification of some difficult templates [57]. | Effective concentration range is narrow [60]. |
| Tween-20 | 0.1 - 1% | A non-ionic detergent that can reduce secondary structures and neutralize carryover SDS from DNA extraction [57] [59]. | Samples with potential SDS contamination [59]. | May increase non-specific amplification; use cautiously in "dirty" PCR reactions [59]. |
| Betaine | 1.0 - 1.7 M | Reduces formation of secondary structures, equalizes the melting temperatures of DNA, and enhances specificity [59]. | GC-rich templates; often a "mystery additive" in commercial PCR kits [59]. | Use Betaine or Betaine mono-hydrate, not Betaine HCl [59]. |
Q4: What purification and sample handling techniques reduce inhibition?
| Technique | Principle | Protocol Tips |
|---|---|---|
| Sample Dilution | Dilutes the concentration of inhibitors below a critical threshold while retaining enough target DNA [57]. | A 1:10 dilution of the extracted DNA is a common starting point [57]. Caution: Excessive dilution can reduce sensitivity by diluting the target DNA below detectable levels. |
| Inhibitor Removal Kits | Use specialized column matrices designed to bind and remove specific inhibitors (e.g., humic acids, tannins) [57]. | Follow manufacturer's protocols. These kits can be highly effective but add cost and processing time to the workflow [57]. |
| Choice of DNA Polymerase | Some polymerases and associated buffers are engineered to be more tolerant of common inhibitors [57]. | Select polymerases marketed as "inhibitor-resistant" for challenging samples. Optimization may be required. |
| Physical Separation of Workflows | Prevents cross-contamination by aerosolized amplicons, which is critical for maintaining assay integrity [20] [56]. | Establish separate, dedicated pre-amplification and post-amplification areas with dedicated equipment (pipettes, centrifuges) and consumables [20]. Maintain a one-way workflow; personnel should not move from post-PCR to pre-PCR areas without changing lab coats and gloves [20]. |
FAQs on PCR Inhibition in Parasitology
Q5: Why is addressing PCR inhibition particularly important in parasitology research? The accuracy of PCR-based diagnosis of parasitic infections is paramount. Inhibition can lead to false-negative results, causing an underestimation of parasitic load or a failure to detect an infection entirely [61]. This has direct consequences for patient management, epidemiological studies, and public health interventions. Robust, inhibitor-tolerant methods are necessary to achieve the high sensitivity required to detect a single parasite's DNA in a complex clinical or environmental sample [61].
Q6: I am working with fecal samples from cats/dogs for parasite detection. What is a recommended approach? A study on detecting Spirometra mansoni in cat and dog feces successfully used a commercial Faecal Genomic DNA Extraction Kit specifically designed for stool samples [58]. These kits are optimized to remove PCR inhibitors common in feces. Following extraction, the use of additives like BSA in the PCR master mix can provide an additional layer of protection against any residual inhibitors, ensuring reliable amplification [57] [58].
Q7: How can I prevent contamination from ruining my parasitology PCR assays? Contamination control is non-negotiative in sensitive PCR applications.
- Use No Template Controls (NTCs): Always include NTCs (all reaction components except the DNA template) in every run. Amplification in the NTC indicates contamination [20] [56].
- Implement Uracil-DNA Glycosylase (UNG) Treatment: Use a master mix containing UNG and incorporate dUTP in place of dTTP in your PCR. UNG will degrade any PCR products (containing uracil) from previous reactions, preventing their re-amplification, while leaving your natural template (containing thymine) intact [20].
- Rigorous Decontamination: Regularly clean work surfaces and equipment with a 10% bleach solution, followed by ethanol or water rinsing to remove residual DNA [62] [56].
Q8: Are there any visual or rapid methods to check for inhibition? While quantitative assessment requires qPCR, you can use a spike-in control. Add a known quantity of a non-target DNA sequence (an Internal Positive Control, IPC) to your PCR reaction. If the IPC fails to amplify or shows a significantly delayed Cq while your sample's internal control (e.g., a host gene) amplifies normally, it suggests the sample contains inhibitors affecting the PCR reaction [56].
Experimental Protocols
Protocol 1: Evaluating PCR Additives to Relieve Inhibition
This protocol is adapted from methods used to optimize SARS-CoV-2 detection in inhibited wastewater samples [57].
1. Sample Preparation:
- Begin with DNA extracted from your parasitology sample (e.g., fecal sample).
- Prepare a 10-fold dilution series of the extracted DNA (e.g., undiluted, 1:2, 1:5, 1:10) in nuclease-free water.
2. Additive Preparation:
- Prepare a master mix containing all standard PCR components (polymerase, buffer, dNTPs, primers, water).
- Aliquot the master mix into separate tubes.
- Spike each aliquot with a different additive to the final concentration indicated in Troubleshooting Guide 2, Q3.
- Include one aliquot with no additive as a control.
3. PCR Setup and Run:
- Add each DNA dilution (including the diluted series) to the different additive-containing master mixes.
- Perform PCR amplification using your standard cycling conditions.
- Analyze results via gel electrophoresis or qPCR.
4. Data Analysis:
- Compare Cq values (for qPCR) or band intensity (for conventional PCR) across different additive and dilution conditions.
- The condition that yields the lowest Cq or strongest band intensity for the undiluted sample indicates the most effective inhibition relief strategy.
Protocol 2: Assessing Inhibition via Sample Dilution and Spiking
This protocol helps confirm if observed PCR failure is due to inhibition.
1. Set up the following reactions:
- Reaction A: Sample DNA + PCR mix (standard reaction).
- Reaction B: Diluted (1:10) Sample DNA + PCR mix.
- Reaction C: Sample DNA + PCR mix + known concentration of a control target (spike-in).
- Reaction D: Diluted (1:10) Sample DNA + PCR mix + the same spike-in.
2. Interpretation:
- If A fails but B is successful, the sample contains inhibitors [57].
- If C shows a significantly higher Cq for the spike-in compared to its expected Cq, or fails altogether, it confirms the presence of inhibitors in the sample matrix.
- If D shows recovery of the spike-in signal, dilution is a viable strategy for that sample.
Research Reagent Solutions
| Item | Function | Example Use Case |
|---|---|---|
| Bovine Serum Albumin (BSA) | Binds to a wide array of PCR inhibitors (humic acids, phenolics), shielding the DNA polymerase [57] [60] [59]. | First-line additive for PCRs with DNA from fecal samples, soil, or plant material. |
| T4 Gene 32 Protein (gp32) | Binds single-stranded DNA, preventing secondary structure formation and improving polymerase processivity; also binds inhibitors [57]. | Optimal for highly inhibited environmental samples like wastewater; can be more effective than BSA in some complex matrices [57]. |
| Inhibitor-Resistant Polymerase | Polymerase enzymes engineered to remain active in the presence of common biological inhibitors. | Recommended for direct amplification from crude samples or samples that cannot be purified extensively. |
| Faecal DNA Extraction Kit | Specialized kits designed to lyse robust parasite eggs/cysts and effectively remove PCR inhibitors common in stool samples [58]. | Essential for molecular diagnosis of intestinal parasites from feces. |
| UNG (Uracil-N-Glycosylase) | Enzyme used in pre-PCR incubation to degrade contaminating amplicons from previous PCRs, preventing false positives [20]. | Critical for high-throughput labs and diagnostic applications to control for amplicon carryover contamination. |
| Inhibitor Removal Columns | Silica-based or other specialized columns that selectively bind inhibitors while allowing DNA to pass through during purification [57]. | Used as an additional clean-up step after initial DNA extraction when inhibition is suspected. |
Workflow Diagram
The diagram below illustrates a systematic workflow for diagnosing and addressing PCR inhibition in the laboratory.
FAQ: Addressing PCR Contamination in the Parasitology Laboratory
1. What defines a confirmed PCR contamination event? A contamination event is confirmed when a negative control reaction produces a positive amplification signal (e.g., a fluorescence curve in real-time PCR or a band in gel electrophoresis) [16]. This indicates that unwanted DNA sequences, most often from previous amplification products (amplicons), have been introduced into your reaction [63].
2. What are the immediate steps to take after identifying contamination? Immediate action is required to prevent the spread of contaminants [16]:
- Discard Compromised Reagents: Dispose of all open aliquots of master mixes, primers, buffers, and water suspected of contamination.
- Decontaminate Surfaces: Thoroughly clean all workstations, pipettes, and equipment with a freshly prepared 10% sodium hypochlorite (bleach) solution, followed by ethanol to remove the bleach [63].
- Replace Consumables: Open new bags of reaction tubes and use fresh, uncontaminated boxes of pipette tips, preferably with aerosol barriers [16].
3. What are the most common sources of PCR contamination? The primary sources are:
- Carryover Contamination: Minute aerosol droplets containing PCR amplicons from previously completed reactions. A single droplet can contain over 10^6 copies of the target sequence [63].
- Cross-Contamination: Physical transfer of DNA between samples during handling, DNA extraction, or reaction setup [16].
- Contaminated Reagents: Reagents or consumables that have been exposed to amplicons in the laboratory environment.
4. How can our lab prevent future contamination events? Prevention relies on a strict, unidirectional workflow and specialized practices [16] [63]:
- Physical Separation of Work Areas: Maintain physically separated rooms or dedicated spaces for:
- Reagent Preparation: For preparing and aliquoting PCR master mixes.
- Sample Preparation: For DNA extraction and template addition.
- Amplification Area: For the thermal cycler.
- Post-Amplification Area: For analyzing PCR products.
- Use of UNG Treatment: Incorporate Uracil-N-Glycosylase (UNG) and dUTP into your PCR master mix. This enzymatic system selectively degrades any uracil-containing carryover amplicons from previous runs before the new PCR begins, effectively sterilizing the reaction mix [63].
Step-by-Step Corrective Action Protocol
The following workflow outlines the systematic response to a confirmed contamination event. Adhering to this protocol is critical for restoring the integrity of your molecular diagnostics and research in parasitology.
Step 1: Immediate Action and Containment
- Halt All PCR Activities: Immediately stop all ongoing PCR setup and pause experiments in the amplification and post-PCR areas to prevent further spread.
- Discard Compromised Materials:
- Initial Decontamination: Wipe down all surfaces, pipette exteriors, and equipment in the reagent and sample preparation areas with a freshly prepared 10% bleach solution. After a few minutes of contact time, wipe again with ethanol or water to remove residual bleach, which can corrode equipment [63].
Step 2: Investigate the Source of Contamination
Conduct a thorough investigation to identify the root cause:
- Workflow Audit: Verify that all personnel have adhered to the unidirectional workflow, moving from the "clean" reagent prep area to the "post-PCR" area without backtracking [16] [63].
- Reagent and Consumable Logs: Check records to identify which reagent batches or consumables were in use during the incident.
- Equipment Check: Inspect and decontaminate microcentrifuges, vortexers, and pipettes, as these are common vehicles for aerosol contamination.
Step 3: Execute Full Laboratory Decontamination
A comprehensive clean-up is essential before resuming work.
- Surface Decontamination: Clean all benches, cabinets, and equipment in all workflow areas (reagent prep, sample prep, PCR, and post-PCR) with 10% bleach, followed by ethanol or water [63].
- Lab Attire: Launder all lab coats used in the affected areas. If possible, use dedicated lab coats for each separate work area [16].
- UV Irradiation: Expose pipettes, racks, and other small, non-disposable equipment to UV light in a crosslinker or UV cabinet. UV light induces thymidine dimers in DNA, rendering it unamplifiable [63]. Note that this method is less effective for short amplicons and G+C-rich templates [63].
Step 4: Restart with New Reagents and Controls
- Introduce New Stocks: Use fresh, frozen aliquots of all reagents. If none exist, prepare new stock solutions in a clean environment.
- Implement UNG/dUTP System: To prevent recurrence from carryover amplicons, adopt the UNG decontamination protocol [63]:
- Substitute dTTP with dUTP in your PCR master mix.
- Include the enzyme Uracil-N-Glycosylase (UNG) in the mix.
- During setup, the UNG will hydrolyze any contaminating uracil-containing amplicons. The initial denaturation step of the PCR cycle (e.g., 95°C) will then inactivate the UNG, allowing the new amplification to proceed without degradation of the native, thymine-containing target DNA.
- Re-validate the Assay: Perform a full validation run with a complete set of controls (negative control, positive control, and no-template control) before processing any valuable patient or research samples.
Step 5: Documentation and Process Review
- Incident Log: Maintain a logbook to record the date, the experiments affected, the corrective actions taken, and the root cause if identified. This helps track patterns and identify systematic issues [16].
- Personnel Training: Use the incident as a training opportunity to reinforce best practices with all laboratory staff.
- SOP Update: If the investigation reveals flaws in the Standard Operating Procedures (SOPs), update them accordingly to prevent future occurrences.
Research Reagent Solutions for Contamination Control
The following table details key reagents and materials essential for preventing and managing PCR contamination in a parasitology research setting.
| Item | Function/Application in Contamination Control |
|---|---|
| UNG (Uracil-N-Glycosylase) | Core enzyme in pre-PCR sterilization; degrades carryover amplicons from previous reactions that contain dUTP [63]. |
| dUTP | Replaces dTTP in PCR master mix; allows newly synthesized amplicons to be distinguishable by UNG and targeted for degradation in future runs [63]. |
| Sodium Hypochlorite (Bleach) | Primary chemical decontaminant for surfaces and equipment; causes oxidative damage to nucleic acids, preventing re-amplification [63]. |
| Aerosol-Barrier Pipette Tips | Prevent aerosolized contaminants from entering pipette shafts and cross-contaminating samples and reagent stocks [16]. |
| Hot-Start DNA Polymerase | Reduces non-specific amplification and primer-dimer formation at low temperatures, improving specificity and reducing potential background [7]. |
| DNA Decontamination Reagents (e.g., PreCR Repair Mix) | Can be used to treat DNA templates that may have been damaged by UV light or other decontamination efforts during troubleshooting [64]. |
In parasitology PCR research, the integrity of your results hinges on the reliability of your fundamental tools. Cross-contamination from improperly maintained equipment is a pervasive threat that can lead to false positives, wasted resources, and invalidated experiments. This guide provides detailed troubleshooting and maintenance protocols for pipettes and centrifuges, two cornerstones of the molecular biology workflow, to safeguard your research against these pitfalls.
Frequently Asked Questions (FAQs): Pipette Accuracy
Q1: How often should I check my pipettes for accuracy?
Pipettes should undergo formal annual calibration [65]. However, a quick routine check is recommended at more frequent intervals—such as quarterly or before critical experiments—to ensure performance hasn't drifted between calibrations [65]. Electronic pipettes often have built-in calibration reminders to help manage this schedule [65].
Q2: My pipette is leaking during use. What should I do?
First, perform a simple leak test [65]:
- Pre-wet the tip by aspirating and dispensing the nominal volume three times.
- Aspirate the nominal volume again.
- Immerse the tip 2 mm in liquid and hold the pipette vertically for 30 seconds.
- If the liquid level drops, a leak is confirmed [65].
A leaking pipette often indicates worn O-rings, seals, or a damaged plunger mechanism [66]. You should contact the manufacturer to discuss repair or service [65].
Q3: Why is my pipette inaccurate even after calibration?
Inaccuracy is frequently traced to user technique rather than the instrument itself. Common errors include [66]:
- Inconsistent plunger pressure: Applying varying force during aspiration or dispensing.
- Incorrect immersion depth: Submerging the tip too deeply or too shallowly.
- Incorrect pipette angle: Holding the pipette at an angle greater than 20 degrees.
Environmental factors are another major cause. Pipettes are calibrated for water at room temperature. Significant differences between liquid temperature, pipette temperature, and ambient temperature will cause volume deviations [66]. Always equilibrate all reagents and equipment to a stable room temperature (15-30°C) before use [65] [66].
Pipette Calibration and Troubleshooting Guide
Standard Gravimetric Calibration Protocol
Follow this detailed methodology to perform a routine gravimetric check of your pipette's accuracy and precision [65].
1. Preparation: Environment and Materials
- Environment: Perform the check in a draft-free area with a constant temperature between 15°C and 30°C, with a maximum deviation of ±0.5°C during measurements [65].
- Balance: Use an analytical balance with draft protection and an evaporation trap. The required readability depends on your pipette volume (see Table 1) [65].
- Test Liquid: Distilled water.
- Weighing Container: A metal container is preferred to minimize static charges [65].
- Tips: Use the pipette manufacturer’s recommended tips to ensure a proper seal [65].
- Equilibration: Place the pipette, tips, and test liquid in the test room for at least 2 hours before starting [65].
Table 1: Balance Readability Requirements for Gravimetric Pipette Calibration [65]
| Pipette Volume (V) | Digits | Readability |
|---|---|---|
| 1 µl ≤ V ≤ 10 µl | 6 | 0.001 mg |
| 10 µl < V ≤ 100 µl | 5 | 0.01 mg |
| V > 100 µl | 4 | 0.1 mg |
2. Measurement Procedure
- Tare the balance with the weighing container [65].
- Pre-wet a new tip by aspirating and dispensing the nominal volume three times [65].
- Dispense the test volume into the weighing container. Dispense along the inner wall and finish by drawing the tip end along the wall to remove residual liquid [65].
- Record the weight [65].
- Tare the balance and repeat steps 3-4 at least three more times using the same tip (minimum of 4 measurements total) [65].
- Eject the tip, load a new one, and repeat the process for a second test volume (e.g., 100% and 10% of the nominal volume) [65].
3. Data Analysis
- Convert mass to volume: Convert each weighing (mi) in mg to volume (Vi) in µl using the formula Vi = mi * Z, where Z is a conversion factor that accounts for water density, local temperature, and air pressure [65].
- Calculate the Mean Volume (V): ( V = \frac{\sum Vi}{n} ), where n is the number of weighings [65].
- Calculate Accuracy (Systematic Error): ( es = \frac{(V - Vs)}{Vs} * 100\% ), where Vs is the selected test volume [65].
- Calculate Precision (Random Error): ( CV = \frac{sr}{V} * 100\% ), where sr is the standard deviation of the measured volumes [65].
Compare the calculated accuracy (es) and precision (CV) values against your pipette's manufacturer specifications. If they fall outside the acceptable range, the pipette requires professional calibration [65].
Troubleshooting Common Pipette Errors
Table 2: Common Pipette Calibration Errors and Solutions [66]
| Error Type | Potential Causes | Corrective Actions |
|---|---|---|
| Inaccurate Volume Delivery | Inconsistent user technique (plunger pressure, angle, immersion depth) [66]. | Standardize pipetting technique; train users on slow, steady plunger action [66]. |
| Temperature Deviation | Liquids or pipette at a different temperature than the calibration environment [66]. | Equilibrate all reagents and equipment to a stable room temperature for 2 hours before use [65] [66]. |
| Air Bubbles | Rapid plunger release; tip not fully submerged; viscous liquids [66]. | Use slow, steady plunger action and ensure proper tip immersion depth [66]. |
| Worn Components | Degraded O-rings, seals, or spring fatigue [66]. | Implement routine preventive maintenance and replace worn parts [66]. |
Frequently Asked Questions (FAQs): Centrifuge Cleanliness
Q1: What is the recommended schedule for cleaning and disinfecting my centrifuge?
- Exterior: Disinfect weekly [67].
- Interior (routine): Clean weekly with a mild detergent. Wipe up spills immediately [67].
- Interior (disinfection): Disinfect monthly, or immediately after a spill of potentially infectious material, using a 10% bleach solution [67].
Q2: What is the proper procedure for disinfecting with bleach?
A 10% (v/v) bleach solution (one part household bleach to nine parts water) is effective for disinfection [67] [20]. Critical considerations:
- Freshness: Prepare a fresh dilution each time you need to disinfect. Once mixed, the solution loses effectiveness after 24 hours and should not be stored [67].
- Contact Time: Allow the bleach solution to work on the surface for 10-15 minutes before wiping it down with de-ionized water to prevent corrosion [20].
- Safety: Wear gloves and eye protection when handling bleach solutions [20].
Q3: What safety precautions are essential before cleaning a centrifuge?
Always unplug the power cord from the electrical outlet before cleaning [67]. Wear disposable gloves and follow your facility's specific safety procedures for handling biohazards and chemicals [67].
Integrating Equipment Maintenance into a Contamination-Free PCR Workflow
Proper equipment upkeep is one critical component of a broader strategy to prevent contamination in sensitive parasitology PCR assays. The workflow below illustrates how maintenance fits into a holistic contamination control plan.
Essential Research Reagent Solutions for Contamination Control
Table 3: Key Materials for Maintaining a Contamination-Free Workflow
| Item | Function | Justification |
|---|---|---|
| Aerosol-Resistant Filter Tips | Acts as a barrier, preventing aerosols from entering the pipette shaft and cross-contaminating samples or reagents [16] [20]. | Critical for both sample handling and PCR setup. |
| UNGs (Uracil-N-Glycosylase) | An enzyme added to the PCR master mix that degrades carryover contamination from previous PCR products (amplicons) containing uracil [20]. | Provides a biochemical defense against the most common source of contamination in established labs [20]. |
| 10% Bleach Solution | A potent and broad-spectrum disinfectant for decontaminating work surfaces, centrifuges, and other equipment [67] [20]. | Effective at degrading DNA, thereby neutralizing the contaminant [20]. |
| Aliquoted Reagents | Dividing master mixes, primers, and water into single-use volumes [16]. | Prevents the contamination of an entire reagent stock, limiting the impact of any single contamination event [16]. |
| Dedicated Lab Coats & Gloves | Personal protective equipment (PPE) designated for specific work areas [16] [20]. | Prevents tracking contaminants from post-PCR areas (high contamination risk) back into pre-PCR clean areas [20]. |
By adhering to these detailed protocols for equipment calibration, maintenance, and integrated workflow management, researchers can significantly reduce experimental variables and the risk of cross-contamination, ensuring the generation of robust and reliable data in parasitology PCR research.
Evaluating and Validating PCR Assays for Sensitivity, Specificity, and Contamination Resistance
Frequently Asked Questions (FAQs) on LOD Determination
FAQ 1: What is the Limit of Detection (LOD) and why is it a critical metric in parasitology PCR? The Limit of Detection (LOD) is the lowest concentration of parasite DNA in a sample that can be consistently detected by your assay with 95% confidence [68]. It is a fundamental parameter for evaluating the analytical sensitivity of a molecular test. In parasitology, a low LOD is crucial for identifying subclinical or early-stage infections where the parasitic burden is very low, enabling accurate diagnosis, effective treatment monitoring, and reliable epidemiological assessment of spillover risks [58] [69].
FAQ 2: My assay's positive controls are working, but I'm getting inconsistent results with low-concentration clinical samples. What could be wrong? Inconsistent detection near the LOD is a common challenge. Beyond the LOD of the PCR chemistry itself, this is often related to subsampling error. When parasite DNA is fragmented and present in very low copies, it may not be distributed evenly across your template solution. Aliquoting for replicate PCRs can lead to some reactions containing a template and others not, causing variable results [70]. To mitigate this, consider DNA fragmentation via sonication or enzymatic digestion to create smaller, more evenly distributed fragments, and perform multiple replicate PCR reactions (e.g., 10-50 replicates) to statistically capture the target [70].
FAQ 3: My no-template controls (NTCs) are showing amplification. How can I identify the source of this contamination? Amplification in NTCs indicates contamination, which severely compromises LOD determination. The sources can be broadly categorized as follows:
- External Contamination: This is the most common source and involves microbial DNA present in your laboratory reagents, including DNA extraction kits [71]. Different brands and even different lots from the same brand can have unique "background microbiota" or "kitomes." Contamination can also come from skin, laboratory surfaces, or collection tubes.
- Internal Contamination: This includes well-to-well cross-contamination during plate setup, sample mix-up, or "index hopping" in multiplexed sequencing runs [71].
Troubleshooting Guide:
- Include More Controls: Routinely run extraction blanks (using molecular-grade water as input) alongside your clinical samples in every batch [71].
- Profile Your Reagents: Test new lots of DNA extraction reagents to understand their contaminant profile. Some manufacturers provide this data.
- Use Bioinformatics: Employ computational tools like Decontam to identify and subtract contaminant sequences found in your negative controls from your sample results [71].
- Physically Separate Pre- and Post-PCR Work: Use separate rooms, equipment, and dedicated lab coats for reagent preparation, sample processing, and PCR amplification to prevent amplicon carryover.
FAQ 4: For a new parasite assay, what is a systematic approach to experimentally determine the LOD? A robust LOD determination requires a dilution series of a known standard, tested with multiple replicates. The workflow below outlines the key steps, from preparation to calculation.
Experimental Protocol for LOD Determination:
- Prepare Standard Material: Use a quantified reference standard. This can be:
- Create Serial Dilutions: Perform a logarithmic (e.g., 10-fold) dilution series of the standard material in a background that mimics a negative clinical sample (e.g., DNA from uninfected host tissue or blood) [68].
- Run Replicate PCRs: Test each dilution level with a high number of replicates (a minimum of 10-20, though some studies use 50 or more for high sensitivity) alongside multiple negative controls [70] [68].
- Analyze Replicate Data: For each dilution, record the number of positive replicates. The LOD is the lowest concentration at which ≥95% of the replicates return a positive result [68].
Quantitative LOD Data from Recent Parasitology Research
The following table summarizes the demonstrated LODs for various molecular assays targeting different parasites, as reported in recent scientific literature. This provides a benchmark for expected performance.
| Parasite | Assay Type | Target Gene | LOD | Reference |
|---|---|---|---|---|
| Spirometra mansoni | qPCR | cytb |
100 copies/μL | [58] |
| Spirometra mansoni | LAMP | cytb |
7.47 pg/μL (cat faecal DNA), 355.5 fg/μL (egg DNA) | [58] |
| Leishmania infantum | qPCR (TaqMan) | kDNA minicircle | 1 parasite/mL | [69] |
| Plasmodium vivax | qPCR (TaqMan) | Cysteine proteinase | 0.01 parasite/μL | [68] |
| Toxoplasma gondii | Cross-Priming Amplification (CPA) | 529 bp repetitive fragment | 100 plasmid copies/μL, 10 oocysts | [72] |
The Scientist's Toolkit: Key Research Reagent Solutions
This table outlines essential materials used in the featured experiments for establishing sensitive parasite detection assays.
| Reagent / Material | Function / Explanation | Example from Research |
|---|---|---|
| Recombinant Plasmid Standard | A cloned target gene fragment used as a quantitative standard for generating a calibration curve and determining the exact copy number for LOD studies. | Used for Plasmodium vivax and Toxoplasma gondii LOD determination [68] [72]. |
| TaqMan Probe | A sequence-specific, fluorescently-labeled hydrolysis probe that increases specificity and allows for accurate quantification in real-time PCR. | Employed in qPCR assays for Spirometra mansoni and Leishmania infantum [58] [69]. |
| Strand-Displacing DNA Polymerase | An enzyme essential for isothermal amplification methods (like LAMP and CPA), as it displaces downstream DNA strands without the need for thermal denaturation. | Used in LAMP for S. mansoni and CPA for T. gondii [58] [72]. |
| DNA Fragmentation Reagents | Chemicals or enzymes used to break genomic DNA into smaller fragments, reducing subsampling error and improving detection sensitivity for low-copy targets. | Sonication or enzymatic digestion was key to the "deep-sampling" PCR method for Trypanosoma cruzi [70]. |
| Background Mimic Solution | A solution of negative host DNA (e.g., from uninfected blood or stool) used to dilute standards, ensuring the PCR reaction matrix mimics a true clinical sample. | Crucial for accurately determining the LOD in a clinically relevant context [68]. |
Molecular diagnostics, particularly Polymerase Chain Reaction (PCR), have become indispensable tools in the clinical parasitology laboratory, offering enhanced sensitivity and specificity over traditional microscopy. A critical decision facing researchers and laboratory professionals is the choice between adopting commercial PCR kits or developing and validating in-house ("homebrew") assays. This analysis provides a technical benchmarking of these two approaches, focusing on their performance in detecting intestinal protozoa and helminths, all within the overarching framework of minimizing cross-contamination—a paramount concern in sensitive molecular assays.
Performance Comparison: In-House vs. Commercial PCR Assays
Multiple studies have directly compared the performance of in-house and commercial real-time PCR (qPCR) platforms for detecting a wide range of parasites. The findings indicate that while both approaches are viable, their agreement can vary significantly depending on the target parasite.
Table 1: Inter-Assay Agreement Between PCR Platforms for Various Parasites [73] [74]
| Parasite | Agreement Level (Kappa Statistic) | Key Findings |
|---|---|---|
| Dientamoeba fragilis, Hymenolepis nana, Cryptosporidium spp., Ascaris lumbricoides | Almost Perfect (0.81–1.00) | High reliability and concordance across different test methods. |
| Necator americanus, Blastocystis spp., Ancylostoma spp., Giardia duodenalis | Substantial (0.61–0.80) | Good, reliable agreement between different PCR assays. |
| Entamoeba histolytica | Moderate (0.41–0.60) | Moderate reliability; results should be interpreted with caution. |
| Microsporidia | Fair (0.21–0.40) | Fair agreement; suggests notable differences in assay performance. |
| Cyclospora spp., Strongyloides stercoralis | Slight (0.00–0.20) | Low agreement; significant variability between test results. |
| Taenia spp. | Poor (<0.00) | Very poor agreement; assays are not consistent in detection. |
A 2025 multicentre study focusing on key intestinal protozoa found that for Giardia duodenalis, there was complete agreement between the commercial AusDiagnostics test and the in-house PCR, with both demonstrating high sensitivity and specificity comparable to microscopy. However, for Cryptosporidium spp. and Dientamoeba fragilis, both molecular methods showed high specificity but limited sensitivity, potentially due to challenges in DNA extraction from the robust oocyst/cyst walls [75]. This highlights that even with optimal PCR chemistry, sample preparation remains a critical factor.
Another study concluded that in-house singleplex RT-PCR assays detected parasites in more samples from patients suspected of parasitosis than any of the three commercial multiplex kits tested. This suggests that while commercial kits target relevant parasites, their performance can vary, and well-validated in-house assays can be highly competitive [76].
Troubleshooting Guides and FAQs
Common Experimental Issues & Solutions
Q: Our negative controls are showing amplification, indicating contamination. What are the first steps to address this? A: Immediate action is required. First, replace all suspected contaminated reagents, particularly water and master mixes, with fresh aliquots. Decontaminate work surfaces and equipment with a 10-15% bleach solution (made fresh daily), followed by wiping with nuclease-free water and then 70% ethanol [28] [20]. Ensure you are using aerosol-resistant filter pipette tips and that all tubes are centrifuged briefly before opening to minimize aerosols [28].
Q: We are getting false-negative results for Cryptosporidium despite using a validated protocol. What could be wrong? A: The issue likely lies in the sample preparation stage. The robust wall of Cryptosporidium oocysts makes DNA extraction challenging [75]. Verify your DNA extraction protocol includes rigorous mechanical disruption methods, such as bead beating. Furthermore, compare the performance of your extraction kit against a known positive sample to ensure it is effective for breaking down these tough structures.
Q: How can we prevent carryover contamination from previously amplified PCR products? A: The most robust strategy is a combination of physical and biochemical measures:
- Physical Separation: Maintain physically separate pre- and post-PCR areas with dedicated equipment, lab coats, and consumables. The workflow should always be unidirectional: from pre-PCR to post-PCR [28] [20] [77].
- UNG Treatment: Incorporate the Uracil-N-Glycosylase (UNG) system into your PCR. This involves using a dNTP mix where dTTP is partially or fully replaced by dUTP. In subsequent reactions, UNG enzyme degrades any uracil-containing carryover amplicons before PCR cycling begins, preventing their amplification [78] [20]. Note that for consistent amplification, trace amounts of dTTP (e.g., 25µM dTTP with 175µM dUTP) may be necessary [78].
Q: Why is there such variable performance for detecting Strongyloides stercoralis and Taenia spp. between different PCR assays? A: The slight to poor inter-assay agreement (kappa: slight to <0) for these parasites [73] [74] points to fundamental assay design differences. The variability can stem from:
- Target Gene Selection: Assays targeting ribosomal genes versus highly repetitive, non-coding genomic elements can have vastly different copy numbers and amplification efficiencies [79].
- Extraction Efficiency: The methods used to recover DNA from larvae or tapeworm segments may differ in efficacy.
- PCR Inhibitors: Stool is a complex matrix with potent PCR inhibitors. The capacity of different master mix formulations to overcome this inhibition can vary.
Workflow for Contamination Minimization
The following diagram illustrates the core principles of a unidirectional workflow essential for preventing contamination in PCR diagnostics.
Experimental Protocols for Key Comparisons
Objective: To evaluate the performance of a commercial RT-PCR test versus an in-house RT-PCR assay against microscopy for identifying intestinal protozoa.
Methodology:
- Sample Collection: 355 stool samples (230 fresh, 125 preserved) were collected across 18 laboratories.
- DNA Extraction:
- Samples were mixed with S.T.A.R. Buffer and centrifuged.
- Supernatant was used for automated nucleic acid extraction on the MagNA Pure 96 System (Roche) using the MagNA Pure 96 DNA and Viral NA Small Volume Kit.
- An internal extraction control was added to each sample prior to extraction.
- In-House RT-PCR Amplification:
- Reaction Mix: 5 µL DNA extract, 12.5 µL of 2× TaqMan Fast Universal PCR Master Mix (Thermo Fisher), 2.5 µL primer/probe mix, nuclease-free water to 25 µL.
- Cycling Conditions: 1 cycle: 95°C for 10 min; 45 cycles: 95°C for 15 s, 60°C for 1 min.
- Platform: ABI 7900HT Fast Real-Time PCR System.
- Commercial Assay: The AusDiagnostics PCR kit was used according to the manufacturer's instructions.
- Analysis: Results were compared against conventional microscopy performed according to WHO/CDC guidelines.
Objective: To correlate qPCR results with known parasite burden and compare assays targeting different genomic regions.
Methodology:
- Sample Preparation:
- Known quantities of parasite eggs/larvae (1 to 40) were used to spike 10 mg samples of naïve (parasite-free) stool.
- DNA Extraction:
- Extraction was performed using the FastDNA Spin Kit for Soil (MP Biomedicals) coupled with a high-speed homogenizer (FastPrep-24).
- qPCR Testing:
- Assay 1 (NHM): Targeted highly repetitive, non-coding genomic elements.
- Assay 2 (BCM): Targeted ribosomal genes (ITS1, ITS2, 18S).
- Aliquots of the same DNA extracts were tested by two independent laboratories using their respective assays.
- Data Analysis:
- Correlation between egg/larvae counts and qPCR output (fg/µL or copies/µL) was assessed using the Kendall rank correlation test.
- Agreement between the two qPCR assays was evaluated using Cohen's kappa statistic.
The Scientist's Toolkit: Essential Reagents & Materials
Table 2: Key Research Reagent Solutions for Parasitology PCR
| Item | Function & Importance |
|---|---|
| UNG/dUTP System | Biochemical contamination control; degrades PCR products from previous runs containing dUTP, preventing re-amplification [78] [20]. |
| Aerosol-Resistant Filter Tips | Physical contamination control; prevents aerosolized samples and reagents from contaminating pipette shafts and subsequent reactions [28] [20]. |
| Internal Extraction Control | Monitors nucleic acid extraction efficiency; detects PCR inhibition and confirms successful DNA isolation from often complex and inhibitory stool matrices [75] [76]. |
| DNA Polymerase Formulations | Robust enzymes (e.g., GoTaq) tolerate inhibitors in crude samples and are compatible with additives like UNG, which is crucial for direct PCR from stool or dried blood spots [78] [80]. |
| Specialized DNA Extraction Kits | Kits designed for soil or stool (e.g., FastDNA Spin Kit for Soil) include protocols and reagents for efficient mechanical and chemical lysis of tough parasite cysts and oocysts [75] [79]. |
| Dried Blood Spot (DBS) Filter Paper | Standardizes blood sample collection, storage, and transport; Whatman 903/CF12 papers show superior blood absorption and are optimal for downstream direct PCR [80]. |
Frequently Asked Questions
Q1: Why is assessing specificity against non-target parasites critical in parasitology PCR? A robust specificity test ensures your PCR assay detects only the intended parasite and does not produce false-positive results by cross-reacting with genetically similar parasites or host DNA. This is fundamental for accurate diagnosis, reliable epidemiological data, and effective treatment strategies. A lack of demonstrated specificity can compromise research findings and clinical interpretations [58].
Q2: What are the common causes of non-specific amplification or cross-reactivity in PCR? Common causes include [81] [82]:
- Sub-optimal primer design: Primers that are not unique to the target organism may bind to and amplify DNA from non-targets.
- Insufficiently stringent PCR conditions: An annealing temperature that is too low can permit primers to bind to non-target sequences.
- Contaminated reagents or equipment: Carryover of DNA from previous amplifications or from the laboratory environment is a frequent source of false positives [82].
Q3: My assay shows cross-reactivity. What steps can I take to improve specificity? You can try the following troubleshooting steps [82]:
- Increase annealing temperature: Raise the temperature in increments of 2°C.
- Redesign primers: Use BLAST alignment to verify the uniqueness of your primer sequences to the target.
- Use touchdown PCR: This technique starts with a high annealing temperature and gradually lowers it, favoring the amplification of the specific target.
- Optimize reagent concentrations: Reduce the amount of template DNA or Mg²⁺ concentration, as excess can promote non-specific binding.
- Employ a Hot-Start polymerase: This can reduce primer-dimer formation and non-specific amplification during reaction setup.
Q4: How should a panel of non-target organisms be selected for specificity testing? Your panel should be comprehensive and relevant to your research context. It must include [58]:
- Phylogenetically related parasites: Genetically similar parasites that are most likely to cause cross-reaction.
- Other common parasites found in the same host species: To ensure the assay does not amplify other typical infections.
- Host genomic DNA: To confirm the assay does not amplify the host's own genetic material.
Q5: What controls are essential when running a specificity panel? Always include the following controls in your experiment [81]:
- Positive Control: A sample with known target DNA to confirm the assay is working.
- Negative Template Control (NTC): A reaction mix with no-template DNA (using ddH₂O instead) to check for reagent contamination.
- Non-Target Controls: Each non-target parasite and host DNA included in the panel.
Experimental Protocol: Establishing Assay Specificity
The following protocol outlines the key steps for validating the specificity of a PCR assay, based on established methodologies in parasitology research [58].
1. Selection and Preparation of Non-Target Panel
- Identify and Source DNA: Compile a list of non-target organisms, focusing on parasites that are genetically close to your target and those commonly found in the same host and geographical region. Source genomic DNA for these parasites from reputable biological repositories.
- Include Host DNA: Extract and include high-quality genomic DNA from the host species (e.g., cat, dog, human) to rule out cross-reactivity.
2. PCR Amplification and Analysis
- Run Parallel Reactions: Subject the target DNA, each non-target DNA, and host DNA to the established PCR protocol under identical conditions.
- Include Critical Controls:
- Positive Control: Target parasite DNA.
- Negative Control: No-template control (NTC) with molecular-grade water.
- Analyze Results: Analyze the amplification products using gel electrophoresis. A specific assay will show a band only in the positive control lane, with no amplification in the non-target, host, and NTC lanes. For qPCR, a fluorescence signal should be detected only in the positive control.
3. Data Interpretation The assay is considered specific only if all non-target samples and the NTC yield negative results, while the positive control yields a strong, correct positive result.
Specificity Validation Data from a Model Study
The table below summarizes quantitative data from a study that established specific PCR, qPCR, and LAMP assays for Spirometra mansoni, demonstrating how to present specificity validation data [58].
Table 1: Specificity Test Results for Spirometra mansoni Molecular Assays
| Assay Type | Target Gene | Non-Target Parasites Tested | Result |
|---|---|---|---|
| PCR | cox1 |
DNA from other common parasites in cat and dog faeces | No cross-reaction observed |
| qPCR | cytb |
DNA from other common parasites in cat and dog faeces | No cross-reaction observed |
| LAMP | cytb / nad5 |
DNA from other common parasites in cat and dog faeces | No cross-reaction observed |
The Scientist's Toolkit: Essential Research Reagent Solutions
Table 2: Key Reagents for Specificity Testing and Contamination Control
| Item | Function in the Experiment |
|---|---|
| High-Fidelity DNA Polymerase | Reduces misincorporation errors during amplification, improving accuracy [82]. |
| Hot-Start Taq Polymerase | Minimizes non-specific amplification and primer-dimer formation by requiring heat activation [82]. |
| dNTP Mix | Provides the building blocks for DNA synthesis; an unbalanced concentration can lead to errors [82]. |
| MgCl₂ Solution | A co-factor for DNA polymerase; its concentration is critical and must be optimized to avoid non-specific binding [82]. |
| Agarose | For gel electrophoresis to visualize and confirm the size and specificity of PCR products [81]. |
| DNA Ladder | Used as a molecular weight marker to verify the size of amplified DNA fragments on a gel. |
| Uracil-N-Glycosylase (UNG) | An enzyme used with dUTP in qPCR to degrade carryover contamination from previous PCR products, preventing false positives [81]. |
Workflow for Specificity Assessment and Troubleshooting
The diagram below illustrates the logical workflow for designing, executing, and troubleshooting a specificity assessment for your PCR assay.
Frequently Asked Questions (FAQs)
General Principles
Q1: Why is validating PCR methods in complex samples particularly challenging in parasitology? Complex samples like stool, blood, and environmental matrices contain numerous PCR inhibitors. These can include polysaccharides and glycolipids from stool that mimic nucleic acids, hemoglobin and lactoferrin from blood, humic acids from the environment, and various ions that compete with magnesium, a critical cofactor for DNA polymerases [83]. These substances can lead to reduced sensitivity, false negatives, or quantification inaccuracies.
Q2: What is the core principle behind minimizing cross-contamination in a parasitology PCR lab? The fundamental principle is strict physical and temporal separation of pre-PCR and post-PCR activities. This involves designating separate rooms or areas for reagent preparation, sample handling, and PCR product analysis, with a one-way workflow from clean to dirty areas. Equipment, pipettes, lab coats, and consumables (especially aerosol-filter tips) must be dedicated to each area and never moved between them [83].
Troubleshooting Common PCR Issues in Complex Samples
Q1: I am getting no amplification products from my clinical stool samples. What should I check first? This is a common issue when working with complex samples. Please consult the troubleshooting table below for a structured approach to diagnosing and resolving this problem.
Q2: My qPCR results show high background or nonspecific amplification. How can I improve specificity? Nonspecific amplification often arises from suboptimal reaction conditions or contaminants. The troubleshooting guide below outlines specific steps to enhance specificity.
Q3: My quantitative results are inconsistent between replicates. What could be the cause? Inconsistent replicates can stem from inhibitors, poor sample homogeneity, or suboptimal thermal cycling. The following table provides causes and solutions.
Table 1: Troubleshooting Guide for PCR in Complex Samples
| Observation | Possible Cause | Recommended Solution |
|---|---|---|
| No Amplification | PCR inhibitors from complex sample (stool, blood) | Dilute template DNA 10-100 fold to dilute inhibitors; re-purify DNA using silica-column based kits; use inhibitor-tolerant polymerases [7] [83]. |
| Suboptimal DNA purity or integrity | Re-purify DNA; assess integrity by gel electrophoresis; ensure DNA is stored in TE buffer or molecular-grade water [7] [84]. | |
| Insufficient template or low parasite load | Increase the amount of input DNA; increase PCR cycles (up to 40); use a DNA polymerase with high sensitivity [7] [83]. | |
| Nonspecific Bands/High Background | Non-stringent PCR conditions | Increase annealing temperature in 2°C increments; use a hot-start DNA polymerase; reduce number of cycles; use touchdown PCR [7] [84] [83]. |
| Excess primers or template | Optimize primer concentrations (typically 0.1-1 µM); reduce the amount of template DNA by 2-5 fold [7] [83]. | |
| Primer-dimer formation | Redesign primers to avoid 3'-end complementarity; use software to check for self-complementarity [84]. | |
| Inconsistent Replicates (qPCR/dPCR) | Non-homogeneous sample or reagents | Mix the reagent stocks and prepared reactions thoroughly before use to eliminate density gradients [7]. |
| Pipetting errors in viscous samples | Use reverse pipetting techniques for viscous samples; ensure pipettes are calibrated [84]. | |
| Presence of inhibitors affecting efficiency | Further purify the DNA template via alcohol precipitation or drop dialysis; use digital PCR (dPCR) which is more tolerant to inhibitors [84] [9]. |
Advanced Techniques and Methodologies
Q1: What advanced molecular techniques can improve sensitivity and quantification for low-level parasitic infections? For challenging scenarios like chronic infections with very low parasite loads, these advanced methods can be employed:
- Digital PCR (dPCR): This method partitions a sample into thousands of nanoreactions, allowing for absolute quantification without a standard curve. It is highly resistant to PCR inhibitors and offers superior sensitivity and precision for quantifying rare targets or subtle load changes, making it ideal for monitoring treatment efficacy [9].
- Loop-mediated isothermal amplification (LAMP): This isothermal technique amplifies DNA with high speed, efficiency, and specificity. It can be visualized directly, is less susceptible to inhibitors, and is well-suited for rapid, field-based screening [58].
- Deep-Sampling PCR: This research-grade method involves fragmenting sample DNA and performing hundreds of replicate PCRs. It dramatically extends the limit of detection by overcoming the statistical problem of sampling very rare targets, and has been used to reveal a >6 log variation in Trypanosoma cruzi burden among hosts [85] [86].
Q2: Can you provide a detailed protocol for validating a PCR assay in fecal samples, as used in recent research? The following protocol is adapted from a 2025 study developing methods for Spirometra mansoni in cat and dog feces [58].
- Sample Collection and Storage:
- Collect approximately 5g of feces from the internal core and surface areas, mix evenly, and store in aliquots.
- To evaluate storage conditions, test temperatures of -80°C, -20°C, 4°C, 25°C (room temperature), and 37°C for durations from 1 week to 6 months. The target gene should remain detectable even after 180 days across these temperatures for a robust assay [58].
- DNA Extraction:
- PCR Assay Setup and Optimization:
- Primer/Probe Optimization: For qPCR, systematically test primer concentrations (e.g., 0.1, 0.2, 0.4 µM) and probe concentrations (e.g., 0.25, 0.5, 1 µM) [58].
- Mg²⁺ Concentration: Optimize Mg²⁺ concentration (e.g., 1.5, 2.0, 2.5 mM) as it critically influences enzyme fidelity and product specificity [7] [84].
- Annealing Temperature: Use a gradient thermal cycler to determine the optimal annealing temperature (e.g., testing 55°C, 60°C, 65°C) [58].
- Validation Steps:
- Sensitivity: Determine the limit of detection (LoD) using serial dilutions of known positive DNA. The established qPCR for S. mansoni achieved a sensitivity of 100 copies/µL [58].
- Specificity: Test the assay against DNA from other common parasites (e.g., Trichuris trichiura, Ascaris spp., hookworms) found in the same host species to ensure no cross-reactivity [58] [87].
- Repeatability: Assess intra-assay and inter-assay precision. A well-optimized qPCR should have coefficients of variation (CVs) below 5% [58].
The Scientist's Toolkit: Key Research Reagent Solutions
Table 2: Essential Materials for Parasitology PCR Diagnostics
| Item | Function/Application | Examples & Notes |
|---|---|---|
| Inhibitor-Tolerant DNA Polymerase | Essential for amplifying targets from inhibitor-rich samples like stool, soil, and blood. | Terra PCR Direct Polymerase; OneTaq DNA Polymerase; kits specifically designed for forensic or stool samples [7] [83]. |
| Fecal DNA Extraction Kit | Standardized method for isolating PCR-quality DNA from complex stool matrices while removing inhibitors. | QIAamp DNA Stool Mini Kit (or similar); kits often include bead-beating steps for mechanical lysis [58] [87]. |
| Hot-Start Taq Polymerase | Prevents non-specific amplification and primer-dimer formation by remaining inactive until the high-temperature denaturation step. | Platinum Taq, Hot Start Taq DNA Polymerases. Crucial for improving specificity in complex reactions [7] [84]. |
| dNTP Mix | Building blocks for DNA synthesis. | Use balanced, high-quality dNTP mixes. Unbalanced concentrations increase PCR error rates [7] [84]. |
| Aerosol-Barrier Pipette Tips | Critical for preventing cross-contamination during liquid handling, a non-negotiable practice for pre-PCR setups. | Use universally; never use non-filter tips in pre-PCR areas [83]. |
| PCR Additives/Co-solvents | Assist in amplifying difficult templates (e.g., GC-rich regions, secondary structures). | GC Enhancer, DMSO, formamide. Use at the lowest effective concentration as they can weaken primer binding [7]. |
Experimental Workflows and Contamination Control
Sample Processing and DNA Extraction Workflow
Diagram 1: DNA extraction from complex samples.
Spatial Separation for Contamination Prevention
Diagram 2: One-way workflow for contamination control.
Troubleshooting Guides
PCR Amplification Failures: Diagnosis and Solutions
Problem: No amplification product is observed after PCR.
| Possible Cause | Recommended Solution | Underlying Principle for Reproducibility |
|---|---|---|
| Poor primer design | Verify primers are non-complementary and specific to the target; increase primer length [88]. | Inconsistent primer binding leads to variable amplification efficiency between replicates. |
| Insufficient primer concentration | Optimize primer concentration, typically within 0.1–1.0 µM [7]. | Suboptimal concentrations cause stochastic amplification failure, especially with low-copy targets. |
| Inappropriate annealing temperature | Optimize temperature in 1–2°C increments; use a gradient cycler. The optimal temperature is usually 3–5°C below the primer Tm [7]. | Temperature fluctuations prevent consistent primer-template hybridization, increasing inter-assay variation. |
| Questionable template quality/quantity | Analyze DNA integrity via gel electrophoresis; increase template amount or use polymerases with high sensitivity [7]. | Degraded or insufficient template is a major source of non-reproducible results in parasitology samples [89]. |
| Presence of PCR inhibitors | Decrease sample volume in the reaction; re-purify DNA using alcohol precipitation to remove contaminants [88]. | Inhibitors from fecal, soil, or blood samples [7] can cause false negatives and inconsistent replicate results. |
Problem: Multiple or non-specific bands are present.
| Possible Cause | Recommended Solution | Underlying Principle for Reproducibility |
|---|---|---|
| Low annealing temperature | Increase temperature stepwise; use hot-start DNA polymerases to prevent activity at room temperature [88] [7]. | Higher stringency ensures only the intended target is amplified consistently across all replicates. |
| Excess Mg2+ concentration | Adjust Mg2+ concentration in 0.5 mM increments to find the optimal level [88]. | Excessive Mg2+ reduces amplification fidelity and promotes mis-priming, leading to spurious bands. |
| Contamination with exogenous DNA | Use aerosol-resistant pipette tips; dedicate separate work areas and pipettors for reaction setup; wear gloves [88]. | Contamination is a critical threat to reproducibility, as it can lead to false positives and irreproducible findings. |
Ensuring Statistical Robustness in Replicate Data Analysis
Problem: High variability between technical replicates in qPCR/digital PCR.
| Possible Cause | Recommended Solution | Underlying Principle for Reproducibility |
|---|---|---|
| Inconsistent sample loading or pipetting | Use digital PCR (dPCR) for absolute quantification without the need for standard curves [9]. | dPCR's partitioning mitigates the impact of pipetting errors and inhibitors on quantification, enhancing consistency [9]. |
| Inhibition varying across samples | Partitioning in dPCR dilutes inhibitors, making the reaction less susceptible to their effects [9]. | Provides more robust and reproducible results from complex samples like feces or soil [9]. |
| Insufficient number of replicates | Incorporate a minimum of three technical replicates; use statistical models in dPCR that eliminate the need for technical replicates [9]. | A sufficient number of replicates is fundamental for calculating reliable mean values and confidence intervals. |
Frequently Asked Questions (FAQs)
Q1: Why is replicate testing non-negotiable in parasitology PCR research? Replicate testing is fundamental to distinguishing true biological signals from technical noise. In parasitology, where samples like feces or environmental samples often contain PCR inhibitors and parasites are not uniformly distributed, replicates allow you to measure variability, assess the reliability of your data, and provide confidence in your findings. Statistical analysis of replicates is what transforms a single observation into a reproducible result [9].
Q2: What is the difference between technical and biological replicates, and do I need both? Yes, both are critical for different reasons. Technical replicates involve testing the same sample multiple times to account for pipetting errors, instrument noise, and reaction efficiency. Biological replicates involve testing different samples from the same group or population (e.g., multiple cattle from one herd) to account for biological variation. Using both types ensures your results are both technically robust and biologically relevant [89] [9].
Q3: How can I minimize the risk of cross-contamination when setting up multiple replicate reactions? Cross-contamination is a primary threat to reproducibility. Key practices include:
- Physical Separation: Use dedicated pre- and post-PCR workstations, equipment, and lab coats.
- Aerosol Management: Always use filtered, aerosol-resistant pipette tips [88].
- Reaction Setup: Set up reactions on ice and consider using hot-start DNA polymerases, which remain inactive until the high-temperature denaturation step, preventing non-specific amplification and primer-dimer formation [7].
- Workflow: Process samples one at a time and change gloves frequently.
Q4: My negative controls are showing amplification in my replicate assays. What should I do? This indicates contamination, and all results from that run are compromised. Immediately discard all reaction mixes. Decontaminate your workspace and equipment with a 10% bleach solution or UV irradiation. Prepare fresh aliquots of all reagents, especially water and primers. Re-run the experiment with new controls. Never ignore a positive negative control, as it invalidates the reproducibility of your entire dataset.
Q5: For absolute quantification, is qPCR or digital PCR better for reproducible results? While qPCR is highly effective, digital PCR (dPCR) offers distinct advantages for reproducibility. dPCR provides absolute quantification without requiring a standard curve, a potential source of variation. Furthermore, by partitioning a sample into thousands of nanoreactions, dPCR minimizes the impact of PCR inhibitors, which are common in parasitological samples, leading to more robust and reproducible quantification, especially for low-abundance parasites [9].
Experimental Protocol: SYBR Green Real-Time PCR for Parasite Detection and Melt Curve Analysis
This protocol, adapted from a study on detecting Babesia and Theileria in cattle and ticks [89], provides a framework for a reproducible qPCR assay with statistical validation.
1. Objective: To reliably detect and distinguish between specific parasite species using SYBR Green real-time PCR and melting temperature (Tm) analysis.
2. Reagent Setup (per 20 µL reaction):
- SYBR Green Master Mix (2X): 10 µL
- Forward Primer (10 µM): 0.8 µL
- Reverse Primer (10 µM): 0.8 µL
- DNA Template: 2 µL (concentration optimized, e.g., 10-50 ng)
- Nuclease-Free Water: to 20 µL
3. Thermal Cycling Conditions:
- Initial Denaturation: 95°C for 5 minutes
- 40 Cycles of:
- Denaturation: 95°C for 30 seconds
- Annealing: Temperature optimized for primers (e.g., 60°C for 30 seconds) [89]
- Extension: 72°C for 30 seconds
- Melting Curve Analysis:
- 95°C for 15 seconds
- 60°C for 1 minute
- Ramp from 60°C to 95°C, with continuous fluorescence acquisition.
4. Data and Statistical Analysis for Reproducibility:
- Threshold Cycle (Ct): Set a consistent threshold for all runs. A cutoff (e.g., Ct < 35) should be predefined to define a positive result [89].
- Tm Calculation: The software will determine the Tm for each sample. Report the mean Tm and standard deviation from your replicates (e.g., Tm = 74.38 ± 0.04°C for B. bigemina) [89].
- Statistical Significance: Use a statistical test like Tukey's HSD test to confirm that the Tm values for different species are significantly distinct (p < 0.05), ensuring the assay can reliably differentiate between pathogens [89].
Research Reagent Solutions for Reproducible Parasitology PCR
| Reagent / Material | Function in Ensuring Reproducibility | Application Note |
|---|---|---|
| Hot-Start DNA Polymerase | Prevents non-specific amplification and primer-dimer formation by remaining inactive until a high-temperature activation step [7]. | Essential for complex samples; improves specificity and consistency of replicate reactions. |
| dNTP Mix (Balanced) | Provides equimolar concentrations of dATP, dCTP, dGTP, and dTTP [7]. | Unbalanced concentrations increase the PCR error rate, leading to sequence mutations and variable amplification. |
| MgCl2 or MgSO4 Solution | Cofactor for DNA polymerase; concentration critically affects primer specificity and efficiency [88] [7]. | Must be thoroughly mixed and optimized for each primer-template system. The required salt (Cl vs. SO4) depends on the polymerase [7]. |
| Nuclease-Free Water | Serves as the reaction solvent without introducing degrading enzymes. | The foundation of the reaction; using low-quality water is a common source of contamination and failed replicates. |
| PCR Additives (e.g., GC Enhancer) | Helps denature GC-rich templates and sequences with secondary structures [7]. | Critical for consistent amplification of difficult parasite genomes; improves yield and reliability. |
| Aerosol-Resistant Pipette Tips | Prevents aerosol-borne contamination during pipetting [88]. | A simple but non-negotiable tool for minimizing cross-contamination between samples and replicates. |
Experimental Workflow for Reproducible PCR
The diagram below outlines the key stages of a reproducible PCR experiment, from sample preparation to data interpretation, highlighting critical steps for minimizing contamination and ensuring statistical validity.
Statistical Validation Workflow
This flowchart describes the process of analyzing replicate data to ensure results are statistically sound and reproducible.
Conclusion
Minimizing cross-contamination is not a single step but an integrated system encompassing rigorous laboratory practice, intelligent assay design, and continuous validation. The combined strategies discussed—from foundational hygiene and spatial separation to advanced techniques like Suppression/competition PCR and single-tube systems—form a robust defense against false results. For the future, the parasitology field must move towards standardizing these contamination control measures and validating them across diverse sample types. Embracing these practices will be paramount for accelerating drug development, improving clinical diagnostic accuracy, and reliably tracking parasites in the food chain, ultimately strengthening both public health and scientific discovery.
References
- 1. Performance of Real-Time Polymerase Chain Reaction ... [https://pmc.ncbi.nlm.nih.gov/articles/PMC5508894/]
- 2. Best practices for performance of real-time PCR assays in ... [https://pmc.ncbi.nlm.nih.gov/articles/PMC7649542/]
- 3. limits of the current polymerase chain reaction (PCR) ... [https://www.sciencedirect.com/science/article/pii/S1198743X14640003]
- 4. Carryover Contamination-Controlled Amplicon Sequencing ... [https://pmc.ncbi.nlm.nih.gov/articles/PMC10269707/]
- 5. How to Prevent Cross-Contamination During PCR Test [https://gangzhumed.com/blogs/how-to-prevent-cross-contamination-during-pcr-test/]
- 6. FAQs regarding Cross Contamination [https://www.gmp-compliance.org/gmp-news/faqs-regarding-cross-contamination]
- 7. PCR Troubleshooting Guide | Thermo Fisher Scientific - US [https://www.thermofisher.com/us/en/home/life-science/cloning/cloning-learning-center/invitrogen-school-of-molecular-biology/pcr-education/pcr-reagents-enzymes/pcr-troubleshooting.html]
- 8. PCR Troubleshooting Guide [https://www.neb.com/en-us/tools-and-resources/troubleshooting-guides/pcr-troubleshooting-guide?srsltid=AfmBOopBCZxxSNaOwrmj8e3UctyXcLPmye2GxiekRr5uw9nI8zbQ9fgB]
- 9. Digital PCR: modern solution to parasite diagnostics and ... [https://parasitesandvectors.biomedcentral.com/articles/10.1186/s13071-023-05756-7]
- 10. Polymerase Chain Reaction (PCR) - StatPearls - NCBI - NIH [https://www.ncbi.nlm.nih.gov/books/NBK589663/]
- 11. Evaluation of Allplex™ GI-Parasite Assay—A Multiplex Real ... [https://pmc.ncbi.nlm.nih.gov/articles/PMC12390207/]
- 12. Real-time PCR for diagnosing and monitoring treatment ... [https://www.frontiersin.org/journals/parasitology/articles/10.3389/fpara.2023.1277372/full]
- 13. Suppression/competition PCR: A novel method to minimize ... [https://pubmed.ncbi.nlm.nih.gov/41192621/]
- 14. key insights from a systematic review | Parasitology Research [https://link.springer.com/article/10.1007/s00436-025-08503-2]
- 15. Is real-time PCR-based diagnosis similar in performance to ... [https://www.sciencedirect.com/science/article/pii/S1198743X15009441]
- 16. How to prevent PCR contamination [https://www.minipcr.com/how-to-prevent-pcr-contamination/]
- 17. Preliminary investigations of parasite contamination ... [https://www.sciencedirect.com/science/article/pii/S2405676624000039]
- 18. Prevalence of intestinal parasite contamination in raw ... [https://journals.plos.org/plosone/article?id=10.1371/journal.pone.0320929]
- 19. Risk of Environmental Contamination by Gastrointestinal ... [https://www.mdpi.com/2076-0817/14/3/211]
- 20. Avoiding Contamination | Thermo Fisher Scientific - ES [https://www.thermofisher.com/us/en/home/life-science/pcr/real-time-pcr/real-time-pcr-learning-center/real-time-pcr-basics/good-laboratory-practice-avoid-contamination-qpcr-experiments.html]
- 21. qPCR Troubleshooting: How to Ensure Successful ... [https://dispendix.com/blog/qpcr-troubleshooting]
- 22. Digital PCR: modern solution to parasite diagnostics and ... [https://pmc.ncbi.nlm.nih.gov/articles/PMC10131454/]
- 23. Real-Time PCR for Detection and Differentiation of ... [https://pmc.ncbi.nlm.nih.gov/articles/PMC154634/]
- 24. Practical Guidance for Clinical Microbiology Laboratories [https://pmc.ncbi.nlm.nih.gov/articles/PMC5740970/]
- 25. Clean Up Your Act! How To Clean Up PCR Contamination [https://bitesizebio.com/20773/clean-up-your-act-how-to-clean-up-pcr-contamination/]
- 26. Faecal occult blood testing: a review of its use and ... [https://pmc.ncbi.nlm.nih.gov/articles/PMC12273078/]
- 27. Fecal occult blood test [https://www.mayoclinic.org/tests-procedures/fecal-occult-blood-test/about/pac-20394112]
- 28. 6 Ways to Minimize Contamination during PCR [https://www.labclinics.com/2019/07/22/six-ways-to-minimize-contamination-during-pcr/?lang=en]
- 29. How to Set Up a Molecular Pathology Lab [https://pmc.ncbi.nlm.nih.gov/articles/PMC10510618/]
- 30. Avoiding Contamination | Thermo Fisher Scientific - NG [https://www.thermofisher.com/ng/en/home/life-science/pcr/real-time-pcr/real-time-pcr-learning-center/real-time-pcr-basics/good-laboratory-practice-avoid-contamination-qpcr-experiments.html]
- 31. Help Prevent PCR Contamination with Laminar Flow Hoods [https://www.sentryair.com/blog/industry-applications/laboratories/help-prevent-pcr-contamination-with-laminar-flow-hoods/]
- 32. Use of uracil DNA glycosylase to control carry-over ... [https://pubmed.ncbi.nlm.nih.gov/2227421/]
- 33. Validation of molecular-diagnostic techniques in the ... [https://www.sciencedirect.com/science/article/abs/pii/S0304401705005765]
- 34. Minimizing PCR Cross-Contamination using GoTaq® DNA ... [https://worldwide.promega.com/resources/pubhub/enotes/minimizing-pcr-crosscontamination-using-gotaq-dna-polymerase-with-dutp-and-ung/]
- 35. Preventing False Positive and False Negative PCR Results [https://www.clinicallab.com/preventing-false-positive-and-false-negative-pcr-results-26261]
- 36. PCR: The Right Way to Decontaminate and Eliminate ... [https://bitesizebio.com/3473/pcr-the-right-way-to-decontaminate-and-eliminate-false-positives/]
- 37. Error-suppression mechanism of PCR by blocker strands - PMC [https://pmc.ncbi.nlm.nih.gov/articles/PMC10111364/]
- 38. Reduction of DNA Contamination in RNA Samples for RT- ... [https://pmc.ncbi.nlm.nih.gov/articles/PMC5476456/]
- 39. 4 Effective Ways to Minimize PCR Contamination [https://www.revsci.com/blogs/thermal-cyclers/4-effective-ways-to-minimize-pcr-contamination?srsltid=AfmBOoplS1bIBvkqT8BSlfJkiPeZLACBVccB6qDR59oomWLSPeSx4dDP]
- 40. /qPCR PCR Quick Reference Troubleshooting [https://www.linkedin.com/pulse/pcrqpcr-troubleshooting-quick-reference-biopathogenix-kejac?tl=en]
- 41. /qPCR Plastics PCR | Thermo Fisher Scientific - BQ Troubleshooting [https://www.thermofisher.com/bq/en/home/life-science/cloning/cloning-learning-center/invitrogen-school-of-molecular-biology/pcr-education/pcr-qpcr-plastics/pcr-qpcr-plastics-troubleshooting.html]
- 42. Development of a Highly Sensitive Nested-PCR Procedure ... [https://pmc.ncbi.nlm.nih.gov/articles/PMC101457/]
- 43. An Introduction to High-Resolution Melting (also known as ... [https://dna-utah.org/Hi-Res/TOP_Hi-Res%20Melting.html]
- 44. Nested PCR: Principle, Protocol and Application [https://www.bocsci.com/resources/nested-pcr-principle-protocol-and-applications.html?srsltid=AfmBOorx2eSVvt8p_s-UxBSFV97a5prx-paHC4PcL_wVMQumPAQj074G]
- 45. Polymerase Chain Reaction: Basic Protocol Plus ... [https://pmc.ncbi.nlm.nih.gov/articles/PMC4846334/]
- 46. PCR Troubleshooting Guide [https://www.neb.com/en-us/tools-and-resources/troubleshooting-guides/pcr-troubleshooting-guide?srsltid=AfmBOoqF2wS7WBrsxeuqwvbco3t5pioOdxEj0c4szZsx6GzOCg-vMKjY]
- 47. Single-tube nested PCR in the diagnosis of tuberculosis [https://pmc.ncbi.nlm.nih.gov/articles/PMC500452/]
- 48. Parasite contamination of berries: Risk, occurrence, and ... [https://pmc.ncbi.nlm.nih.gov/articles/PMC7033989/]
- 49. Troubleshooting your PCR [https://www.takarabio.com/learning-centers/pcr/faq/troubleshooting?srsltid=AfmBOopfpqBEWQwCHL24xXR0s33lmORACL8I8U90dxCH5Ibrmb-LvV0D]
- 50. PCR Troubleshooting Guide [https://www.neb.com/en-us/tools-and-resources/troubleshooting-guides/pcr-troubleshooting-guide?srsltid=AfmBOorim8A3vCDMUoH4vihQSFf_-vs3zOTHFVA5F5DTwKoqmhI9Ej9y]
- 51. Microbiological quality of raw berries and their products [https://www.sciencedirect.com/science/article/pii/S2405844019366514]
- 52. Dos and don'ts for molecular testing [https://www.who.int/teams/global-malaria-programme/case-management/diagnosis/nucleic-acid-amplification-based-diagnostics/dos-and-don-ts-for-molecular-testing]
- 53. Amplification of the No Template Control (NTC) [https://www.thermofisher.com/us/en/home/life-science/pcr/real-time-pcr/real-time-pcr-learning-center/real-time-pcr-basics/real-time-pcr-troubleshooting-tool/gene-expression-quantitation-troubleshooting/amplification-no-template-control.html]
- 54. A Real-Time PCR Assay for the Diagnosis of Intestinal ... [https://pmc.ncbi.nlm.nih.gov/articles/PMC8010660/]
- 55. Validation of PCR-based protocols for the detection of ... [https://pmc.ncbi.nlm.nih.gov/articles/PMC7034050/]
- 56. Controlling for contamination in qPCR testing - LGC [https://blog.biosearchtech.com/how-to-control-for-contamination-in-qpcr-testing]
- 57. Evaluation of PCR-enhancing approaches to reduce ... [https://www.sciencedirect.com/science/article/abs/pii/S0048969724069250]
- 58. Development of PCR, qPCR and LAMP methods for the ... [https://pmc.ncbi.nlm.nih.gov/articles/PMC12508883/]
- 59. Just What Do All These Additives Do? [https://bitesizebio.com/19420/just-what-do-all-these-additives-do/]
- 60. Bovine serum albumin further enhances the effects of organic ... [https://pmc.ncbi.nlm.nih.gov/articles/PMC3466135/]
- 61. DNA probes and PCR for diagnosis of parasitic infections - PMC [https://pmc.ncbi.nlm.nih.gov/articles/PMC172851/]
- 62. PCR product contamination and how to deal with it [https://bento.bio/resources/bento-lab-advice/pcr-product-contamination-what-it-is-how-it-occurs-and-how-to-deal-with-it/]
- 63. Preventing PCR Amplification Carryover Contamination in ... [https://www.annclinlabsci.org/content/34/4/389.long]
- 64. PCR Troubleshooting Guide [https://www.neb.com/en-us/tools-and-resources/troubleshooting-guides/pcr-troubleshooting-guide?srsltid=AfmBOop-wpiHnM8C-7E-S8bWUCB4yzvtMnRoUwZQdpEtW-iaMjb8al5n]
- 65. How to test the accuracy and precision of your pipette [https://www.integra-biosciences.com/united-states/en/blog/article/how-test-accuracy-and-precision-your-pipette]
- 66. Common Pipette Calibration Errors: Expert Tips for Accurate ... [https://ips-us.com/common-pipette-calibration-errors-and-how-to-avoid-them/]
- 67. Cleaning and Disinfecting Centrifuges [https://referencemanual.aclab.com/welcome/centrifuge/cleaning-and-disinfecting-centrifuges/]
- 68. Analytical validation of real-time quantitative PCR assays ... [https://pmc.ncbi.nlm.nih.gov/articles/PMC6358008/]
- 69. Quantification of Parasite Load by a Real-Time PCR Assay ... [https://pmc.ncbi.nlm.nih.gov/articles/PMC8308825/]
- 70. Peer review in Serial 'deep-sampling' PCR of fragmented ... [https://elifesciences.org/articles/104547/peer-reviews]
- 71. Deciphering the impact of contaminating microbiota in DNA ... [https://pmc.ncbi.nlm.nih.gov/articles/PMC12502690/]
- 72. A novel cross-priming amplification technique combined ... [https://www.sciencedirect.com/science/article/abs/pii/S0304401725000135]
- 73. Comparison of commercial and in-house real-time PCR ... [https://pubmed.ncbi.nlm.nih.gov/32371221/]
- 74. Comparison of commercial and in-house real-time PCR ... [https://www.sciencedirect.com/science/article/abs/pii/S0001706X19317693]
- 75. Comparative analysis of commercial and “In-House ... [https://parasitesandvectors.biomedcentral.com/articles/10.1186/s13071-025-06879-9]
- 76. Selecting PCR for the Diagnosis of Intestinal Parasitosis [https://pmc.ncbi.nlm.nih.gov/articles/PMC5695021/]
- 77. Seven tips for avoiding DNA contamination in your PCR [https://www.takarabio.com/about/bioview-blog/tips-and-troubleshooting/avoid-dna-contamination-in-pcr?srsltid=AfmBOorwlVacs5soJI31pLERQrnItAvogeG4-4pqtHBBiw8Em03LP_E4]
- 78. Minimizing PCR Cross-Contamination using GoTaq® DNA ... [https://www.promega.com/resources/pubhub/enotes/minimizing-pcr-crosscontamination-using-gotaq-dna-polymerase-with-dutp-and-ung/]
- 79. Comparison of multi-parallel quantitative real-time PCRs ... [https://parasitesandvectors.biomedcentral.com/articles/10.1186/s13071-024-06464-6]
- 80. The Comparison of PCR Kits for the Detection of Erythrocytic ... [https://pmc.ncbi.nlm.nih.gov/articles/PMC9392634/]
- 81. Tips for successful PCR and Troubleshooting PCR-qPCR [https://info.abmgood.com/polymerase-chain-reaction-pcr-qpcr-troubleshooting]
- 82. Troubleshooting your PCR [https://www.takarabio.com/learning-centers/pcr/faq/troubleshooting?srsltid=AfmBOoqUjbk-S4DULctN3TvCY4evG0ynJQSkUULHz8Ih9jAKdOf_nRHz]
- 83. Troubleshooting your PCR [https://www.takarabio.com/learning-centers/pcr/faq/troubleshooting?srsltid=AfmBOor9F2JPJAp_Hm_Nzpom22zuS5UfS8en0Gq3lXcNoLt7AcvVYVwP]
- 84. PCR Troubleshooting Guide [https://www.neb.com/en-us/tools-and-resources/troubleshooting-guides/pcr-troubleshooting-guide?srsltid=AfmBOooLGH7p1TcKTGLsQptRUjAKL0bFZ3T9keclQUyveKU9yjSjLYbd]
- 85. Serial 'deep-sampling' PCR of fragmented DNA reveals the ... [https://elifesciences.org/articles/104547]
- 86. Serial 'deep-sampling' PCR of fragmented DNA reveals the ... [https://elifesciences.org/reviewed-preprints/104547/reviews]
- 87. Assessing the diagnostic value of qPCR for Trichuris trichiura [https://www.frontiersin.org/journals/parasitology/articles/10.3389/fpara.2025.1679294/full]
- 88. Taq PCR Kit Troubleshooting Guide [https://www.neb.com/en-us/tools-and-resources/troubleshooting-guides/taq-pcr-kit-troubleshooting-guide?srsltid=AfmBOooT7NMuoKcE_hZm2U3TOO4XLmf4pdQVRVHHITHxZFGjcjQ8qTTY]
- 89. Piroplasmida) in hard ticks and cattle blood from Thailand [https://pmc.ncbi.nlm.nih.gov/articles/PMC12380414/]