Optimizing Wildlife Disease Surveillance: A Comprehensive Guide to Pooled Testing Strategies
This article provides a comprehensive framework for implementing and optimizing pooled testing in wildlife health surveillance.
Optimizing Wildlife Disease Surveillance: A Comprehensive Guide to Pooled Testing Strategies
Abstract
This article provides a comprehensive framework for implementing and optimizing pooled testing in wildlife health surveillance. Aimed at researchers and surveillance professionals, it covers foundational principles, advanced methodological protocols, strategies for troubleshooting and cost optimization, and rigorous validation techniques. By synthesizing current research and practical applications, this guide aims to enhance the efficiency, accuracy, and cost-effectiveness of large-scale wildlife disease screening programs, crucial for managing emerging infectious diseases and protecting biodiversity.
The Principles and Imperatives of Wildlife Health Surveillance
Troubleshooting Guide for Pooled Testing in Wildlife Surveillance
This guide addresses common challenges researchers face when implementing pooled testing protocols for wildlife disease surveillance.
FAQ 1: Our pooled testing results are inconsistent, with unexpected false negatives. What could be the cause?
Several factors can lead to false negatives in pooled testing. The table below outlines common causes and corrective actions based on proficiency testing guidance [1].
| Suspected Cause | Troubleshooting Actions | Corrective Actions |
|---|---|---|
| Specimen Handling Error | Check sample storage temperature and handling delays. Verify pipette calibration [1]. | Train staff on proper routing and storage. Implement a lab calendar for PT sample arrival [1]. |
| Reagent Issue | Check for recent reagent lot changes or near-expiry reagents. Review QC records from the day of testing [1]. | Establish a rigorous validation process for new reagent lots using patient samples. Improve reagent storage and expiration date management [1]. |
| Pool Size Too Large | Re-test samples individually to confirm false negatives. Review the disease prevalence in your population [2]. | Re-calculate the optimal pool size using statistical tools to minimize dilution effects. Use prevalence data to inform pool size selection [3] [2]. |
| Instrument Technical Problem | Check instrument maintenance logs and action logs for errors around the time of testing [1]. | Perform preventative maintenance. Contact the manufacturer for assistance if systematic errors are suspected [1]. |
FAQ 2: How do we determine the optimal pool size for a new wildlife disease surveillance program?
Optimal pool size is a balance between cost efficiency and test sensitivity. The goal is to use the largest pool size that does not significantly reduce the assay's ability to detect a positive sample [2]. This depends primarily on two factors:
- Disease Prevalence: Pooled testing is most efficient for screening diseases with low prevalence [4] [2]. As prevalence increases, more pools test positive, requiring individual retests and reducing efficiency.
- Assay Sensitivity: The more sensitive the test, the larger the potential pool size. For example, one study found that while ELISA could detect CWD in a 1:9 pool, the more sensitive RT-QuIC assay could detect it in a 1:49 pool [3].
Actionable Protocol: To determine your pool size:
- Estimate Prevalence: Use historical data or preliminary surveys to estimate the disease prevalence (p) in your population.
- Validate Experimentally: Conduct a pilot study. Create pools of various sizes (e.g., 1:5, 1:10, 1:20) by diluting a known positive sample with confirmed negative samples. The largest pool size that consistently returns a positive result is your maximum viable size [3].
- Use Statistical Tools: Leverage available R packages and software designed to optimize pool size based on prevalence and test accuracy metrics [2].
FAQ 3: What are the primary advantages and disadvantages of implementing a pooled testing strategy?
Pooled testing offers significant benefits but also presents unique challenges, as summarized below [4].
| Pros | Cons |
|---|---|
| Conserves testing reagents and reduces overall costs [3] [4]. | Reduces test sensitivity due to sample dilution, risking false negatives [4]. |
| Increases surveillance capacity, allowing more individuals to be tested [3] [4]. | Lacks established infrastructure for sample aliquoting and data management, increasing manual error risk [4]. |
| Useful for large-scale screening in low-prevalence populations [2]. | Increases turnaround time for positive results due to the need for retesting [4]. |
| Can facilitate the use of ultra-sensitive, commercially viable new assays [3]. | Does not conserve sample collection materials (swabs, vials) [4]. |
Experimental Protocol: Evaluating Pooling Thresholds for Wildlife Disease Surveillance
The following detailed methodology is adapted from a study on Chronic Wasting Disease (CWD) testing [3].
1. Objective To evaluate the efficacy of pooled testing for a wildlife disease using both a standard screening assay (e.g., ELISA) and a novel, highly sensitive assay (e.g., RT-QuIC).
2. Materials and Reagents
- Tissue Samples: Collected from a wildlife species of interest (e.g., medial retropharyngeal lymph nodes (RPLNs) from white-tailed deer).
- Homogenization Equipment: Grinding tubes and a homogenizer.
- Diagnostic Kits:
- Standard assay (e.g., TeSeE ELISA Purification and Detection Kits).
- Novel assay (e.g., reagents for Real-Time Quaking-Induced Conversion (RT-QuIC)).
- Laboratory Equipment: Microplate reader, plate washer, and real-time thermoshaker.
3. Procedure
- Step 1: Sample Collection and Storage
- Collect tissue samples post-mortem from wildlife, following standard field protocols.
- Place samples in individually labeled bags and store frozen (-20°C) until processing.
Step 2: Assigning Tissue Pools
- Use a predefined number of confirmed positive and test-negative samples.
- Create tissue pools by combining one positive "spike" sample with an increasing number of negative samples. Each individual contributes an equal tissue mass.
- Example pooling thresholds: 1:1, 1:2, 1:4, 1:9, 1:19, and 1:49 [3].
Step 3: Tissue Homogenization for Pooled Testing
- Partially thaw samples and trim excess connective tissue.
- For each pool, apportion the calculated tissue mass from each constituent sample into a tared grinding tube.
- The tissue mass per individual decreases as the pool size increases (e.g., from 100mg per individual in a 1:1 pool to 20mg in a 1:9 pool) [3].
- Homogenize the tissue according to the manufacturer's protocol.
Step 4: Diagnostic Testing
- ELISA Screening: Test the pooled homogenates using the standard commercial ELISA kit, following the manufacturer's instructions. Record optical densities (ODs).
- Novel Assay Testing: Test the pooled homogenates using the sensitive assay (e.g., RT-QuIC). This may require a specific tissue dilution (e.g., 0.02% tissue homogenate) [3].
Step 5: Data Analysis
- Determine the maximum pooling threshold at which each assay reliably returns a positive result for the spiked sample.
- Compare the cost per test and detection sensitivity between the two assays at different pool sizes.
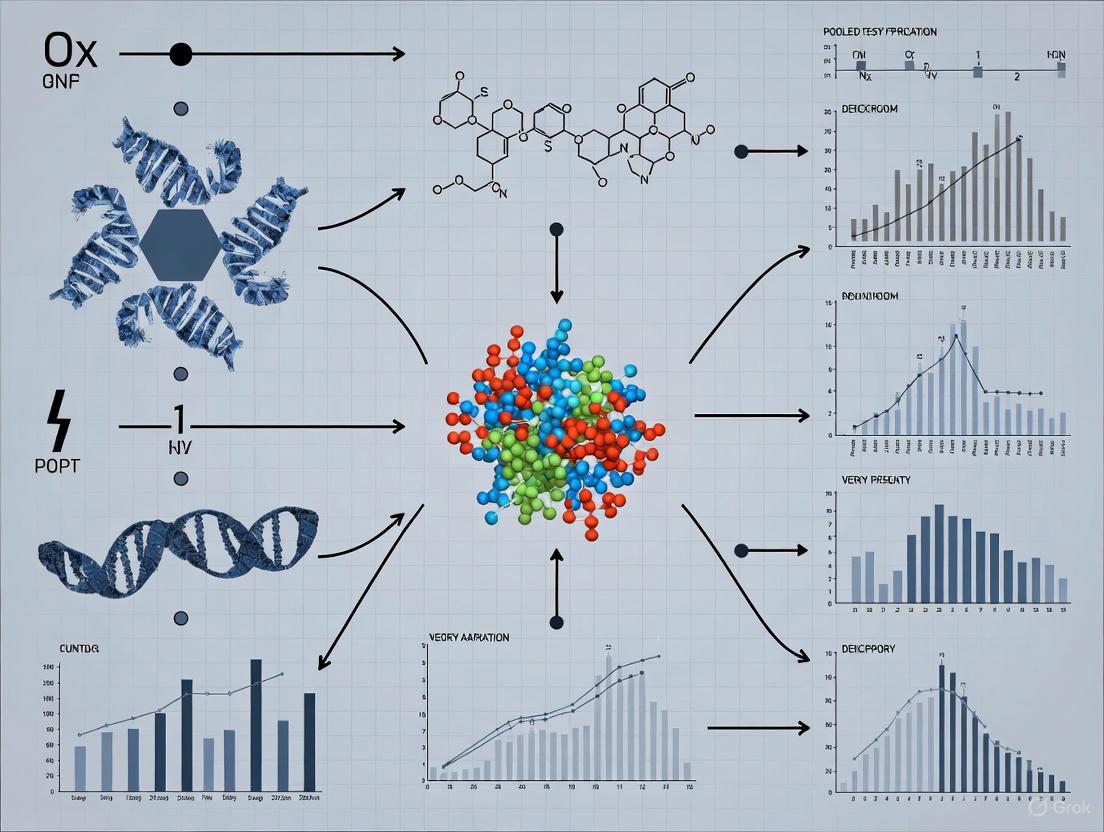
Wildlife Pooled Testing Workflow
The diagram below illustrates the logical workflow for implementing a pooled testing strategy in wildlife disease surveillance.
Research Reagent Solutions for Wildlife Pooled Testing
The table below lists key materials and reagents essential for conducting pooled testing in wildlife disease surveillance.
| Research Reagent / Material | Function in Pooled Testing |
|---|---|
| Homogenization Tubes | Containers designed for grinding and homogenizing solid tissue samples (e.g., lymph nodes) into a uniform liquid suspension for testing [3]. |
| ELISA Kits | Commercial test kits containing all necessary antibodies, substrates, and buffers to detect pathogen-specific proteins (antigens) via an enzyme-linked immunosorbent assay. The current standard for CWD screening [3]. |
| RT-QuIC Reagents | Chemicals and recombinant prion protein substrate required for the Real-Time Quaking-Induced Conversion assay, an ultra-sensitive method to amplify and detect misfolded prion proteins [3]. |
| Retropharyngeal Lymph Node (RPLN) Tissue | The target tissue routinely collected from cervids for CWD surveillance. Serves as the source of the pathogen in the test sample [3]. |
| Sample Collection Kits | Include Whirl-Pak bags, labels, and preservatives for sterile and organized sample collection and transport from the field to the lab [3]. |
Troubleshooting Guides and FAQs
Frequently Asked Questions
Q1: What are the primary zoological and ecological factors that can lead to errors in my wildlife disease study design? A1: The main factors are related to the intrinsic characteristics of wildlife populations and their environments. Impediments include the unknown population densities of free-ranging animals, diverse zoological and behavioral characteristics, and limited access to investigation materials. These can lead to biased samples and incorrect prevalence estimates if not properly accounted for in your study design [5].
Q2: Why is my pooled testing protocol yielding inaccurate prevalence estimates for a wildlife pathogen? A2: Traditional pooled testing algorithms often assume each individual has the same probability of being positive. This is frequently unrealistic in wildlife populations, where individuals have varying risks based on species, age, location, or behavior. Using non-informative procedures in a heterogeneous population can reduce the accuracy of your prevalence estimates and testing efficiency [6].
Q3: How can I improve the cost-efficiency of a wildlife disease surveillance program that uses pooled testing? A3: Consider implementing informative retesting procedures. These methods use known risk factors (e.g., species, sex, geographic origin) to estimate an individual's probability of infection. This information is then used to form pools strategically, minimize the number of positive pools, and determine the order of individual retesting, which significantly reduces the total number of tests required [6].
Q4: What is the key difference between scanning and targeted surveillance in wildlife health? A4: Scanning (or passive) surveillance typically involves the investigation of sick or dead animals that are found and submitted, making it effective for detecting mortality events. Targeted (or active) surveillance involves proactively sampling live or apparently healthy animals to detect specific pathogens or antibodies, which is crucial for identifying healthy carriers of important zoonotic or economically significant pathogens [5].
Q5: We demonstrated freedom from a disease in a wildlife population, but the results are being questioned. What common pitfall might we have encountered? A5: Demonstrating disease freedom requires robust survey design and a thorough understanding of population parameters. A common pitfall is the lack of data on free-ranging population densities, which makes it difficult to confirm that your sample size is sufficiently large and representative to reliably detect the disease if it were present [5].
Troubleshooting Common Experimental Issues
Problem: Inconclusive or conflicting diagnostic test results from wildlife samples.
- Potential Cause: Many diagnostic tests are developed and validated for domestic animals and may not perform accurately with wildlife species due to physiological and immunological differences [5].
- Solution: Whenever possible, use diagnostic tests that have been specifically validated for your target wildlife species. If such tests are unavailable, clearly state this as a limitation in your research and interpret results with caution. There is a recognized need for more development and validation of diagnostic tests specifically for wildlife [5].
Problem: Pooled testing results in an unexpectedly high number of positive pools, making the process inefficient.
- Potential Cause: The pool size may be too large for the actual disease prevalence, or the population may be more heterogeneous than anticipated.
- Solution: Optimize your pool size using statistical models that account for the estimated prevalence. For heterogeneous populations, switch from a standard Dorfman testing method to an informative procedure like Pool-specific Optimal Dorfman (PSOD) or Informative Sterrett, which leverage individual risk factors to create smarter pool configurations [6].
Problem: Failure to detect an emerging disease outbreak in a wildlife population during routine surveillance.
- Potential Cause: Reliance on a single data source (e.g., only carcass collection) and a lack of an interdisciplinary approach.
- Solution: Implement a triangulation approach by integrating multiple data sources. Enhance your surveillance by incorporating data from wildlife rehabilitation centers, camera trapping for animals with visible lesions, and samples from hunted or farmed wildlife. This creates a more sensitive early-warning system [5].
Experimental Protocols & Data Presentation
Detailed Methodology: Informative Dorfman Testing for Wildlife Surveillance
This protocol adapts pooled testing for heterogeneous wildlife populations.
1. Pre-Sampling Phase: Data Collection and Risk Modeling
- Step 1: For each individual or sample, collect all available risk factors (e.g., species, age class, sex, geographical location, known migration patterns, proximity to human settlements).
- Step 2: If a training dataset exists (historical surveillance data from a similar population), use it to fit a binary regression model (e.g., logistic regression) to predict the probability of infection based on the risk factors.
- Step 3: Apply this model to your current sample set to estimate an individual risk probability of being positive for each specimen.
2. Pool Formation Phase
- Step 4: Order all specimens from highest to lowest estimated risk.
- Step 5: For Threshold Optimal Dorfman (TOD), set a probability threshold. Specimens above the threshold are tested individually. Specimens below the threshold are grouped into pools of optimal size
s, calculated to minimize the expected number of tests. - Step 6: For Pool-specific Optimal Dorfman (PSOD), starting from the highest-risk specimen, algorithmically assign successive specimens into pools of variable sizes
s1, s2, s3,...that collectively minimize the expected number of tests.
3. Testing and Decoding Phase
- Step 7: Test each pool. Any pool that tests negative is declared free of infection; all members are categorized as negative.
- Step 8: For any pool that tests positive, all individual specimens within that pool are tested to decode and identify the positive individual(s).
Table 1: Comparison of Wildlife Health Surveillance Types [5]
| Surveillance Type | Key Objective | Typical Data Source | Best For | Key Challenge |
|---|---|---|---|---|
| Scanning (Passive) | Early detection of outbreaks/mortality events | Carcasses; sick animals from the public | Detecting novel disease events; clinical diseases | Reporter bias; often no population denominator data |
| Targeted (Active) | Estimate disease prevalence; demonstrate disease freedom | Proactive sampling of live or hunter-harvested animals | Monitoring known pathogens; healthy carriers | Requires knowledge of population ecology for valid sampling |
Table 2: Overview of Common Pooled Testing Procedures [6]
| Procedure | Type | Key Principle | Ideal Context |
|---|---|---|---|
| Dorfman | Non-Informative | Simple two-stage: test pool, then test all individuals in positive pools. | Homogeneous populations; low prevalence; simplicity is key. |
| Halving (3H, 4H) | Non-Informative | Iteratively split a positive pool into smaller sub-pools. | Moderately high-throughput; can be more efficient than Dorfman. |
| Sterrett | Non-Informative | After a positive pool, test individuals one-by-one and re-pool remainder. | Populations where most positive pools contain only one positive. |
| Matrix Testing | Non-Informative | Arrange samples in a grid; test row and column pools. | Very high-throughput screening of many samples. |
| TOD / PSOD | Informative | Use risk probabilities to form optimal pools. | Heterogeneous wildlife populations with known risk factors. |
| Informative Sterrett | Informative | Use risk probabilities to determine retesting order in positive pools. | Heterogeneous wildlife populations where re-pooling is feasible. |
Workflow Visualization
The Scientist's Toolkit: Research Reagent & Material Solutions
Table 3: Essential Materials for Wildlife Health Investigations
| Item / Solution | Function in Wildlife Health Investigations |
|---|---|
| Validated Diagnostic Assays | Species-specific serological or molecular tests (e.g., ELISA, PCR) validated for wildlife to ensure accurate detection of pathogens or antibodies [5]. |
| Risk Factor Data | Pre-existing data on species, ecology, and individual traits used to build statistical models for informative pooled testing and study design [6]. |
| Standardized Necropsy Kits | Field kits for thorough post-mortem examination of carcasses, which is the foundation of scanning surveillance and mortality event investigation [5]. |
| Sample Pooling Matrix | The liquid medium (e.g., transport media) used to composite individual specimens (blood, tissue homogenate) into a single pool for group testing [6] [7]. |
| Metadata Tracking System | A standardized database for recording crucial ecological, spatial, and temporal metadata alongside health data, which is essential for valid analysis and interpretation [5]. |
This technical support center provides troubleshooting and guidance for researchers implementing pooled testing approaches in wildlife disease surveillance. Pooled testing, where samples from multiple animals are combined and tested as a single unit, is a efficient strategy for large-scale screening, particularly when disease prevalence is low [8]. This resource addresses common experimental challenges and outlines best practices to ensure your data is reliable, reproducible, and compliant with emerging global standards for wildlife disease data [9] [10].
Frequently Asked Questions (FAQs) and Troubleshooting
Q1: When is pooled testing most effective, and how do I determine the optimal pool size?
A: Pooled testing is most efficient for screening large populations with a low disease prevalence and when testing a consistent subpopulation repeatedly [8] [4]. The efficiency gains are mechanical and epidemiological: frequent testing removes infected individuals quickly, lowering subsequent infection probability within the group and making future pooled tests more likely to be negative [8].
- Troubleshooting Guide: Inefficient Pooling
- Problem: Too many pools are testing positive, requiring costly individual re-testing.
- Potential Cause: The disease prevalence in your sampled population is higher than anticipated.
- Solution: Re-assess your population's infection rate. Reduce the pool size to minimize dilution effects and false negatives. The optimal pool size is a balance; while larger pools test more individuals at once, they also increase the risk of sample dilution and lower test sensitivity [4].
Q2: How does frequent testing and the "natural groupings" of wildlife impact pooled testing strategy?
A: Increasing testing frequency can paradoxically reduce the total number of tests required. When a population is tested frequently, the probability of infection at any given test is low, making large pools more efficient [8]. Furthermore, using natural groupings (e.g., animals from the same herd, social group, or geographic cluster) is highly advantageous because their correlated infection risk lowers the overall likelihood of a positive pool result, enhancing efficiency [8].
Q3: Our pooled test was positive, but subsequent individual tests were all negative. What happened?
A: This discrepancy could arise from several factors:
- Sample Cross-Contamination: During the manual aliquoting and pooling process, samples can be contaminated [4]. Review sterile pipetting techniques and use a laboratory information system to track samples.
- Test Sensitivity/Specificity Issues: The test may have imperfect specificity, leading to a false positive pool result.
- Low Viral Load: An individual with a very low viral load may test positive in a concentrated pool but fall below the detection threshold when tested individually due to dilution [4].
Q4: What are the critical data fields I must report when publishing pooled testing results for wildlife?
A: To ensure data is FAIR (Findable, Accessible, Interoperable, and Reusable), adhere to minimum data standards. The table below summarizes key required and conditional fields based on a recent standard for wildlife disease research [9] [10].
- Crucially, you must report negative results and data at the finest possible spatial, temporal, and taxonomic scale, not just summaries [9] [10].
| Field Category | Field Name | Requirement Level | Notes for Pooled Testing |
|---|---|---|---|
| Sampling Data | Sample ID | Required | Unique identifier for each sample collected. |
| Animal ID | Conditional | Leave blank if animals are not individually identified [9]. | |
| Pool ID | Recommended | Critical for pooling. A unique identifier for the sample pool. | |
| Test date | Required | Date the diagnostic test was performed. | |
| Host Data | Host species | Required | Use a controlled vocabulary (e.g., GBIF) where possible [9]. |
| Location | Required | Geographic coordinates of sampling. May require obfuscation for sensitive species [10]. | |
| Parasite/Pathogen Data | Pathogen tested for | Required | The target parasite or pathogen. |
| Diagnostic test | Required | e.g., PCR, ELISA. | |
| Test result | Required | Positive, negative, or inconclusive for the pool. | |
| Pathogen identity | Conditional | Report if available (e.g., GenBank accession for positive samples) [9]. |
Experimental Protocols and Workflows
Standard Workflow for Pooled Sample Testing
The following diagram illustrates the core decision-making process for a pooled testing strategy, from sample collection to final result reporting.
Detailed Methodology: Implementing a Pooled PCR Testing Protocol
This protocol is adapted for detecting a viral pathogen (e.g., a coronavirus) in oral or rectal swabs from bats [9], a common wildlife surveillance target.
Sample Collection & Storage:
- Collect individual swab samples from each animal in the field, placing them in labeled vials containing viral transport media.
- Store samples immediately on dry ice or in a liquid nitrogen dry shipper for transport to the laboratory.
- Metadata Recording: Record all required data fields (see Table above) for each sample at the time of collection.
Pool Construction (in a BSL-2 or appropriate containment lab):
- Determine Pool Size: Based on preliminary prevalence estimates, define a optimal pool size (e.g., 5 samples per pool) [8].
- Thaw and Vortex Samples.
- Aliquot and Combine: Using sterile pipette tips for each sample, aliquot a defined volume (e.g., 50 µL) from each individual sample vial into a new, labeled master tube (the "pool").
- Maintain Chain of Custody: Meticulously track which individual samples constitute each pool. Using a Laboratory Information Management System (LIMS) is highly recommended to avoid human error [4].
Nucleic Acid Extraction & PCR:
- Extract total nucleic acid from the pooled sample according to your preferred kit's manufacturer instructions.
- Perform the PCR reaction using pathogen-specific primers and controls (negative and positive).
- Follow the workflow in the diagram above: If the pool tests negative, report all constituent samples as negative. If positive, proceed to step 4.
Deconvolution of Positive Pools:
- Return to the original, archived sample vials for every member of the positive pool.
- Perform individual nucleic acid extraction and PCR testing on each of these original samples.
- Report the final results for each individual animal.
The Scientist's Toolkit: Research Reagent Solutions
The table below lists essential materials and their functions for setting up a pooled testing experiment for wildlife disease surveillance.
| Research Reagent / Material | Function in Experiment |
|---|---|
| Viral Transport Media | Preserves virus viability and nucleic acids during sample transport from the field to the lab. |
| Nucleic Acid Extraction Kit | Isolates DNA/RNA from the pooled sample for downstream molecular analysis. |
| Pathogen-specific Primers/Probes | For PCR/dPCR assays; designed to target conserved regions of the pathogen's genome. |
| PCR Master Mix | Contains enzymes, dNTPs, and buffer necessary for the nucleic acid amplification reaction. |
| Positive Control | Contains a known, non-infectious fragment of the target pathogen's genome to validate the test's performance. |
| Negative Control | Nuclease-free water to monitor for cross-contamination during the testing process. |
| Laboratory Information Management System | Tracks samples, pool compositions, and test results to prevent manual errors [4]. |
FAQs: Wildlife Disease Data Management and Standardization
Q1: What is a wildlife disease data standard and why is it important?
A data standard is a common structure and set of properties for recording and sharing information. For wildlife disease research, a minimum data standard ensures that data from different studies are Findable, Accessible, Interoperable, and Reusable (FAIR). This is critical for aggregating datasets to test ecological theory, monitor the impacts of climate change, and track emerging threats to human and ecosystem health. Standardization solves the problem of reconciling datasets that vary greatly in scope and granularity, enabling more powerful and actionable synthesis research [9].
Q2: My study uses a pooled testing approach. How does this affect my data reporting?
The data standard is flexible enough to accommodate pooled testing designs. When samples from multiple animals are combined in a single test:
- If individual animals are identified, you can link the single test result to multiple Animal ID values.
- If animals are not individually identified (e.g., mosquito pools), the Animal ID field can be left blank. You must still report all relevant information about the pool, including the diagnostic method used, the test result, and the location and date of sampling [9].
Q3: What are the most critical data fields to report?
The proposed minimum data standard includes 40 core data fields. While the full list should be consulted, 9 fields are considered required to ensure basic interoperability and usefulness. The table below summarizes these mandatory fields [9].
| Category | Required Field Name | Description |
|---|---|---|
| Project Metadata | Project Title | The official title of the research project. |
| Project Personnel | Individuals responsible for creating the dataset. | |
| Project Funding | Organizations or grant numbers that funded the work. | |
| Project License | The license under which the data are published. | |
| Geodetic Datum | The coordinate reference system (e.g., WGS84). | |
| Sample Identifier | A unique ID for the sample, from which a test result is derived. | |
| Animal ID | A unique identifier for the host animal (can be blank for pooled samples). | |
| Observation Date | The date the host animal was sampled. | |
| Latitude | The latitude of the sampling location in decimal degrees. | |
| Longitude | The longitude of the sampling location in decimal degrees. | |
| Diagnostic Method | The method used for parasite detection (e.g., PCR, ELISA, culture). | |
| Test Result | The outcome of the diagnostic test (e.g., positive, negative, inconclusive). | |
| Parasite Taxon | The scientific name of the detected parasite, if applicable. |
Q4: Why must I report negative test results?
Reporting negative results is essential for calculating accurate disease prevalence and understanding pathogen dynamics. When only positive results are shared, it is impossible to compare prevalence across different populations, time periods, or host species. This creates significant bias in synthetic studies and meta-analyses. Including negative data provides the complete picture needed for robust epidemiological analysis [9] [10].
Q5: What are the best practices for sharing sensitive data, like locations of threatened species?
The standard includes guidance for ethical and secure data sharing. For sensitive data, such as precise locations of threatened species or high-risk pathogens, you should:
- Obfuscate location data: Generalize coordinates to a larger area (e.g., round to fewer decimal places) to protect vulnerable populations.
- Use context-aware sharing: Evaluate the potential for misuse (e.g., wildlife culling, bioterrorism) and employ data embargoes or restricted-access protocols in repositories where necessary [10].
Troubleshooting Guides
Issue 1: Inconsistent or Non-Interoperable Datasets
| Symptom | Possible Cause | Solution |
|---|---|---|
| Inability to merge your data with other studies for analysis. | Missing required metadata; data shared only in summary tables, not disaggregated; inconsistent formatting. | Adopt the minimum data standard. Share disaggregated data in a "tidy" format where each row is a single test. Use the provided templates and validation tools to ensure consistency [9]. |
| Data cannot be understood or reused by others. | Lack of project metadata and data dictionaries. | Document the dataset with the 24 metadata fields (7 required), including license, geodetic datum, and detailed diagnostic method descriptions. Use controlled vocabularies where possible [9]. |
Issue 2: Challenges with Non-Invasive Sampling Methods
Non-invasive sampling minimizes stress and impact on wildlife, aligning with ethical 3Rs (Replacement, Reduction, Refinement) principles. Below are common methods and their applications [11].
| Sample Material | Primary Collection Method | Key Applications in Disease/Health Research |
|---|---|---|
| Faeces | Collection from habitat | Stress hormone assessment; diet studies; detection of viruses, bacteria, helminths, and protozoa. |
| Hair/Feathers/Skin | Hair traps; collection from resting sites | Genetics; pollutant studies; detection of some ectoparasites. |
| Urine | Collection from habitat/surfaces | Stress physiology; reproductive hormone assessment; detection of some pathogens (e.g., leptospirosis). |
| Saliva & Other Body Fluids | Collection from discarded materials (e.g., chewed plants) | Pathogen detection (e.g., rabies); immunoglobulin and antibody assays. |
| Invertebrates | Trapping blood-sucking invertebrates (e.g., mosquitoes, ticks) | Indirect collection of host blood for pathogen screening. |
Workflow for Implementing a Non-Invasive Method:
Issue 3: Data Formatting and Validation Errors
| Symptom | Solution |
|---|---|
| Errors when uploading to repositories or using validation tools. | Format data as a rectangular/tidy dataset (e.g., a CSV file). Use the provided template files (.csv or .xlsx) from the standard's GitHub repository to ensure correct structure [9]. |
| Uncertainty about whether your dataset is compliant. | Use the JSON Schema or the dedicated R package (wddsWizard) available on GitHub to automatically validate your data and metadata against the standard before submission [9]. |
The Researcher's Toolkit: Essential Research Reagents and Materials
The following table details key materials and resources used in wildlife disease surveillance, from sample collection to data publication.
| Tool/Reagent | Function in Wildlife Disease Surveillance |
|---|---|
| Non-Invasive Sample Collection Kits | Used for gathering faeces, hair, or other materials without handling animals. Includes sterile swabs, gloves, and stable storage tubes for transport [11]. |
| Controlled Vocabularies & Ontologies | Standardized lists of terms (e.g., for species names, diagnostic methods) that improve data interoperability and machine-readability [9]. |
| Data Validation Software (R package/JSON Schema) | Automated tools that check a dataset's structure and content against the data standard, ensuring compliance before sharing [9]. |
| Generalist Data Repository (e.g., Zenodo) | An open-access platform for publishing and preserving final datasets, ensuring they are findable and citable with a persistent DOI [9] [10]. |
| Specialist Data Platform (e.g., PHAROS, GBIF) | A dedicated database for wildlife disease or biodiversity data, offering tools for analysis, visualization, and integration with other datasets [9] [12]. |
Workflow for Managing a Pooled Testing Study
This diagram outlines the key steps for designing, executing, and reporting a study that uses pooled samples, ensuring data is structured for broader integration.
The Role of Pooled Testing in Addressing Wildlife Surveillance Constraints
Frequently Asked Questions (FAQs)
1. What is pooled testing and when should it be used in wildlife surveillance? Pooled testing is a procedure where individual specimens (e.g., tissue, swabs) from multiple animals are combined into a single pool and tested as one sample [6] [4]. It is most effective and cost-efficient for screening wildlife populations with low disease prevalence [4] [2]. This approach is particularly valuable for conserving limited testing reagents, reducing costs, and facilitating surveillance of large populations [4].
2. How does pooled testing affect the sensitivity of diagnostic tests? Pooling samples can lead to a reduction in sensitivity due to the dilution of positive material [4]. The degree of sensitivity loss depends on the pool size and the analytical sensitivity of the test itself. For example, in one study, ELISA detected Chronic Wasting Disease (CWD) in pools of up to 9 individuals, while the more sensitive RT-QuIC assay detected it in pools of up to 49 individuals [3]. Each assay and pool size requires laboratory validation to confirm acceptable performance [4].
3. What are the key steps for validating a pooled testing protocol in my lab? Laboratories must conduct their own validation studies to demonstrate minimal loss of analytical sensitivity when moving from individual to pool testing [4]. This includes:
- Population-Specific Validation: Testing should be relevant to the wildlife populations being surveyed (e.g., species, tissue type).
- Assay-Specific Validation: Each diagnostic assay used must be individually validated for pooled samples.
- Determining Pooling Threshold: Establishing the maximum number of samples that can be pooled while maintaining reliable detection of a positive sample [3].
4. What are the main data reporting standards for wildlife disease research? When sharing data, researchers should adhere to minimum reporting standards. Key data fields include [9]:
- Sample Data: Sample ID, collection date, and geographic coordinates.
- Host Data: Host species, sex, and age class.
- Parasite Data: Diagnostic test used, test result, and parasite identity (if detected). Data should be shared in a "tidy" format where each row corresponds to a single test outcome, facilitating reuse and aggregation [9].
Troubleshooting Guides
Issue 1: High Number of Positive Pools Leading to Increased Testing
Problem: The number of positive pools is high, negating the cost and efficiency benefits of pooled testing.
| Potential Cause | Solution |
|---|---|
| High disease prevalence | Re-evaluate the suitability of pooled testing. It is not cost-effective when prevalence is high (e.g., >15%) [2]. Consider switching to individual testing or using more advanced algorithms like informative retesting that use risk factors to group animals [6]. |
| Inappropriately large pool size | Reduce the pool size. Larger pools are more likely to contain at least one positive individual. Determine the optimal pool size statistically, balancing test reduction with the probability of pool positivity [2]. |
| Contamination during pooling | Review and standardize manual aliquoting procedures. Implement rigorous quality control measures to avoid cross-contamination between samples, which can cause false positives [4]. |
Issue 2: Inconsistent or Unexpected Test Results
Problem: Test results from pooled samples are variable, or a known positive sample is not detected in a pool.
| Potential Cause | Solution |
|---|---|
| Loss of analytical sensitivity | This is a common challenge [4]. Validate the pool size to ensure the target pathogen is still detectable after dilution. Use a more sensitive diagnostic assay (e.g., RT-QuIC over ELISA) to achieve higher pooling thresholds [3]. |
| Improper sample homogenization | Ensure tissue or specimen samples are thoroughly and consistently homogenized before creating the pool aliquot to guarantee a representative sample [3]. |
| Testing error | Implement retesting protocols for verification. Use controls in each test run to monitor assay performance and identify potential errors [4]. |
Issue 3: Logistical and Workflow Challenges
Problem: The process of manually creating pools is time-consuming and increases the risk of specimen mix-up.
| Potential Cause | Solution |
|---|---|
| Manual specimen handling | Automated specimen aliquoting systems can minimize human error but require investment [4]. Without automation, develop a strict sample tracking system and standardized workflows to manage pooling and deconstruction of positive pools. |
| Lack of software support | Utilize or develop laboratory information system (LIS) support to track individual specimens through the pooling and retesting process, reducing the risk of data entry errors [4]. |
Experimental Protocols & Data
Detailed Methodology: Validating a Pooled Testing Protocol for CWD
The following protocol, adapted from a study evaluating CWD in white-tailed deer, provides a template for validating pooled testing for other wildlife diseases [3].
1. Tissue Collection and Preparation:
- Collect tissue samples (e.g., retropharyngeal lymph nodes) according to standard field surveillance procedures.
- Partially thaw samples and trim excess connective tissue.
- For each pool, apportion a defined mass of tissue from each individual into a homogenization tube. The mass per individual decreases as the pool size increases (e.g., from 100 mg per individual in a 1:1 pool to 20 mg in a 1:9 pool) [3].
2. Creating Tissue Pools:
- Prepare pools by combining tissue from one known positive individual with tissue from a increasing number of known negative individuals (e.g., 1:1, 1:4, 1:9, 1:19).
- Homogenize the combined tissue thoroughly using a standardized method (e.g., grinding tubes) [3].
3. Analytical Testing:
- Test the pooled tissue homogenates using the standard screening assay (e.g., ELISA) and/or more sensitive research assays (e.g., RT-QuIC).
- Include appropriate positive and negative controls in each test run.
- Record the results for each pool size to determine the maximum pooling threshold at which the positive sample is still reliably detected [3].
Quantitative Data from Wildlife Pooled Testing Studies
The table below summarizes key findings from a study on Chronic Wasting Disease (CWD), demonstrating how different assays perform under pooled conditions [3].
| Diagnostic Assay | Target | Maximum Validated Pool Size | Key Finding |
|---|---|---|---|
| ELISA | Prion protein (PrPCWD) | 1:9 | Remained positive at a standard tissue homogenate volume, but with a lower pooling threshold than more sensitive assays. |
| RT-QuIC (Real-Time Quaking-Induced Conversion) | Prion protein (PrPCWD) | 1:49 | Detected the target pathogen in much larger pools due to its signal amplification nature, significantly reducing per-sample costs. |
Comparison of Pooled Testing Algorithms
The table below compares different pooling algorithms, which can be chosen based on prevalence and available individual risk information [6].
| Algorithm | Description | Best Use Case |
|---|---|---|
| Dorfman Testing | Simple two-stage method; test pools, then retest all individuals in positive pools. | Low prevalence populations; simplest to implement. |
| Halving | A positive pool is split into two sub-pools for testing, recursively. | Low prevalence; can be more efficient than Dorfman. |
| Sterrett's Procedure | After a positive pool, test individuals one-by-one until a positive is found, then re-pool the remainder. | Populations where only one positive per pool is likely. |
| Array Testing | Individuals are assigned to multiple pools in a grid; retesting occurs at intersections of positive rows/columns. | High-throughput screening; can be more efficient than hierarchical methods. |
| Informative Retesting | Uses individual risk factors (e.g., age, location) to assign individuals to pools and order retesting. | Heterogeneous populations where some individuals have higher known risk. |
The Scientist's Toolkit: Research Reagent Solutions
| Item | Function in Pooled Testing |
|---|---|
| TeSeE ELISA Kit (Bio-Rad) | A commercially available immunoassay for detecting the abnormal prion protein associated with CWD, used for initial screening of individual or pooled samples [3]. |
| Homogenization/Grinding Tubes | Specially designed tubes containing lysing matrix for mechanical disruption and homogenization of tissue samples, ensuring a uniform representative aliquot for testing [3]. |
| RT-QuIC Reagents | Components for the Real-Time Quaking-Induced Conversion assay, including recombinant prion protein substrate, buffers, and a fluorescent dye (e.g., Thioflavin T) to detect amyloid fibril formation through amplification [3]. |
| Pooling Matrix Software | Custom or commercial software to manage the complex logistics of sample pooling, including tracking individual specimens through pool assignment and decoding positive pools [4]. |
Workflow Diagram
Implementing Pooled Testing Protocols: From Dorfman to Advanced Strategies
Dorfman testing, introduced by Robert Dorfman in 1943, is a two-stage hierarchical group testing algorithm designed to efficiently identify rare diseases in large populations. Originally proposed to screen military recruits for syphilis, this method reduces the total number of tests required by initially pooling specimens for testing [13] [2].
In this approach, individual specimens are combined into a single master pool during the first stage. If the pool tests negative, all individuals within it are declared disease-free. If the pool tests positive, a second stage of individual testing is performed to identify the specific positive cases [13]. This method is particularly advantageous in wildlife disease surveillance, where researchers often monitor diseases with low prevalence and operate under significant cost constraints [14] [2].
▷ How Dorfman Testing Works: A Visual Guide
The following diagram illustrates the two-stage hierarchical testing process.
▷ Optimal Pool Size Configuration
Determining the optimal pool size is critical for maximizing testing efficiency. The following table summarizes recommended pool sizes for different disease prevalence rates, based on empirical studies.
| Disease Prevalence | Optimal Pool Size | Expected Test Reduction | Application Context |
|---|---|---|---|
| Low (0.1% - 1%) | 11 - 33 | Up to 90% | Chronic Wasting Disease (CWD) surveillance with RT-QuIC assay [14] |
| Moderate (1% - 5%) | 8 - 15 | 50% - 80% | Chlamydia/Gonorrhea screening with multiplex assays [13] [2] |
| High (>5%) | 3 - 8 | 20% - 50% | Not generally recommended above 10% prevalence [2] |
★ Frequently Asked Questions (FAQs)
▷ General Principles
What is the primary advantage of Dorfman testing in wildlife surveillance? Dorfman testing significantly reduces the number of tests required, which lowers costs and allows for more extensive monitoring within budget constraints. This is particularly valuable for natural resource agencies managing diseases like Chronic Wasting Disease (CWD) in cervids, where diagnostic costs represent a major expenditure after staff time [14].
When is Dorfman testing not appropriate? This method is less efficient for high-prevalence diseases (>10%) where most pools would test positive, necessitating many second-stage individual tests. It also requires careful validation when using assays susceptible to dilution effects, which can reduce sensitivity when pooling multiple specimens [15].
▷ Experimental Design & Implementation
How do I determine the optimal pool size for my study? Optimal pool size depends primarily on disease prevalence and assay sensitivity. Lower prevalence allows for larger pools. For CWD surveillance using RT-QuIC, pools of up to 50 have been validated, while ELISA-based testing typically uses smaller pools of 5-10 [14]. Statistical optimization techniques can precisely calculate the most efficient size [2].
What are the critical considerations for specimen collection and handling? Ensure each specimen contributes an equal volume to the pool. For CWD testing, studies used precisely weighed tissue samples (e.g., 20±2mg per individual in a 1:9 pool). Proper homogenization is essential for consistent results across the pool [14].
▷ Troubleshooting Experimental Issues
How can I address dilution effects that reduce test sensitivity? Use more sensitive detection methods like RT-QuIC instead of ELISA, as they maintain detection capability even in large pools. For CWD, RT-QuIC detected positives in 1:49 pools at 0.02% tissue dilution, while ELISA was limited to 1:9 pools [14]. Alternatively, reduce pool size to maintain adequate target concentration.
What is the impact of assay error rates on classification accuracy? Assay sensitivity and specificity directly impact the number of false positives and negatives. Higher error rates necessitate smaller pools and may require confirmatory testing. The Markov chain approach can model these error rates to predict overall classification accuracy [13].
▷ Essential Research Reagent Solutions
The following table outlines key materials and their functions for implementing Dorfman testing in wildlife disease surveillance.
| Reagent/Material | Function | Application Example |
|---|---|---|
| Aptima Combo 2 Assay | Simultaneous detection of multiple infections (e.g., chlamydia, gonorrhea) | Discriminating between infections in pooled specimens [13] [2] |
| TeSeE ELISA (Bio-Rad) | Detection of prion protein (PrPCWD) in CWD surveillance | Initial screening of pooled retropharyngeal lymph nodes [14] |
| RT-QuIC Assay | Ultra-sensitive detection of prion aggregates through amplification | Identifying CWD positives in large pools (up to 1:49) [14] |
| Homogenization Tubes with Beads | Standardized tissue disruption for consistent pooling | Preparing uniform tissue homogenates from wildlife specimens [14] |
| Nucleic Acid Preservation Buffer | Stabilizes genetic material during transport and storage | Maintaining integrity of pathogen targets in field collections [9] |
▷ Advanced Methodological Extensions
Multiplex Assays for Multiple Infections Modern applications increasingly use discriminating multiplex assays that can detect multiple infections simultaneously from a single pool. The Aptima Combo 2 Assay simultaneously detects chlamydia and gonorrhea, while the Procleix Ultrio Assay discriminates among HIV, HBV, and HCV [13].
Higher-Stage Hierarchical Algorithms For even greater efficiency, researchers can implement S-stage hierarchical algorithms (S>2). These involve splitting positive pools into smaller subpools for additional stages of testing before proceeding to individual testing. This approach can provide an estimated 11% further reduction in tests compared to standard two-stage Dorfman testing [13].
Bayesian Approaches for Heterogeneous Populations Bayesian group testing methods incorporate prior information about infection probabilities and account for dilution effects. These approaches are particularly valuable when prevalence varies across subpopulations or when testing error is a significant concern [15].
Pooled testing is a cornerstone of efficient disease surveillance in wildlife research. While the Dorfman procedure is widely known, this guide details more sophisticated algorithms—Halving, Sterrett, and Array Testing—that can further reduce the number of tests required and conserve valuable reagents. These methods are particularly valuable for screening large wildlife populations for pathogens like bovine leukemia virus (BLV) or other diseases of interest where prevalence is low [6] [16]. The following sections provide a technical deep-dive, complete with troubleshooting guides and experimental protocols, to support their implementation in your research.
Comparison of Advanced Pooled Testing Procedures
The table below summarizes the core operational characteristics, advantages, and limitations of the three advanced procedures.
| Procedure | Core Operational Principle | Key Advantage | Primary Limitation | Ideal Use-Case Scenario |
|---|---|---|---|---|
| Halving [6] | A positive pool is split into two equal sub-pools. The process repeats for positive sub-pools (e.g., 3-4 steps) before individual testing. | Reduces the number of retests compared to Dorfman by eliminating sub-pools that test negative. | Can involve multiple testing rounds; may be time-consuming for very large pools. | Screening large batches where positivity is expected to be very low. |
| Sterrett [6] | Individuals from a positive pool are tested one-by-one until a positive is found. Remaining specimens are re-pooled and the process repeats. | Highly efficient when the number of positives in a pool is very small (often just one). | Efficiency decreases rapidly as the number of positives within a single pool increases. | Ideal for surveillance of very rare diseases within a population. |
| Array (Matrix) [6] | Specimens are arranged in a grid. Pools are made from each row and each column. Positives are identified at the intersection of a positive row and column. | Can screen a large number of specimens (n²) with only 2n tests in the first stage. | Decoding can be complex; testing errors can lead to misclassification. | High-throughput screening of many specimens when test accuracy is very high. |
Frequently Asked Questions (FAQs)
Q1: When should I consider using Halving over the standard Dorfman procedure? Use Halving when working with large initial pool sizes and you want to avoid the inefficiency of individually testing every member of a positive pool. Halving is more efficient than Dorfman when prevalence is low because it systematically eliminates negative sub-groups, reducing the total number of tests [6].
Q2: Our lab is dealing with a very rare pathogen. Which method is most suitable? For very rare pathogens, the Sterrett procedure is often optimal. Its efficiency is highest when there is a high probability that a positive pool contains only a single positive individual. By stopping individual testing after finding the first positive and re-pooling the rest, it minimizes test usage in this specific scenario [6].
Q3: What is the impact of test sensitivity and specificity on Array Testing? Array testing is susceptible to test errors. If a test yields a false positive or false negative, it can lead to the misclassification of multiple individuals. For example, a single false negative in a row or column could cause a true positive to be missed. Therefore, array testing requires a highly accurate and reliable PCR assay to be effective [6].
Q4: Can these methods be used for multiplex assays that detect multiple pathogens? Yes, the principles of these pooling algorithms can be extended to multiplex testing. Research is ongoing to develop and optimize regression models and hierarchical group testing protocols for the joint estimation of multiple disease prevalences from a single testing round, making it highly relevant for comprehensive wildlife disease surveillance [17].
Troubleshooting Guide
| Problem | Possible Cause | Recommended Solution |
|---|---|---|
| High number of positive pools in Halving | Pool size is too large for the disease prevalence. | Re-estimate prevalence and use a smaller initial pool size. Re-configure the halving steps (e.g., use 3-step instead of 4-step). |
| Sterrett procedure is inefficient | Multiple positive individuals are present within single pools. | Re-evaluate the initial pool size. If prevalence is higher than anticipated, switch to a method like Halving or use smaller pools. |
| Inconsistent results in Array Testing | Low test sensitivity leading to false negatives, or cross-contamination leading to false positives. | Verify the limit of detection (LOD) of your PCR assay and confirm it is suitable for the dilution factor of pooling. Implement stringent anti-contamination protocols. |
| Low overall sensitivity in any pooled method | Specimen pooling has diluted the target pathogen below the assay's detection threshold. | Validate the pool size against your specific PCR assay's LOD. For a 5:1 pool, one study found PPA could range from 82% to 100%, depending on the test platform used [18]. Reduce pool size to mitigate dilution effects. |
| Difficulty identifying positive individuals in Array Testing | Complex pattern of positive rows/columns, potentially due to multiple infections or test error. | Perform individual (retesting) on all specimens located at the intersections of positive rows and columns. If a row tests positive but no columns do (or vice versa), individually test all members of that row/column [6]. |
Experimental Protocol: Implementing a Halving Procedure
This protocol is designed for screening wildlife samples for a specific genetic marker, such as the BoLA-DRB3*009:02 allele in cattle, using real-time PCR [16].
1. Sample Preparation and DNA Extraction
- Collect biological samples (e.g., blood, tissue) from the target wildlife population.
- Extract genomic DNA from each individual sample using a commercial kit (e.g., Wizard Genomic DNA Purification Kit or equivalent automated system).
- Quantify and normalize DNA concentrations to ensure uniformity.
2. Initial Pool Formation and Testing
- Pool Size: Based on preliminary prevalence estimates, form an initial pool of size n (e.g., n=8). Use a validated model to optimize the size for your expected prevalence.
- Pooling: Combine equal volumes of normalized DNA from each of the n individuals into a single microcentrifuge tube.
- Stage 1 PCR: Perform your validated real-time PCR assay (e.g., using a TaqMan MGB probe) on the pooled sample.
- Interpretation: If the pool tests negative, all n individuals are declared negative. If positive, proceed to the next stage.
3. Halving and Sub-Pool Testing
- Stage 2: Split the positive initial pool into two sub-pools of size n/2 (e.g., 4 and 4).
- Test each sub-pool individually.
- Stage 3: For any sub-pool that tests positive, split it again into two further sub-pools of size n/4 (e.g., 2 and 2). Test these new sub-pools.
- Individual Testing: The positive sub-pools from the final halving step (size 2) are resolved by testing each of the two remaining individuals separately.
Halving Procedure Workflow
The Scientist's Toolkit: Essential Research Reagents
| Item | Function / Description | Application Example |
|---|---|---|
| TaqMan MGB Probe Assays | Highly specific and sensitive real-time PCR probes. The Minor Groove Binder (MGB) increases the melting temperature (Tm) allowing for better discrimination between similar sequences. | Discriminating between the BoLA-DRB3*009:02 allele and other closely related alleles in cattle [16]. |
| High-Fidelity DNA Polymerase | A DNA polymerase with proofreading activity to minimize errors during PCR amplification, crucial for accurate genotyping. | Used in the initial conventional PCR step to verify the specificity of designed primers for a new target [16]. |
| Automated Nucleic Acid Extraction System | A system that automates the purification of nucleic acids from raw samples, ensuring high throughput, consistency, and reduced risk of cross-contamination. | Processing hundreds of wildlife blood or tissue samples for high-volume surveillance projects [16]. |
| Laboratory Information Management System (LIMS) | Software-based system for tracking and managing samples and their associated data. | Essential for keeping track of complex sample relationships in Array Testing and Halving procedures, ensuring correct decoding of results. |
Array Testing Layout and Decoding
Troubleshooting Guides
FAQ: My pooled testing results are inconsistent. How can I improve accuracy?
Problem: Inconsistent results from pooled testing protocols in wildlife disease surveillance. Impact: Unreliable prevalence estimates, potentially missing emerging pathogen threats, and wasted laboratory resources. Context: Often occurs when using non-informative procedures (like standard Dorfman testing) on a heterogeneous wildlife population with varying infection risks [6].
Solution Architecture:
- Quick Fix (Time: 5 minutes): Review and refine your pooling strategy. Ensure animals with similar known risk factors (e.g., same species, age class, or sampling location) are grouped into the same pool to reduce heterogeneity [6].
- Standard Resolution (Time: 15 minutes): Switch from a non-informative to an informative pooled testing procedure. Implement Ordered Halving (3H.order or 4H.order), which sorts individuals by estimated risk and creates sub-pools to isolate positives more efficiently [6].
- Root Cause Fix (Time: 30+ minutes): Develop a risk probability model for your study population. Use historical data on species, age, sex, and ecological factors to estimate individual infection probabilities. Apply a sophisticated informative algorithm like Pool-Specific Optimal Dorfman (PSOD) that uses these probabilities to determine optimal pool sizes and compositions [6].
FAQ: How do I handle a positive pool without testing every individual?
Problem: A testing pool returns a positive result, and individual retesting of all members is cost-prohibitive or sample volume is limited. Impact: Inability to identify the specific positive individuals within the pool, leading to incomplete data and potential underestimation of transmission dynamics. Context: A common challenge in large-scale wildlife surveillance where sample materials or test kits are limited [6].
Solution Architecture:
- Quick Fix (Time: 5 minutes): Use the Sterrett procedure. After a pool tests positive, retest individuals one-by-one until the first positive is found. Then, re-pool the remaining untested individuals and repeat the process [6].
- Standard Resolution (Time: 15 minutes): Implement an informative version of the Sterrett procedure (One-Stage or Two-Stage Informative Sterrett). Order individuals within the positive pool by their estimated risk (highest risk first) before beginning individual retesting. This often finds positives with fewer tests [6].
- Root Cause Fix (Time: 30+ minutes): Adopt matrix (array) testing for initial screening. Individuals are assigned to multiple pools (e.g., in a grid), and results are decoded based on the pattern of positive rows and columns, which can identify one or more positives without universal individual retesting [6].
FAQ: My data are not comparable with other wildlife disease studies. What is the issue?
Problem: Collected data on pathogen presence/absence cannot be easily aggregated or compared with datasets from other research groups. Impact: Hinders meta-analyses, ecological synthesis, and global health threat assessment, violating FAIR (Findable, Accessible, Interoperable, and Reusable) data principles [9] [10]. Context: A systemic issue in wildlife disease ecology often caused by a lack of standardized data and metadata reporting, especially the omission of negative test results and key methodological details [9].
Solution Architecture:
- Quick Fix (Time: 5 minutes): Ensure your dataset includes all individual-level test results, both positive and negative. Do not report only summary statistics [9].
- Standard Resolution (Time: 15 minutes): Adopt a minimum data standard for wildlife disease research. Format your data into a "tidy" rectangular format where each row is a single diagnostic test. Include the 9 required core fields: host identification, diagnostic method, test outcome, parasite identification, and date/location of sampling [9] [10].
- Root Cause Fix (Time: 30+ minutes): Fully implement the wildlife disease data standard. Use the provided templates and validation tools (e.g., JSON Schema, R package) to structure your dataset with all 40 core data fields and 24 metadata fields. Share the complete, standardized dataset in an open-access repository like Zenodo or the PHAROS platform [9].
Experimental Protocols & Data Presentation
Protocol: Implementing Informative Dorfman Retesting
Objective: To reduce the number of tests required for pathogen screening in a heterogeneous wildlife population by using risk factors to inform pool construction.
Methodology:
- Risk Probability Estimation: For each individual in the study cohort, estimate a probability of infection (p) using a pre-existing logistic regression model. The model can incorporate risk factors such as host species, age, sex, body condition, and known exposure history [6].
- Ordering and Pool Formation: Order all individuals from highest to lowest estimated risk (p).
- Algorithm Selection:
- Threshold Optimal Dorfman (TOD): Apply a threshold (e.g., p > 0.2). Test high-risk individuals individually. Group the remaining low-risk individuals into pools of optimal size (see table below) [6].
- Pool-Specific Optimal Dorfman (PSOD): Without a threshold, use a greedy algorithm to partition the ordered list of individuals into successive pools of variable sizes that minimize the expected number of tests [6].
- Testing and Decoding:
- Test each formed pool.
- If a pool tests negative, all individuals within it are declared negative.
- If a pool tests positive, all individuals within that pool are tested individually to decode the positive from the negative individuals [6].
Workflow Visualization:
Diagram: Informative Dorfman Retesting Workflow
Quantitative Data Comparison
Table 1: Comparison of Non-Informative and Informative Pooled Testing Procedures [6]
| Procedure | Key Principle | Requires Risk Estimates? | Best Suited For |
|---|---|---|---|
| Dorfman | Simple two-stage: pool test, then individual retest if positive. | No | Homogeneous populations; simplest to implement. |
| Halving (3H, 4H) | Iteratively split positive pools into halves for testing. | No | Scenarios where a moderate reduction in tests beyond Dorfman is desired. |
| Sterrett | After a positive pool, test individuals until a positive is found, then re-pool remainder. | No | Populations expected to have very few (often one) positive per pool. |
| Matrix Testing | Individuals assigned to multiple pools in a grid; decode via row/column results. | No | High-throughput screening of many samples. |
| TOD / PSOD | Use risk probabilities to set pool sizes and composition (informed Dorfman). | Yes | Heterogeneous populations with known risk factors (e.g., species, age). |
| Ordered Halving | Halving procedure performed on pools ordered by individual risk. | Yes | Heterogeneous populations where iterative refinement is feasible. |
| Informative Sterrett | Sterrett procedure with individuals ordered by risk for retesting. | Yes | Heterogeneous populations with low prevalence where sequential decoding is efficient. |
Table 2: Essential Data Fields for Standardized Wildlife Disease Reporting [9]
| Field Category | Required Fields (9) | Example Data | Purpose in Informative Retesting |
|---|---|---|---|
| Host Data | Host species, Animal ID (if applicable) | Myotis lucifugus, BZ19-114 | Core variables for stratifying risk and forming informed pools. |
| Sample Data | Sample date, Sample ID, Location (e.g., latitude/longitude) | 2019-03-15, SWAB-001, 17.2500° N, 88.7667° W | Critical spatiotemporal context for estimating risk probabilities. |
| Parasite Data | Test result, Pathogen target, Diagnostic method | Positive, Alphacoronavirus, PCR | The fundamental outcome of the diagnostic test. |
| Additional Context | Host age, Host sex, Diagnostic test citation | Adult, Female, (Smith et al. 2020) | Additional covariates for building accurate risk models. |
The Scientist's Toolkit
Table 3: Research Reagent Solutions for Pooled Pathogen Screening
| Item | Function in Experiment |
|---|---|
| Sample Lysis Buffer | Inactivates pathogens for safe handling and releases nucleic acids or antigens for downstream testing. |
| Nucleic Acid Extraction Kit | Purifies DNA/RNA from composite pool samples or individual samples for PCR-based assays. |
| PCR Master Mix | A pre-mixed solution containing enzymes, dNTPs, and buffer for the amplification of pathogen genetic material. |
| Pathogen-Specific Primers/Probes | Oligonucleotides designed to bind to and detect a specific sequence from the target pathogen. |
| ELISA Kit | Detects pathogen-specific antibodies (serology) or antigens in a sample using an enzyme-linked immunoassay. |
| Risk Factor Data | Pre-existing data on host ecology (species, age, sex) used to estimate infection probability for informative pooling [6]. |
| Data Standard Template | A predefined spreadsheet format (e.g., .csv) with required fields to ensure data is FAIR and reusable [9]. |
Troubleshooting Guides
Common Pooled Testing Issues and Solutions
Issue 1: Loss of Detection Sensitivity in Pooled Samples
- Problem: A known positive sample is not detected when pooled with negative samples, leading to false negatives.
- Cause: Dilution of the target analyte (e.g., viral RNA, prion protein) below the assay's limit of detection [4] [19]. This is more pronounced with larger pool sizes and in samples with low initial analyte concentration.
- Solution:
- Validate Pool Size: Conduct in-house validation to determine the maximum pool size that does not significantly compromise sensitivity for your specific assay and sample type [4] [20]. For SARS-CoV-2, studies have shown that pool sizes of 5:1 often maintain >85% positive percent agreement [20].
- Use More Sensitive Assays: Employ ultra-sensitive assays like RT-QuIC, which can maintain detection even at high pooling thresholds (e.g., 1:49) due to signal amplification [3].
- Adjust Thresholds: For some assays, lowering the positive/negative cut-off threshold can recover sensitivity lost due to pooling [20].
- Concentrate Samples: Use centrifugal filters to concentrate the pooled sample to the maximal volume compatible with a single extraction column, countering the dilution effect [19].
Issue 2: Cross-Contamination and Specimen Mix-Ups
- Problem: Contamination between samples or mislabeling leads to inaccurate results.
- Cause: Manual aliquoting and pipetting steps during pool formation are prone to human error [4].
- Solution:
- Automate the Process: Implement automated liquid handling systems for pool formation. This increases throughput, reduces pipetting errors, and enables automated sample tracking [20].
- Implement Dual-Check Systems: For manual workflows, a two-person verification system for sample labeling and pooling can drastically reduce errors [21].
- Use Barcodes/RFID: Implement a barcode or RFID system to track samples and pools throughout the entire workflow, ensuring accurate identification [21].
Issue 3: Increased Turnaround Time for Positive Results
- Problem: Reporting times for positive individuals are delayed compared to individual testing.
- Cause: The multi-stage nature of pooled testing requires positive pools to be "decoded" through subsequent rounds of individual retesting [4].
- Solution:
- Archive Aliquots: Before creating pools, set aside a portion of every individual sample. If a pool tests positive, the archived aliquots can be tested immediately without recalling individuals, which is time-prohibitive [22].
- Use Efficient Algorithms: Implement informative or hierarchical retesting protocols (e.g., halving, Sterrett's procedure) that minimize the number of retests needed to identify all positives within a positive pool [6].
Issue 4: Inefficient Pool Sizing in Heterogeneous Populations
- Problem: The cost-saving benefits of pooling are not realized because too many pools test positive, requiring full retesting.
- Cause: Using a fixed pool size for a population with a high or variable disease prevalence [22].
- Solution:
- Prevalence-Based Sizing: Use statistical models to calculate the optimal pool size based on the estimated disease prevalence in the population being tested. Pooling is most cost-effective when prevalence is low (e.g., <10%) [22] [23].
- Informative Pooling: Use known risk factors (e.g., species, location, age) to categorize individuals by their probability of being positive. High-risk individuals can be tested in smaller pools or individually, while low-risk individuals are grouped into larger pools, minimizing the number of positive pools [6].
Laboratory Processing and Workflow Challenges
- Challenge: Lack of established infrastructure and software for managing the pooling workflow [4].
- Solution: Utilize Laboratory Information Management Systems (LIMS) or electronic lab notebooks with specific functionalities for sample pooling. These systems can manage pool construction, track parent-child sample relationships, and guide the deconstruction of positive pools [21] [24].
Frequently Asked Questions (FAQs)
Q1: What is the single most important factor for successful pooled testing? A1: Low disease prevalence is the most critical factor. When prevalence is low (typically below 10%), the vast majority of pools will test negative, leading to significant savings in reagents and time. As prevalence increases, the number of positive pools rises, making retesting more frequent and less efficient [22] [4] [23].
Q2: How do I determine the optimal pool size for my surveillance project? A2: The optimal pool size is a balance between cost-saving and maintaining detection sensitivity. It depends on:
- Estimated Prevalence: Lower prevalence allows for larger pools.
- Assay Sensitivity: More sensitive assays can tolerate larger pool sizes without loss of detection [3].
- Sample Type and Volume: Ensure each sample still contributes sufficient analyte after dilution. You should perform a validation study using your specific assay and sample matrix to determine the maximum pool size that does not unacceptably reduce sensitivity [4] [20].
Q3: Can I use pooled testing for any disease or pathogen? A3: No. Pooled testing is best suited for screening purposes for infectious diseases in large populations where the expected prevalence is low. It is commonly used for blood-borne pathogens (HIV, Hepatitis), SARS-CoV-2 in low-prevalence areas, and wildlife diseases like Chronic Wasting Disease (CWD) [22] [4] [3]. It is less suitable for diagnostic testing in symptomatic, high-prevalence populations.
Q4: What are the key steps in validating a pooled testing protocol in my lab? A4: Key validation steps include [4] [20]:
- Determining Analytical Sensitivity: Compare the limit of detection (LLOD) of your assay for individual samples versus pooled samples at your intended pool size.
- Establishing Percent Positive Agreement: Test a panel of known positive and negative samples individually and in pools to ensure the pooled testing agrees with individual results (the FDA recommends >85% positive agreement for SARS-CoV-2) [20].
- Assaying Specificity: Confirm that negative pools consistently test negative.
- Documenting the Workflow: Fully document the procedures for pool formation, testing, and data analysis to ensure consistency and avoid errors.
Q5: Our pooled testing workflow is too manual and time-consuming. How can we improve it? A5: The primary solution is automation.
- Automated Liquid Handlers: These systems can accurately and rapidly create sample pools, reducing human error and hands-on time [20].
- Digital Management Software: A Laboratory Information Management System (LIMS) designed for pooling can automate sample tracking, pool assignment, and result interpretation, streamlining the entire workflow [21] [24].
Experimental Protocols and Data
Detailed Methodology: Validation of Pooling Thresholds for Chronic Wasting Disease (CWD)
This protocol, based on published research, outlines how to evaluate pooling thresholds for wildlife disease surveillance [3].
1. Sample Collection and Preparation
- Sample Type: Medial retropharyngeal lymph nodes (RPLNs) from white-tailed deer.
- Initial Screening: Test all individual "A" samples with a screening test (e.g., ELISA for prion protein). Retain the paired "B" sample frozen.
- Sample Selection: Select confirmed positive and confirmed negative "B" samples for the pooling study. Re-test them individually to confirm their status before pooling.
2. Pool Formation
- Tissue Homogenization: Partially thaw RPLNs and trim connective tissue. For each pool, combine tissue from one positive "spike" sample with tissue from a variable number of negative samples.
- Standardized Contribution: Each individual sample in a pool must contribute an equal tissue mass. For example:
- 1:4 Pool: 100 mg from 1 positive + 100 mg from 4 negatives (total 500 mg).
- 1:9 Pool: 50 mg from 1 positive + 50 mg from 9 negatives (total 500 mg).
- Homogenize the combined tissue in a grinding tube with appropriate buffer.
3. Testing of Pools
- Test the pooled homogenates with the desired assay(s) (e.g., ELISA and/or a more sensitive assay like RT-QuIC).
- For RT-QuIC, a tissue homogenate dilution series (e.g., 0.02%) may be used.
- Record the results (Positive/Negative) and quantitative values (e.g., Optical Density for ELISA, Ct value for PCR).
4. Data Analysis
- Determine the maximum pooling threshold (e.g., 1:4, 1:9, 1:19) at which the assay can consistently detect the positive sample.
- Compare the sensitivity and specificity of different assays under pooled conditions.
Quantitative Data from Pooled Testing Studies
Table 1: Impact of Pool Size on SARS-CoV-2 Assay Performance (Panther Fusion System) [20]
| Pool Size | Positive Percent Agreement (vs. Neat Testing) | Average CT Value Increase | Meets FDA >85% PPA? |
|---|---|---|---|
| 5:1 | >85% | 1.92 - 2.41 CT | Yes |
| 10:1 | Reduced Performance | 3.03 - 3.29 CT | No (for this validation) |
| Key Finding | Pool sizes ≤ 5:1 maintained acceptable diagnostic sensitivity. |
Table 2: Pooling Thresholds for Chronic Wasting Disease Detection [3]
| Assay Type | Tissue Preparation | Maximum Validated Pooling Threshold |
|---|---|---|
| ELISA (TeSeE) | Standard volume tissue homogenate | 1:9 (1 positive in 9 total) |
| RT-QuIC | 0.02% tissue homogenate | 1:49 (1 positive in 49 total) |
| Key Finding | RT-QuIC, an ultra-sensitive amplification assay, allows for significantly larger pool sizes, drastically reducing costs. |
Workflow Visualization
Pooled Testing Decoding Workflow
The Scientist's Toolkit: Research Reagent Solutions
Table 3: Essential Materials for Pooled Testing in Wildlife Surveillance
| Item | Function/Benefit | Example Use-Case |
|---|---|---|
| Automated Liquid Handler | Precisely combines individual samples into pools, reducing human error and increasing throughput [20]. | High-volume surveillance of cervids for CWD [3]. |
| Centrifugal Filters | Concentrates diluted pooled samples, helping to counteract analyte dilution and maintain test sensitivity [19]. | SARS-CoV-2 RNA concentration from pooled nasopharyngeal swabs. |
| Sensitive Detection Assays (e.g., RT-QuIC) | Ultra-sensitive assays that can detect low levels of pathogen even after significant dilution in a pool, enabling larger, more cost-effective pool sizes [3]. | CWD prion detection in 1:49 pools of deer lymph nodes [3]. |
| Barcode/RFID System | Provides unique identifiers for samples and pools, ensuring traceability and preventing misidentification throughout the complex workflow [21]. | Tracking thousands of individual and pooled samples in a large-scale study. |
| Laboratory Information Management System (LIMS) | Software that manages sample metadata, pool assignments, and results; crucial for tracking the parent-child relationships in pooled testing [21] [24]. | Managing the workflow for a multi-site wildlife disease surveillance program. |
Frequently Asked Questions (FAQs)
Q1: What is the minimum data I must report when sharing my wildlife disease dataset? A minimum data standard for wildlife disease research has been established to ensure data interoperability. Your dataset should include 40 core data fields, with 9 being mandatory, plus 24 metadata fields (7 required). The mandatory fields capture the essential who, what, when, and where of each diagnostic test, ensuring the data can be meaningfully reused and aggregated [9] [10].
Q2: My study uses a pooled testing approach. How should I format this data? For pooled testing, the data standard is flexible. If animals are not individually identified, you may leave the "Animal ID" field blank. However, if the pool consists of samples from multiple known animals, you can link the single test result to multiple Animal ID values. It is critical to document the pooling strategy and the number of samples per pool in your methodology [9].
Q3: Why is it important to report negative test results? Reporting negative results is vital for accurately calculating disease prevalence, understanding pathogen dynamics across time and geography, and avoiding bias in synthetic research. Most datasets that only report positive detections or summary statistics severely constrain secondary analysis and meta-analyses [9] [10].
Q4: How can I manage the risk of reduced sensitivity when using pooled testing? The dilution effect from pooling samples can lead to false negatives. To manage this [4]:
- Use pooling primarily when pathogen prevalence is low.
- Validate your assay to demonstrate the minimum loss of analytical sensitivity when moving from individual to pool testing.
- Consider the size of your pools; larger pools generally carry a greater risk of dilution and reduced sensitivity.
Q5: Where should I deposit my wildlife disease data? Researchers are encouraged to share data in findable, open-access repositories. This can include generalist repositories like Zenodo or specialist platforms designed for wildlife disease data, such as the Pathogen Harmonized Observatory (PHAROS) database. Data should be formatted in open, non-proprietary formats (e.g., .csv) and include readable documentation [9] [10].
Troubleshooting Guides
Issue 1: Inconsistent Data Formatting Hinders Aggregation
Problem: Data from different research groups or studies cannot be easily combined due to varying formats, missing fields, or inconsistent vocabularies.
Solution: Adopt and implement the minimum data standard.
| Solution Step | Action | Key Consideration |
|---|---|---|
| 1. Tailor the Standard | Review the list of 40 data fields. Select all required fields and any optional fields relevant to your study design [9]. | Identify which controlled vocabularies or ontologies you will use for free-text fields to ensure consistency. |
| 2. Format the Data | Structure your data in a "tidy" or "rectangular" format where each row represents a single diagnostic test outcome [9]. | Use the provided template files (.csv or .xlsx) available on the standard's GitHub repository (github.com/viralemergence/wdds) [9]. |
| 3. Validate the Data | Use the provided JSON Schema or the accompanying R package (wddsWizard) to check that your dataset conforms to the standard before sharing [9]. | Validation helps catch formatting errors and missing required fields that could make your data unusable for others. |
Issue 2: Managing Diagnostic Sensitivity in Pooled Testing
Problem: Pooling samples dilutes individual samples, potentially reducing test sensitivity and increasing the rate of false-negative results.
Solution: A proactive and validated approach to pool design and confirmation.
| Problem Cause | Diagnostic Strategy | Mitigation Steps |
|---|---|---|
| Sample Dilution | The target pathogen concentration in a positive sample falls below the assay's detection limit after dilution in the pool. | 1. Prevalence-Based Sizing: Use larger pools only when disease prevalence is very low. Use smaller pools or individual testing when prevalence is higher [4].2. Assay Validation: Conduct in-house validation to quantify the loss of analytical sensitivity for your specific assay and pool size on relevant sample matrices [4].3. Confirmatory Testing: Always retest each individual sample from a positive pool to identify the true positive(s) [4]. |
| High Prevalence | A high proportion of positive pools leads to increased labor, cost, and time for retesting. | Monitor Prevalence: Regularly reassess the cost-effectiveness of your pooling strategy as disease prevalence in the population changes [4]. |
Issue 3: Handling Incomplete Host or Sample Metadata
Problem: Historical datasets or samples collected by third parties lack critical contextual information, such as precise location, host sex, or age.
Solution: A tiered approach to data curation and reporting.
Guide:
- Audit and Gap Analysis: Systematically review existing datasets against the minimum data standard to identify missing fields.
- Report What You Know: Share the data at the finest spatial, temporal, and taxonomic scale available. It is better to provide a partially complete record with clear notations on what is missing than to omit the data entirely.
- Use Missing Data Codes: Employ standardized notations like "NA" (not available) or "UNK" (unknown) for missing information. Document these codes in the data dictionary.
- Future-Proofing: For new sample collection, integrate the minimum data standard fields into your field data collection sheets and laboratory information management systems (LIMS).
Experimental Protocol: Implementing a Pooled Testing Approach for Wildlife Pathogen Surveillance
This protocol outlines a method for screening wildlife samples for a specific pathogen using a pooled testing strategy to conserve reagents, framed within the minimum data reporting standard.
1. Objective To detect the presence of a specific pathogen (e.g., a coronavirus) in a population of wild bats using oral swabs, while conserving diagnostic reagents through a multi-stage pooled testing protocol.
2. Materials and Reagents
| Research Reagent Solution | Function in the Experiment |
|---|---|
| Viral Transport Media (VTM) | Preserves viral integrity and nucleic acids from swab samples during transport and storage. |
| Nucleic Acid Extraction Kit | Isolates total RNA/DNA from the pooled and individual samples for downstream molecular analysis. |
| PCR Master Mix | Contains enzymes, buffers, and nucleotides required for the reverse transcription and amplification of the target pathogen's genetic material. |
| Forward and Reverse Primers | Target-specific oligonucleotides that bind to and define the region of the pathogen's genome to be amplified. |
| Positive Control (Plasmid or RNA) | Contains the target sequence; used to verify the PCR assay is functioning correctly. |
| Negative Control (Nuclease-free Water) | Ensures no contamination is present in the reagents or during the setup process. |
3. Step-by-Step Procedure
- Step 1: Sample Collection. Collect oral swabs from individual bats. Place each swab in a pre-labeled tube containing VTM. Record host data (species, sex, age, weight) and sampling data (date, location) according to the minimum data standard fields.
- Step 2: Pool Formation. In a biosafety cabinet, combine equal-volume aliquots from multiple (e.g., 5) individual samples into a single tube to create a pool. Maintain a clear, cross-referenced record of which individual samples compose each pool.
- Step 3: Nucleic Acid Extraction. Extract total nucleic acids from each pooled sample as per the kit manufacturer's instructions. Also, extract from positive and negative controls.
- Step 4: Primary Screening (Pooled PCR). Perform the diagnostic PCR assay on all pooled samples.
- If the pool tests negative: Report a negative result for every individual sample within that pool. The data record for each individual will have the same test result but remain linked to its unique host and sample data.
- If the pool tests positive: Proceed to Step 5.
- Step 5: Confirmatory Testing (Individual PCR). Re-extract nucleic acid from the original VTM of each individual sample that constituted the positive pool. Perform the diagnostic PCR on each of these individual samples.
- Step 6: Data Recording and Sharing. For each test performed (both pooled and individual), create a record in your dataset. For positive individual tests, add the parasite identity and, if sequencing was performed, the GenBank accession number. Format the final dataset according to the minimum data standard and share it in a public repository.
The following workflow diagram illustrates the pooled testing pathway and data reporting structure.
Maximizing Efficiency: Cost-Sensitive Models and Granularity Selection
Frequently Asked Questions (FAQs)
1. How do I determine the best pool size for a new wildlife disease surveillance program? The optimal pool size depends primarily on the expected disease prevalence and the test's sensitivity. For diseases with very low prevalence (e.g., <2%), larger pool sizes (e.g., 10-15) are often more cost-effective. For higher prevalences, smaller pools (e.g., 5) are necessary to maintain sensitivity. You should use a statistical power calculation or optimization technique that balances cost efficiency with the required precision for prevalence estimation [25] [2]. Laboratory validation is crucial to confirm that pooling does not reduce sensitivity below an acceptable level due to sample dilution [25] [23].
2. Our pooled testing results are inconsistent. What could be causing this? Inconsistent results can stem from several factors:
- Loss of Sensitivity from Dilution: The target pathogen may be diluted in the pool below the detection limit of the test. This is especially likely for large pool sizes or samples with low pathogen load [25] [26].
- Imperfect Test Accuracy: The sensitivity and specificity of the diagnostic test itself will impact results. Always account for these values in your prevalence calculations and model designs [27].
- High Prevalence: If the actual disease prevalence is higher than anticipated, the probability of multiple positive samples in a single pool increases, which can complicate the interpretation of results and require a different statistical approach [27].
3. When is it not advisable to use pooled testing? Pooled testing is generally not recommended in the following scenarios:
- High Disease Prevalence: When the expected prevalence exceeds 10-15%, the cost and effort of retesting numerous positive pools often negate the benefits [23] [2].
- Inadequate Test Sensitivity: If the diagnostic test has low inherent sensitivity, the further dilution of samples in a pool will make it unreliable.
- Need for Individual-Level Data: If your research goal requires identifying every single infected animal, the retesting process for large pools may become prohibitively complex and expensive compared to individual testing.
4. How do I calculate the true disease prevalence from pooled test results? You cannot simply use the proportion of positive pools. The calculation must account for the pool size and the test's known sensitivity and specificity. Statistical methods, such as Maximum Likelihood Estimation (MLE) within a "missing data" framework, are required to obtain an accurate estimate of the individual-level prevalence and its confidence interval [2] [27].
Troubleshooting Guides
Problem: Loss of Test Sensitivity in Pooled Samples
Potential Causes and Solutions:
Cause: Sample Dilution The concentration of the pathogen in a pooled sample is below the detection threshold of the assay.
Solution:
- Determine Maximum Pool Size: Prior to full-scale surveillance, conduct a laboratory validation study. Sequentially test a known positive sample pooled with an increasing number of known negative samples to find the largest pool size that still returns a positive result [25].
- Adjust Test Protocol: If possible, adjust the test's parameters to increase sensitivity. For qPCR, this could involve increasing the cycle threshold (Ct); however, this may require re-validation of the test's specificity [25].
- Reduce Pool Size: The most direct solution is to reduce the number of samples per pool.
Problem: The Optimal Pool Size is Not Cost-Effective
Potential Causes and Solutions:
Cause: Prevalence is Too High The primary benefit of pooling is realized with low prevalence. As prevalence increases, more pools test positive, leading to more retests and higher costs.
Solution:
- Re-estimate Prevalence: Use recent surveillance data to update your estimate of disease prevalence.
- Re-calculate Optimal Size: Use an optimization technique that minimizes the total number of tests required. The table below illustrates how the cost efficiency changes with prevalence and pool size.
- Consider a Different Protocol: For higher prevalences, more complex protocols like array testing may be more efficient than simple two-stage hierarchical pooling [2].
Experimental Protocol: Validating Pool Size for a New Pathogen
This protocol outlines the key steps to establish and validate an optimal pool size for wildlife disease surveillance.
1. Define Objectives and Constraints:
- Clearly state the goal (e.g., population-level prevalence estimation or case identification).
- Define the required confidence level and precision for prevalence estimates.
- Establish the budget and maximum acceptable cost per sample.
2. Conduct a Pilot Study for Initial Prevalence Estimation:
- Individually test a random subset of animals (e.g., 100-200) from the target population.
- Use this data to calculate an initial prevalence estimate, adjusting for test sensitivity and specificity [27].
3. Laboratory Validation of Pool Sensitivity:
- Materials:
- Known positive sample(s) with a low pathogen load (representing the weakest positive likely encountered in the field).
- Known negative samples.
- Standard diagnostic test reagents and equipment.
- Method:
- Create pools by diluting the positive sample in negative samples. Test pool sizes in an increasing series (e.g., 3, 5, 8, 10, 15, 20).
- For each pool size, repeat the process with multiple replicates to ensure reliability.
- Record the pool size at which the test result becomes inconsistent or turns negative. The maximum viable pool size is one step below this threshold [25] [26].
4. Statistical Optimization of Pool Size:
- Use the initial prevalence estimate and the test's sensitivity/specificity to calculate the optimal pool size.
- The optimization goal can be to maximize the precision of the prevalence estimator or to minimize the total number of tests required for a given precision [25] [2].
- The following table provides a simplified example of how pool size affects the number of tests needed in a two-stage Dorfman protocol for a population of 1000 individuals, assuming a test sensitivity of 100% and specificity of 100%.
| Expected Prevalence | Pool Size | Number of Pools (Stage 1) | Expected Positive Pools | Retests (Stage 2) | Total Tests | Efficiency (Tests per Individual) |
|---|---|---|---|---|---|---|
| 1% | 5 | 200 | 10 | 50 | 250 | 0.25 |
| 1% | 10 | 100 | 10 | 100 | 200 | 0.20 |
| 5% | 5 | 200 | 50 | 250 | 450 | 0.45 |
| 5% | 10 | 100 | 40 | 400 | 500 | 0.50 |
| 10% | 5 | 200 | 100 | 500 | 700 | 0.70 |
Note: This is a theoretical calculation. In practice, imperfect test accuracy must be incorporated into the model [27].
5. Full-Scale Implementation and Monitoring:
- Implement the chosen pooling strategy in your surveillance program.
- Continuously monitor results. If the observed proportion of positive pools deviates significantly from expectations, re-evaluate your prevalence estimate and optimal pool size.
Workflow and Decision Diagrams
Diagram Title: Pooled Testing Implementation Workflow
Diagram Title: Two-Stage Hierarchical Pooling Protocol
The Scientist's Toolkit: Key Research Reagent Solutions
| Item | Function in Pooled Testing Research |
|---|---|
| Known Positive Control Sample | A critical reagent for laboratory validation of pool sizes. Used to test the detection limit of the assay when diluted in negative samples [25]. |
| High-Fidelity Diagnostic Assay | The core test used for detection. Ideally has high sensitivity and specificity that is minimally affected by the sample matrix and potential dilution effects [2] [27]. |
| Statistical Software (R/Python) | Essential for calculating prevalence estimates from complex pooled data, accounting for test error, and running simulations to determine optimal pool sizes [25] [2]. |
| Anti-IgG/IgM Antibodies | Used in ELISA and other serological assays to detect pathogen-specific antibodies in wildlife serum samples, a common target in surveillance [28]. |
| qPCR Master Mix & Primers/Probes | Essential reagents for molecular identification of pathogen DNA/RNA in pooled tissue, blood, or swab samples. The cycle threshold (Ct) is a key metric for assessing dilution [25]. |
Troubleshooting Guides & FAQs
Why is my pooled test failing to detect a known positive sample?
This issue typically relates to the dilution effect or assay sensitivity.
Possible Cause #1: Excessive Dilution
- Explanation: When a single positive sample is pooled with too many negative samples, the target pathogen's concentration can be diluted below the assay's detection limit [3].
- Solution: Re-calculate the optimal pool size using the assay's known sensitivity and the expected disease prevalence. Reduce the number of samples per pool.
Possible Cause #2: Suboptimal Assay Sensitivity
- Explanation: The diagnostic test may not be sensitive enough for the chosen pooling strategy. Less sensitive assays allow for lower pooling thresholds [3].
- Solution: Use a more sensitive assay. For example, RT-QuIC can detect positives at much higher dilutions (e.g., 1:49) compared to ELISA (e.g., 1:9) [3]. Validate the pooling threshold for each new assay.
Diagnostic Steps:
- Re-test the known positive sample individually to confirm its status.
- Create a new pool with the positive sample and fewer negative samples (e.g., a 1:2 or 1:4 ratio) and re-run the test.
- If the smaller pool tests positive, the issue is likely excessive dilution. If it remains negative, investigate potential assay or reagent failure.
Escalation Path: If the problem persists, contact your lab manager or the assay manufacturer to confirm the test's validated pooling limits and sensitivity specifications.
How do we differentiate between a true positive and a false positive in a pooled test?
This is a critical step that relies on a confirmatory testing protocol and understanding of test specificity.
Possible Cause #1: Inherent Test Specificity
- Explanation: No diagnostic test is perfect. A false positive can occur even in a pool, though the likelihood may be low [2].
- Solution: All positive pool results must be followed by individual (retest) testing of every sample that was in that pool to unambiguously identify the positive individual(s) [2] [29].
Possible Cause #2: Cross-Contamination
- Explanation: Improper sample handling during the pooling process can lead to contamination.
- Solution: Implement strict laboratory protocols, use clean equipment for each sample, and include negative control pools (pools of known negative samples) in each test run to monitor for contamination [30].
Step-by-Step Resolution Process:
- Initial Pool Test: Run the test on the pooled sample.
- Resolution of Positive Pools: For any pool that tests positive, proceed to the next stage.
- Individual Retesting: Test each individual specimen from the positive pool separately.
- Identification: The individual sample(s) that test positive are the true positives. Samples that test negative in the individual retest were part of a false positive pool or the signal was too diluted for accurate individual identification.
Validation Step: Confirm the status of individual positives using a different, highly specific diagnostic method if possible (e.g., confirming an ELISA result with IHC) [3].
Our prevalence estimate seems inaccurate. How can we correct for testing errors?
Accurate prevalence estimation requires statistical models that account for imperfect test sensitivity and specificity.
Possible Cause #1: Uncorrected Test Errors
- Explanation: Using a simple proportion of positive pools to estimate prevalence without adjusting for the test's sensitivity and specificity will yield a biased estimate [2].
- Solution: Use maximum likelihood estimation (MLE) or other statistical methods that incorporate known values for sensitivity and specificity into the prevalence calculation [2].
Possible Cause #2: Non-optimal Pool Size
- Explanation: The size of the pool influences the precision of the prevalence estimator. An improperly chosen pool size can reduce estimation efficiency [2].
- Solution: Determine the optimal pool size by minimizing the expected variance of the prevalence estimator or by maximizing a measure of cost-efficiency, which considers both statistical precision and testing costs [2].
Step-by-Step Resolution Process:
- Gather Assay Performance Data: Obtain the sensitivity and specificity values for your test from the manufacturer's literature or internal validation studies [2].
- Collect Pooling Data: Record the number of pools tested and the number of positive pools.
- Apply Statistical Correction: Use a prevalence estimation formula that corrects for testing errors. For example, a basic adjusted estimator is: (\widehat{p} = \frac{\widehat{AP} + Sp - 1}{Se + Sp - 1}), where (\widehat{AP}) is the apparent prevalence (proportion of positive pools), (Se) is sensitivity, and (S_p) is specificity. For more complex pooling protocols, specialized software or R packages are recommended [2].
Experimental Protocols & Data
The following table summarizes key experimental findings from a study evaluating pooled testing for Chronic Wasting Disease (CWD) using two different assays [3].
- Experimental Objective: To determine the maximum pooling threshold at which ELISA and RT-QuIC assays could reliably detect a single positive sample diluted in negative samples.
- Sample Type: Medial retropharyngeal lymph nodes (RPLNs) from white-tailed deer.
- Pooling Method: Tissue from one positive deer was combined with tissue from a variable number of test-negative deer, with each individual contributing an equal tissue volume [3].
Table 1: Comparative Assay Performance in Pooled Testing
| Assay | Description | Maximum Validated Pooling Threshold | Key Experimental Findings |
|---|---|---|---|
| ELISA | Standard screening test using antibodies to detect pathogenic prion protein (PrPCWD). [3] | 1:9 (1 positive in 9 negatives) | Remained positive at a standard tissue homogenate volume. Performance is limited at higher dilutions. [3] |
| RT-QuIC | Ultra-sensitive amplification assay that detects and amplifies prion aggregates. [3] | 1:49 (1 positive in 49 negatives) | Remained positive even at a very low (0.02%) tissue dilution. Superior sensitivity allows for much higher pooling, drastically reducing costs. [3] |
Detailed Methodology for Pooled Sample Testing
This protocol is adapted from research on CWD surveillance and can be generalized for other wildlife diseases [3].
Table 2: Step-by-Step Protocol for Validation of Pooling Thresholds
| Step | Action | Details & Considerations |
|---|---|---|
| 1. Sample Preparation | Partially thaw and trim samples. | Use retropharyngeal lymph nodes (RPLNs) or other appropriate tissue. Remove excess connective tissue. [3] |
| 2. Create Tissue Pools | Apportion tissue into grinding tubes. | For each pool, combine tissue from one known positive with tissue from multiple known negatives. The total tissue mass per pool should be consistent (e.g., 200mg). As pool size increases, the mass contributed by each individual decreases (e.g., from 100mg each in a 1:1 pool to 20mg each in a 1:9 pool). [3] |
| 3. Homogenization | Homogenize the pooled tissue. | Use a homogenizer with grinding tubes to create a uniform tissue homogenate. [3] |
| 4. Assay Execution | Perform the diagnostic test. | Run the standardized assay (e.g., ELISA or RT-QuIC) according to the manufacturer's protocol. For novel assays like RT-QuIC, a specific tissue dilution (e.g., 0.02%) may be required. [3] |
| 5. Analysis | Determine the positive/negative outcome. | For ELISA, compare optical densities to a plate-specific threshold. For RT-QuIC, analyze the amplification curves. [3] |
| 6. Validation | Confirm with a gold standard. | Confirm the true status of individual "positive" and "negative" samples using a confirmatory method like Immunohistochemistry (IHC). [3] |
Workflow Visualization
Pooled Testing Logical Workflow
Test Outcome Decision Logic
The Scientist's Toolkit
Essential Research Reagent Solutions
Table 3: Key Materials for Pooled Testing in Wildlife Surveillance
| Reagent/Material | Function in Experiment |
|---|---|
| Retropharyngeal Lymph Node (RPLN) Tissue | The standard sample matrix for surveillance of diseases like Chronic Wasting Disease in cervids. Provides a high concentration of the target pathogen for detection. [3] |
| TeSeE ELISA Kits | A commercially available immunoassay for sensitive and specific detection of the pathogenic prion protein (PrPCWD). Used for initial screening of individual or pooled samples. [3] |
| RT-QuIC Reagents | Components for the Real-Time Quaking-Induced Conversion assay, including recombinant prion protein substrate, buffers, and salts. This ultra-sensitive test amplifies minute amounts of misfolded prions, enabling detection in highly diluted (pooled) samples. [3] |
| Tissue Homogenization Grinding Tubes | Specially designed tubes containing lysing matrix for mechanical disruption of tissue. Essential for creating a uniform homogenate from pooled samples, ensuring each test aliquot is representative. [3] |
| Positive Control Tissue | Tissue from a confirmed infected animal. Critical for validating each test run, ensuring reagents are functioning correctly, and determining the assay's detection limit under pooling conditions. [3] [30] |
| Negative Control Tissue | Tissue from confirmed disease-free animals. Used to create negative control pools to monitor for cross-contamination and establish baseline test values. [3] [30] |
Frequently Asked Questions
Q1: What is a cost-sensitive multi-granularity decision model in the context of wildlife disease surveillance? A cost-sensitive multi-granularity decision model is a computational framework that helps researchers optimize group-based (pooled) testing strategies by considering different levels of data grouping (granularity) and the associated costs. It aims to find the most efficient way to test wildlife samples for pathogens by balancing testing expenses against the cost of incorrect results. The model systematically explores various pooling strategies to identify the one that minimizes total costs, which is particularly valuable for large-scale surveillance programs with limited resources [31] [32].
Q2: How do I determine the optimal group size for pooled testing in my wildlife study? The optimal group size is not fixed; it depends on the expected prevalence of the pathogen in your study population. You can use the following quantitative guidance derived from statistical expectations [31]:
| Expected Infection Rate | Recommended Optimal Group Size |
|---|---|
| 0.1% (1 in 1000) | 34 - 36 individuals per pool |
| 1% (1 in 100) | 11 - 12 individuals per pool |
| 5% (1 in 20) | 5 - 6 individuals per pool |
Q3: What are the most common errors when setting up a pooled testing experiment, and how can I avoid them? Common errors include incorrect sample homogenization, using an inappropriate group size for the expected prevalence, and miscalculating the total cost structure. To avoid these, follow a standardized protocol for sample processing, perform a pilot study to estimate local prevalence, and use a validated cost-calculation tool that includes all relevant expenses, not just the direct testing costs [9] [31].
Q4: My initial pooled tests are coming back with too many positive pools, making the approach inefficient. What should I do? A high number of positive pools suggests that the initial assumption of disease prevalence was too low. You should recalculate the optimal group size using the new, higher prevalence rate from your initial results. Implementing a two-stage or hierarchical multi-granularity testing approach can also restore efficiency by re-testing samples from positive pools in smaller subgroups or individually [31].
Q5: How do I account for the costs of sample collection, not just laboratory testing?
A comprehensive cost-sensitive model must include both collection costs (e.g., field personnel, equipment, transportation) and testing costs (e.g., reagents, laboratory labor). The total cost for a project testing ( N ) individuals in groups of size ( k ) can be represented as Total Cost = (Collection Cost per sample × N) + (Testing Cost per pool × (N/k)) + (Expected Confirmatory Test Cost). Failing to include collection costs can lead to the selection of a supposedly "optimal" strategy that is not cost-effective in practice [31].
Troubleshooting Guides
Issue 1: Inconsistent or Unreliable Test Results After Pooling
Problem: Test results from pooled samples are variable and do not align with expected outcomes or subsequent confirmatory tests.
Solution: This is often related to sample quality or homogenization.
- Step 1: Verify Sample Integrity. Ensure that individual samples (e.g., swabs, tissue, blood) are collected and stored using a standardized protocol. Inconsistent sample quality can lead to false negatives in pools [9].
- Step 2: Optimize Homogenization Protocol. Confirm that the method used to create the sample pool thoroughly mixes all individual samples. Incomplete homogenization means the test may not detect a positive sample within the pool.
- Step 3: Validate Pooled Test Sensitivity. Conduct a validation experiment by spiking a known negative pool with a weak positive sample. This confirms that your pooling protocol and diagnostic assay can detect a single infected sample within a larger pool [33].
Issue 2: The Chosen Pool Size is Not Cost-Effective
Problem: The selected group size is leading to higher-than-expected costs, often because too many pools test positive, requiring many follow-up tests.
Solution: Dynamically adapt the pooling strategy based on real-time data.
- Step 1: Re-estimate Prevalence. Use initial results to calculate a more accurate, local disease prevalence rate.
- Step 2: Re-calculate Optimal Group Size. Apply the updated prevalence rate to a multi-granularity model to find a new, more efficient group size [31].
- Step 3: Implement a Hierarchical Model. Instead of a single round of pooling, use a multi-granularity approach. For example, first test large pools. For any positive pool, proceed to a second round of testing on the corresponding individual samples or smaller sub-pools. This workflow can be more efficient than a single-round strategy when prevalence is uncertain [31].
Issue 3: Difficulty Integrating Data into Wildlife Disease Databases
Problem: Shared or aggregated datasets are rejected by repositories like PHAROS or do not contain the necessary information for other researchers to use them.
Solution: Adhere to a minimum data reporting standard from the beginning of your project.
- Step 1: Use a Standardized Template. Format your data according to established wildlife disease data standards. This typically involves creating a "tidy" data table where each row represents a single diagnostic test and includes required fields like host species, date, location, and test result [9].
- Step 2: Include Essential Metadata. Document the project-level details, including sampling method, diagnostic assay specifications (e.g., primer sequences for PCR), and data collection protocols. These metadata are crucial for interoperability and re-use [9].
- Step 3: Share Negative Data. Repositories require the reporting of both positive and negative test results. Sharing only positive results prevents the calculation of true prevalence and limits the data's utility for ecological analysis [9].
Experimental Protocols & Workflows
Protocol 1: Implementing a Single-Layer Pooled Testing Strategy
Objective: To efficiently screen a large number of wildlife samples for a specific pathogen at the lowest possible cost using a fixed group size.
Methodology:
- Sample Collection & Preparation: Collect individual samples (e.g., oral/rectal swabs) and preserve them in a suitable medium. Label each sample uniquely [9].
- Determine Optimal Group Size (k): Based on preliminary data or literature, estimate the infection probability (p). Use a cost-sensitive model to calculate the group size
kthat minimizes the expected number of tests per individual [31]. - Create Sample Pools: Combine equal-volume aliquots from each of
kindividual samples into a single tube, creating a pooled sample. Record the composition of each pool. - Diagnostic Testing: Perform the standard diagnostic test (e.g., PCR) on all pooled samples.
- Interpretation & Confirmatory Testing:
- Negative Pool: If a pool tests negative, all
kindividuals in that pool are recorded as negative. - Positive Pool: If a pool tests positive, all
koriginal individual samples are tested separately to identify the positive individual(s).
- Negative Pool: If a pool tests negative, all
Protocol 2: Validating a Multi-Granularity Hierarchical Testing Model
Objective: To demonstrate that a two-stage hierarchical testing approach reduces total costs compared to individual testing or single-layer pooling.
Methodology:
- Define Granularity Levels: Establish two testing layers. The first layer uses a larger group size (e.g., k1=12), and the second layer uses a smaller group size (e.g., k2=3) or individual testing.
- First-Stage Testing: Test all samples in pools of size k1.
- Second-Stage Testing: For any pool that tests positive in the first stage, sub-divide it into smaller subgroups of size k2 for testing. This hierarchical decision process is a core feature of multi-granularity optimization [31].
- Final Confirmation: Any positive subgroup from the second stage is tested individually to pinpoint the positive sample(s).
- Data Analysis: Calculate the total number of tests performed and the total cost. Compare this to the number of tests that would have been required for individual testing (100% more) or an optimized single-layer pool to demonstrate efficiency gains [31].
Model Visualization with DOT Scripts
Single-Layer Pooled Testing Logic
Multi-Granularity Hierarchical Testing
The Scientist's Toolkit
| Research Reagent / Material | Primary Function in Pooled Testing |
|---|---|
| Universal Transport Medium (UTM) | Preserves viral and bacterial samples collected in the field (e.g., via swabs) to maintain nucleic acid integrity before and during pool creation [9]. |
| Sample Lysis Buffer | Breaks open cells and viral particles in the sample to release nucleic acids, a critical first step before creating a homogeneous pool for molecular testing. |
| PCR Master Mix | Contains the necessary enzymes, nucleotides, and buffer for the polymerase chain reaction. It is used in the diagnostic test to detect pathogen genetic material in the pooled sample [9]. |
| Pathogen-Specific Primers/Probes | Short DNA sequences designed to bind to and amplify a unique section of the target pathogen's genome, ensuring the test is specific and not reacting to other organisms [9]. |
| Positive Control Plasmid | A non-infectious synthetic DNA containing the target sequence. It is used to validate that each pooled test reaction was performed correctly and can detect the pathogen. |
The Scientist's Toolkit: Research Reagent Solutions
The following reagents and materials are essential for maintaining sample integrity during the collection, storage, and processing of wildlife specimens for pooled testing.
| Item | Function in Pooled Testing |
|---|---|
| Phosphate-Buffered Saline (PBS) | Used to create fecal suspension solutions for homogenization and pooling; helps maintain genome stability during storage [34]. |
| Viral Transport Media | A liquid medium used to preserve viral samples collected on swabs; maintains pathogen viability and nucleic acid integrity during transport [35]. |
| MagMAX Pathogen RNA/DNA Kit | A commercial nucleic acid extraction kit used to purify genetic material from complex sample matrices like feces, enabling downstream molecular analysis [34]. |
| AgPath-ID One-Step RT-PCR Kit | A master mix reagent used for the reverse transcription and amplification of viral RNA in real-time PCR assays [34]. |
| Flocked Swabs (Sterile, Dry) | Used for non-invasive sample collection (e.g., oral, pelt); designed to maximize specimen absorption and elution [36]. |
| Silica Gel Desiccant Packs | Used to keep samples like dried blood spots (OptiSpot) dry during storage and shipping, preventing nucleic acid degradation from moisture [36]. |
| EDTA Tubes | Blood collection tubes that prevent coagulation by chelating calcium; suitable for hematology but not for chemistry tests due to potential interference [37]. |
Key Quantitative Data on Sample Stability and Pooling
Sample Pooling Impact on Detection Sensitivity
Pooling specimens is an efficient strategy for wildlife surveillance, but it dilutes the target analyte. The following table summarizes key performance data from SARS-CoV-2 pooling studies, which provide a model for other pathogens [34] [20].
| Parameter | 5-Sample Pool | 10-Sample Pool | Notes |
|---|---|---|---|
| Limit of Detection (LOD) | 12.8 genome copies/25µL PCR [34] | 6.4 genome copies/25µL PCR [34] | LOD is halved in the 10-sample pool due to greater dilution. |
| Average Ct Value Shift | Increase of ~2.35 [34] | Increase of ~3.45 [34] | A higher Ct shift indicates greater dilution of the positive sample. |
| Reliable Detection Threshold | Pools with original Ct < 36 [34] | Pools with original Ct < 34 [34] | Samples with low viral loads (high Ct) may be missed in larger pools. |
| Positive Percent Agreement | >85% (Pool sizes ≤ 5:1) [20] | >85% (Pool sizes ≤ 5:1) [20] | Meets FDA recommendation for pooled surveillance testing. |
Sample Storage Stability Under Various Conditions
Understanding how environmental factors affect sample integrity during storage and transport is critical. The data below, derived from studies on SARS-CoV-2 RNA stability in fecal PBS suspensions, can inform general best practices [34] [38] [39].
| Variable | Condition | Impact on Sample Integrity / Recommended Maximum Duration |
|---|---|---|
| Temperature | Room Temperature | Fecal pellets, oral, and pelt swabs can be held at room temp if shipped same day [36]. SARS-CoV-2 genome in fecal suspension shown to be stable across a wide range of temperatures over 28 days [34]. |
| Temperature | Refrigerated (4°C) | Recommended short-term storage for most sample types prior to shipping [36]. |
| Temperature | Frozen (-20°C or below) | Recommended for long-term storage of feces, swabs, and serum [36]. |
| Time in Transit | Overnight Shipping | Standard recommendation for all sample types to minimize degradation [36]. |
| Freeze-Thaw Cycles | Multiple Cycles | Can degrade nucleic acid targets; should be minimized during transport and storage [38]. |
Frequently Asked Questions (FAQs)
Sample Collection and Handling
Q1: What is the maximum number of samples I can pool for sensitive pathogen detection in a surveillance study? The optimal pool size involves a trade-off between resource savings and detection sensitivity. For SARS-CoV-2 in feces, 5-sample pools demonstrated consistent detection of positive samples with an original Ct value below 36, while 10-sample pools were reliable for samples with Ct below 34 [34]. Another study using nasopharyngeal samples concluded that pool sizes of up to 5:1 maintained a positive percent agreement of over 85%, meeting FDA recommendations [20]. The acceptable pool size depends on the expected pathogen load in your population; for low-prevalence or low-viral-load scenarios, smaller pools (e.g., 3:1 to 5:1) are more reliable.
Q2: How should I collect and store fecal samples from wildlife to ensure RNA stability for PCR? Collect fecal pellets using clean gloves or sterile forceps to avoid cross-contamination and place them in a sterile, labeled tube [36]. For storage, you have several options:
- Short-term (Same-day shipping): Hold at room temperature [36].
- Short-term (A few days): Refrigerate the samples [36].
- Long-term: Freeze the samples [36]. A study on SARS-CoV-2 found that the viral genome in a PBS fecal suspension remained stable across a wide range of temperatures and for up to 28 days, supporting the robustness of fecal sampling [34].
Q3: What are the best practices for shipping samples to an external laboratory? Always ship samples overnight. Use a three-layer packaging system: 1) a primary, leak-proof container (e.g., sealed tube), 2) a secondary container with absorbent material, and 3) a sturdy outer shipping box [35]. For most sample types (feces, dry swabs), shipping at ambient temperature or with ice packs is acceptable [36]. However, serum for serology must be shipped frozen with sufficient ice packs, though dry ice is not required [36]. Always protect paperwork by placing it in a waterproof bag separate from the samples [35].
Troubleshooting Pre-Analytical Errors
Q4: My pooled samples are yielding unexpectedly high Ct values (low signal). What could be the cause? High Ct values in pooled tests can result from several pre-analytical factors:
- Excessive Pool Size: The primary cause is often diluting a low-viral-load sample in too large a pool. Confirm that your pool size is validated for the expected pathogen concentration in your study population [34] [20].
- Sample Degradation: Improper storage or prolonged transport times can degrade nucleic acids. Ensure samples are stored and shipped according to recommended conditions (e.g., frozen on ice packs for long transports) [38] [39].
- Inhibitors: Feces and other complex matrices contain endogenous substances that can inhibit PCR. Using a robust nucleic acid extraction kit with purification steps, like the MagMAX Pathogen kit, can help remove these inhibitors [34] [38].
Q5: I am seeing inconsistent results between individual and pooled tests. How can I resolve this? Inconsistencies, such as a positive individual sample that goes undetected in a pool, are often related to sensitivity loss at the limit of detection. To resolve this:
- Re-test the Pool: Confirm the initial result.
- Audit Sample Integrity: Check the storage history and condition of the original samples. Multiple freeze-thaw cycles or exposure to high temperatures during transport can compromise integrity [38] [39].
- Review Pooling Methodology: Ensure the pooling technique is accurate and volumes are consistent. Automated liquid handling can reduce pipetting errors compared to manual workflows [20].
- Check the Assay Chemistry: Some assay chemistries have a lower inherent limit of detection, making them more suitable for pooled testing. Validation should account for the specific test being used [20].
Q6: What are the critical environmental factors to control during sample transport? The main environmental factors are temperature, physical agitation, and humidity.
- Temperature: Extreme heat or cold can degrade samples. Use appropriate coolants (ice packs for chilled, dry ice for frozen) and avoid leaving samples in uninsulated lockboxes, where temperatures can fluctuate significantly [39].
- Agitation: Vigorous shaking, such as in pneumatic tube systems (PTS), can cause hemolysis in blood samples and potentially disrupt cells in other specimens. If using a PTS, validate that your sample types are not adversely affected [39].
- Humidity: High humidity can compromise dry samples like swabs or dried blood spots. Ship these with a desiccant pack to keep them dry [38] [36].
Experimental Protocol: Validating a Sample Pooling Strategy
This protocol outlines the key steps for validating a fecal sample pooling approach for pathogen detection, based on methods used for SARS-CoV-2 in animals [34].
1. Objective: To determine the impact of 5-sample and 10-sample pooling on the sensitivity and limit of detection (LOD) of a real-time RT-PCR assay for a specific pathogen in fecal samples.
2. Materials and Equipment:
- Banked positive and negative fecal samples (confirmed by individual testing)
- PBS buffer
- Nucleic acid extraction kit (e.g., MagMAX Pathogen RNA/DNA Kit) and automated extraction system (e.g., KingFisher Flex)
- Real-time RT-PCR master mix (e.g., AgPath-ID One-Step RT-PCR Kit)
- Real-time PCR instrument
- Micropipettes and sterile, filtered tips
3. Procedure:
- Step 1: Sample Preparation. Create a positive fecal suspension in PBS. Prepare negative sample pools by combining 4 or 9 negative fecal suspensions.
- Step 2: Generate Pools. Spike the positive suspension into the negative pools to create 5-sample and 10-sample pools containing one known positive. Also, prepare the neat (unpooled) positive sample for comparison.
- Step 3: Nucleic Acid Extraction. Extract RNA/DNA from all pooled samples and neat samples using the validated extraction protocol, eluting in a consistent volume [34].
- Step 4: Real-Time RT-PCR. Perform the PCR assay on all extracted samples. Include appropriate negative and positive amplification controls.
- Step 5: Data Analysis. Record the Cycle threshold (Ct) values for the neat positive and all positive-containing pools. Calculate the average Ct value shift for each pool size.
4. Calculation of LOD for Pooled Testing: The LOD for the pooled testing is determined by testing serial dilutions of a standardized pathogen isolate (with a known genome copy number) in a pool of negative samples. The LOD is the lowest concentration at which 19 out of 20 (95%) replicate tests are positive [34]. This will be a higher (less sensitive) copy number than the LOD for individual testing.
Workflow Diagram: Sample Pooling & Stability Management
The diagram below illustrates the logical workflow and critical decision points for managing pre-analytical variables in a sample pooling strategy for wildlife surveillance.
Pooled testing is a strategic approach that combines individual samples into pools for initial screening, significantly enhancing testing capacity and conserving valuable reagents. In wildlife disease surveillance, where large-scale testing is often needed but resources are limited, this method is invaluable. Its efficiency, however, is highly dependent on disease prevalence. This guide provides troubleshooting and best practices for implementing dynamic pooling strategies that adapt to varying levels of disease occurrence, ensuring cost-effectiveness and reliable results for researchers and scientists.
Core Principles and Optimization
The efficiency of a pooled testing strategy is primarily governed by the prevalence of the disease in the population and the chosen pool size. Lower prevalence allows for larger, more efficient pools. The following table summarizes the optimization goals for different prevalence scenarios.
Table 1: Pooled Testing Strategy Based on Disease Prevalence
| Prevalence Scenario | Recommended Strategy | Optimal Pool Size Guidance | Key Objective |
|---|---|---|---|
| Low Prevalence | Use larger pools | 11-16 samples per pool [25] [40] | Maximize testing efficiency and resource conservation |
| High Prevalence | Use smaller pools or individual testing | 5 or fewer samples per pool [25] | Maintain cost-effectiveness and manage turnaround time |
The optimal pool size can be determined mathematically. The Dorfman equation calculates the efficiency of a simple two-stage pooling protocol, where efficiency is defined as the average number of samples that can be screened per test performed [40]:
Efficiency = 1 + (1/n) - (1 - P)^n - 1
Where:
- n = pool size
- P = prevalence of the disease
The goal is to select a pool size (n) that maximizes this efficiency value for a given prevalence (P). For example, one study determined that a pool size of 11 was optimal for a disease prevalence of 0.66% [40].
Troubleshooting Guide
T1: Loss of Sensitivity and False Negatives
Problem: A pooled test returns a negative result, but you suspect a weakly positive sample was missed due to dilution.
Explanation: Dilution is an inherent challenge in pooling. Combining multiple samples reduces the concentration of the target pathogen in the pool, which can drop below the detection limit of your assay, especially for samples with low viral loads [40] [4].
Solutions:
- Validate Maximum Pool Size: Before implementation, experimentally determine the largest pool size that does not significantly compromise sensitivity. This involves testing a known weak positive sample in pools of increasing size [25] [40].
- Adjust qPCR Cycle Threshold (Ct): For qPCR assays, consider increasing the cycle threshold for pooled testing to detect diluted targets. One study maintained sensitivity for pool sizes up to 16 by adjusting the Ct threshold from 37 to 40 cycles [25].
- Reduce Pool Size: If loss of sensitivity is suspected, the most direct solution is to reduce the number of samples per pool [4].
T2: Managing Positive Pools and Increased Turnaround Time
Problem: A high number of positive pools are requiring individual retests, creating a logistical bottleneck and delaying the reporting of final results.
Explanation: This is a classic sign of operating in a high-prevalence environment. The efficiency of pooled testing diminishes as prevalence increases because more pools test positive, triggering a second round of individual tests [4].
Solutions:
- Dynamically Adjust Pool Size: Continuously monitor prevalence and adjust your pool size accordingly. In high-prevalence situations, switch to smaller pools or revert to individual testing to improve turnaround time [25].
- Implement Efficient Laboratory Workflows: Use automated specimen aliquoting and laboratory information system software designed for managing pooling protocols to minimize manual errors and speed up the process of deconstructing positive pools [4].
T3: Laboratory Errors in Complex Workflows
Problem: The manual steps involved in creating and tracking pools lead to specimen mix-ups or cross-contamination.
Explanation: Manual aliquoting and the complex logistics of tracking pools and their constituent samples are prone to human error, particularly in laboratories without established pooling infrastructure [4].
Solutions:
- Automate Where Possible: Invest in automated liquid handlers for sample aliquoting to reduce hands-on time and error risk [4].
- Use Robust Tracking Systems: Ensure your laboratory information system (LIS) can manage the unique identifiers for both pools and individual samples throughout the two-stage testing process [4].
- Implement Strict Protocols: Enforce standardized operating procedures (SOPs) for sample handling, pipetting, and pool creation.
Frequently Asked Questions (FAQs)
FAQ 1: What is the single most important factor when designing a pooled testing strategy?
The most critical factor is an accurate estimate of the disease prevalence in the population you are sampling [40]. The pool size must be optimized for this prevalence to achieve efficiency.
FAQ 2: How does pool size affect the sensitivity of a PCR test?
Larger pool sizes lead to greater dilution of each individual sample. For a sample with a low pathogen concentration, this dilution can cause its concentration to fall below the assay's limit of detection, resulting in a false negative [40] [4].
FAQ 3: Can I use pooled testing for multiple pathogen targets simultaneously?
Yes. Multiplex assays allow for the simultaneous detection of multiple pathogens in a single pool [25]. Statistical models exist to jointly estimate the prevalence of multiple infections from pooled testing data, though the optimization becomes more complex [25].
FAQ 4: What are the primary trade-offs of pooled testing?
The main trade-off is between efficiency and sensitivity/turnaround time. While pooling saves tests and reagents in low-prevalence settings, it can reduce sensitivity and, when prevalence is high, increase the time to report positive results due to the required retesting [4].
Experimental Protocols
P1: Protocol for Validating Maximum Pool Size
This protocol is essential before implementing a pooled testing strategy to ensure diagnostic sensitivity is maintained [40].
- Sample Selection: Select a known positive sample with a high Ct value (low viral load, e.g., Ct >32) to represent a "worst-case" scenario.
- Create Experimental Pools: Create a series of pools by mixing the single positive sample with an increasing number of known negative samples (e.g., pool sizes from 5 to 15).
- Run Assay: Extract nucleic acid from each experimental pool and run the entire batch using your standard PCR assay.
- Determine Maximum Size: The maximum valid pool size is the largest number of samples mixed where the assay consistently returns a positive result. Pools larger than this that yield negative results indicate that dilution has caused a loss of sensitivity.
P2: Protocol for a Two-Stage (Dorfman) Pooling Test
This is the standard protocol for routine pooled testing [4].
- Collection & Pooling: Collect individual samples. In the lab, create pools of size n by combining aliquots from n individual samples.
- Stage 1 - Pooled Test: Test all pools. Any pool that tests negative is concluded to contain all negative individuals. Report these as negative.
- Stage 2 - Individual Retest: For any pool that tests positive, retrieve the original n individual samples and test each one separately.
- Reporting: Report the final individual results based on the retests.
Workflow and Strategy Diagrams
The Scientist's Toolkit: Research Reagent Solutions
Table 2: Essential Materials for Pooled Testing in Wildlife Surveillance
| Item | Function | Key Considerations |
|---|---|---|
| Nucleic Acid Extraction Kit | Extracts viral/bacterial genetic material from pooled samples. | Choose kits validated for the sample type (e.g., swabs, tissue, blood) and compatible with downstream assays [40]. |
| Multiplex Real-Time PCR (qPCR) Assay | Simultaneously detects multiple pathogen targets in a single reaction. | Conserves reagents and allows for joint prevalence estimation [25]. Verify sensitivity with diluted samples. |
| Positive Control Material | Contains known target pathogen to validate each testing run. | Should include weak positives to monitor assay sensitivity in the pooling context [40]. |
| Automated Liquid Handler | Automates the precise aliquoting of samples for pool creation. | Reduces manual errors and cross-contamination; essential for high-throughput applications [4]. |
| Data Standard Template | Standardized spreadsheet for recording results. | Ensures data includes host, pathogen, and method details for reusability and interoperability [9]. |
Key Recommendations for Implementation
- Be Dynamic: Continuously monitor disease prevalence in your target population and be prepared to adjust pool sizes accordingly. A static approach is inefficient.
- Validate First: Never assume a pool size is feasible. Conduct dilution experiments to empirically determine the maximum pool size that maintains acceptable sensitivity for your assay.
- Standardize Data: Adhere to minimum data standards for reporting wildlife disease studies. This includes documenting negative results and key metadata, which enables data aggregation and powerful secondary analysis [9] [10].
- Plan for Logistics: Ensure your lab has the physical (tube racks, freezers) and digital (LIS software) infrastructure to manage the complex workflow of pooling and retesting without introducing errors [4].
Assaying Performance: Validation, Sensitivity, and Comparative Analysis
This technical support center provides troubleshooting guides and FAQs for researchers establishing validation protocols for Limit of Detection (LOD) and Percent Agreement, specifically within the context of wildlife surveillance using pooled testing approaches.
Frequently Asked Questions (FAQs)
What is the difference between Limit of Blank (LoB), Limit of Detection (LoD), and Limit of Quantitation (LoQ)?
These three terms describe the smallest concentration of an analyte that can be reliably measured, each representing a different level of confidence [41].
- Limit of Blank (LoB): The highest apparent analyte concentration expected when replicates of a blank sample (containing no analyte) are tested. It is the threshold above which an observed signal can be reliably distinguished from background noise [41].
- Limit of Detection (LoD): The lowest analyte concentration that can be reliably distinguished from the LoB. It represents the point where detection is feasible, though not necessarily quantifiable with precise accuracy [41].
- Limit of Quantitation (LoQ): The lowest concentration at which the analyte can not only be detected but also quantified with acceptable precision and bias (trueness) [41].
How is Percent Agreement different from Cohen's Kappa?
Both measure interrater reliability, but they account for different factors.
- Percent Agreement: This is the simplest measure, calculated as the number of times raters agree divided by the total number of items rated, expressed as a percentage [42]. Its major limitation is that it does not account for the agreement that would be expected to occur by pure chance [43].
- Cohen's Kappa: This statistic measures the agreement between two raters while correcting for the agreement expected by chance. This provides a more robust measure of reliability, especially when coding categories are not evenly distributed [43].
Why is my calculated LoD much higher than expected from the package insert?
Discrepancies in LoD can arise from several factors:
- Matrix Effects: Your sample matrix (e.g., wildlife blood, tissue homogenates) may differ from the ideal conditions used by the manufacturer, potentially interfering with the assay chemistry.
- Methodology Differences: You may be using a different approach (e.g., visual vs. signal-to-noise) or a different statistical model (SD of the blank vs. calibration curve slope) than the manufacturer [44].
- Reagent and Instrument Variation: Different lots of reagents or different instrument platforms can affect performance. Always verify the manufacturer's claims in your own laboratory.
When is it appropriate to use pooled testing in surveillance?
Pooled testing is particularly advantageous in disease surveillance of wildlife populations when the disease prevalence is low (typically below 10%) [23]. The primary benefit is cost savings and increased efficiency, as it allows you to screen a larger number of individuals with fewer tests. A properly designed pooling strategy can maintain the sensitivity of your testing while significantly expanding the scope of your surveillance [2].
Troubleshooting Guides
Issue: High Variation in Low Concentration Samples Affecting LoD
Problem: Replicate measurements of a low-concentration sample show high standard deviation, leading to an unreasonably high LoD.
Solution:
- Confirm Sample Homogeneity: Ensure your low-concentration sample is thoroughly mixed and stable.
- Check Instrument Precision: Verify that your instrument is well-calibrated and performing with low baseline noise.
- Increase Replicates: The CLSI EP17 guideline recommends using 60 replicates to establish LoB and LoD, and at least 20 for verification [41]. Using too few replicates can inflate your estimate of standard deviation.
- Re-evaluate Sample Preparation: Minute inconsistencies in pipetting or dilution at low concentrations can cause large relative errors. Use calibrated equipment and meticulous technique.
Issue: Low Percent Agreement Between Raters
Problem: Two or more independent raters (e.g., scientists interpreting a visual test) show unacceptably low agreement in their scoring.
Solution:
- Refine Definitions: Ambiguous coding categories are a primary cause of disagreement. Review and explicitly define each category with clear, objective criteria and examples.
- Enhanced Training: Conduct additional training sessions using a "gold standard" set of samples until consensus is achieved among all raters [43].
- Use a Third Rater: For disputed items, employ a third, more experienced rater to make a final determination.
- Consider a Different Metric: If agreement remains low, calculate Cohen's Kappa to see if the issue is a true lack of consensus or simply a statistical artifact of category distribution [43].
Technical Specifications & Data
The following table compares the key features and formulas for LoB, LoD, and LoQ [41].
| Parameter | Sample Type | Key Characteristic | Formula |
|---|---|---|---|
| Limit of Blank (LoB) | Sample containing no analyte | Highest concentration expected from a blank | LoB = mean_blank + 1.645(SD_blank) |
| Limit of Detection (LoD) | Sample with low concentration of analyte | Lowest concentration distinguished from LoB | LoD = LoB + 1.645(SD_low concentration sample) |
| Limit of Quantitation (LoQ) | Sample with low concentration at or above LoD | Lowest concentration quantified with acceptable precision and bias | LoQ ≥ LoD (Determined by meeting precision/bias goals) |
Alternative LoD/LOQ Calculation Methods
For instrumental methods, LoD and LoQ can also be determined using the standard deviation of the response and the slope of the calibration curve [44].
| Parameter | Basis of Calculation | Typical S/N Ratio | Formula |
|---|---|---|---|
| Limit of Detection (LOD) | Standard deviation & calibration curve slope | 3:1 | LOD = 3.3 * σ / S |
| Limit of Quantitation (LOQ) | Standard deviation & calibration curve slope | 10:1 | LOQ = 10 * σ / S |
Where σ = standard deviation of the response and S = slope of the calibration curve [44].
Comparison of Reliability Metrics
This table outlines the core differences between Percent Agreement and Cohen's Kappa [42] [43].
| Feature | Percent Agreement | Cohen's Kappa |
|---|---|---|
| Calculation | (Number of Agreements / Total Items) * 100 |
(Observed Agreement - Expected Chance Agreement) / (1 - Expected Chance Agreement) |
| Accounts for Chance? | No | Yes |
| Best For | Quick, initial assessment; simple nominal data | Robust, publishable data; accounts for unequal category distribution |
| Interpretation | Simpler, but can be inflated | More complex; values ≤ 0 indicate no agreement, 0-0.20 slight, 0.21-0.40 fair, 0.41-0.60 moderate, 0.61-0.80 substantial, 0.81-1.0 almost perfect [43]. |
Experimental Protocols & Workflows
Detailed Protocol: Determining LoB and LoD per CLSI EP17
This protocol provides a methodology for establishing LoB and LoD in your laboratory [41].
Materials:
- Assay reagents and calibrators
- Matrix-appropriate blank sample (e.g., analyte-free serum)
- Low-concentration analyte sample
- Precision pipettes and calibrated analytical instrument
Procedure:
- Test Blank Samples: Measure at least 60 replicates of the blank sample. If verifying a manufacturer's claim, a minimum of 20 replicates is acceptable.
- Calculate LoB: Compute the mean and standard deviation (SD) of the blank measurements. Calculate the LoB using the formula:
LoB = mean_blank + 1.645(SD_blank). This establishes the threshold where only 5% of blank measurements would exceed this value. - Test Low-Concentration Samples: Measure at least 60 replicates of a sample containing a low concentration of the analyte.
- Calculate LoD: Compute the mean and SD of the low-concentration sample measurements. Calculate the LoD using the formula:
LoD = LoB + 1.645(SD_low concentration sample). This ensures that 95% of measurements at the LoD concentration will exceed the LoB. - Verify the LoD: Prepare and test a sample at the calculated LoD concentration. No more than 5% of the measurements (roughly 1 in 20) should fall below the LoB. If more do, the LoD must be re-estimated using a sample with a slightly higher concentration.
Workflow: Establishing a Pooled Testing Protocol for Surveillance
The following diagram illustrates the logical workflow for designing and validating a pooled testing strategy for wildlife disease surveillance, integrating concepts of LOD and reliability [23] [2].
Workflow: Calculating Percent Agreement and Kappa
This diagram outlines the process for assessing and interpreting interrater reliability using both Percent Agreement and Cohen's Kappa [42] [43].
The Scientist's Toolkit: Essential Research Reagents & Materials
| Item | Function in Validation Protocol |
|---|---|
| Analyte-Free Matrix | A sample material (e.g., serum, buffer) that is commutable with real specimens but contains no analyte. Critical for determining the Limit of Blank (LoB) [41]. |
| Low-Level Calibrator/Control | A sample with a known, low concentration of the analyte. Used for determining the Limit of Detection (LoD) and Limit of Quantitation (LoQ) [41] [44]. |
| Precision Pipettes | Essential for accurate and reproducible liquid handling, especially when making serial dilutions for low-concentration samples or creating pooled specimens. |
| Calibrated Analytical Instrument | The core instrument (e.g., ELISA plate reader, PCR machine, HPLC) must be properly calibrated and maintained to ensure precise and accurate signal measurement [41]. |
| Statistical Software (e.g., R) | Necessary for performing complex calculations for LOD/LOQ, interrater reliability (Kappa), and optimizing pool sizes using specialized packages [2]. |
Impact of Pool Size and Assay Chemistry on Test Sensitivity
Troubleshooting Guides
Guide 1: Addressing Reduced Sensitivity in Large Testing Pools
Problem: A noticeable decrease in test sensitivity occurs when individual samples are tested in a pool compared to being tested individually.
Explanation: This is a known phenomenon primarily caused by pooling dilution [45] [46]. In a pool, the viral load or biomarker concentration from a single infected specimen is diluted by the infection-free specimens in the same pool. This dilution can reduce the concentration of the target analyte below the analytical sensitivity (the assay's minimum detection limit) of the test, leading to a false negative result [47] [46]. The impact is more pronounced for specimens with low viral loads, such as those from early or late stages of infection.
Solution:
- Re-test Individually: Re-test all specimens from the positive pool individually to identify the true positive sample(s).
- Optimize Pool Size: Reduce the pool size (e.g., from 8 to 4 or 5). The optimal pool size balances cost savings with acceptable sensitivity loss [45].
- Validate Pool Size: Before implementing pooled testing, conduct a validation study to determine the largest pool size that does not cause a significant drop in sensitivity for your specific assay and expected viral load range.
Guide 2: Managing False Positives in Pooled Testing
Problem: The test returns a positive result for a pool, but subsequent individual re-testing of all samples in the pool fails to identify a positive specimen.
Explanation: This false positive can stem from two main issues related to analytical specificity [47] [48]:
- Cross-contamination: During the process of pooling samples, trace amounts of a positive specimen may contaminate an adjacent pool [45].
- Cross-reactivity: The assay's chemistry may not be perfectly specific and could react to non-target organisms or genetic sequences present in the samples, especially in wildlife surveillance where host diversity is high [45] [48].
Solution:
- Confirm with a Gold Standard Test: Re-test the original individual samples (or the pool extract) using a different, highly specific diagnostic test to confirm the results [49].
- Review Laboratory Techniques: Implement strict anti-contamination protocols, including using separate work areas for sample pooling and reagent preparation, using filter tips, and frequently changing gloves.
- Assay Validation: Ensure the assay's analytical specificity has been rigorously tested against a panel of likely cross-reactive agents that may be present in the wildlife population under study [48].
Frequently Asked Questions (FAQs)
FAQ 1: What is the difference between "analytical" and "diagnostic" sensitivity and specificity?
These terms describe different performance aspects of a test [47] [48]:
- Analytical Sensitivity: The smallest amount of a substance that an assay can accurately measure. It is the detection limit of the assay's chemistry [47].
- Analytical Specificity: The ability of an assay to measure only the target organism or substance and not others. It refers to the assay's ability to avoid cross-reactions [47] [48].
- Diagnostic Sensitivity: The probability that a test will be positive when the disease is present. It is the true positive rate [47] [49].
- Diagnostic Specificity: The probability that a test will be negative when the disease is absent. It is the true negative rate [47] [49].
FAQ 2: How does pool size quantitatively affect test sensitivity?
The overall sensitivity of a pooled test (SEₖ) decreases as the pool size (k) increases due to pooling dilution. The following table summarizes findings from a study on Bovine Viral Diarrhea Virus (BVDV) using RT-PCR, demonstrating this relationship [45]:
| Pool Size (k) | Pooled Test Sensitivity (SEₖ) | Specificity (SPₖ) |
|---|---|---|
| 1 (Individual) | 0.94 | - |
| 4 | 0.92 | 0.95 |
| 8 | 0.90 | 0.90 |
| 16 | 0.85 | 0.85 |
Note: Values are approximate and based on a specific assay and prevalence. Actual values must be validated for your specific context [45].
FAQ 3: When should I prioritize high diagnostic sensitivity over high specificity, and vice versa?
The choice depends on the goal of your surveillance program [48]:
- Prioritize High Sensitivity: When the cost of missing an infected individual (a false negative) is very high. This is crucial for disease eradication programs or for detecting dangerous, transmissible pathogens where you must identify all positive cases, even if it means some false positives [48].
- Prioritize High Specificity: When false positives are unacceptable because they lead to unnecessary costs, culling of healthy animals, or trade restrictions. This is suitable when the disease can be managed and false negatives are somewhat tolerable [48].
- Serial Testing: A common strategy is to use an initial test with high sensitivity to "screen out" negatives, followed by a second test with high specificity on the positive samples to confirm the result [48].
Factors Influencing Pooled Test Performance
The following table consolidates key factors and their impacts on pooled test sensitivity and specificity, as identified in research [45] [46]:
| Factor | Impact on Sensitivity | Impact on Specificity | Notes |
|---|---|---|---|
| Increased Pool Size | Decreases | Decreases (if cross-contamination occurs) | Larger pools cause greater dilution of the target analyte [45] [46]. |
| Low Viral Load | Decreases | No direct impact | Specimens in the window period or with resolving infections are more likely to be diluted below the detection limit [46]. |
| Presence of Cross-reacting Agents | No direct impact | Decreases | Non-target organisms can cause false positives; specificity drops markedly as their prevalence increases [45]. |
| Assay's Analytical Sensitivity | Increases with higher sensitivity | No direct impact | A more sensitive base assay is more resistant to the effects of pooling dilution [47]. |
| Assay's Analytical Specificity | No direct impact | Increases with higher specificity | Reduces the likelihood of false positives due to cross-reactivity [47] [48]. |
Experimental Protocols
Protocol: Deriving Pooled Test Sensitivity Based on Viral Load and Pooling Dilution
This methodology integrates viral load progression and pooling dilution to accurately compute sensitivity for different pool sizes [46].
1. Viral Load Progression Modeling:
- Objective: Model the concentration of the pathogen (VL(t)) in an infected host over time (t) post-exposure.
- Method: Use a multi-phase mathematical model. A common approach expands the "doubling time" model [46]:
- Window Period (t ≤ tw): Model using exponential growth:
VL(t) = C₀ * 2^(t/λ), whereC₀is the initial concentration andλis the doubling time. - Post-Window to Steady State (tw < t ≤ ts): Model using a log-normal function to capture peak and decline:
VL(t) = VL(t_w) + (C_w/t) * exp( -(ln(t - t_w) - a)² / b ), whereC_w,a, andbare calibration parameters. - Steady State (t > ts): Viral load remains constant at
VL(t_s).
- Window Period (t ≤ tw): Model using exponential growth:
- Calibration: Parameters (
C₀,λ,t_w,t_p,t_s,C_w,a,b) must be calibrated using clinical data from the target wildlife species or from the literature [46].
2. Modeling Pooling Dilution and Test Outcome:
- Objective: Determine the probability that an infected specimen, when pooled, will be detected.
- Method: Use a probit function or other dose-response model that relates the probability of a positive test to the viral load concentration in the pool [46]. The effective concentration in a pool of size
kwithiinfected specimens is roughly(i * VL(t)) / k. - Calculation: The conditional sensitivity, given
iinfected specimens in a pool, is the probability that the pooled viral load exceeds the assay's detection threshold.
3. Overall Pooled Sensitivity Calculation:
- Objective: Compute the unconditional sensitivity for a given pool size.
- Method: Use the law of total probability. Combine the conditional sensitivities from Step 2 with the probabilities of having
iinfected specimens in a pool, which follows a binomial distribution based on the disease prevalence (p). This may involve calculating higher-dimensional integrals, for which Monte Carlo simulations can be used [45] [46].
Signaling Pathways and Workflows
The Scientist's Toolkit: Research Reagent Solutions
| Item | Function in Pooled Testing |
|---|---|
| High Fidelity PCR Master Mix | Provides the enzymes and reagents for accurate amplification of target nucleic acids. High fidelity is crucial for maintaining test specificity and minimizing false positives in complex pooled samples [48]. |
| Target-Specific Primers and Probes | Short nucleotide sequences designed to bind exclusively to a unique genetic sequence of the target pathogen. Their design is critical for achieving high analytical specificity and avoiding cross-reactivity with non-target organisms in wildlife samples [48]. |
| Internal Control Template | A non-target nucleic acid sequence added to each sample and pool. It controls for the presence of PCR inhibitors and verifies that the amplification process worked correctly, helping to identify false negatives [48]. |
| Standardized Reference Panels | Comprise characterized samples with known concentrations of the target pathogen and common cross-reactive agents. Essential for validating the analytical sensitivity and specificity of an assay before it is deployed in pooled testing [48]. |
| Nucleic Acid Extraction Kits | Used to isolate and purify pathogen RNA or DNA from wildlife specimens (e.g., blood, swabs, tissue). Efficient extraction is critical for obtaining a viral load measurement that reflects the true state of infection [46]. |
In the context of wildlife surveillance research, managing testing resources efficiently is paramount, especially when monitoring for pathogens in large populations. Pooled testing is a strategy that enhances the efficiency of large-scale screening campaigns by combining multiple individual specimens into a single test. This approach, first introduced by Robert Dorfman, is particularly valuable for conserving reagents, reducing costs, and increasing testing capacity when the pathogen prevalence is low [50]. Two primary methodologies exist for pooling: specimen pooling (combining raw or lightly processed samples at the initial stage) and RNA elute pooling (combining purified nucleic acids after individual RNA extraction has been performed). This technical support article provides a comparative analysis of these two approaches, offering troubleshooting guidance and experimental protocols to inform researchers and scientists in their surveillance efforts.
Key Concepts and Experimental Findings
What is Pooled Testing?
Pooled testing is a group testing strategy designed to efficiently screen large populations for rare pathogens. In its simplest form, known as Dorfman testing, individual specimens are combined into a pool. If the pool tests negative, all individuals within it are declared negative with a single test. If the pool tests positive, further retesting is performed to identify the positive individual(s) [6]. This method is most efficient when disease prevalence is low (typically below 5-10%) [51] [52].
Comparative Analysis: Specimen Pooling vs. RNA Elute Pooling
The choice between pooling at the specimen stage or the RNA elute stage involves a trade-off between workflow efficiency and test sensitivity. The table below summarizes the core characteristics, advantages, and limitations of each method.
Table 1: Core Characteristics of Specimen Pooling and RNA Elute Pooling
| Feature | Specimen Pooling | RNA Elute Pooling |
|---|---|---|
| Process Stage | Prior to nucleic acid extraction [51] | After individual RNA extraction [51] [53] |
| Typical Workflow | Combine aliquots of raw samples → Single RNA extraction → Single RT-PCR test [51] | Individual RNA extraction for all samples → Combine RNA elutes → Single RT-PCR test [53] |
| Primary Advantage | Maximizes resource savings; fewer extractions and tests required [51] [52] | Better test concordance and specificity; reduced risk of cross-contamination and dilution from inhibitors [51] |
| Primary Limitation | Greater risk of sensitivity loss due to dilution; potential for higher false negatives [51] | Higher resource use for RNA extraction; lower savings on reagents and time [51] |
| Best Application | High-volume screening in very low prevalence settings with high-test sensitivity [52] | Settings where maximizing detection of low viral loads is critical, or when specimen integrity is a concern [51] |
Recent studies have provided quantitative data on the performance of both pooling strategies. The following table consolidates key findings from the literature, focusing on sensitivity and the impact of pool size.
Table 2: Experimental Performance Data from Recent Studies
| Study & Method | Pool Sizes Tested | Reported Sensitivity | Key Findings / Concordance |
|---|---|---|---|
| Specimen Pooling [51] | 3, 5, and 8 | - 3-pool: >98%- 5-pool: >98%- 8-pool: 100% | 93% concordance with individual tests; 7 pools missed weak positives; Ct value increase of 2.3-2.9% in pools with strong positives. |
| RNA Elute Pooling [51] | 3, 5, and 8 | 100% for all pool sizes | 100% specificity; better concordance rate than specimen pooling. |
| RNA Elute Pooling [53] | 8 | 95.4% | Specificity and Positive Predictive Value of 100%; one weak positive (Ct 39) was missed in a pool. |
| Specimen Pooling [52] | 6 and 9 | Detected single positives with Ct up to 34 | Average Ct value shift (delta Ct) of 1.33 (for 6-pool) and 2.58 (for 9-pool), indicating a 2.5x to 6x dilution of viral RNA. |
Troubleshooting Guides
Common Problems and Solutions in RNA Handling
Successful pooling, particularly RNA elute pooling, relies on high-quality RNA. The following guide addresses common issues encountered during RNA isolation and cleanup.
Table 3: Troubleshooting Guide for RNA Preparation
| Problem | Potential Cause | Solution |
|---|---|---|
| Low RNA Yield | - Incorrect reagent addition- Insufficient mixing with ethanol- Incomplete elution [54] | - Verify protocol for buffer reconstitution and order of addition.- Ensure thorough mixing of ethanol with sample and binding buffer.- Apply elution buffer directly to the center of the column matrix. For difficult samples, use larger elution volumes or multiple elutions. |
| Degraded RNA | - RNase contamination- Improper storage [54] | - Use a clean workspace, wear gloves, and use RNase-free tips and tubes.- Store purified RNA at -70°C if not used immediately. |
| Low A260/A230 Ratio | - Residual guanidine salt carry-over [54] | - Ensure wash steps are performed completely. Avoid contact between the column and flow-through. Re-centrifuge if unsure. |
| Low A260/A280 Ratio | - Phenol or protein contamination [55] | - Reprecipitate the RNA to remove contaminants. Perform phase separation after chloroform addition at 4°C. |
| Poor Downstream PCR Performance | - Salt or ethanol carry-over- DNA contamination [54] | - Re-centrifuge the column to ensure all traces of wash buffer are removed.- Treat RNA sample with DNase I and perform an RNA cleanup protocol. |
| False Negatives in Pooled Testing | - Overly large pool size diluting target below detection limit [51] [52] | - Re-optimize pool size based on prevalence and assay sensitivity. Re-test individual samples from a positive pool. |
Frequently Asked Questions (FAQs)
Q1: What is the optimal pool size for my wildlife surveillance study? A1: The optimal pool size depends on the expected prevalence of the pathogen. For a prevalence rate of around 5%, pool sizes of 5-8 have been shown to be effective [51] [52]. As prevalence increases, the optimal pool size decreases. Using optimization theory and software tools can provide specific guidelines for your study's context [17].
Q2: Can pooling lead to false-negative results? A2: Yes, the primary risk of pooling is false negatives due to the dilution of a positive sample in a pool of negatives, which can reduce the viral concentration below the assay's limit of detection. This is particularly true for specimens with low viral loads (high Ct values) and is more pronounced in specimen pooling compared to RNA elute pooling [51] [53].
Q3: How does pooling affect the Cycle Threshold (Ct) value? A3: Pooling positive samples with negative ones causes dilution, leading to an increase in the Ct value. One study reported an average Ct shift (delta Ct) of 1.33 for 6-sample pools and 2.58 for 9-sample pools in specimen pooling, equating to a 2.5x to 6x loss in the apparent viral RNA concentration [52]. This effect is a key consideration when setting a Ct cut-off for positive pool results.
Q4: Is specimen pooling or RNA elute pooling more cost-effective? A4: Specimen pooling is generally more cost-effective as it saves on both extraction and PCR reagents. One study reported a six-fold cost reduction per sample with specimen pooling [51]. RNA elute pooling only saves on PCR reagents, as an individual extraction is still performed for every sample, but it offers higher sensitivity.
Q5: What are "informative" pooling procedures? A5: Standard pooling treats all samples as having an equal probability of being positive. Informative procedures, however, use known risk factors (e.g., species, age, location) to assign each sample a different probability of being positive. This information is then used to form smarter pools—for example, grouping high-risk individuals together—which can further reduce the number of tests required [6].
Experimental Protocols
Detailed Protocol: Specimen Pooling for SARS-CoV-2 Detection
The following protocol is adapted from a study that compared pooling strategies using standard laboratory equipment [51].
Key Reagent Solutions:
- Viral Transport Media (VTM): For sample collection and transport.
- Nucleic Acid Extraction Kit: e.g., Huwel Nucleic Acid Extraction Kit.
- RT-qPCR Master Mix: e.g., nCoV Real-Time Detection kit based on Taqman probe technology.
- SARS-CoV-2 Primers/Probes: Targeting E and ORF1ab (RdRp) genes.
Methodology:
- Sample Collection & Processing: Collect combined naso-oropharyngeal swabs and transport in VTM under a proper cold chain.
- Pool Formation: For a pool size of 5, combine 60 μl from each of the 5 specimen samples into a single tube. Mix thoroughly.
- RNA Extraction: Extract RNA from the 300 μl pooled sample using the nucleic acid extraction kit, following the manufacturer's protocol. Elute the RNA in a standard volume (e.g., 60 μl).
- RT-qPCR: Use 10 μl of the pooled RNA elute for the RT-qPCR assay. The thermocycling conditions used in the study were: 50°C for 15 min; 95°C for 3 min; 45 cycles of 95°C for 5 s and 60°C for 40 s.
- Interpretation: A positive pool result indicates that at least one sample in the pool is positive, necessitating individual testing of all constituent samples to identify the positive one(s). A negative pool result clears all samples in the pool.
Detailed Protocol: RNA Elute Pooling for SARS-CoV-2 Detection
This protocol is adapted from studies that pooled already-extracted RNA [51] [53].
Key Reagent Solutions:
- Individual RNA Elutes: Extracted from each sample using a standard kit (e.g., Qiasymphony DSP Virus/Pathogen kit).
- RT-qPCR Master Mix: e.g., AgPath-ID One-Step RT-PCR Reagents.
- SARS-CoV-2 Primers/Probes: Targeting E gene and RdRP gene for confirmation.
Methodology:
- Individual RNA Extraction: Extract RNA from each individual specimen sample separately. Elute each in an identical, small volume (e.g., 60 μl).
- RNA Pool Formation: For a pool size of 8, combine equal volumes of RNA elute from each of the 8 samples. For example, pool 5 μl from each elute to create a 40 μl pooled RNA sample. Mix thoroughly.
- RT-qPCR: Use 5 μl of the pooled RNA mixture for the RT-qPCR assay. It is critical to ensure that the volume of RNA per reaction is the same as in individual tests to maintain sensitivity [53]. The individual tests and pooled tests should be run on the same plate under uniform conditions.
- Interpretation: Similar to specimen pooling. A positive pool requires retesting of the individual RNA elutes (which are already available) to pinpoint the positive sample(s).
Workflow and Decision Diagrams
Pooled Testing Strategy Selection Workflow
The following diagram outlines a logical decision process for selecting and implementing a pooling strategy in a wildlife surveillance research context.
Diagram 1: Pooling Strategy Workflow
The Scientist's Toolkit
Table 4: Essential Research Reagent Solutions for Pooled Testing Experiments
| Item | Function / Application |
|---|---|
| Viral Transport Media (VTM) | Preserves viral integrity in specimens during collection and transport [51]. |
| Nucleic Acid Extraction Kit | For isolating RNA from individual specimens or pooled specimens (e.g., Huwel, Qiagen kits) [51] [53]. |
| RT-qPCR Master Mix | A one-step mix containing reverse transcriptase and DNA polymerase for direct amplification of RNA targets [51] [53]. |
| Pathogen-Specific Primers/Probes | Oligonucleotides designed to specifically amplify and detect the target pathogen's genetic material (e.g., E gene, RdRP gene for SARS-CoV-2) [51] [53]. |
| DNase I Enzyme | For removing contaminating genomic DNA from RNA preparations to prevent false positives in PCR [54]. |
| RNA Cleanup Kit / Columns | For purifying and concentrating RNA after pooling or to remove inhibitors, improving downstream performance [54]. |
| Positive Control Template | RNA of known concentration from the target pathogen, essential for validating assay sensitivity and determining the limit of detection [52]. |
Evaluating Different Nucleic Acid Amplification Methods in a Pooled Context
Troubleshooting Guides
FAQ: Addressing Common Pooled NAAT Challenges
1. Why did my pooled test produce a false negative result?
False negatives in pooled testing primarily occur due to specimen dilution, which reduces the assay's analytical sensitivity [4]. When samples from multiple individuals are combined, the viral concentration from a single positive specimen is diluted below the assay's limit of detection (LoD). One study reported that Positive Percent Agreement (PPA) for pooled testing versus individual testing ranged from 71.7% to 82.6% for pools of 8, and 82.9% to 100% for pools of 4 [56]. This dilution effect is more pronounced when positive samples have high cycle threshold (Ct) values, indicating lower viral loads.
2. How does pool size affect test performance?
Pool size directly impacts test sensitivity and efficiency. Larger pools (e.g., 8 samples) conserve more reagents but significantly increase the risk of false negatives due to greater dilution [4]. Smaller pools (e.g., 4 samples) offer better sensitivity but with reduced resource savings. The optimal pool size depends on disease prevalence in your population—lower prevalence allows for larger pools, while higher prevalence requires smaller pools to avoid frequent retesting of positive pools [4] [56].
3. What are the key logistical challenges with sample pooling?
Pooling introduces several logistical challenges:
- Manual Processing: Most laboratories lack automated infrastructure for pooling, requiring manual aliquoting which increases hands-on time, risk of specimen mix-up, and cross-contamination [4].
- Turnaround Time: While negative results are reported faster, positive results have longer turnaround times due to the required second-stage individual testing [4].
- Supply Consumption: Pooling conserves testing reagents but does not save on collection kits, swabs, or plastic consumables that may also face supply constraints [4].
4. How should we validate a pooled testing strategy for our laboratory?
The FDA requires laboratories to conduct their own population-specific validation studies demonstrating minimal loss of analytical sensitivity when moving from individual to pool testing [4]. This validation should:
- Use relevant patient populations (symptomatic vs. asymptomatic)
- Test each assay independently if using multiple platforms
- Establish performance characteristics for your chosen pool size
- Evaluate the effect of dilution on your assay's limit of detection
Troubleshooting Common Experimental Issues
| Problem | Possible Causes | Solutions |
|---|---|---|
| Low Sensitivity/High False Negatives | Pool size too large; Samples with high Ct values; Assay with narrow dynamic range | Reduce pool size (e.g., from 8 to 4); Validate with known weak positives; Choose assay with high sensitivity [56] |
| Inconsistent Results Between Runs | Pipetting errors during pooling; Cross-contamination; Improper mixing | Implement automated liquid handlers; Use clean technique; Ensure thorough vortexing before aliquoting [4] |
| Long Turnaround Times for Positive Results | High prevalence leading to frequent positive pools; Manual retesting process | Monitor prevalence and adjust pool size; Implement efficient workflow for second-stage testing [4] |
| Inhibition of Amplification | Carryover of inhibitors from original specimens; Concentrated inhibitors in pool | Pre-treat samples to remove inhibitors; Dilute samples further; Include robust internal controls [57] |
Experimental Protocols & Data Analysis
Quantitative Comparison of Pooled NAAT Performance
Table 1: Performance Characteristics of Different NAAT Platforms in Pooled Testing [56]
| Testing Platform | Gene Target | Method | Pool Size | Positive Percent Agreement (PPA) | Key Considerations |
|---|---|---|---|---|---|
| Laboratory-Developed Test (LDT) | Envelope (E) gene | rRT-PCR | 8 | 71.7% - 82.6% | Requires laboratory development and validation |
| Panther Fusion | ORF1ab | rRT-PCR | 8 | 71.7% - 82.6% | Automated system; specific cutoff values needed |
| Panther Aptima | ORF1ab | TMA | 8 | Varies with RLU cutoff | Optimal cutoff (350 RLU) determined by ROC analysis |
Table 2: Impact of Pool Size on Testing Efficiency and Sensitivity [56]
| Pool Size | Dilution Factor | *Theoretical Maximum Efficiency | Observed PPA Range | Recommended Use Case |
|---|---|---|---|---|
| 3 | 1:3 | 3x | Data from in silico study | High prevalence populations (>10%) |
| 4 | 1:4 | 4x | 82.9% - 100% | Moderate prevalence (5-10%) |
| 5 | 1:5 | 5x | Data from in silico study | Moderate prevalence (5-10%) |
| 8 | 1:8 | 8x | 71.7% - 82.6% | Low prevalence populations (<2%) |
*Theoretical Maximum Efficiency assumes 0% prevalence; actual efficiency decreases as prevalence increases.
Detailed Methodology: Implementing Pooled NAAT
Sample Pooling Protocol:
Sample Collection and Transport: Collect specimens using standard methods (e.g., nasopharyngeal swabs in viral transport media). Maintain cold chain during transport to the laboratory [4].
Pool Construction:
- For a pool size of 4: Combine 500μL from each of 4 individual samples into a single tube, creating a total volume of 2mL (1:4 dilution) [56].
- For a pool size of 8: Combine 500μL from each of 8 individual samples, creating 4mL total volume (1:8 dilution) [56].
- Use calibrated pipettes and consider automated liquid handlers to minimize errors [4].
Nucleic Acid Extraction:
- Extract total nucleic acids from 500μL of the pooled sample using approved extraction systems (e.g., QIAsymphony with DSP Virus/Pathogen Midi Kit) [56].
- Elute into 60μL of AVE buffer or manufacturer-recommended elution buffer.
Amplification and Detection:
Result Interpretation and Reporting:
- If the pool tests negative: Report all individual specimens as negative.
- If the pool tests positive: Test each component specimen individually to identify the positive sample(s) [4].
- Maintain careful sample tracking throughout the process to ensure correct result reporting.
Visualizing Pooled Testing Workflows
Research Reagent Solutions
Table 3: Essential Materials for Pooled NAAT Implementation
| Reagent/Equipment | Function | Example Products/Notes |
|---|---|---|
| Automated Liquid Handler | Precise aliquoting for pool construction; reduces human error | QIAGEN QIAsymphony; critical for minimizing cross-contamination [4] |
| Nucleic Acid Extraction Kit | Isolation of viral RNA/DNA from pooled specimens | QIAsymphony DSP Virus/Pathogen Midi Kit; elution in 60μL AVE buffer [56] |
| NAAT Reagents & Platforms | Target amplification and detection | Panther Fusion SARS-CoV-2 Assay; Laboratory-developed tests (LDTs) [56] |
| Internal Control Reagents | Monitoring extraction and amplification efficiency | RNase P gene for human specimen adequacy [56] |
| Sample Collection Materials | Standardized specimen collection | Viral transport media; swabs; unaffected by pooling strategy [4] |
Frequently Asked Questions (FAQs)
FAQ 1: What is the primary cost-saving advantage of pooled testing over individual testing? The primary advantage is a significant reduction in the total number of tests required, which lowers reagent costs and laboratory workload, especially when disease prevalence is low. Instead of testing every sample individually, specimens are combined into pools. If a pool tests negative, all individuals within it are declared negative with a single test. Individual retesting is only needed for positive pools. Studies have demonstrated that optimized pooling strategies can reduce testing costs by nearly half compared to individual testing or traditional fixed-size pooling methods [31] [6].
FAQ 2: How does disease prevalence affect the decision to use pooled testing? Pooled testing is most efficient for diseases with low prevalence. The optimal pool size and the resulting cost savings are highly dependent on the infection rate within the population being tested.
- Low Prevalence (Ideal): When the positive rate is low (e.g., <5-10%), most pools will test negative, leading to massive savings. For example, one study found pooling effective for HIV, gonorrhea, and chlamydia, which had low to moderate prevalence [2].
- High Prevalence (Less Efficient): When the positive rate is high, a larger number of pools test positive, necessitating many follow-up tests. This can erode savings and even make individual testing more efficient. For instance, SARS-CoV-2's high prevalence at certain stages made pooled testing less universally applicable [2].
FAQ 3: What are the key methodological differences between simple and advanced pooled testing protocols? Protocols range from simple two-stage methods to complex multi-stage algorithms.
- Dorfman Testing: The simplest two-stage method. An initial pool is tested; if positive, each member of the pool is tested individually to identify the positive sample(s) [6].
- Advanced Algorithms: These include multi-stage hierarchical (halving) procedures, array testing, and informative methods. These sophisticated protocols use complex pooling patterns or risk-based groupings to further reduce the number of tests required compared to Dorfman testing [6] [31].
FAQ 4: How is the optimal pool size determined? Optimal pool size is determined by minimizing the total cost or maximizing efficiency, which is a function of disease prevalence and test accuracy. Statistical models are used to find the pool size that minimizes the expected number of tests per individual. For example, research on Tilapia lake virus (TiLV) found that pooling five serum samples was effective for farm-level surveillance [58]. Another cost-sensitive decision model uses granular computing to dynamically find the best grouping strategy, which can be more efficient than using a fixed pool size of 10 [31].
FAQ 5: Can pooled testing be used for serological surveys (antibody detection)? Yes. Pooled serum testing is a validated, cost-effective approach for large-scale serological surveillance. Research on TiLV demonstrated that an ELISA could effectively detect specific antibodies in pooled serum samples, making it suitable for monitoring immune status in wildlife and farmed animal populations [58].
Troubleshooting Guides
Issue 1: Loss of Sensitivity or Dilution Effects in Pooled Samples
Problem: Combining multiple samples can dilute the target analyte (e.g., pathogen RNA or antibodies) from a positive individual, potentially causing a false negative result [58].
Solution:
- Validate Pool Size: Conduct pilot studies to determine the maximum pool size that does not significantly reduce the sensitivity of your specific assay. For example, a study on fish sera found that pools of five maintained acceptable sensitivity unless only one seropositive sample was present, where dilution was a concern [58].
- Optimize Protocol Statistically: Use statistical models that incorporate the dilution effect into their regression frameworks to correct for potential biases in prevalence estimation [2].
- Employ Advanced Algorithms: Consider array testing or other advanced designs that are less susceptible to the dilution effect compared to simple master pool testing [6] [29].
Issue 2: Inefficient Pooling Strategy Leading to Higher-Than-Expected Costs
Problem: The chosen pooling strategy is not yielding the expected cost savings, potentially because the pool size is not optimized for the current disease prevalence.
Solution:
- Implement Informative Pooling: If individual risk-factor data (e.g., species, location, symptoms) is available, use "informative retesting" procedures. These methods group individuals with similar risks, which minimizes the number of positive pools and increases testing efficiency [6].
- Use Multi-Granularity Models: Adopt hierarchical grouping models that systematically explore different group allocations at multiple levels to find the most cost-effective configuration [31].
- Leverage Software Tools: Utilize available R packages and software applications designed for pooled testing optimization to determine the optimal pool size and strategy for your specific context [2] [17].
Issue 3: Complexity in Managing Data and Decoding Positive Pools
Problem: Complex pooling protocols, such as array testing or multi-stage hierarchical testing, generate complicated data that can be challenging to interpret and decode.
Solution:
- Apply Logical Analysis: For complex pooling designs like array testing, use a system of logical equations to unambiguously identify positive samples from the pooled test outcomes [29].
- Adopt Standardized Workflows: Implement and follow a clear, step-by-step experimental workflow for both sample processing and data analysis to reduce errors.
The following workflow outlines a generalized protocol for implementing and benchmarking a pooled testing strategy.
Issue 4: Estimating Population Prevalence from Pooled Results
Problem: Estimating the true disease prevalence from pooled test results is statistically more complex than from individual tests, especially with imperfect test accuracy.
Solution:
- Use Maximum Likelihood Estimation (MLE): Employ MLE methods, which are the standard approach for estimating prevalence from pooled data. These methods can account for the correlation between pooled responses and testing errors [2].
- Account for Test Error: Ensure your statistical model incorporates the known sensitivity and specificity of the diagnostic assay to correct for misclassification [2] [17].
- Leverage Retesting Data: For protocols that include retesting of individuals from positive pools, use estimation frameworks that incorporate all stages of testing data to improve the precision of the prevalence estimate [2].
Experimental Protocol & Benchmarking Data
Detailed Methodology: Benchmarking Pooled vs. Individual Testing
This protocol provides a framework for conducting a rigorous comparison.
1. Experimental Design:
- Sample Collection: Collect individual specimens (e.g., blood, tissue, swabs) from the target wildlife population. A minimum sample size should be determined by statistical power calculations.
- Reference Testing: First, test all samples individually using the gold-standard assay to establish the "true" individual status and calculate the true prevalence.
- Pool Creation: Physically combine aliquots of the individual samples to form pools based on the chosen protocol (e.g., Dorfman with an optimal size of 5). Ensure thorough homogenization.
2. Pooled Testing Execution:
- Blinded Testing: Perform the diagnostic test on the pooled samples in a blinded manner.
- Retesting Decoding: For any pool that tests positive, follow the specific decoding procedure of the protocol (e.g., in Dorfman testing, proceed to individually test all members of that pool).
3. Data Analysis and Benchmarking:
- Calculate Metrics: For the pooled strategy, calculate the total number of tests expended and the estimated prevalence.
- Compare to Individual Testing: Benchmark these metrics against the individual testing approach, where the total number of tests is simply the number of samples.
Quantitative Benchmarking Data
The following tables summarize key performance metrics from research studies.
Table 1: Cost Savings of Optimized Pooling Strategies [31]
| Scenario | Traditional Method (e.g., 10 per pool) | Optimized Pooling Strategy | Reduction in Testing Costs |
|---|---|---|---|
| Fixed population, low prevalence | Baseline | Cost-sensitive multi-granularity model | Nearly 50% |
| Fixed population, varying prevalence | Baseline | Hierarchical quotient space model | Significant cost savings |
Table 2: Performance of Different Pooling Algorithms (10 samples, 5% prevalence) [29]
| Pooling Algorithm | Expected Number of Tests per Individual | Reduction vs. Individual Testing | Expected Accuracy (Hits) |
|---|---|---|---|
| Individual Testing | 1.00 | 0% | ~99% (depends on test) |
| New Logical Algorithm | 0.37 | 63% | 99.16% - 99.90% |
| Other Published Algorithms | >0.37 | <63% | Similar or worse |
Table 3: Applied Example from Infectious Disease Data [2]
| Disease | Estimated Prevalence (p) | Suggested Use Case for Pooled Testing |
|---|---|---|
| HIV | Low | Ideal |
| Gonorrhea/Chlamydia | Moderate | Ideal |
| SARS-CoV-2 | Fairly High | Less ideal, highly dependent on current prevalence |
The Scientist's Toolkit: Research Reagent Solutions
Table 4: Essential Materials for Pooled Testing Experiments
| Item | Function in Experiment | Example / Specification |
|---|---|---|
| High-Sensitivity Assay Kits | Detects the target pathogen or antibody in diluted samples. Critical for minimizing false negatives. | qPCR assays for pathogen RNA; Indirect ELISA for antibodies (e.g., TiLV-S4 ELISA) [58] |
| Sample Collection Supplies | Collects and stores individual specimens without cross-contamination. | Sterile swabs, blood collection tubes, sterile urine cups |
| Pooling Platform & Consumables | Precisely combines liquid aliquots from individual samples into a single pool. | Automated liquid handler; multi-channel pipettes; sterile pipette tips; pool containers (e.g., 5mL tubes) |
| Statistical Software & Packages | Determines optimal pool size, analyzes pooled data, and estimates prevalence. | R packages (e.g., groupTesting [17], shiny apps [2]); MATLAB [31] |
| Laboratory Information Management System (LIMS) | Tracks sample identity through the pooling and testing process to avoid decoding errors. | Barcode system linking individual samples to their pool memberships |
Conclusion
Pooled testing represents a powerful tool for scalable and economically viable wildlife disease surveillance, particularly for pathogens with low prevalence. Success hinges on a methodical approach that integrates foundational ecological principles with sophisticated statistical optimization to determine ideal pool sizes and protocols. Rigorous validation is non-negotiable, as factors like pool size, assay type, and sample matrix directly impact diagnostic sensitivity. Future efforts should focus on developing and validating field-deployable rapid tests for wildlife, standardizing multi-granularity optimization models, and fostering interdisciplinary collaboration. By adopting these optimized pooled testing strategies, wildlife health professionals can significantly enhance global capacity for early disease detection, outbreak prevention, and the protection of both animal and human health in the face of emerging infectious threats.
References
- 1. Post Event Follow-Up/Troubleshooting [https://wslhpt.org/post-event-troubleshooting/]
- 2. Optimizing Disease Surveillance Through Pooled Testing ... [https://link.springer.com/article/10.1007/s13253-024-00646-6]
- 3. Evaluating the Diagnostic Efficacy of Using Pooled ... [https://www.mdpi.com/2076-0817/13/12/1133]
- 4. Pooled Testing: Guidance from the CAP's Microbiology ... [https://www.cap.org/covid-19/pooled-testing-guidance-from-cap-microbiology-committee]
- 5. Wildlife health investigations: needs, challenges and ... [https://pmc.ncbi.nlm.nih.gov/articles/PMC4228302/]
- 6. Pooled testing procedures for screening high volume ... [https://pmc.ncbi.nlm.nih.gov/articles/PMC3500568/]
- 7. Optimizing Pooled Testing for Estimating the Prevalence of ... [https://pubmed.ncbi.nlm.nih.gov/35975123/]
- 8. Pooled testing efficiency increases with test frequency - PMC [https://pmc.ncbi.nlm.nih.gov/articles/PMC8764680/]
- 9. A minimum data standard for wildlife disease research and ... [https://www.nature.com/articles/s41597-025-05332-x]
- 10. Standardizing Wildlife Disease Data for Global Health ... [https://globalbiodefense.com/2025/06/24/wildlife-disease-data-standard/]
- 11. A Review of Non-Invasive Sampling in Wildlife Disease ... [https://pmc.ncbi.nlm.nih.gov/articles/PMC9265025/]
- 12. Database of Global Data Sources for Biodiversity ... [https://www.speciesmonitoring.org/data-sources.html]
- 13. Hierarchical group testing for multiple infections - PMC [https://pmc.ncbi.nlm.nih.gov/articles/PMC5362369/]
- 14. Evaluating the Diagnostic Efficacy of Using Pooled Samples ... [https://pmc.ncbi.nlm.nih.gov/articles/PMC11679922/]
- 15. BAYESIAN GROUP TESTING WITH DILUTION EFFECTS [https://www.medrxiv.org/content/10.1101/2021.01.15.21249894v4.full-text]
- 16. A pooled testing system to rapidly identify cattle carrying ... [https://pmc.ncbi.nlm.nih.gov/articles/PMC9543338/]
- 17. Optimizing Pooled Testing for Estimating the Prevalence of ... [https://link.springer.com/article/10.1007/s13253-022-00511-4]
- 18. Dive into the deep end of pooled testing for COVID-19 [https://shea-online.org/dive-into-the-deep-end-of-pooled-testing-for-covid-19/]
- 19. Sample pooling as a strategy for community monitoring ... [https://www.nature.com/articles/s41598-021-82765-5]
- 20. Validation of SARS-CoV-2 pooled testing for surveillance ... [https://journals.plos.org/plosone/article?id=10.1371/journal.pone.0276729]
- 21. Common Problems In Clinical Sample Management And ... [https://genemod.net/blog/common-problems-in-clinical-sample-management-and-how-to-solve-them]
- 22. Pooling test samples: How and when it works. [https://chs.asu.edu/diagnostics-commons/blog/pooling-test-samples]
- 23. To pool or not to pool? Guidelines for pooling samples ... [https://pubmed.ncbi.nlm.nih.gov/31637760/]
- 24. Maximize Lab Efficiency with Sample Pooling [https://www.labguru.com/blog/maximize-lab-efficiency-with-sample-pooling]
- 25. Optimizing Pooled Testing for Estimating the Prevalence of ... [https://pmc.ncbi.nlm.nih.gov/articles/PMC9373899/]
- 26. Simulation modelling to estimate the herd-sensitivity of ... [https://www.sciencedirect.com/science/article/abs/pii/S0167587721000386]
- 27. Comparison of methods for estimation of individual-level ... [https://www.sciencedirect.com/science/article/abs/pii/S0167587798001317]
- 28. Therapeutic Antibody Drug Discovery Planning [https://www.genscript.com/therapeutic-antibody-drug-discovery-planning.html]
- 29. Logical analysis of sample pooling for qualitative analytical ... [https://www.sciencedirect.com/science/article/pii/S0169743923001521]
- 30. Experimental design: Learn how to solve problems like a ... [https://www.labster.com/blog/experimental-design-learn-how-to-solve-problems-like-a-real-scientist]
- 31. A cost-sensitive decision model for efficient pooled testing ... [https://www.nature.com/articles/s41598-024-68930-6]
- 32. Multi-granularity feature selection on cost-sensitive data ... [https://www.sciencedirect.com/science/article/abs/pii/S0950705118302508]
- 33. Methodological Considerations for Optimizing and Validating ... [https://pmc.ncbi.nlm.nih.gov/articles/PMC6054129/]
- 34. Evaluation of Fecal Sample Pooling for Real-Time RT-PCR ... [https://pmc.ncbi.nlm.nih.gov/articles/PMC11599033/]
- 35. Collection and Submission of Laboratory Samples from ... [https://www.merckvetmanual.com/clinical-pathology-and-procedures/collection-and-submission-of-laboratory-samples/collection-and-submission-of-laboratory-samples-from-animals]
- 36. Health Monitoring | Sample Collection & Preparation [https://www.idexxbioanalytics.com/health-monitoring/sample-collection-preparation]
- 37. PRE-ANALYTICAL ERRORS: WHAT ARE THEY AND ... [https://battlab.com/pre-analytical-errors-what-are-they-and-how-to-avoid-them/]
- 38. Taking a step back from testing: Preanalytical considerations ... [https://pmc.ncbi.nlm.nih.gov/articles/PMC9729171/]
- 39. The impact of environmental factors on external and ... [https://www.sciencedirect.com/science/article/abs/pii/S0009912022002429]
- 40. Experimental and Mathematical Optimization of a Pooling ... [https://pmc.ncbi.nlm.nih.gov/articles/PMC8032915/]
- 41. Limit of Blank, Limit of Detection and Limit of Quantitation [https://pmc.ncbi.nlm.nih.gov/articles/PMC2556583/]
- 42. Intercoder Reliability Techniques: Percent Agreement [https://methods.sagepub.com/ency/edvol/the-sage-encyclopedia-of-communication-research-methods/chpt/intercoder-reliability-techniques-percent-agreement]
- 43. Interrater reliability: the kappa statistic - PMC [https://pmc.ncbi.nlm.nih.gov/articles/PMC3900052/]
- 44. What is meant by the limit of detection and quantification (LOD ... [https://mpl.loesungsfabrik.de/en/english-blog/method-validation/limit-of-detection-quantifcation]
- 45. Factors affecting sensitivity and specificity of pooled- ... [https://pubmed.ncbi.nlm.nih.gov/16427711/]
- 46. A methodology for deriving the sensitivity of pooled testing, based on viral load progression and pooling dilution | Journal of Translational Medicine | Full Text [https://translational-medicine.biomedcentral.com/articles/10.1186/s12967-019-1992-2]
- 47. "Sensitivity" and "specificity" reconsidered: the meaning of these terms in analytical and diagnostic settings - PubMed [https://pubmed.ncbi.nlm.nih.gov/8992938/]
- 48. Analytical Specificity - an overview | ScienceDirect Topics [https://www.sciencedirect.com/topics/agricultural-and-biological-sciences/analytical-specificity]
- 49. Sensitivity and specificity [https://en.wikipedia.org/wiki/Sensitivity_and_specificity]
- 50. Sample pooling methods for efficient pathogen screening [https://journals.plos.org/plosone/article?id=10.1371/journal.pone.0236849]
- 51. Effectiveness of sample pooling strategies for diagnosis of... [https://pmc.ncbi.nlm.nih.gov/articles/PMC9870240/]
- 52. Sample pooling as a strategy for community monitoring for... [https://www.nature.com/articles/s41598-021-82765-5?error=cookies_not_supported]
- 53. sample reverse transcriptase real time PCR... | PLOS One Pooled RNA [https://journals.plos.org/plosone/article?id=10.1371/journal.pone.0236859]
- 54. Troubleshooting Guide for RNA Cleanup [https://www.neb.com/en-us/tools-and-resources/troubleshooting-guides/troubleshooting-guide-for-rna-cleanup?srsltid=AfmBOoqDYQyBHsBG6jp2RdDUvBX_dujuNMUGIPx3HPv9_cvTyLPgiX9t]
- 55. RNA Sample Collection, Protection, and Isolation Support ... [https://www.thermofisher.com/ht/en/home/technical-resources/technical-reference-library/nucleic-acid-purification-analysis-support-center/rna-sample-collection-protection-isolation-support/rna-sample-collection-protection-isolation-support-troubleshooting.html]
- 56. Performance of Nucleic Acid Amplification Tests ... [https://pmc.ncbi.nlm.nih.gov/articles/PMC7774575/]
- 57. How to Troubleshoot Sequencing Preparation Errors (NGS ... [https://www.cd-genomics.com/resource-sequencing-preparation-troubleshooting.html]
- 58. Assessment and Performance of Pooled Serum Samples ... [https://pmc.ncbi.nlm.nih.gov/articles/PMC12300263/]