Navigating Coproantigen ELISA: Addressing Diagnostic Limitations in Parasitic Disease Research
This article provides a comprehensive analysis of coproantigen ELISA, a critical diagnostic technique for detecting parasitic infections through stool antigen detection.
Navigating Coproantigen ELISA: Addressing Diagnostic Limitations in Parasitic Disease Research
Abstract
This article provides a comprehensive analysis of coproantigen ELISA, a critical diagnostic technique for detecting parasitic infections through stool antigen detection. Targeting researchers, scientists, and drug development professionals, we explore the fundamental principles of coproantigen tests, their methodological applications across various parasites including Fasciola hepatica, Taenia solium, and intestinal nematodes, systematic troubleshooting approaches for assay optimization, and rigorous validation through comparative studies with serological tests and fecal egg counts. The content synthesizes current research to address key limitations including sensitivity constraints, specificity challenges, and pre-analytical variables, while proposing future directions for enhancing diagnostic accuracy in biomedical and clinical research settings.
Understanding Coproantigen ELISA: Principles, Mechanisms, and Diagnostic Advantages
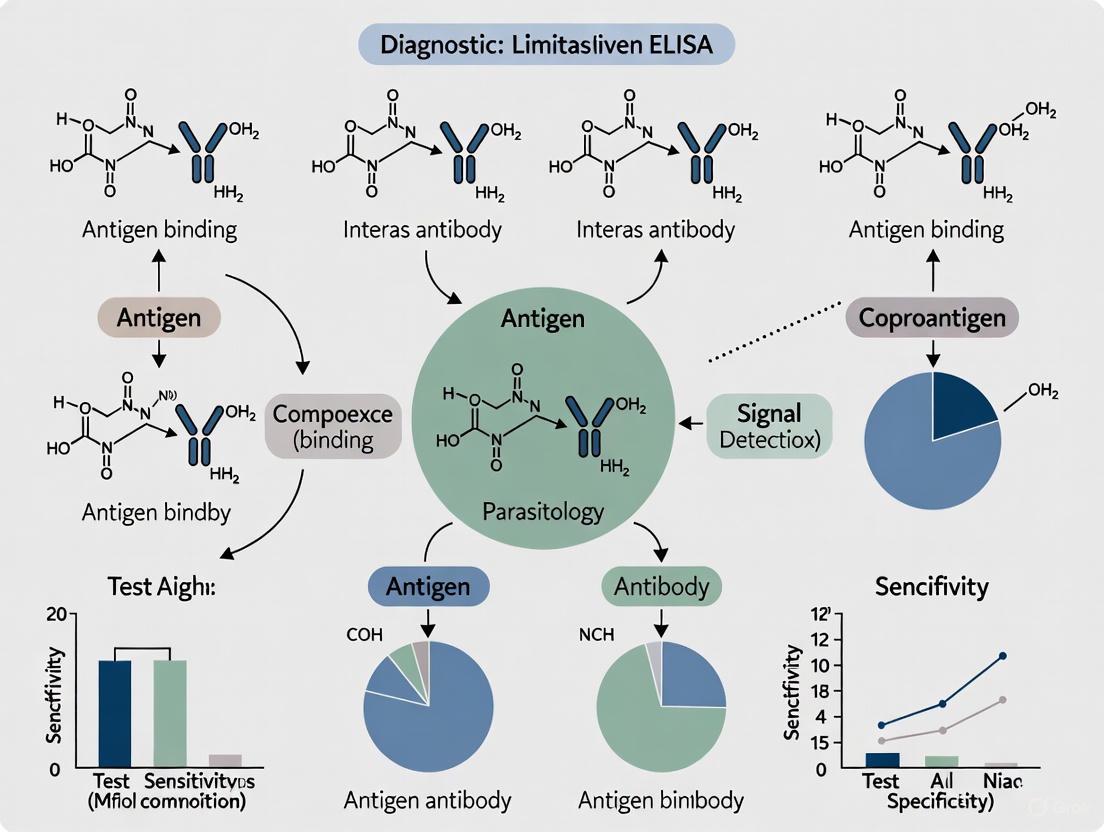
Coproantigen Enzyme-Linked Immunosorbent Assay (ELISA) represents a critical advancement in parasitology diagnostics, enabling the detection of specific parasite antigens within fecal samples. This technique belongs to the sandwich ELISA format, known for its high specificity and suitability for analyzing complex, crude samples without requiring purification prior to measurement [1]. The fundamental principle relies on the specific binding of antibodies to parasite-derived biomarkers, facilitating the detection of active infections through non-invasive means.
The assay operates through a precise antibody-antigen interaction system, where the capture and detection antibodies bind to distinct, non-overlapping epitopes on the target antigen [1]. This dual-antibody system provides the specificity required to differentiate between parasite-specific biomarkers and other components in complex fecal matrices. The detection methodology typically employs enzyme-labeled antibodies that catalyze a colorimetric, fluorescent, or chemiluminescent reaction, producing a measurable signal proportional to the antigen concentration [1] [2].
Technical Principles and Workflow
Core Mechanism of Sandwich ELISA
The coproantigen ELISA operates on the sandwich assay principle, which requires carefully matched antibody pairs specific to different epitopes of the target parasite antigen [1]. This configuration provides exceptional analytical specificity because the target molecule must be recognized by two separate antibodies simultaneously, significantly reducing false positives from non-specific binding. The process begins with a capture antibody immobilized on a solid surface, which binds the target antigen from the sample solution. A second enzyme-conjugated detection antibody then binds to a different site on the captured antigen, completing the "sandwich" structure [1].
The detection system typically employs enzymes such as Horseradish Peroxidase (HRP) or Alkaline Phosphatase (AP), which convert substrates into measurable products [1]. The selection of substrate depends on the required assay sensitivity and available detection instrumentation, with options including colorimetric (e.g., TMB, ABTS), chemiluminescent, or fluorescent detection methods [1] [2]. The intensity of the generated signal is directly proportional to the amount of antigen present in the sample, allowing for both qualitative detection and quantitative measurement when compared against a standard curve [1].
Visual Workflow: Sandwich ELISA Procedure
The following diagram illustrates the step-by-step process of a sandwich coproantigen ELISA:
Detailed Procedural Steps
Step 1: Plate Coating and Sample Addition – The process begins with polystyrene microplate wells pre-coated with capture antibodies specific to the target parasite antigen [2]. Fecal samples, appropriately processed and diluted, are added to these wells. During incubation, any target antigens present in the sample bind specifically to the immobilized capture antibodies [2].
Step 2: Washing – The plate undergoes thorough washing to remove unbound materials, including fecal debris, non-specific proteins, and other sample components [2]. This critical step minimizes background signal by eliminating materials that could contribute to non-specific binding in subsequent steps.
Step 3: Detection Antibody Addition – An enzyme-conjugated detection antibody, specific to a different epitope on the target antigen, is added to the wells [2]. This antibody forms the second part of the "sandwich" by binding to the captured antigen. The enzyme conjugate (typically HRP or AP) serves as the signal-generating component.
Step 4: Additional Washing – Another washing step removes any unbound detection antibodies, ensuring that only specifically bound antibodies remain [2]. This further reduces potential background signal and improves assay precision.
Step 5: Substrate Addition – A substrate solution specific to the conjugated enzyme is added [2]. For HRP conjugates, Tetramethylbenzidine (TMB) is commonly used, producing a blue color when converted. The enzyme catalyzes the conversion of the substrate to a detectable product.
Step 6: Signal Measurement and Analysis – The reaction is stopped at an optimal time, and the developed color is measured spectrophotometrically at the appropriate wavelength [2]. The optical density values are compared against a standard curve of known antigen concentrations to quantify the target biomarker in the sample [1].
Essential Research Reagents and Equipment
Successful implementation of coproantigen ELISA requires specific materials and instrumentation. The following table summarizes the critical components and their functions in the assay workflow:
| Component Category | Specific Examples | Function in Assay |
|---|---|---|
| Solid Support | 96-well or 384-well polystyrene microplates [1] [2] | Provides surface for antibody immobilization and subsequent binding reactions |
| Capture System | Coated capture antibody [2] | Specifically binds target antigen from sample |
| Detection System | Enzyme-conjugated detection antibody [2] | Binds to captured antigen; enzyme generates measurable signal |
| Signal Generation | HRP or AP enzyme substrates (TMB, ABTS) [1] | Enzyme-converted to colored, fluorescent, or luminescent product |
| Separation System | Wash buffers (often with Tween-20) [3] | Removes unbound materials between steps to reduce background |
| Blocking Agents | BSA, casein, or gelatin [3] | Covers unused binding sites to prevent non-specific antibody attachment |
| Measurement | Microplate reader [2] | Precisely measures signal intensity (absorbance, fluorescence, luminescence) |
Troubleshooting Guide: Common Experimental Issues
No Signal or Weak Signal Problems
Inadequate signal represents one of the most frequent challenges in coproantigen ELISA. The following table outlines primary causes and solutions for this issue:
| Possible Cause | Recommended Solution |
|---|---|
| Reagents not at room temperature | Allow all reagents to equilibrate at room temperature for 15-20 minutes before starting assay [4]. |
| Incorrect reagent storage | Verify storage conditions (typically 2-8°C for most components) and check expiration dates [4]. |
| Improper washing technique | Ensure thorough washing; invert plate on absorbent tissue and tap forcefully to remove residual fluid [4]. |
| Insufficient antibody concentration | Increase concentration of primary or secondary antibody; consider overnight incubation at 4°C [3]. |
| Standard degradation | Reconstitute fresh standard; verify preparation method and avoid repeated freeze-thaw cycles [3]. |
| Sample antigen below detection limit | Concentrate sample or reduce dilution factor; include known positive control to verify detection capability [3]. |
| Sodium azide in buffers | Use azide-free buffers as sodium azide inhibits HRP activity [3]. |
High Background and Signal Issues
Excessive background signal can compromise assay sensitivity and specificity. The following troubleshooting table addresses this concern:
| Possible Cause | Recommended Solution |
|---|---|
| Insufficient washing | Increase wash cycles and duration; incorporate 30-second soak steps between washes [4]. |
| Inadequate blocking | Extend blocking time and/or increase concentration of blocking agent (BSA, casein, gelatin) [3]. |
| Excessive antibody concentration | Titrate primary and secondary antibodies to determine optimal concentration [3]. |
| Substrate exposure to light | Protect substrate from light during storage and use; limit light exposure during development step [4]. |
| Extended incubation times | Strictly adhere to recommended incubation periods; excessive time increases non-specific binding [4]. |
| Enzyme conjugate too concentrated | Check manufacturer's recommended dilution and titrate if necessary [3]. |
| Plate sealers reused or contaminated | Use fresh plate sealers for each incubation step to prevent cross-contamination [4]. |
Data Quality and Reproducibility Issues
Inconsistent results between replicates or assays represent significant challenges in research settings. The following table addresses these concerns:
| Possible Cause | Recommended Solution |
|---|---|
| Inconsistent washing | Standardize washing protocol across all wells; ensure equal aspiration and dispensing [4]. |
| Uneven coating | Mix coating solution thoroughly; ensure equal volume in each well; use plate sealer during coating step [3]. |
| Temperature fluctuations | Maintain consistent incubation temperature; avoid areas with environmental variations [4]. |
| Evaporation effects | Use proper plate sealers during all incubations; avoid stacking plates [4]. |
| Pipetting inaccuracies | Calibrate pipettes regularly; use proper pipetting technique; ensure consistent solution dispensing [3]. |
| Bubble formation | Centrifuge plate before reading to eliminate bubbles that affect optical measurements [3]. |
| Variable sample preparation | Use consistent sample processing methods; limit freeze-thaw cycles; maintain consistent dilution schemes [3]. |
Frequently Asked Questions (FAQs)
Q1: What are the critical validation parameters for establishing a new coproantigen ELISA? A robust coproantigen ELISA requires validation of several parameters: specificity (cross-reactivity testing with related parasites), sensitivity (limit of detection and quantification), precision (intra-assay and inter-assay variability), accuracy (spike-and-recovery experiments), and sample stability (effect of storage conditions on antigen integrity).
Q2: How can we minimize cross-reactivity in coproantigen detection? Cross-reactivity can be reduced through several approaches: using monoclonal antibodies with well-defined epitope specificity, optimizing wash buffer stringency (salt concentration, detergent percentage), employing competitive inhibition assays with related antigens, and incorporating specific blocking agents relevant to fecal components.
Q3: What sample processing methods improve coproantigen detection in fecal samples? Effective processing includes: homogenization in appropriate extraction buffers, centrifugation to remove particulate matter, filtration to eliminate debris, and addition of protease inhibitors to prevent antigen degradation. The optimal method varies by target antigen and should be validated for each application.
Q4: How does the sandwich ELISA format provide advantages over other immunoassay formats for coproantigen detection? The sandwich format offers superior specificity for complex samples like feces because it requires dual antibody recognition, effectively pre-concentrating the target antigen from the crude matrix while minimizing false positives. It also provides a broad dynamic range for quantification and doesn't require sample purification before analysis [1].
Q5: What quality controls are essential for reliable coproantigen ELISA results? Essential controls include: known positive and negative samples, calibration standards in matrix, blank wells (no sample), and internal controls for sample interference. For quantitative assays, a standard curve with appropriate curve-fitting model should be included on every plate.
Q6: How can we address hook effects (high-dose effects) in coproantigen ELISA? Hook effects, where extremely high antigen concentrations yield falsely low signals, can be addressed by running samples at multiple dilutions, using antibodies with higher affinity, or modifying the assay format to increase the dynamic range. If hook effects are suspected, sample dilution should produce proportional results.
Coproantigen Enzyme-Linked Immunosorbent Assay (ELISA) represents a significant advancement in parasitological diagnostics, addressing critical limitations of traditional methods. This technique detects specific parasite antigens present in host faeces, providing two fundamental advantages: the capacity for early detection of pre-patent infections and the ability to confirm current, active infection status [5] [6]. Unlike antibody detection methods that indicate exposure history or coproscopic techniques that rely on egg shedding, coproantigen ELISA directly targets molecules shed by developing and mature parasites, offering a more accurate picture of active infection dynamics. This makes it particularly valuable for monitoring treatment efficacy and implementing timely control strategies [7] [6].
Technical FAQs & Troubleshooting Guide
FAQ: How does coproantigen ELISA enable early detection compared to faecal egg count? Coproantigen ELISA detects metabolic antigens released by late immature and adult flukes into the bile and faeces before egg laying commences. In contrast, faecal egg sedimentation tests can only identify infection after flukes reach sexual maturity and begin laying eggs, which occurs at 8–12 weeks post-infection for Fasciola hepatica. This provides a critical diagnostic window of several weeks where infection can be identified and treated before parasite reproduction and further environmental contamination [6].
FAQ: Why does coproantigen ELISA indicate current infection while antibody ELISA does not? Antibody-based ELISAs detect the host's immune response to the parasite, which can persist long after the infection has been cleared by successful treatment. Coproantigen ELISA directly detects antigens sourced from the living parasite. Consequently, these antigens disappear rapidly following effective treatment, allowing the test to differentiate between current and past infections, which is crucial in endemic areas [6].
Troubleshooting Guide: Common Coproantigen ELISA Issues
Table 1: Common Technical Issues and Solutions in Coproantigen ELISA
| Problem | Possible Cause | Solution |
|---|---|---|
| High Background | Insufficient washing leaving non-specific bindings [8] [9]. | Increase wash cycles; ensure thorough aspiration; add a 30-second soak step between washes [8] [9]. |
| Weak or No Signal | Reagents added incorrectly, degraded substrate, or inadequate incubation [8] [9]. | Confirm reagent preparation and order; use fresh substrate; validate incubation time and temperature [8] [9]. |
| Poor Replicate Data (High CV%) | Inconsistent pipetting or washing techniques [10] [9]. | Calibrate pipettes; establish a Standard Operating Procedure (SOP) for all steps; ensure thorough mixing of reagents [10]. |
| Poor Standard Curve | Inaccurate serial dilutions of standards [10] [9]. | Check pipette calibration and calculations; ensure thorough mixing during dilution series preparation [10]. |
| Edge Effects | Temperature variation across the plate during incubation [9]. | Use a thermostatic incubator; seal the plate completely; avoid stacking plates [9]. |
Experimental Protocols & Workflows
Protocol: Field Evaluation of Diagnostic Accuracy
The following protocol, adapted from a study evaluating the enhanced MM3-COPRO ELISA, outlines a robust method for validating coproantigen test performance under field conditions [6].
- Sample Collection: Collect fresh faecal samples directly from the rectum of animals. Refrigerate samples (4°C–8°C) and analyze within a few days to maintain antigen integrity [6].
- Establishing a Cut-Off Value:
- Select a "parasite-free" population of animals from flocks with no history of infection, confirmed by serology and necropsy.
- Run the coproantigen ELISA on these known negative samples.
- Calculate the cut-off value for positivity. One method involves using a bootstrap resampling method to estimate the statistical distribution without assumptions about the underlying data [6].
- Testing "Infected" Flocks: Collect and test samples from flocks with a known history of infection and high seroprevalence.
- Comparative Analysis: Process all samples in parallel using the coproantigen ELISA and a reference test (e.g., faecal egg sedimentation). Note that the sedimentation test has limited sensitivity, so coproantigen-positive but sedimentation-negative samples may represent true infections [6].
- Post-Treatment Validation: To confirm active infection in ELISA-positive animals, administer a known effective flukicide (e.g., triclabendazole) and re-test faecal samples 21 days post-treatment. The disappearance of coproantigen confirms both the diagnosis and treatment efficacy [6].
Protocol: Calculating Results and Diagnostic Performance
For quantitative in-house ELISAs, accurate data analysis is critical. The workflow below ensures reliable results and assessment of the assay's diagnostic power [11] [12].
Figure 1: Workflow for ELISA Data Analysis and Diagnostic Validation
Steps for Quantitative Analysis:
- Read and Adjust Data: Read the Optical Density (OD) at the appropriate wavelength (e.g., 450 nm). Subtract the OD of the blank (zero standard) well from all other readings for background correction [11].
- Generate Standard Curve: Prepare a serial dilution of the known standard. Plot the adjusted OD values against the standard concentrations. Use an appropriate curve-fitting model, such as the 4-Parameter Logistic (4PL) model, which is highly accurate for the sigmoidal curves typical of ELISA [11].
- Interpolate Concentrations: Use the fitted standard curve equation to calculate the concentration of unknown samples from their adjusted OD values. Multiply the result by the sample's dilution factor to obtain the final concentration [11].
- Quality Control: Ensure the Coefficient of Variation (CV%) between replicate wells is <10-15%. The standard curve should have a high coefficient of determination (R² > 0.98) [11].
Steps for Qualitative Analysis & Validation:
- Set Cut-Off: Determine the cut-off value for a positive result. This can be statistically derived (e.g., Mean OD of negative controls + 2 × Standard Deviation) or based on kit specifications [11].
- Perform ROC Analysis: To evaluate the assay's diagnostic performance, use Receiver Operating Characteristics (ROC) analysis. This calculates parameters like sensitivity and specificity and helps identify the optimal cut-off point (Youden index) by plotting sensitivity against 1-specificity [13]. An Area-Under-Curve (AUC) of >0.99 indicates high diagnostic accuracy [13].
Performance Data & Comparative Analysis
Table 2: Comparative Diagnostic Performance of Coproantigen ELISA
| Parasite & Host | Reference Test | Coproantigen ELISA Sensitivity | Coproantigen ELISA Specificity | Key Advantage Demonstrated |
|---|---|---|---|---|
| Fasciola hepatica in Sheep [6] | Faecal Sedimentation | Higher than sedimentation (detected 100% of sedimentation-positive and 12% of sedimentation-negative samples) [6] | 100% (coproantigens disappeared post-treatment) [6] | Early Detection & Current Infection |
| Cryptosporidium spp. in Farm Animals [12] | Modified Ziehl-Neelsen (MZN) Microscopy | 98% [12] | 100% [12] | High Sensitivity & Specificity |
| Ascaridia galli in Chickens [13] | Worm Burden (Necropsy) | 93% [13] | 100% [13] | Non-invasive Qualitative Diagnosis |
| Heterakis gallinarum in Chickens [13] | Worm Burden (Necropsy) | 85% [13] | 92% [13] | Cross-reactive Detection of related species |
Table 3: Coproantigen ELISA vs. Traditional Diagnostic Methods
| Feature | Coproantigen ELISA | Faecal Egg Count / Microscopy | Antibody (Serology) ELISA |
|---|---|---|---|
| Detects Pre-Patent Infection | Yes [6] | No [6] | Yes |
| Indicates Current Infection | Yes (antigens disappear post-treatment) [6] | Yes (during patent period) | No (antibodies persist post-treatment) [6] |
| Time to Diagnosis | ~2.5 hours for 40 samples [6] | Time-consuming, especially for many samples [6] | Varies |
| Technical Skill Required | Moderate (standardized protocol) | High (for egg identification) [12] | Moderate |
The Scientist's Toolkit: Essential Research Reagents & Materials
Table 4: Key Reagents and Materials for Coproantigen Research
| Item | Function / Description | Example / Note |
|---|---|---|
| Capture Antibody | Binds specifically to the target coproantigen in the faecal sample. The core of assay specificity. | e.g., Anti-Fasciola MM3 monoclonal antibody; Anti-Cryptosporidium IgG PAbs [12] [6]. |
| Detection Antibody | Binds to the captured antigen; is conjugated to an enzyme (e.g., HRP) for signal generation. | Conjugated with Horseradish Peroxidase (HRP) [12]. |
| Coated Microplate | Solid phase to which the capture antibody is immobilized. | Use dedicated ELISA plates, not tissue culture plates [8] [9]. |
| Enzyme Substrate | Converted by the conjugated enzyme into a colored product, measured as OD. | e.g., TMB (3,3',5,5'-Tetramethylbenzidine). Protect from light [9]. |
| Blocking Buffer | Prevents non-specific binding of other proteins to the plate after coating. | e.g., BSA, non-fat dry milk, or casein [10]. |
| Wash Buffer | Removes unbound materials from the plate wells, reducing background. | Typically PBS or Tris-based with a mild detergent (e.g., Tween-20) [8]. |
| Stop Solution | Halts the enzyme-substrate reaction, stabilizing the signal for reading. | e.g., 1M Sulfuric Acid [11]. |
| Data Analysis Software | For fitting standard curves and interpolating sample concentrations. | GraphPad Prism, Boster's Online ELISA Tool, MyAssays [11]. |
Frequently Asked Questions (FAQs)
Q1: What is the primary diagnostic advantage of a coproantigen ELISA over traditional methods like faecal egg count? Coproantigen ELISA detects specific parasite antigens in stool, often during the early, pre-patent stage of infection before eggs are produced. This provides higher sensitivity than faecal egg sedimentation tests, which rely on visual identification of eggs and can miss low-worm-burden or pre-patent infections [6] [5]. Furthermore, coproantigen levels correlate with active infection and can be used to monitor drug efficacy, whereas antibody-based serological tests cannot distinguish between past and current infections [6].
Q2: My coproantigen ELISA results are inconsistent between runs. What could be the cause? Poor assay-to-assay reproducibility is often linked to procedural variations [4] [8]. Key factors to stabilize include:
- Incubation Temperature and Time: Adhere strictly to recommended incubation temperatures and times; avoid areas with environmental fluctuations [8].
- Washing Consistency: Ensure a consistent and thorough washing procedure. If using an automated plate washer, check that all ports are clean and unobstructed [8].
- Reagent Preparation: Always use fresh buffers and check calculations for standard curve dilutions. Do not reuse plate sealers or reagent reservoirs, as residual HRP enzyme can cause high background [4] [8].
Q3: How can I confirm that a positive coproantigen test indicates an active infection and not just the presence of residual antigen after successful treatment? The disappearance of coproantigens after anthelmintic treatment confirms their association with active infection. For example, in Fasciola hepatica, coproantigens become undetectable in faeces after successful treatment with triclabendazole [6]. A coproantigen reduction test (CRT), which measures the decrease in antigen levels post-treatment, is a reliable method for confirming cure and assessing drug efficacy [7].
Q4: What are the main limitations of coproantigen ELISAs, and how can they be mitigated? A key limitation is the potential for false negatives, particularly in infections with very low worm burdens or during the earliest stages of invasion [7]. This can be mitigated by using a multi-modal diagnostic approach, combining coproantigen ELISA with PCR and faecal egg counting to improve overall diagnostic sensitivity and provide corroborating evidence [7]. Furthermore, a lack of species-specific antigens in some test formats can limit precise parasite identification [14].
Troubleshooting Guide: Coproantigen ELISA
| Problem | Possible Cause | Recommended Solution |
|---|---|---|
| Weak or No Signal | Reagents not at room temperature [4]. | Allow all reagents to sit for 15-20 minutes at room temperature before starting the assay [4]. |
| Incorrect reagent storage or expired reagents [4]. | Double-check storage conditions (typically 2-8°C); confirm all reagents are within their expiration dates [4]. | |
| Capture antibody did not bind properly to the plate [8]. | Ensure you are using an ELISA plate (not a tissue culture plate) and that the coating antibody was diluted in the correct buffer (e.g., PBS) [8]. | |
| High Background | Insufficient washing, leaving unbound enzyme conjugate in wells [4] [8]. | Follow the recommended washing procedure meticulously. Increase the number of washes or add a 30-second soak step between washes [8]. |
| Substrate exposure to light prior to use [4]. | Store substrate in the dark and limit its exposure to light during the assay procedure [4]. | |
| Longer incubation times than recommended [4]. | Adhere strictly to the incubation times specified in the protocol [4]. | |
| Poor Replicate Data | Uneven coating of the plate or poor plate quality [8]. | Ensure consistent coating and blocking volumes. Use a high-quality ELISA plate and confirm the dilution of the capture antibody is in PBS without additional protein [8]. |
| Plate sealers were reused or not used [4] [8]. | Use a fresh plate sealer for each incubation step to prevent well-to-well contamination and evaporation [4] [8]. | |
| Poor Standard Curve | Incorrect serial dilution of the standard [4] [8]. | Check pipetting technique and double-check dilution calculations. Prepare a new standard curve [4] [8]. |
| Capture antibody did not bind to the plate [4]. | Verify plate type and coating procedure as above [4]. |
Experimental Workflow & Visualization
The following diagram illustrates a generalized proteomics-based workflow for the discovery and validation of novel coproantigen targets, as applied to parasites like Strongyloides stercoralis [14].
Coproantigen Discovery Workflow
This computational approach, termed "reverse vaccinology" for vaccine development, can be powerfully applied to diagnostic antigen discovery [14]. It leverages publicly available genomic, transcriptomic, and proteomic data to systematically identify proteins that are: expressed in parasitic life stages, present in excretory/secretory (E/S) products, phylogenetically specific to the target parasite, and predicted to be antigenic [14]. This method reduces reliance on parasite culture and can reveal diagnostically relevant antigens that are difficult to purify biochemically [14].
Research Reagent Solutions
The table below lists key reagents and materials essential for developing and running coproantigen detection assays.
| Reagent / Material | Function in Assay | Key Considerations |
|---|---|---|
| Capture Antibody | Binds specifically to the target coproantigen immobilized on the plate. | Must be highly specific and affinity-purified. For novel targets, may be raised against recombinant proteins identified via proteomics [14] [15]. |
| Detection Antibody | Binds to a different epitope on the captured antigen; conjugated to a reporter enzyme (e.g., HRP). | Requires pairing with a capture antibody that does not cause steric hindrance. Must be titrated for optimal signal [8]. |
| ELISA Microplate | Solid phase for immobilizing the capture antibody. | Use plates designed for ELISA (high protein-binding capacity). Tissue culture plates are not suitable [4] [8]. |
| Blocking Buffer | Covers unused protein-binding sites on the plate to prevent non-specific binding. | Typically contains a high concentration of an irrelevant protein (e.g., BSA, casein, or proprietary blends). |
| Wash Buffer | Removes unbound reagents and sample matrix components between assay steps. | Usually a PBS or Tris-based solution with a mild detergent (e.g., Tween-20). Consistent and thorough washing is critical [4] [8]. |
| Enzyme Substrate | Converted by the reporter enzyme (e.g., HRP) into a detectable colored or fluorescent product. | Must be compatible with the detection antibody conjugate. Protect from light and use immediately after preparation [4]. |
| Standard / Calibrant | A known quantity of the target antigen used to generate the standard curve for quantification. | Should be a highly pure preparation of the native or recombinant target protein. Proper serial dilution is vital [8]. |
Diagnostic Performance Data
The table below summarizes performance characteristics of coproantigen tests for different parasites, as reported in the literature.
| Parasite | Diagnostic Test | Reported Sensitivity & Specificity | Key Advantage & Application |
|---|---|---|---|
| Fasciola hepatica | Enhanced MM3-COPRO (cELISA) [6] | Higher sensitivity than coproscopy; detected antigens in 12% of coproscopy-negative samples. Highly specific (antigens disappeared post-treatment) [6]. | Detects active infection pre-patency. Useful for monitoring flukicide efficacy via Coproantigen Reduction Test (CRT) [6] [7]. |
| Fasciola hepatica (in cattle) | Coproantigen ELISA [5] | Sensitivity: 77-94%. Specificity: Equal to or greater than faecal egg sedimentation [5]. | More sensitive than sedimentation tests. Best used to supplement, not replace, faecal egg counting due to limited evidence base [5]. |
| Strongyloides stercoralis | (Proposed coproantigen RDT) [14] | (Predicted) Targets identified via 'omics' to be specific and antigenic [14]. | Aims to detect active infection for surveillance and validating cure, overcoming limitations of serology and microscopy [14]. |
In coproantigen ELISA research, the accuracy of a diagnostic test is fundamentally governed by three core performance metrics: sensitivity, specificity, and the potential for cross-reactivity.
- Sensitivity measures the test's ability to correctly identify true positive cases, calculated as the percentage of infected individuals that test positive. High sensitivity is crucial for reliable disease detection and surveillance [16] [17].
- Specificity measures the test's ability to correctly identify true negative cases, calculated as the percentage of uninfected individuals that test negative. High specificity is essential to avoid false positives and misdiagnosis [16] [18].
- Cross-reactivity occurs when antibodies in the assay bind to non-target molecules that share structural similarities with the target antigen, leading to false positive results and reduced test specificity [19].
These interconnected parameters form a framework that defines the limitations and diagnostic utility of coproantigen ELISAs in both research and clinical applications.
Comparative Performance of ELISA Formats
Different ELISA formats offer distinct advantages and limitations in sensitivity and specificity, making them suitable for various diagnostic applications. The selection of format often involves trade-offs between these critical parameters.
Table 1: Performance Characteristics of Common ELISA Formats
| ELISA Format | Principle | Best Use Cases | Relative Sensitivity | Relative Specificity | Key Limitations |
|---|---|---|---|---|---|
| Indirect | Detects antibodies using immobilized antigen and enzyme-labeled secondary antibody [20]. | Antibody detection, immune response monitoring [20]. | High (e.g., 95.69% for swIAV detection) [17]. | Lower (e.g., 60% for swIAV) [17]. | Potential cross-reactivity with secondary antibody [19]. |
| Competitive | Sample antibodies compete with labeled antibody for limited antigen sites [17]. | Small molecule detection, specificity-critical applications [21]. | Lower (e.g., 81.36%) [17]. | Higher (e.g., 83.33%) [17]. | Reduced sensitivity due to competition [17]. |
| Blocking | Sample antibodies block binding of specific monoclonal antibody to antigen [17]. | Multispecies detection, confirmatory testing [17]. | Moderate (e.g., 82.89%) [17]. | Moderate (e.g., 76.67%) [17]. | Intermediate performance characteristics [17]. |
| Sandwich | Captures antigen between two antibodies; detection antibody is enzyme-linked [20]. | Protein and cytokine quantification [21]. | High (e.g., 98% for cryptosporidiosis) [18]. | High (e.g., 100% for cryptosporidiosis) [18]. | Requires two epitopes; antibody pairing critical [19]. |
Figure 1: Troubleshooting Framework for Coproantigen ELISA Performance Limitations
Experimental Protocols for Assessing Limitations
Protocol for Determining Sensitivity and Specificity
Purpose: To quantitatively establish the diagnostic sensitivity and specificity of a coproantigen ELISA using known positive and negative samples compared to a reference standard.
Materials:
- Test ELISA kits and reagents
- Well-characterized positive and negative sample panels
- Reference standard method (e.g., PCR, microscopy)
- Microplate reader, pipettes, incubation equipment
Procedure:
- Sample Panel Preparation: Assemble a blinded panel of samples with known status confirmed by reference methods [16]. Include at least 50 positive and 100 negative samples for statistical power.
- ELISA Testing: Perform the coproantigen ELISA according to established protocols, including appropriate controls [18].
- Data Analysis: Calculate sensitivity as (True Positives / [True Positives + False Negatives]) × 100 and specificity as (True Negatives / [True Negatives + False Positives]) × 100 [16] [18].
- Statistical Validation: Determine 95% confidence intervals for both parameters using appropriate statistical methods [16].
Example Calculation: In a cryptosporidiosis study comparing 268 sandwich ELISA positive samples to PCR, sensitivity was calculated as 98% (263/268 × 100) when 263 samples were PCR-positive [18].
Protocol for Evaluating Cross-Reactivity
Purpose: To systematically assess and quantify cross-reactivity with related antigens or organisms that may cause false positive results.
Materials:
- Target antigen and related potential cross-reactants
- ELISA coating buffers, blocking agents, detection reagents
- Positive and negative control samples
Procedure:
- Antigen Panel Preparation: Coat ELISA plates with target antigen and phylogenetically related antigens that may cross-react [19].
- Antibody Incubation: Test ELISA antibodies against all antigen-coated wells using standardized concentrations.
- Signal Measurement: Develop plates and measure optical density for all antigen-antibody combinations.
- Cross-reactivity Calculation: Express cross-reactivity as percentage of signal obtained with non-target antigen compared to target antigen [19].
Validation Example: A Fasciola hepatica coproantigen ELISA demonstrated minimal cross-reactivity when tested against Paramphistomum cervi and Taenia hydatigena, confirming high specificity for the target parasite [16].
Frequently Asked Questions (FAQs)
Q1: Our coproantigen ELISA shows high background signal. What are the primary causes and solutions?
A: High background typically stems from insufficient washing, inadequate blocking, or antibody overconcentration. Implement these solutions:
- Enhanced Washing: Increase wash cycles and incorporate 30-second soak steps between washes [4] [8]
- Blocking Optimization: Test different blocking buffers (BSA, non-fat milk) at varying concentrations and incubation times [19]
- Antibody Titration: Perform checkerboard titration to determine optimal antibody concentrations that minimize non-specific binding [19]
Q2: How can we improve the sensitivity of our coproantigen ELISA for low-abundance targets?
A: Consider these evidence-based approaches:
- Reagent Optimization: Systematically optimize capture and detection antibody concentrations using titration experiments [19]
- Signal Amplification: Extend substrate incubation times (within linear range) and use high-sensitivity substrates [8]
- Sample Pre-treatment: Concentrate samples or remove interfering substances through extraction or dilution in appropriate buffers [21]
Q3: What validation steps are essential when adapting a coproantigen ELISA to a new species?
A: Comprehensive validation should include:
- Cross-reactivity Testing: Evaluate against common parasites or antigens in the target species [16]
- Matrix Effects: Compare standard curves in buffer vs. target species fecal matrix using spike-and-recovery experiments [19]
- Method Comparison: Validate against established diagnostic methods (e.g., sedimentation, PCR) with appropriate statistical analysis [16] [18]
Q4: How do we address inconsistent results between replicates in coproantigen ELISA?
A: Poor reproducibility typically indicates technical issues:
- Pipetting Technique: Calibrate pipettes and ensure proper mixing of reagents [4]
- Washing Consistency: Check automated plate washer nozzles for clogs and ensure even wash buffer distribution [8]
- Environmental Control: Maintain consistent incubation temperatures and use fresh plate sealers for each step to prevent evaporation [4]
Research Reagent Solutions
Table 2: Essential Reagents for Coproantigen ELISA Development and Troubleshooting
| Reagent Category | Specific Examples | Function & Importance | Optimization Tips |
|---|---|---|---|
| Capture Antibodies | Monoclonal MM3 for F. hepatica [22], Anti-C. parvum IgG PAbs [18] | Binds target antigen; determines assay specificity | Test concentrations from 1-10 μg/mL in coating buffer; ensure purity [19] |
| Blocking Agents | BSA, non-fat dry milk, casein | Reduces non-specific binding and background noise | Compare different agents and concentrations (1-5%); optimize incubation time [19] |
| Detection Antibodies | HRP-conjugated antibodies, biotinylated antibodies | Generates measurable signal; impacts sensitivity | Titrate for optimal signal:noise ratio; consider enzyme labels (HRP, AP) [19] [20] |
| Substrates | TMB (colorimetric), CDP-Star (chemiluminescent) | Enzyme substrate producing detectable signal | Choose based on required sensitivity; protect from light; use immediately after preparation [4] [20] |
| Wash Buffers | PBS with 0.05% Tween-20 | Removes unbound reagents; critical for low background | Ensure correct pH and surfactant concentration; add soak steps [4] [8] |
| Sample Diluents | PBS with protein additives | Maintains antigen integrity while reducing matrix effects | Match to sample matrix; validate with spike-and-recovery tests [19] |
Advanced Applications and Methodological Integration
The limitations of coproantigen ELISAs can often be addressed through methodological integration and advanced statistical approaches. Research demonstrates that combining diagnostic methods significantly enhances overall detection capability.
In veterinary parasitology, studies have successfully employed a multi-modal diagnostic approach integrating coproantigen ELISA with faecal egg sedimentation tests and PCR to improve the interpretation of drug resistance in Fasciola hepatica [7]. This integrated methodology proved particularly valuable in field investigations where multiple factors could contribute to apparent drug failure.
Statistical optimization methods such as the Taguchi method have shown promise in improving ELISA performance by systematically evaluating how different factors interact to affect absorbance values and background noise [19]. These approaches can identify key variables that impact sensitivity and specificity, leading to more robust assay protocols.
For diagnostic applications requiring high precision, Bayesian no-gold-standard approaches have been employed to evaluate the performance of multiple diagnostic tests simultaneously, providing more realistic estimates of sensitivity and specificity when perfect reference standards are unavailable [16]. These statistical methods acknowledge the inherent limitations of all diagnostic tests while providing frameworks for comparative performance assessment.
Coproantigen ELISA in Practice: Protocol Development and Species-Specific Applications
FAQs: Addressing Common Experimental Challenges
FAQ 1: For a sandwich coproantigen ELISA, which antibody type is better for the capture role: monoclonal or polyclonal?
For the capture antibody in a sandwich ELISA, polyclonal antibodies are often recommended. Because they recognize multiple epitopes on the target antigen, they are more effective at capturing the protein of interest, even if some epitopes are masked or altered. This makes them superior for ensnaring the target antigen from the solution [23] [24].
FAQ 2: What are the primary causes of high background signal in my coproantigen ELISA, and how can I resolve them?
A high background signal is a common issue that can compromise your results. The table below outlines frequent causes and their solutions [4] [8] [25].
| Possible Cause | Recommended Solution |
|---|---|
| Insufficient washing | Ensure complete washing; add a 30-second soak step between washes; remove all residual fluid by tapping the plate forcefully on absorbent tissue [4] [8]. |
| Ineffective blocking | Increase blocking incubation time or try an alternative blocking agent (e.g., 5-10% normal serum) [25] [26]. |
| Contaminated reagents or buffers | Prepare fresh buffers and use fresh pipette tips for each solution to avoid cross-contamination [8] [25]. |
| Plate sealers reused or not used | Use a fresh plate sealer for each incubation step to prevent well-to-well contamination [4] [8]. |
| Non-specific binding of conjugated antibody | Include controls to identify the source. Use a primary antibody from a different species than the sample and add Tween-20 to wash buffers [25]. |
FAQ 3: My ELISA is producing a weak or absent signal, even though I know the target is present. What should I check?
A weak or absent signal can stem from procedural errors or reagent issues. Focus on these key areas [4] [8] [25]:
- Reagent Preparation: Confirm all reagents were at room temperature before use and were prepared to the correct dilution. Double-check pipetting accuracy and calculations [4].
- Antibody Concentration: If you are developing your own assay, you may need to optimize (titrate) the concentration of the detection antibody, as too little will result in a weak signal [8] [25].
- Reagent Integrity: Ensure reagents have not expired and were stored correctly. Do not use buffers containing sodium azide with HRP-based detection systems, as azide inhibits the enzyme [4] [25].
FAQ 4: I am observing high variation between duplicate wells. How can I improve reproducibility?
Poor replicates are often due to technical inconsistencies. To improve reproducibility [4] [8] [26]:
- Pipetting Technique: Use calibrated pipettes and ensure proper technique. Make sure all reagents are mixed thoroughly before use.
- Washing Consistency: If using an automatic plate washer, check that all ports are clean and unobstructed. Ensure all wells are washed equally.
- Sample Preparation: Remove any particulate matter by centrifuging samples before adding them to the plate.
- Avoid Bubbles: Carefully pipette to avoid creating bubbles in the wells, which can interfere with the plate reader.
Experimental Protocol: Evaluating Antibody Efficacy in Coproantigen ELISA
The following protocol is adapted from field investigations designed to diagnose Fasciola hepatica (liver fluke) infection and assess drug resistance, a context where the accuracy of the coproantigen ELISA is critical [27].
1. Objective To evaluate the diagnostic performance of monoclonal vs. polyclonal antibody pairs in a sandwich coproantigen ELISA for detecting Fasciola hepatica antigens in ruminant faecal samples, comparing their sensitivity and specificity against a gold standard method.
2. Materials
- Faecal Samples: Collected from naturally infected sheep, cattle, or goats. Pre-screen farms to ensure a sufficient prevalence of infection [27].
- Antibody Pairs:
- Set A: Polyclonal (capture) / Monoclonal (detection)
- Set B: Monoclonal (capture) / Polyclonal (detection)
- Set C: Monoclonal (capture) / Monoclonal (detection)
- Commercial Coproantigen ELISA Kit: For comparative validation.
- Reference Standards: Positive and negative control faecal samples.
- Standard ELISA Equipment: Microplate washer, reader, incubator.
3. Methodology
- Sample Preparation: Pool and thoroughly mix faecal samples per farm. A defined weight (e.g., 3g for sheep/goats, 6g for cattle) is processed for analysis [27].
- Multimodal Diagnostic Comparison: To establish a "true" infection status, all samples are tested in parallel using:
- ELISA Procedure:
- Coat plates with the designated capture antibody from each set.
- Block plates with an appropriate blocking buffer (e.g., 5% BSA or a commercial immunoassay stabilizer) [26].
- Add prepared faecal samples and controls. Incubate and wash.
- Add the corresponding detection antibody from each set. Incubate and wash.
- Add enzyme-conjugated secondary antibody (if needed). Incubate and wash.
- Add substrate solution. Stop the reaction and read the absorbance.
- Data Analysis:
- Calculate the sensitivity and specificity for each antibody set against the composite reference standard (FEC, qPCR, and necropsy).
- Perform regression analysis to determine which test best predicts the actual fluke burden, as measured by total worm count [28].
Research Reagent Solutions
The table below lists key reagents essential for robust and reliable coproantigen ELISA development.
| Reagent / Material | Function & Importance |
|---|---|
| ELISA Plate (not tissue culture plate) | Optimized surface for high protein-binding capacity, ensuring efficient adsorption of the capture antibody [8] [25] [26]. |
| Protein Stabilizers & Blockers | Critical for minimizing non-specific binding (high background) and stabilizing dried capture proteins, thereby increasing assay shelf-life and signal-to-noise ratio [26]. |
| Sample/Assay Diluents | Specially formulated buffers that reduce matrix interferences (e.g., from faecal samples) and the risk of false positives [26]. |
| Fresh Plate Sealers | Used for each incubation step to prevent well-to-well contamination and evaporation, which causes edge effects [4] [8]. |
| TMB Substrate | A sensitive chromogenic substrate for HRP enzyme. Must be prepared fresh and protected from light to prevent high background [4] [25] [26]. |
Workflow Diagram: Antibody Selection & Diagnostic Pathway
The following diagram illustrates the logical workflow for selecting antibodies and interpreting results within the context of diagnosing parasitic infections like liver fluke.
Frequently Asked Questions (FAQs)
FAQ 1: What are the primary diagnostic challenges for Fasciola hepatica, and how can they be addressed? Diagnosing Fasciola hepatica (liver fluke) is complicated by several factors. The parasite has a long prepatent period (8-12 weeks) before eggs appear in faeces, hindering early diagnosis [27]. Faecal Egg Count (FEC) tests can show false negatives during pre-patent infections and false positives if eggs remain in the gall bladder after successful treatment [29]. Furthermore, drug resistance, particularly to triclabendazole (TCBZ), is an emerging problem [27]. A multi-modal diagnostic approach is recommended to overcome these limitations, combining traditional sedimentation/FEC with a coproantigen ELISA (cELISA) and PCR. This combination improves accuracy, allows for earlier detection, and facilitates the diagnosis of drug failure [27].
FAQ 2: My coproantigen ELISA for Fasciola hepatica is showing weak signal. What could be the cause? Weak or no signal in an ELISA can stem from several procedural issues. The most common causes include [4]:
- Reagents not at room temperature: All reagents should be at room temperature before starting the assay.
- Incorrect storage: Ensure all components are stored as specified (typically 2-8°C) and are not expired.
- Improper pipetting or dilutions: Check pipetting technique and double-check dilution calculations.
- Insufficient detector antibody: For commercial kits, follow the optimized protocol without modification.
- Scratched wells: Be cautious when pipetting or washing to avoid scratching the well bottom.
FAQ 3: Does co-infection with other parasites cause cross-reactivity in the Fasciola hepatica coproantigen ELISA? A study investigating this specific issue found no significant cross-reactivity in a commercial F. hepatica coproantigen ELISA from faecal samples of cattle and sheep concurrently infected with gastrointestinal nematodes, coccidians, or rumen flukes (paramphistomes) [29]. The test demonstrated high specificity for F. hepatica coproantigens under field conditions.
FAQ 4: How is anthelmintic resistance confirmed in Fasciola hepatica? Resistance is evaluated through Faecal Egg Count Reduction Tests (FECRT) and Coproantigen Reduction Tests (CRT) [27]. Animals are divided into treatment and control groups. The efficacy of a drug is calculated by comparing faecal egg counts or coproantigen levels before and after treatment. For example, TCBZ resistance was confirmed on one sheep property with an efficacy of only 86-89% [27]. These tests should be performed using W.A.A.V.P. guidelines where available.
Troubleshooting Guides
Guide 1: Troubleshooting Coproantigen ELISA
The table below outlines common problems encountered during coproantigen ELISA procedures, their possible causes, and recommended solutions [4].
| Problem | Possible Cause | Solution |
|---|---|---|
| Weak or No Signal | Reagents not at room temperature; expired reagents; incorrect dilutions; insufficient washing. | Allow reagents to warm up for 15-20 mins; check expiration dates; verify pipetting and calculations; ensure thorough washing. |
| Excessively High Signal | Insufficient washing; longer incubation times than recommended; incorrect dilutions. | Follow recommended washing procedure; adhere to protocol-specified incubation times; double-check dilution calculations. |
| High Background | Insufficient washing; substrate exposed to light prior to use. | Increase wash duration/soak steps; store substrate in dark and limit light exposure during assay. |
| Poor Replicate Data | Insufficient washing; cross-contamination between wells. | Ensure consistent and thorough washing; use fresh plate sealers during incubations. |
| Inconsistent Assay-to-Assay Results | Inconsistent incubation temperature; variable reagent preparation. | Maintain consistent incubation temperature as per protocol; carefully standardize reagent preparation. |
| Edge Effects | Uneven temperature across the plate; evaporation. | Avoid stacking plates; ensure plate is completely sealed during incubations. |
Guide 2: Troubleshooting Diagnostic Inconsistencies in Fasciolosis
Diagnostic results can sometimes be conflicting. The table below explores scenarios where Fasciola coproantigen tests and faecal egg counts may not align and suggests interpretation and actions [27] [29].
| Scenario | Possible Interpretation | Recommended Action |
|---|---|---|
| cELISA Positive, FEC Negative | Early pre-patent infection; low-burden adult infection with egg output below FEC detection limit. | Use cELISA to confirm active infection. Re-test with both methods after 2-4 weeks. |
| FEC Positive, cELISA Negative | Presence of eggs from a past, cleared infection (eggs lingering in gall bladder); very low fluke burden. | Investigate treatment history. Use a combined diagnostic approach (e.g., add PCR) for confirmation [27]. |
| Suspected Drug Failure (Clinical signs persist post-treatment) | Anthelmintic resistance; under-dosing; poor drug administration. | Perform a Faecal Egg Count Reduction Test (FECRT) or Coproantigen Reduction Test (CRT) to assess drug efficacy [27]. |
Diagnostic Method Comparisons & Protocols
Table 1: Comparison of Diagnostic Methods for Fasciola hepatica
This table summarizes the key characteristics of different diagnostic methods for Fasciola hepatica, highlighting the utility of a multi-modal approach [27] [30] [29].
| Diagnostic Method | Target | Key Advantage | Key Limitation | Ideal Use Case |
|---|---|---|---|---|
| Sedimentation & Faecal Egg Count (FEC) | Microscopic eggs | Confirms active, patent infection; cost-effective. | Cannot detect pre-patent infections; low sensitivity for low-burden infections; irregular egg shedding. | Routine monitoring of patent infections. |
| Coproantigen ELISA (cELISA) | Parasite antigens in faeces | Detects pre-patent and low-burden infections; monitors treatment efficacy. | May have reduced sensitivity for very low burdens; requires specific reagents and equipment. | Early diagnosis; drug efficacy studies (CRT). |
| qPCR | Parasite DNA in faeces | High sensitivity and specificity; species confirmation. | Higher cost; requires specialized lab equipment and skills. | Confirmatory testing; research; specificity-critical studies. |
| Antibody ELISA (Ab-ELISA) | Host antibodies in serum | Can indicate exposure/history of infection. | Cannot differentiate between past and current infection. | Seroprevalence studies in human medicine [30]. |
Protocol 1: Sequential Sieving for Egg Enrichment (Adapted for Fasciolosis)
This protocol, adapted from a method developed for Toxocara [31], can be used to enrich and purify Fasciola eggs from faecal samples, improving the sensitivity of both microscopy and PCR by removing copro-inhibitors.
Workflow Diagram: Sequential Sieving Protocol
Materials:
- Conical cylinders
- Nylon sieves with mesh sizes: 105µm, 40µm, 20µm
- Strainer (8-11 mm mesh)
- Centrifuge and 50-ml centrifuge tubes
- Tap water
Method:
- Initial Processing: Weigh 3 g of faeces and suspend in approximately 20 ml of tap water. Sieve the suspension through a coarse strainer (8-11 mm) into a conical cylinder. Fill the cylinder to 250 ml with tap water [31].
- Sedimentation: Allow the sample to sediment for approximately 15 hours (overnight). Sharply decant and discard the supernatant [31].
- Sequential Sieving: Transfer the remaining supernatant (approx. 45 ml) through a series of nylon sieves [31]:
- First, decant over a 105µm sieve to remove large particulate matter. Collect the filtrate.
- Next, draw the filtrate through a 40µm sieve to capture matter (including Fasciola eggs) in the 40-105µm size range.
- Finally, pass it through a 20µm sieve to capture smaller particles and fragmented eggs.
- Analysis: The material retained on the 40µm and 20µm sieves can be used for microscopic examination (FEC) or washed for DNA extraction and subsequent qPCR analysis [31].
Protocol 2: Field Efficacy Trial for Flukicide Resistance
This protocol outlines the key steps for a field investigation to evaluate the prevalence of Fasciola hepatica and susceptibility to anthelmintics, based on W.A.A.V.P. guidelines [27].
Workflow Diagram: Flukicide Resistance Field Trial
Materials:
- Experimental animals (e.g., sheep, cattle, goats)
- Anthelmintics: Triclabendazole (TCBZ), positive control drugs (e.g., closantel/abamectin for sheep, albendazole for goats), and water for negative control.
- Diagnostic equipment and reagents for sedimentation, FEC, cELISA, and qPCR.
Method:
- Farm and Animal Enrollment: Select farms with a known history of F. hepatica infection. Pre-screen animals by collecting faecal samples for baseline prevalence testing using sedimentation/FEC and cELISA [27].
- Experimental Design: Divide enrolled animals (e.g., a "mob") into treatment groups (typically 15 animals per group). Groups should include [27]:
- Test group: Treated with the drug under investigation (e.g., TCBZ).
- Positive control group: Treated with an alternative effective drug.
- Negative control group: Treated with water (placebo).
- Sample Collection and Treatment: Collect pre-treatment faecal samples from all animals. Administer treatments according to manufacturer instructions and animal weight. Collect post-treatment faecal samples at an appropriate interval (e.g., 14-21 days) [27].
- Efficacy Assessment: Perform Faecal Egg Counts (FEC) and coproantigen ELISA (cELISA) on all samples. Calculate drug efficacy using Faecal Egg Count Reduction Test (FECRT) and Coproantigen Reduction Test (CRT). The formula for FECR is [27]:
- FECR (%) = (1 - (Arithmetic Mean FEC post-treatment group / Arithmetic Mean FEC pre-treatment group)) × 100
- Efficacy below a certain threshold (e.g., 90% for TCBZ) indicates resistance [27].
The Scientist's Toolkit: Research Reagent Solutions
The following table details key materials and reagents essential for conducting research on Fasciola hepatica diagnostics and resistance monitoring.
| Item | Function / Application | Example / Note |
|---|---|---|
| MM3 Monoclonal Antibody | Core component in specific coproantigen ELISA kits; captures F. hepatica-specific antigens in faecal samples. | Used in commercial cELISA kits; demonstrated high specificity with no significant cross-reactivity to other common parasites [29]. |
| Triclabendazole (TCBZ) | Front-line anthelmintic for treating immature and adult F. hepatica; used in efficacy and resistance trials. | Drug of choice for human fasciolosis; resistance is a growing global problem and a key research focus [27]. |
| Closantel / Albendazole | Used as positive control drugs in resistance trials against which the efficacy of TCBZ is compared. | Closantel is often used for sheep; Albendazole for goats. Reduced efficacy of Albendazole in goats has been reported [27]. |
| cELISA Kit | Detects coproantigens for diagnosis of active F. hepatica infection, including pre-patent stages. | Allows for Coproantigen Reduction Test (CRT) to assess drug efficacy. Sensitivity can be lower in very low-burden infections [27] [29]. |
| qPCR Assays | Provides highly sensitive and specific detection of Fasciola DNA in faecal samples; used for confirmation and species identification. | Helps overcome limitations of microscopy and serology. Can be used in parallel with cELISA for improved diagnostic accuracy [27] [31]. |
FAQs & Troubleshooting Guides
Frequently Asked Questions (FAQs)
Q1: What is the main advantage of using coproantigen ELISA over traditional faecal egg sedimentation (FEST) for detecting Fasciola hepatica?
The primary advantage is higher diagnostic sensitivity, enabling earlier detection of active infection. The coproantigen ELISA detects parasite antigens shed into the faeces, which can occur before the parasites mature and begin laying eggs. One study in cattle found the mean sensitivity of the coproantigen ELISA was 94%, significantly higher than 4g and 10g faecal egg sedimentation tests, which showed sensitivities of 43% and 64%, respectively [5] [32].
Q2: Can the coproantigen ELISA completely replace the faecal egg sedimentation test?
Current evidence suggests it should be used as an adjunctive test rather than a complete replacement. While the coproantigen ELISA demonstrates equal or superior sensitivity, the evidence is not yet strong enough to recommend discontinuing the simple and affordable FEST. A combined diagnostic approach improves overall accuracy and facilitates earlier detection of drug failure [5] [27] [32].
Q3: What are the critical pre-analytical factors for stool specimen collection to ensure reliable antigen detection?
Proper collection and preservation are critical [33]:
- Container: Use a dry, clean, leakproof container.
- Contamination: Avoid contamination with urine, water, or soil.
- Processing: Fresh stool should be examined, processed, or preserved immediately.
- Preservation: If immediate processing isn't possible, refrigerate the specimen or preserve it using appropriate methods. Specimens kept under refrigeration without preservatives are suitable for antigen testing [33].
Q4: Which fecal protein extraction method is considered optimal for immunoassays?
Combination protocols that integrate multiple complementary extraction mechanisms are most effective. No single method guarantees universal success, but a synergistic application of mechanical homogenization (to disrupt solids), detergent extraction (to solubilize proteins), and organic precipitation (to remove contaminants) provides a comprehensive strategy to maximize protein recovery and minimize matrix interference for immunoassays [34].
ELISA Troubleshooting Guide
Table 1: Common ELISA Problems and Solutions
| Problem | Possible Cause | Solution |
|---|---|---|
| Weak or No Signal [4] [8] | Reagents not at room temperature | Allow all reagents to sit for 15-20 minutes before starting the assay. |
| Incorrect storage or expired reagents | Double-check storage conditions (typically 2-8°C) and confirm all reagents are within their expiration dates [4]. | |
| Insufficient or improper washing | Follow recommended washing procedures. Ensure plates are drained well after washing. Increase soak steps if background is high [8]. | |
| High Background [4] [8] | Insufficient washing | Increase wash cycles and/or add a 30-second soak step between washes. Tap plate forcefully on absorbent tissue to remove residual fluid [4] [8]. |
| Plate sealers reused or not used | Use a fresh plate sealer for each incubation step to prevent cross-contamination between wells [4]. | |
| Substrate exposed to light or over-incubation | Store substrate in the dark and adhere strictly to recommended incubation times [4]. | |
| Poor Replicate Data (High Variation) [4] [8] | Insufficient or uneven washing | Ensure consistent and thorough washing. Check that all ports of an automated washer are clean and unobstructed [8]. |
| Uneven coating or plate quality | Use validated ELISA plates (not tissue culture plates). Ensure consistent coating and blocking procedures [8]. | |
| Scratch to wells | Use caution when pipetting or using plate washers to avoid scratching the well bottoms [4]. | |
| Poor Assay-to-Assay Reproducibility [4] [8] | Variations in incubation temperature or time | Adhere strictly to recommended incubation temperatures and times across all runs [4]. |
| Inconsistent reagent preparation | Check pipetting technique and double-check dilution calculations. Use fresh buffers [4] [8]. |
Experimental Protocols & Workflows
Optimal Stool Processing and Antigen Extraction Workflow
The following diagram outlines a recommended integrated protocol for preparing stool samples for coproantigen ELISA, synthesizing best practices from the literature.
Stool Processing and Antigen Extraction Workflow
Protocol Steps:
- Mechanical Homogenization: Begin by thoroughly homogenizing the fresh or frozen stool sample in a suitable buffer. This first step disrupts the solid matrix and makes internal antigens more accessible [34].
- Chemical Lysis: Add a detergent-based solution (e.g., SDS or commercial bacterial protein extraction reagents like B-PER) to solubilize proteins and disrupt hydrophobic interactions. Incorporate protease inhibitors at this stage to preserve target antigen integrity [34].
- Intensive Disruption: Subject the mixture to vigorous disruption via vortexing or, for more robust lysis, bead beating. Bead beating with a matrix containing ceramic, silica, and glass beads (e.g., Lysing Matrix E) is particularly effective for lysing gram-positive bacteria and tough cysts, increasing yield and accuracy [35].
- Clarification: Centrifuge the lysate to pellet insoluble debris, lipids, and particulate matter. The supernatant containing the soluble antigens is collected [34].
- Purification & Concentration: Precipitate the target proteins from the supernatant using ice-cold organic solvents like acetone or ethanol. This step concentrates the antigen and further removes soluble contaminants and salts that can interfere with the immunoassay [34].
- Final Preparation: Re-suspend the final protein pellet in a buffer compatible with your ELISA (e.g., PBS). The sample is now ready for analysis [34].
Method Comparison for Fecal Protein Extraction
Table 2: Comparison of Fecal Protein Extraction Methods [34]
| Method | Mechanism | Advantages | Disadvantages |
|---|---|---|---|
| Mechanical Homogenization | Physical disruption of fecal solids. | Releases intracellular and particle-bound proteins. Simple and rapid. | Does not inactivate proteases; may generate heat. Incomplete alone [34]. |
| Detergent Extraction | Solubilizes proteins by disrupting hydrophobic and ionic interactions. | Effective at solubilizing a wide range of proteins; can inactivate some enzymes. | Can denature proteins; detergents may interfere with downstream immunoassays [34]. |
| Organic Solvent Precipitation | Reduces protein solubility to precipitate them, removing contaminants. | Effectively removes lipids, pigments, and other non-protein contaminants; concentrates the sample. | Can denature proteins; may lead to irreversible aggregation and loss of some proteins [34]. |
| Immunoaffinity Capture | Uses antibodies to selectively bind and purify target antigens. | Highly specific; removes virtually all non-target matrix interference. | Only for known antigens; low and variable recovery efficiency; expensive [34]. |
The Scientist's Toolkit: Research Reagent Solutions
Table 3: Essential Materials for Stool Antigen Extraction and Immunoassay
| Item | Function / Application | Specific Examples / Notes |
|---|---|---|
| Lysing Matrix E | A composite matrix of ceramic, silica, and glass beads for mechanical homogenization of complex samples like stool [35]. | Proven effective for stool and environmental samples. Available in various tube sizes for different sample volumes (e.g., 2 mL for 500 mg sample) [35]. |
| Protease Inhibitor Cocktails | Added to extraction buffers to prevent proteolytic degradation of target antigens during processing [34]. | Essential for preserving labile protein epitopes recognized by immunoassay antibodies. |
| Detergent Lysis Buffers | Solubilize membrane and structural proteins from feces and microbial cells. | B-PER (Bacterial Protein Extraction Reagent), SDS [34]. |
| Commercial Fecal Extraction Kits | Provide optimized, standardized buffers and protocols for specific sample types. | Kits like the FastDNA SPIN Kit for Feces are designed to work with lysing matrices for streamlined workflow [35]. |
| Coproantigen ELISA Kits | Ready-to-use kits for detecting specific parasitic antigens (e.g., Fasciola hepatica). | Bio K201 (Bio-X Diagnostics) [5] [36]. Kits include pre-coated plates and all necessary reagents. |
| Plate Sealers | Adhesive films used to cover microplates during incubation steps. | Prevents well-to-well contamination and evaporation. Use a fresh sealer for each incubation to avoid carry-over of HRP enzyme [4] [8]. |
Optimizing Coproantigen ELISA: Systematic Troubleshooting and Performance Enhancement
Why is optimization like checkerboard titration critical for coproantigen ELISA diagnostics?
In coproantigen ELISA research, diagnostic limitations often stem from suboptimal assay conditions. Non-specific binding, high background, and weak signals in complex fecal samples can lead to false positives or negatives. Checkerboard titration systematically tests different concentrations of two key reagents (e.g., capture antibody and sample antigen) simultaneously to find the optimal combination that maximizes specific signal while minimizing background [37] [38]. This is fundamental for developing a robust, reliable diagnostic assay.
ELISA Troubleshooting Guide
1. What causes high background noise and how can it be fixed?
High background is often due to insufficient blocking or washing, antibody cross-reactivity, or reagent over-concentration [39] [40].
- Causes & Solutions:
- Incomplete Blocking: Use a robust blocking buffer (e.g., 5% BSA) and extend blocking time to at least 1 hour [40].
- Inadequate Washing: Increase wash cycles to 3-5 times, ensuring wells are filled completely and liquid is aspirated thoroughly each time [39] [40].
- Antibody Cross-reactivity: Switch to high-specificity monoclonal antibodies or use cross-adsorbed secondary antibodies [40].
- Excessive Reagent Concentration: Optimize antibody and enzyme-conjugate concentrations using checkerboard titration [39].
2. Why is my signal weak or absent?
Weak signal can result from low antibody affinity, insufficient reagent concentration, or degraded components [39] [40].
- Causes & Solutions:
- Low Antibody Titer/Affinity: Verify antibody specificity and compatibility. Optimize pairing through titration [40].
- Insufficient Substrate Incubation: Extend substrate incubation time and monitor color development [40].
- Improper Sample Preparation: Ensure samples are properly centrifuged to remove impurities. Use protease inhibitors to prevent degradation [40].
- Overly Diluted Reagents: Re-optimize detection antibody and enzyme-conjugate concentrations; one component may be limiting [39].
3. How do I address poor reproducibility between assays?
Poor reproducibility, indicated by a high coefficient of variation (CV > 15%), is often a technical issue [41] [40].
- Causes & Solutions:
- Pipetting Errors: Use calibrated, multi-channel or automated liquid handling systems for consistency [40].
- Inconsistent Incubation: Standardize incubation time and temperature (e.g., 37°C in a humidified chamber to prevent evaporation) [40].
- Edge Effects: Avoid using the outer wells of the plate or use plate sealers to minimize evaporation differences [40].
- Reagent Batch Variation: Validate new reagent batches with small-scale pilot experiments before full-scale use [40].
4. What leads to a poor standard curve and how can it be improved?
A standard curve with poor linearity (R² < 0.98) or a "hook effect" compromises accurate quantification [39] [40].
- Causes & Solutions:
- Poor Dilution Range: Use logarithmic dilutions to ensure standards cover the expected dynamic range [40].
- Excess Detection Antibody: Can cause signal suppression at high antigen concentrations. Optimize antibody concentrations using checkerboard titration [40].
- Improper Standard Handling: Aliquot standards to avoid repeated freeze-thaw cycles. Vortex thoroughly after reconstitution [40].
Checkerboard Titration Protocol
Checkerboard titration assesses two variables at once (e.g., antibody and antigen concentration) across a plate to find the optimal combination [37] [38].
Methodology
- Plate Setup: The capture antibody is serially diluted across the columns (e.g., from a high to a low concentration), while the antigen (or sample) is serially diluted down the rows [37] [42]. All other reagents and conditions are kept constant.
- Assay Execution: Run the entire ELISA protocol through to signal development with this plate layout.
- Data Analysis: Measure the absorbance for each well. The optimal condition is identified by the combination that yields the strongest specific signal with the lowest background (i.e., the highest signal-to-noise ratio) [43] [41].
Sample Plate Layout and Analysis
Reagent Concentration Guidelines
The table below provides recommended starting concentration ranges for key reagents. These are guidelines; optimal concentrations should be determined empirically for each assay [43] [41].
| Reagent | Polyclonal Serum / Crude Ascites | Affinity-Purified Polyclonal | Affinity-Purified Monoclonal |
|---|---|---|---|
| Coating Antibody | 5–15 µg/mL [43] [41] | 1–12 µg/mL [43] [41] | 1–12 µg/mL [43] [41] |
| Detection Antibody | 1–10 µg/mL [43] [41] | 0.5–5 µg/mL [43] [41] | 0.5–5 µg/mL [43] [41] |
| Enzyme Conjugate (HRP) | \ | 0.02–0.2 µg/mL [43] [41] | \ |
| Enzyme Conjugate (AP) | \ | 0.1–0.2 µg/mL [43] [41] | \ |
Experimental Workflow for Assay Optimization
The following diagram outlines the logical workflow for developing and validating an optimized ELISA protocol.
The Scientist's Toolkit: Essential Research Reagent Solutions
| Item | Function in Checkerboard Titration / ELISA |
|---|---|
| Matched Antibody Pairs | Sets of antibodies (capture & detection) known to bind distinct epitopes on the same target antigen, crucial for sandwich ELISA specificity [43] [39]. |
| Affinity-Purified Antibodies | Antibodies purified against the specific antigen, recommended for optimal signal-to-noise ratio and reduced background [43] [41]. |
| Blocking Buffers (e.g., BSA) | Proteins or solutions used to coat all unsaturated surface areas of the microplate well to prevent non-specific binding of detection antibodies [19] [39]. |
| Microplate Washer | Automated system for consistent and thorough washing steps, critical for removing unbound reagents and reducing background variability [19]. |
| Spectrophotometric Plate Reader | Instrument to measure the absorbance of the colored product in each well, enabling quantitative analysis of the assay results [44]. |
Key Validation Methods for Diagnostic Assays
1. What is a spike-and-recovery experiment and why is it important?
This test assesses matrix interference, a critical factor in complex samples like feces [42] [41].
- Protocol: A known amount of the purified analyte (the "spike") is added to both the sample matrix and to the standard diluent. The ELISA is run, and the measured concentration of the spiked sample is compared to the expected value.
- Interpretation: The percentage recovery is calculated. A recovery close to 100% indicates minimal matrix interference. Significantly lower recovery suggests the sample matrix is inhibiting the assay, requiring diluent optimization [42] [41].
2. How is dilutional linearity tested?
This determines the assay's linear range and checks for the "hook effect" (prozone effect), where very high antigen concentrations can yield falsely low signals [42] [40].
- Protocol: A sample with a high concentration of the analyte is serially diluted until its concentration falls below the assay's lower limit of quantification. Each dilution is analyzed.
- Interpretation: The observed concentration for each dilution is plotted against the expected (theoretical) concentration. A linear relationship indicates good dilutional linearity. Non-linearity, especially at high concentrations, may indicate a hook effect and require antibody re-optimization [42] [40].
3. How do you determine the precision of an ELISA?
Precision measures the assay's repeatability (within a plate) and reproducibility (between plates and days) [41].
- Protocol: Run multiple replicates (e.g., n=5 or 10) of samples at low, medium, and high concentrations within the same plate (intra-assay) and across different plates on different days (inter-assay).
- Interpretation: Calculate the mean, standard deviation, and coefficient of variation (%CV) for each sample set. An intra-assay %CV <10% and an inter-assay %CV <15% are generally considered acceptable [41].
FAQ: Understanding Core Concepts
What is the primary function of a blocking buffer in ELISA? The primary function of a blocking buffer is to cover any unoccupied protein-binding sites on the solid phase (e.g., the microplate well) after the capture antibody or antigen has been immobilized. This prevents subsequent assay reagents, such as detection antibodies, from binding non-specifically to these sites, thereby reducing background noise and improving the signal-to-noise ratio of the assay [45] [46].
How can the sample matrix lead to interference in ELISA? The sample matrix (e.g., serum, plasma) can contain various interfering substances that lead to false positives or high background. Common interferents include:
- Rheumatoid Factor (RF): An autoantibody that can bridge capture and detection antibodies, mimicking a true positive signal [47].
- Heterophilic Antibodies: Human antibodies that can bind to animal-derived immunoglobulins used in the assay [47].
- Other Components: Substances like hemoglobin from hemolyzed samples or endogenous enzymes can also skew results [48] [26].
Why is there no single "perfect" blocking buffer for every application? The optimal blocking buffer depends on the specific antibody-antigen pair, the detection system, and the sample matrix. Each combination has unique characteristics; for instance, a buffer that effectively blocks one system might quench the signal in another or be incompatible with certain detection methods (e.g., biotin-streptavidin systems) [45] [46]. Empirical testing is often necessary to identify the best blocker for a given assay.
Troubleshooting Guide: Common Problems & Solutions
| Problem & Symptom | Potential Cause | Recommended Solution |
|---|---|---|
| High BackgroundSignal in blank/negative control wells is elevated. | Inadequate blocking or washing; interference from sample matrix. | Ensure thorough washing with correct buffer volumes [48] [4]. Use a more effective or concentrated blocking buffer [49]. Incorporate blockers against interferents like RF or HAMA [47]. |
| Weak or No SignalLow absorbance readings, signal below detection limit. | Blocking buffer may be masking the antigen-antibody interaction; insufficient antibody concentration. | Switch to a different blocking buffer (e.g., from milk to BSA or a proprietary blocker) [45] [49]. Increase the concentration of the detection antibody or antigen [48] [49]. |
| High VariationPoor reproducibility between replicate wells. | Inconsistent pipetting, inadequate washing, or contaminated reagents. | Check pipette calibration and technique [50] [26]. Ensure complete and consistent washing [4]. Prepare fresh reagents and buffers for each assay [49]. |
| False Positive SignalsSignal detected in absence of target analyte. | Often caused by rheumatoid factor (RF) or heterophilic antibodies in the sample matrix. | Use recombinant Fab or F(ab')₂ antibody fragments to eliminate Fc-mediated binding [47]. Include specific blocking reagents like mouse IgG or animal-free blockers in the assay buffer [47]. |
| Edge EffectsSignificant signal variation between edge and center wells. | Uneven temperature and evaporation across the plate. | Avoid stacking plates during incubation [50] [4]. Use a well-sealing plate sealer and ensure all reagents are at room temperature before use [26] [4]. |
Experimental Protocols for Troubleshooting
Protocol: Systematic Evaluation of Blocking Buffers
Purpose: To identify the optimal blocking buffer for a specific coproantigen ELISA system by comparing signal-to-noise ratios.
Materials:
- Coated ELISA microplate (with capture antibody)
- Target antigen (recombinant or purified)
- Negative control matrix (e.g., naive sample matrix)
- Detection antibody (with label, e.g., HRP)
- Candidate blocking buffers (see Table 1)
- Wash buffer, substrate, and stop solution
- Plate reader
Method:
- Plate Coating: Coat the plate with capture antibody overnight. Wash twice.
- Blocking: Divide the plate. Block different wells with different candidate buffers (e.g., 200 µL/well) for 1-2 hours at room temperature.
- Antigen Addition: Add a dilution series of the target antigen to some wells, and negative control matrix to others. Incubate.
- Detection: Add the detection antibody according to your standard protocol. Incubate and wash.
- Signal Development: Add substrate, incubate in the dark, then stop the reaction.
- Data Analysis: Measure absorbance. For each blocking buffer, calculate the signal-to-noise ratio (Mean signal of antigen-positive wells / Mean signal of negative control wells). The buffer yielding the highest ratio is optimal.
Protocol: Assessing and Mitigating Rheumatoid Factor Interference
Purpose: To confirm RF interference in samples and validate a mitigation strategy.
Materials:
- Test samples (potentially containing RF)
- RF-positive and RF-negative control sera
- Standard ELISA reagents
- Commercially available RF blocking reagent (e.g., blended animal immunoglobulins or proprietary formulas)
Method:
- Sample Pre-treatment: Split each test and control sample into two aliquots. Treat one aliquot with an RF blocking reagent according to the manufacturer's instructions. The other aliquot remains untreated.
- Run ELISA: Process both treated and untreated samples through the standard ELISA procedure on the same plate.
- Interpretation: A significant decrease in the measured signal in the RF-positive control and test samples after blocker treatment indicates successful mitigation of RF interference. Signals in true positive samples (containing the target antigen) should remain largely unaffected [47].
Visual Guide: Interference and Mitigation Workflow
The following diagram illustrates the mechanisms of common interferences and how blocking strategies work to mitigate them.
The Scientist's Toolkit: Research Reagent Solutions
Table 1: Key reagents for reducing background and interference in immunoassays.
| Reagent Category | Specific Examples | Function & Rationale |
|---|---|---|
| Protein-Based Blockers | Non-fat Dry Milk (5%), BSA (2-5%), Casein, Purified Single Proteins (e.g., StartingBlock) | Covers non-specific binding sites on the solid phase. BSA is preferred for phosphoprotein detection and biotin-streptavidin systems, while casein offers a low-fluorescence, high-performance alternative [45]. |
| Specialized Commercial Blockers | SuperBlock, Blocker FL, TRU Block, SynBlock | Proprietary formulations (often serum- and biotin-free) designed for rapid blocking and compatibility with specific detection methods like fluorescence, reducing background effectively [45] [47] [46]. |
| Interference Blockers | Mouse IgG, Anti-HAMA Blockers, Animal-Free Blocker Blends | Added to sample diluent or buffer to pre-absorb heterophilic antibodies and Rheumatoid Factor (RF), preventing them from bridging assay antibodies [47]. |
| Engineered Antibodies | Recombinant Antibodies, F(ab)₂ or Fab Fragments | Lack the Fc region, eliminating a primary target for RF and heterophilic antibody binding, thus drastically reducing false-positive signals [47]. |
| Wash Buffers with Detergent | PBS/TBS with 0.05-0.1% Tween-20 | Helps to disrupt weak, non-specific interactions during wash steps, lowering background. Concentration must be optimized to avoid eluting specific, weak-binding antibodies [45] [49]. |
Core Concepts: Enzymes, Substrates, and Detection
What are the key enzyme-substrate systems used in ELISA?
The choice of enzyme conjugate and its matching substrate is fundamental to ELISA performance, directly influencing the assay's sensitivity and dynamic range. The table below summarizes the most common systems.
Table 1: Common Enzyme-Substrate Systems in ELISA
| Enzyme | Common Substrates | Detection Method | Key Characteristics |
|---|---|---|---|
| Horseradish Peroxidase (HRP) | Tetramethylbenzidine (TMB), ABTS [20] [51] | Colorimetric | TMB produces a blue color that turns yellow after stopping; widely used, good sensitivity [20]. |
| Alkaline Phosphatase (AP) | BCIP/NBT, pNPP [20] [51] | Colorimetric | BCIP/NBT produces a blue-purple precipitate; often used in plate-based assays [20]. |
| Horseradish Peroxidase (HRP) | Enhanced Luminol-based | Chemiluminescent | Produces light upon reaction; offers higher sensitivity and a broader dynamic range than colorimetric methods [51]. |
| Alkaline Phosphatase (AP) | CDP-Star, CSPD | Chemiluminescent | Similar to HRP chemiluminescent, provides high sensitivity [51]. |
| Alkaline Phosphatase (AP) | AttoPhos | Fluorescent | Fluorescent substrate offers higher sensitivity and a broader dynamic range compared to colorimetric methods [52]. |
How does detection method impact sensitivity and dynamic range?
The detection method—colorimetric, chemiluminescent, or fluorescent—dictates the limits of your assay. The dynamic range is the concentration range of the antigen over which the assay can provide accurate measurements, and it is heavily influenced by the signal output [53].
- Colorimetric Detection: This is the most common method. The enzyme catalyzes a reaction that produces a soluble colored product, measured by absorbance. While robust and easy to use, it generally has a narrower dynamic range (~2 logs) and lower sensitivity compared to other methods [52] [51].
- Chemiluminescent Detection: Here, the enzyme reaction produces light. This method typically offers the highest sensitivity and the widest dynamic range (can exceed 3-4 logs), making it ideal for detecting low-abundance targets [51].
- Fluorescent Detection: The enzyme acts on a substrate to produce a fluorescent signal. Fluorescent detection provides enhanced sensitivity and a broader dynamic range than colorimetric methods, helping to achieve lower limits of detection [52].
Experimental Optimization Protocols
How do I systematically optimize conjugate and antibody concentrations?
Optimizing reagent concentrations is critical for maximizing the signal-to-noise ratio. The checkerboard titration is a standard method to efficiently optimize two parameters simultaneously [43] [54].
Table 2: Recommended Concentration Ranges for ELISA Optimization
| Reagent Source | Coating Antibody | Detection Antibody |
|---|---|---|
| Polyclonal Serum | 5–15 µg/mL | 1–10 µg/mL |
| Crude Ascites | 5–15 µg/mL | 1–10 µg/mL |
| Affinity-Purified Polyclonal | 1–12 µg/mL | 0.5–5 µg/mL |
| Affinity-Purified Monoclonal | 1–12 µg/mL | 0.5–5 µg/mL |
Protocol: Checkerboard Titration for Sandwich ELISA
- Prepare Capture Antibody Dilutions: Dilute your capture antibody in a coating buffer (e.g., PBS, pH 7.4, or carbonate-bicarbonate, pH 9.4) across a range of concentrations (see Table 2). Coat different rows of the microplate with each concentration [43] [51].
- Block the Plate: After incubation and washing, block the plate with a suitable blocking buffer (e.g., BSA, casein, or non-fat dry milk) for at least 1-2 hours to cover any unsaturated binding sites [54] [10].
- Add Antigen and Detection Antibody: Add a fixed, known concentration of your antigen. Then, prepare different concentrations of your detection antibody (see Table 2) and add them to different columns of the plate. This creates a matrix where each well has a unique combination of capture and detection antibody concentrations [43].
- Develop and Analyze: Complete the assay with your enzyme conjugate (if the detection antibody is not directly conjugated) and substrate. The optimal condition is the combination that yields the strongest specific signal with the lowest background [43] [54].
What is the detailed protocol for a high-sensitivity fluorescent ELISA?
Fluorescent substrates can rescue assays where the target is in low abundance. Below is an adapted protocol for a direct ELISA using a fluorescent substrate like AttoPhos [52].
Protocol: Direct ELISA with Fluorescent Substrate
Day 1: Plate Coating
- Coat each well with 100 µL of coating antibody diluted in filtered phosphate-buffered saline (PBS).
- Seal the plate and incubate overnight at 4°C.
Day 2: Blocking and Sample Incubation
- Aspirate the coating solution.
- Block each well with 200 µL of a blocking buffer (e.g., 4% BlockACE) for 3 hours at room temperature.
- Wash the plate 3 times with PBS-T (PBS with 0.05% Tween 20).
- Load 100 µL of standards or samples, freshly diluted in a sample diluent (e.g., 10% BlockACE in PBS-T).
- Seal the plate and incubate overnight at 4°C.
Day 3: Detection and Signal Measurement
- Wash the plate as before.
- Incubate each well with 100 µL of the enzyme-conjugated primary antibody (e.g., alkaline phosphatase-conjugated) for 2 hours at room temperature.
- Wash the plate thoroughly.
- Amplify the signal by adding 100 µL of fluorescent substrate (e.g., AttoPhos). Incubate for 5-10 minutes at room temperature, protected from light.
- Measure the signal on a fluorometer with the appropriate excitation/emission wavelengths (e.g., Ex/Em 440/550 nm for AttoPhos) [52].
Troubleshooting Guides & FAQs
Frequently Asked Questions (FAQs)
Q1: My ELISA has a high background. Could the enzyme conjugate be the issue? Yes, an excessively high concentration of the enzyme conjugate is a common cause of high background [54] [10]. The conjugate binds non-specifically, generating signal even where the target is not present. Solution: Perform a titration of the enzyme conjugate to find the concentration that gives the best signal-to-noise ratio. Refer to Table 3 for recommended starting ranges.
Q2: I am not getting any signal. What should I check regarding my substrates? First, ensure all reagents are equilibrated to room temperature before use to prevent condensation and ensure proper reaction kinetics [54]. Then, verify the integrity of your substrate. Chromogenic substrates can degrade upon exposure to light or contamination [10]. For fluorescent substrates, protect them from light to prevent photobleaching [52]. Always check expiration dates and prepare substrates according to the manufacturer's instructions.
Q3: My dynamic range is too narrow. How can I improve it? A narrow dynamic range often occurs when the detection system is saturated at high analyte concentrations or lacks sensitivity at the low end. Solutions:
- Switch to a detection method with a wider dynamic range, such as chemiluminescent or fluorescent, instead of colorimetric [52] [51].
- Ensure your standard curve is properly prepared with serial dilutions and that your samples fall within its linear portion [53].
- Re-optimize your antibody and conjugate concentrations using a checkerboard titration to find a less saturated operating point [43].
Troubleshooting Common Problems
Table 3: Troubleshooting Guide for Conjugate and Substrate Issues
| Problem | Potential Causes | Solutions |
|---|---|---|
| Weak or No Signal | • Degraded substrate or conjugate [54] [10].• Incorrect conjugate concentration (too low) [43].• Substrate not suitable for detection instrument. | • Use fresh reagents; check expiration dates.• Titrate the conjugate to find optimal concentration (see Table 4).• Verify instrument compatibility (e.g., filter sets for fluorescence) [52]. |
| High Background | • Enzyme conjugate concentration too high [54] [10].• Inadequate blocking or washing [54] [10].• Non-specific antibody binding. | • Titrate down conjugate concentration.• Optimize blocking buffer and ensure thorough washing.• Use affinity-purified antibodies and include negative controls [54]. |
| Poor Reproducibility (High CV) | • Inconsistent pipetting during reagent or sample preparation [10].• Uneven coating or temperature gradients across the plate ("edge effect") [10]. | • Calibrate pipettes and train operators on consistent technique.• Use a plate sealer during incubations and incubate in a stable temperature environment [10]. |
The Scientist's Toolkit: Research Reagent Solutions
Table 4: Essential Reagents for ELISA Development and Optimization
| Reagent / Material | Function | Key Considerations |
|---|---|---|
| Matched Antibody Pairs | A pair of antibodies that bind distinct epitopes on the target for sandwich ELISA [54]. | The foundation of a specific assay. Monoclonal-monoclonal pairs offer high specificity; polyclonal detection can enhance signal [54]. |
| HRP or AP Conjugates | Enzyme linked to the detection antibody to generate a measurable signal [20] [51]. | HRP is smaller and more economical; AP is more stable. Optimal concentration is critical (see Table 5) [43]. |
| High-Sensitivity Substrates | Chemiluminescent or fluorescent reagents that react with the enzyme to produce light or fluorescence [52] [51]. | Essential for low-abundance targets. Requires a compatible plate reader (luminometer or fluorometer). |
| Microplates | 96- or 384-well polystyrene plates that passively bind proteins [20] [51]. | Use clear for colorimetry, white for chemiluminescence, black for fluorescence. Ensure high protein-binding capacity and low well-to-well variation [51]. |
| Blocking Buffer | A protein solution (e.g., BSA, casein) used to cover unused plastic surface to prevent non-specific binding [54] [10]. | The type and concentration must be optimized for each assay to minimize background. |
| Wash Buffer | Typically PBS with a detergent like Tween-20, used to remove unbound reagents [20] [10]. | Critical for reducing background. The number of washes, soak time, and consistency of technique are vital [10]. |
Table 5: Recommended Enzyme Conjugate Concentration Ranges
| Enzyme | System | Recommended Concentration |
|---|---|---|
| HRP | Colorimetric | 20–200 ng/mL [43] |
| HRP | Chemiluminescent | 10–100 ng/mL [43] |
| HRP | Chemifluorescent | 25–50 ng/mL [43] |
| AP | Colorimetric | 100–200 ng/mL [43] |
| AP | Chemiluminescent | 40–200 ng/mL [43] |
Why are pre-analytical variables so critical in coproantigen ELISA research?
In diagnostic research, the accuracy of a coproantigen ELISA for detecting pathogens like Fasciola hepatica is fundamentally limited by the quality of the incoming samples. Pre-analytical variables—encompassing everything from how a sample is collected to how it is stored and processed—are a major source of error and irreproducibility. Even with a perfectly optimized assay, a compromised sample will yield misleading results, directly impacting the interpretation of a test's sensitivity and specificity [5] [7]. Meticulous attention to these initial steps is therefore not just good practice; it is essential for validating the diagnostic efficacy of coproantigen ELISA and ensuring reliable data in both research and clinical settings.
Sample Collection & Processing Protocols
The following table provides detailed methodologies for the collection and initial processing of various sample types relevant to ELISA, ensuring analyte stability and minimizing pre-analytical degradation.
Table 1: Sample Collection and Processing Guidelines for ELISA
| Sample Type | Collection Tube & Additives | Centrifugation Parameters | Post-Processing Handling | Key Considerations |
|---|---|---|---|---|
| Serum [55] [56] [57] | Serum separator tube (SST) [55]. No anticoagulant [56]. | Allow to clot for 30 min at room temperature [55] [56]. Centrifuge at 1,000-1,300 x g for 10-15 min [55] [56] [57]. | Aliquot supernatant (serum). Assay immediately or store at ≤ -20°C [55] [56]. | Insufficient clotting or centrifugation can lead to fibrin clots and clogged pipette tips [57]. |
| Plasma [55] [56] [57] | Tube with anticoagulant (EDTA, heparin, or citrate) [55]. | Centrifuge at 1,000-1,300 x g for 10-15 min within 30 min of collection [55] [56] [57]. | Aliquot supernatant (plasma). Assay immediately or store at ≤ -20°C [55] [56]. | For platelet-poor plasma, a second centrifugation at 10,000 x g for 10 min is recommended [55]. |
| Cell Culture Supernatant [55] [56] | Not specified. | Centrifuge at 500 x g for 5 min to remove cells and debris [55]. | Aliquot supernatant. Assay immediately or store at ≤ -20°C [55] [56]. | Avoid repeated freeze-thaw cycles to preserve protein integrity [56]. |
| Tissue Homogenate [55] [56] | Lysis buffer with protease inhibitors (e.g., RIPA buffer) [55] [56]. | Homogenize tissue in PBS or lysis buffer. Centrifuge at 13,000-14,000 x g for 5-20 min to remove debris [55] [56]. | Aliquot supernatant. Perform total protein assay. Assay immediately or store at ≤ -20°C [56]. | Rinse tissue with PBS to remove excess blood before homogenization [55] [56]. |
| Cell Lysate [55] [56] | Lysis buffer with protease inhibitors [56]. | Solubilize cells on ice for 30 min. Centrifuge at 14,000 x g for 5 min to remove insoluble material [55]. | Aliquot supernatant. Perform total protein assay. Assay immediately or store at ≤ -20°C [55] [56]. | Keep samples on ice during extraction to minimize protease activity [56]. |
| Saliva, Urine, Milk [55] [56] | Sterile container. | Centrifuge at 10,000 x g for 2-15 min to remove particulate matter [55] [56]. | Aliquot the aqueous supernatant. Assay immediately or store at ≤ -20°C [55] [56]. | For human milk, multiple centrifugation steps may be needed to adequately separate the aqueous fraction [55]. |
| Faecal Samples (for coproantigen) [5] [7] | General principles apply; specific protocols may vary. | Particulates should be removed by centrifugation [55] [56]. | Aliquot and store at ≤ -20°C. Avoid repeated freeze-thaw cycles [55] [56]. | Diagnostic sensitivity can be affected by sample stability and the presence of interfering substances [5] [7]. |
Sample Stability & Storage Guidelines
Proper storage is critical for maintaining sample integrity from the time of collection until analysis. Inconsistent storage conditions are a major contributor to assay-to-assay variability.
Table 2: Sample Storage Conditions and Stability
| Storage Condition | Maximum Recommended Storage Duration | Best Practices & Rationale |
|---|---|---|
| 2-8°C [56] | Up to 5 days [56]. | A short-term solution for samples that will be analyzed quickly. |
| -20°C [55] [56] | Up to 6 months [56]. | A common long-term storage temperature. The freezer must be of a NON frost-free type to prevent damaging temperature cycles that degrade samples [56] [57]. |
| -80°C [56] | Up to 2 years [56]. | Ideal for long-term preservation of most analytes. Provides the most stable environment to prevent protein degradation and loss of immunoreactivity [56] [57]. |
| Liquid Nitrogen [56] | Indefinite (with proper methods) [56]. | Used for the most critical long-term biobanking needs. |
Avoiding Repeated Freeze-Thaw Cycles
Repeatedly freezing and thawing a sample is highly detrimental and can fragment proteins, degrade labile analytes, and ultimately lead to falsely low readings in your ELISA.
- Aliquoting is Essential: Immediately after processing, divide the sample into multiple single-use aliquots in appropriate, labeled microcentrifuge tubes [56] [57].
- Thawing Protocol: Thaw aliquots quickly in a 15-25°C water bath or at room temperature and use them immediately [56].
- Avoid Refreezing: If a sample must be refrozen, do so promptly after thawing, but be aware that this will still contribute to degradation. The best practice is to never refreeze a used aliquot [56].
Troubleshooting FAQs: Pre-analytical Pitfalls
Q1: Our ELISA results show a weak or absent signal, even for positive controls. Could this be related to sample handling? Yes, this is a common symptom of pre-analytical issues.
- Analyte Degradation: This is the most likely cause. Ensure samples were snap-frozen after collection and have not been subjected to multiple freeze-thaw cycles [56] [58]. Always store samples at ≤ -20°C or lower immediately after processing [55].
- Incompatible Additives: If collecting plasma, ensure the anticoagulant (e.g., EDTA, heparin, citrate) is compatible with your assay. Similarly, avoid using sodium azide in any buffers, as it inhibits the HRP enzyme used in many ELISA detection systems [3] [58].
- Incorrect Sample Type: Verify that your sample matrix (e.g., serum, plasma, homogenate) has been validated for the specific ELISA kit you are using [58].
Q2: We are observing high background noise and poor replicate data. How could sample collection be a factor? High background and poor reproducibility often stem from inconsistent or contaminated samples.
- Incomplete Clarification: Particulate matter in the sample can scatter light and cause high, variable readings. Always centrifuge samples as recommended (see Table 1) and ensure the supernatant is clear before adding it to the plate [59] [58].
- Cross-Contamination: Reusing pipette tips or plate sealers can lead to carryover of reagents or samples between wells, causing high background and poor replicate data. Always use fresh pipette tips and plate sealers for each reagent and step [4] [59].
- Non-Homogenous Samples: If samples are not mixed thoroughly after thawing, the analyte may not be evenly distributed, leading to high variation between replicates. Vortex or pipette-mix samples gently but thoroughly before use [59].
Q3: Our standard curve is poor, but we are confident in our pipetting. What else could be wrong? A poor standard curve can originate from problems with the standard stock solution itself.
- Degraded Standard: The standard is often a lyophilized protein that is reconstituted. If it has been stored improperly, reconstituted with the wrong buffer, or used past its expiration date, it will not generate a reliable curve. Always briefly spin the vial before opening to collect all material and confirm it is fully dissolved [60] [58].
- Improper Diluent: Using an incorrect buffer to reconstitute or serially dilute the standard can cause protein instability or adsorption to tube walls. Always use the diluent specified in the protocol [60].
The Scientist's Toolkit: Essential Research Reagents & Materials
Table 3: Essential Materials for Pre-analytical Sample Management
| Item | Function & Key Feature |
|---|---|
| Microcentrifuge Tubes (0.5-0.65 mL) [57] | For sample aliquoting and storage. Use screw-cap or snap-cap tubes that maintain a seal at low temperatures to prevent evaporation and sample loss. |
| Serum Separator Tubes (SST) & Anticoagulant Tubes [55] [57] | For clean collection of serum (SST) or plasma (EDTA, heparin, citrate). Essential for obtaining acellular liquid fractions from blood. |
| Protease Inhibitor Cocktails [56] | Added to lysis buffers for tissues and cells. Prevents enzymatic degradation of the target protein by endogenous proteases during sample preparation. |
| RIPA Lysis Buffer [55] [56] | A widely used buffer for efficient extraction of proteins from cells and tissues. It helps to solubilize membrane proteins and nuclear components. |
| PBS (Phosphate Buffered Saline) [55] [56] | An isotonic solution used for rinsing cells and tissues to remove contaminants like blood, and as a base for making homogenates and diluting antibodies. |
| Dry Ice & Styrofoam Shipping Containers [57] | Critical for maintaining the frozen state of samples during transportation from the collection site to the laboratory or between facilities. |
Experimental Workflow: From Sample to Storage
The following diagram summarizes the critical steps and decision points in the pre-analytical phase, from sample collection to storage, highlighting best practices to ensure sample stability.
Validating Coproantigen ELISA: Comparative Performance Against Established Diagnostic Methods
Frequently Asked Questions
What is the primary challenge in using antibody tests to determine the timing of an infection? The primary challenge is that immunoglobulins (IgG and IgM) can persist in the body for weeks or months after an infection has cleared. A single positive test indicates a past infection but cannot confirm if it is current. For example, anti-Fasciola antibodies can remain detectable long after successful treatment, making it difficult to distinguish a past, resolved infection from an active one in endemic areas [30] [6].
How can we definitively differentiate a current from a past infection? The most reliable method is to test paired serum samples. An initial ("acute") sample is taken at the beginning of the illness, and a second ("convalescent") sample is collected 2-3 weeks later. The demonstration of seroconversion (from negative to positive) or a significant rise in antibody titers between the two samples confirms a recent or current infection [61] [62].
My ELISA test is positive, but my patient is asymptomatic. Does this indicate a past infection? Not necessarily. It could indicate a past infection, a recent asymptomatic infection, or a very early-stage infection before symptom onset. The result must be correlated with clinical presentation and, if necessary, paired sample testing or alternative diagnostic methods like PCR or antigen detection [63] [64].
What are the advantages of coproantigen tests over antibody tests for diagnosing active infections? Coproantigen tests detect specific antigens shed by the parasite during its active life stage in the host. A positive result is a direct indicator of a current, active infection. Furthermore, these antigens disappear quickly after successful treatment, making the test useful for monitoring therapeutic efficacy, which antibody tests cannot do [65] [6] [5].
What does "cross-reactivity" mean in serological testing, and how can it be managed? Cross-reactivity occurs when antibodies against one pathogen (e.g., Dengue virus) also react to antigens from a related pathogen (e.g., Zika virus), leading to a false positive. In such cases, confirmation with a more specific test, such as a Plaque Reduction Neutralization Test (PRNT), is required to identify the exact infecting agent [62].
Troubleshooting Common Experimental Issues
Issue: Inconsistent results when comparing coproantigen ELISA with fecal egg count (coproscopy).
| Potential Cause | Explanation | Solution |
|---|---|---|
| Pre-patent Infections | The infection is active, but the parasites have not yet matured to egg-laying adults. | The coproantigen ELISA can detect infections before patency. A positive ELISA with negative coproscopy is likely a true positive during the pre-patent period [65] [5]. |
| Low Parasite Burden | The number of eggs shed in feces is too low for microscopic detection. | Coproantigen ELISA has been shown to be more sensitive than coproscopy in cases of low fluke burdens. Treat animals that are ELISA-positive/coproscopy-negative and re-test; disappearance of coproantigen post-treatment confirms the diagnosis [6]. |
| Sample Degradation | Coproantigens or eggs may degrade if fecal samples are not stored or processed correctly. | Refrigerate samples at 4–8°C and analyze them within a few days of collection to maintain antigen integrity [6]. |
Issue: Interpreting a single positive antibody test in a region where a disease is endemic.
| Potential Cause | Explanation | Solution |
|---|---|---|
| Past, Resolved Infection | Antibodies from an infection that was successfully treated or cleared months ago are still detectable. | Implement a paired serum sampling strategy. A stable or declining antibody titer suggests a past infection, while a rising titer indicates a recent one [61]. |
| Vaccination History | In diseases like COVID-19, a positive antibody test may result from vaccination rather than infection. | Use an antigen-specific test. For SARS-CoV-2, a test positive for anti-N (nucleocapsid) protein antibodies indicates past infection, whereas a test positive only for anti-S (spike) protein antibodies is consistent with vaccination history [64]. |
Data Presentation: Test Performance and Kinetics
Table 1: Comparative Sensitivity of Serological Tests Over Time Post-Symptom Onset (SARS-CoV-2 Example) [63]
| Time Since Symptom Onset | IgG/IgM Combination Sensitivity (%) | Key Interpretation |
|---|---|---|
| 1 - 7 days | 30.1 | Low sensitivity; not reliable for diagnosing current infection. Use viral tests (e.g., PCR). |
| 8 - 14 days | 72.2 | Sensitivity increases; can be used to complement other tests. |
| 15 - 21 days | 91.4 | High sensitivity; useful for detecting past/recent infection. |
| 21 - 35 days | 96.0 | Very high sensitivity; optimal window for confirming past infection. |
Table 2: Key Characteristics of Diagnostic Tests for Fasciola Infection [30] [65] [6]
| Test Type | Target | Can Detect Active Infection? | Can Differentiate Current from Past Infection? | Key Advantage | Key Limitation |
|---|---|---|---|---|---|
| Antibody (Ab)-ELISA | Host antibodies (IgG) | Indirectly | No | Early detection (1-4 weeks post-infection). | Cannot distinguish current from past infection; antibodies persist. |
| Coproantigen ELISA | Parasite antigens in feces | Yes | Yes (antigens clear post-treatment) | Direct marker of active infection; can monitor treatment efficacy. | Cannot detect very early (pre-hepatic) infection. |
| Coproscopy | Parasite eggs in feces | Yes (only in patent stage) | Not directly | Gold standard for patent infection; low cost. | Low sensitivity; cannot detect pre-patent infections. |
Table 3: Interpreting SARS-CoV-2 Antibody Tests Based on Vaccination Status [64]
| Vaccination Status | Anti-S Antibody | Anti-N Antibody | Interpretation |
|---|---|---|---|
| Vaccinated | + | + | Vaccinated and previously infected. |
| Vaccinated | + | – | Vaccinated, not previously infected. |
| Unvaccinated | + | + | Not vaccinated, previously infected. |
| Unvaccinated | – | – | Not previously vaccinated or infected. |
| Unknown | + | + | Previously infected (may or may not be vaccinated). |
Experimental Protocols
Protocol 1: Using Paired Sera to Confirm Recent Infection
This protocol is a cornerstone for determining whether a positive serological test indicates a recent/current infection or a past one [61] [62].
- Collection of Acute-Phase Sample: Draw a blood sample (e.g., 5 ml in a serum separator tube) from the patient as early as possible after symptom onset (Day 0-7).
- Collection of Convalescent-Phase Sample: Draw a second blood sample from the same patient 14 to 21 days after the first sample.
- Sample Processing: Centrifuge blood samples to separate serum. Store serum at -20 °C or below, avoiding repeated freeze-thaw cycles.
- Parallel Testing: Test both serum samples in parallel using the same antibody assay (e.g., ELISA, CLIA) under identical conditions.
- Interpretation:
- Recent Infection Confirmed: Seroconversion (negative to positive) or a four-fold or greater increase in antibody titer between the acute and convalescent samples.
- Past Infection Indicated: A stable or declining antibody titer.
Protocol 2: Evaluating Active Fasciola Infection Using Coproantigen ELISA and Treatment Efficacy
This protocol leverages the key advantage of coproantigen tests—their ability to confirm active infection and monitor treatment success [65] [6].
- Sample Collection: Collect fresh fecal samples from the rectum of the subject. Refrigerate samples (4–8°C) and process within 2-5 days.
- Coproantigen ELISA:
- Prepare a fecal suspension from the sample.
- Follow the specific protocol for the coproantigen test (e.g., the enhanced MM3-COPRO ELISA or its commercial version BIO K 201).
- Measure the optical density (OD) and compare it to the established cut-off (e.g., OD 0.021 for sheep in one study [65]).
- Correlative Microscopy: Perform a fecal egg sedimentation test on the same sample for comparative analysis.
- Therapeutic Intervention: Administer an anthelmintic treatment (e.g., triclabendazole) to all subjects testing positive by coproantigen ELISA.
- Post-Treatment Confirmation: Collect a second fecal sample 21 days post-treatment and re-test with the coproantigen ELISA.
- Interpretation:
- Active Infection Confirmed: A positive coproantigen test prior to treatment, especially in cases with negative coproscopy, followed by a negative test post-treatment.
- Treatment Efficacy: The disappearance of coproantigen after treatment confirms drug success and the test's utility in monitoring.
The Scientist's Toolkit: Research Reagent Solutions
| Item | Function in Research | Example Context |
|---|---|---|
| Recombinant Antigens (N, S, RBD) | Used to coat plates in in-house ELISA to detect specific antibodies. Crucial for differentiating infection from vaccination. | SARS-CoV-2 serology; using S protein to detect vaccine response and N protein to detect natural infection [66] [67] [64]. |
| MM3 Monoclonal Antibody | The capture antibody in the MM3-COPRO ELISA; specifically detects Fasciola coproantigens in fecal samples. | Diagnosis of active fascioliasis in humans and ruminants [65] [6]. |
| Anti-Human Ig Conjugates | Enzyme-labeled antibodies (e.g., anti-human IgG-peroxidase) that bind to patient antibodies in an ELISA, enabling detection. | A key component for all indirect serological ELISA tests [30] [67]. |
| Plaque Reduction Neutralization Test (PRNT) | The gold-standard assay for detecting and quantifying virus-specific neutralizing antibodies; used to confirm positive IgM results and resolve cross-reactivity. | Confirming Dengue virus infection and differentiating it from other flaviviruses like Zika [62]. |
| Excretory/Secretory (E/S) Antigens | Partially purified antigens derived from the culture of adult parasites; used as a target in antibody-detection ELISA tests. | In-house serodiagnosis of parasitic infections like fascioliasis [30]. |
Diagnostic Test Selection and Interpretation Workflow
This diagram outlines the logical decision-making process for selecting and interpreting diagnostic tests to resolve current versus past infection status.
Antibody Kinetics and Diagnostic Windows
This diagram visualizes the typical timing of biomarker appearance, which is fundamental to interpreting serological test results.
Diagnostic Performance: Coproantigen ELISA vs. Fecal Egg Counts
For researchers monitoring helminth infections, selecting the appropriate diagnostic tool is critical, particularly for detecting early-stage or low-burden infections. The table below summarizes key performance metrics of Coproantigen ELISA in comparison to traditional fecal egg count methods.
Table 1: Comparative Diagnostic Performance of Coproantigen ELISA and Fecal Egg Count Methods
| Diagnostic Method | Target Parasite | Reported Sensitivity | Key Advantages | Key Limitations |
|---|---|---|---|---|
| Coproantigen ELISA | Fasciola hepatica (in cattle) | 77%-94% [5] | Superior sensitivity for pre-patent and low-intensity infections; detects infection before egg production begins [5] [68] | Moderate strength of evidence for some parasites; can be subject to cross-reactivity without specific antibodies [5] [68] |
| Coproantigen ELISA | Strongyloides spp. | Enabled detection of subpatent infections in research settings [68] | Specific detection of Strongyloides antigens; no cross-reactivity with hookworm or Schistosoma mansoni in controlled studies [68] | Requires further development and validation for widespread clinical use [68] |
| McMaster Egg Counting | Soil-Transmitted Helminths (STH: A. lumbricoides, T. trichiura, hookworm) | 75.6% (A. lumbricoides) to 80.3% (T. trichiura) [69] | Quantitative (eggs per gram - EPG); simple format; suitable for field use [69] | Lower sensitivity than Kato-Katz for some STH; analytic sensitivity (e.g., 10 EPG) can be a limitation in low-intensity infections [69] [70] |
| Kato-Katz Thick Smear | Soil-Transmitted Helminths (STH) | 88.1% (A. lumbricoides) to 82.6% (T. trichiura) [69] | Higher sensitivity for some STH like A. lumbricoides; recommended by WHO for STH quantification [69] | Rapid clearing of hookworm eggs leads to false negatives; fixed multiplication factor can introduce inaccuracy in EPG counts [69] |
| FLOTAC | Gastro-Intestinal Nematodes (GIN in cattle) | Analytic sensitivity of 1 EPG [70] | High analytic sensitivity; provides the most precise FECRT results [70] | More complex methodology compared to McMaster [70] |
The core advantage of coproantigen ELISA is its ability to detect infections during the pre-patent period and in low-intensity settings where egg counts are undetectable. A study on Fasciola hepatica in cattle found the coproantigen ELISA had a sensitivity of 94%, significantly outperforming the 10g fecal egg sedimentation test, which had a sensitivity of only 64% [5]. Similarly, a research assay for Strongyloides was able to specifically detect subpatent infections in rodents and humans, demonstrating the principle for diagnosing infections before patency [68].
Experimental Protocol: Developing a Coproantigen Capture ELISA
This protocol outlines the key steps for developing a coproantigen capture ELISA, based on research for Strongyloides detection [68].
Antigen and Antibody Preparation
- Excretory/Secretory (E/S) Antigen Preparation: Culture adult parasitic worms (e.g., S. ratti) in RPMI medium supplemented with antibiotics (e.g., ceftriaxone, amphotericin B, gentamicin) for 24 hours at 37°C in 5% CO₂ [68].
- Antibody Production: Immunize a host animal (e.g., rabbit) with purified E/S antigen emulsified in Freund's complete adjuvant for the primary immunization, followed by boosters with antigen in Freund's incomplete adjuvant [68]. Purify immunoglobulins from the antiserum using Protein A sepharose [68].
Fecal Sample Preparation
- Homogenize fecal samples in a formalin-containing solution (e.g., 4% formalin) at a ratio of 1:3 (w/v) [68]. Formalin preservation helps reduce cross-reactivity with non-target fecal components and improves antigen stability during storage [68].
- Centrifuge the homogenized sample at 3,200 g for 15 minutes at 4°C to remove debris. Collect and aliquot the cleared supernatant for testing or storage at -20°C [68].
Assay Workflow
The following diagram illustrates the core steps of the coproantigen capture ELISA workflow.
Troubleshooting Guide & FAQs: Coproantigen ELISA
Troubleshooting Common ELISA Issues
Table 2: Common Coproantigen ELISA Issues and Solutions
| Problem | Possible Cause | Recommended Solution |
|---|---|---|
| Weak or No Signal | Reagents not at room temperature [4]. | Allow all reagents to sit for 15-20 minutes at room temperature before starting the assay [4]. |
| Incorrect storage or expired reagents [4]. | Double-check storage conditions (often 2-8°C); confirm all reagents are within their expiration dates [4]. | |
| Insufficient antigen (low infection intensity). | Concentrate fecal supernatant or validate the assay with spiked samples to confirm detection limits [3]. | |
| High Background | Inadequate washing [4] [8]. | Increase wash steps and duration; include a 30-second soak step; ensure plates are drained thoroughly [3]. |
| Non-specific binding [3]. | Optimize concentration of blocking agent (e.g., BSA, casein) and include detergents like Tween-20 in wash buffers [3]. | |
| Contaminated buffers or reused plate sealers [4] [8]. | Prepare fresh buffers and use fresh plate sealers for each incubation step [8]. | |
| High Variation Between Replicates | Inconsistent pipetting or bubbles in wells [3]. | Check pipette calibration; ensure solutions are mixed thoroughly; centrifuge plate to remove bubbles before reading [3]. |
| Uneven coating or washing [8]. | Ensure consistent reagent volumes across wells; check that automated plate washer nozzles are not clogged [8]. | |
| Poor Standard Curve | Improper serial dilution of standards [4]. | Double-check pipetting technique and dilution calculations; prepare a fresh standard curve [4] [8]. |
| Capture antibody not binding effectively [4]. | Ensure an ELISA-grade plate is used and that the coating buffer is correct (e.g., PBS) [4]. |
Frequently Asked Questions (FAQs)
Q1: Can I use distilled water instead of deionized water to prepare kit diluents? It is not recommended. While deionized water is validated for use, distilled water has not been routinely evaluated and may impact assay performance due to differences in ionic content or contaminants [71].
Q2: My sample readings are above the highest standard. What should I do? Dilute the samples with the appropriate calibrator diluent and re-run the assay. The standard curve range is validated for reliable performance, and extrapolating beyond it is not advised [71].
Q3: How can I validate the coproantigen ELISA for a new sample type (e.g., tissue homogenates)? Perform a spike-and-recovery experiment. Split a sample, spike a known amount of the standard into one aliquot, and then run both spiked and unspiked samples in a dilution series. Recovery rates between 80-120% are generally considered acceptable [71].
Q4: Why is formalin used in fecal sample preparation for coproantigen detection? Research on Strongyloides coproantigen indicates that formalin preservation of fecal samples helps to reduce non-specific reactivity and improves the specificity of the assay by masking cross-reactive epitopes [68].
The Scientist's Toolkit: Key Research Reagent Solutions
Table 3: Essential Reagents and Materials for Coproantigen Research
| Item | Function / Application | Considerations |
|---|---|---|
| Excretory/Secretory (E/S) Antigens | Immunogen for generating specific antibodies; assay standard [68]. | Superior to somatic antigens for raising antibodies for coproantigen detection, leading to better specificity [68]. |
| Protein A Sepharose | Purification of immunoglobulins from antiserum [68]. | Critical for obtaining specific capture and detection antibodies. |
| Formalin (4-10%) | Fecal sample preservation [68]. | Reduces cross-reactivity with fecal components and stabilizes antigens for long-term storage [68]. |
| ELISA Plates | Solid phase for antibody immobilization. | Use high-binding ELISA plates, not tissue culture plates, for optimal antibody coating [4] [8]. |
| Streptavidin-HRP Conjugate | Detection system for biotinylated antibodies. | Check dilution and titrate for optimal signal-to-noise; avoid HRP contamination [8]. |
| TMB (3,3',5,5'-Tetramethylbenzidine) Substrate | Chromogenic substrate for HRP. | Light-sensitive; prepare immediately before use and read absorbance promptly after stopping the reaction [3]. |
Conceptual Framework: The Coproantigen Advantage
The diagram below illustrates the fundamental principle of how coproantigen detection overcomes the limitations of traditional fecal egg counts, particularly for pre-patent and low-intensity infections.
Coproantigen Enzyme-Linked Immunosorbent Assays (ELISAs) represent a significant advancement in parasitic disease diagnosis, yet their performance varies considerably across different parasite species. Understanding these variations is crucial for researchers and diagnosticians aiming to implement these assays effectively. This technical support center addresses the diagnostic limitations of coproantigen ELISA research by providing targeted troubleshooting guides, detailed methodologies, and essential resource information to optimize assay performance across diverse parasitic infections.
Performance Metrics Across Parasite Types
The sensitivity and specificity of ELISA-based diagnostics differ substantially depending on the target parasite, antigen preparation, and assay format. The table below summarizes documented performance characteristics across various parasitic diseases:
Table 1: Species-Specific Performance of ELISA-Based Diagnostic Methods
| Parasite Species | Disease | Assay Type | Antigen Used | Sensitivity (%) | Specificity (%) | Reference |
|---|---|---|---|---|---|---|
| Leishmania major | Cutaneous Leishmaniasis | IgG ELISA | Amastigote/Promastigote | 83.6 | 62.7 | [72] |
| Leishmania major | Cutaneous Leishmaniasis | IgM ELISA | Amastigote/Promastigote | 84.7 | 54.3 | [72] |
| Leishmania major | Cutaneous Leishmaniasis | IFA | Promastigote | 91.6 | 81.0 | [72] |
| Echinococcus granulosus | Human Hydatidosis | Native ELISA | Native Antigen B | 100.0 | 95.0* | [73] |
| Echinococcus granulosus | Human Hydatidosis | Commercial ELISA Kit | Commercial Antigen | 44.0 | 96.0* | [73] |
| Strongyloides stercoralis | Strongyloidiasis | Coproantigen ELISA | E/S Antigen | Detected subpatent infection | No cross-reactivity with other helminths | [74] |
*Specificity values compared to commercial ELISA; surgical confirmation not available for heterologous groups
Troubleshooting Guide: Common ELISA Issues and Solutions
FAQ: Addressing Critical Performance Challenges
Q: What causes weak or no signal in my coproantigen ELISA?
A: Weak signals can result from multiple factors:
- Reagents not equilibrated to room temperature before use [4]
- Incorrect storage conditions for assay components (most kits require 2-8°C storage) [4]
- Expired reagents beyond their validated shelf life [4]
- Improper coating of capture antibody to the plate surface [4]
- Inadequate detector antibody concentration or insufficient incubation times [4]
Q: How can I reduce high background signal in my assays?
A: High background often stems from:
- Insufficient washing between steps; ensure complete well drainage after each wash [4]
- Cross-reactivity or sample contamination [26]
- Exposure of substrate to light prior to use [4]
- Extended incubation times beyond recommended durations [4]
- Ineffective blocking; consider trying different blocking buffers [26]
Q: Why do I observe high variation between replicate samples?
A: Poor reproducibility typically arises from:
- Pipetting errors during reagent preparation [26]
- Inadequate plate washing consistency [4]
- Presence of bubbles in wells before reading [26]
- Contaminated buffers or reagents [26]
- Inconsistent incubation temperatures across the plate [4]
Q: What measures can minimize false positive results?
A: False positives can be addressed by:
- Using specialized diluents to reduce matrix interferences [26]
- Implementing effective blocking steps with optimized buffers [26]
- Ensuring proper washing techniques to remove unbound components [4]
- Validating against heterologous samples to check cross-reactivity [72] [74]
Q: How can I overcome edge effects in my ELISA plates?
A: Edge effects result from temperature variations across the plate:
- Avoid stacking plates during incubation [4]
- Ensure complete plate sealing with fresh sealers for each step [4]
- Use uniform room temperature surfaces during incubations [26]
- Maintain consistent incubation environments without temperature fluctuations [4]
Experimental Protocols for Coproantigen ELISA
Protocol 1: Native Antigen B Preparation for Hydatidosis Detection
Based on methodology with 100% sensitivity for hydatid cyst detection [73]
- Source Material Collection: Obtain hydatid cysts from infected sheep livers, selecting only cysts with clear liquid content
- Fluid Aspiration and Processing: Aspirate cyst contents and centrifuge at 2000 rpm for 10 minutes
- Antigen Purification: Dialyze supernatant against acetate buffer (5 mM, pH 8) at 4°C
- Concentration: Centrifuge dialyzed solution at 5000×g for 30 minutes at 4°C
- Protein Quantification: Determine protein concentration using Bio-Rad or BCA protein assay
- Storage: Aliquot and store at -20°C until use
Protocol 2: Coproantigen ELISA for Strongyloides Detection
Methodology for detecting subpatent Strongyloides infection [74]
- Antibody Production: Raise polyclonal rabbit antiserum against Strongyloides ratti excretory/secretory (E/S) antigens
- Plate Coating: Coat plates with capture antibody in carbonate/bicarbonate buffer (pH 9.6)
- Sample Preparation: Prepare fecal supernatants in formalin-containing buffer (1:3 ratio)
- Blocking: Use 3% skim milk in PBS for 1-2 hours at room temperature
- Incubation: Add samples and controls, incubate for 1.5 hours
- Detection: Add HRP-conjugated detection antibody, incubate for 1 hour
- Substrate Reaction: Develop with OPD or TMB substrate
- Termination: Stop reaction with stop solution after optimal color development
- Reading: Measure absorbance at appropriate wavelength (490nm for OPD, 450nm for TMB)
Protocol 3: Checkerboard Titration for Assay Optimization
Critical step for determining optimal reagent concentrations [73]
- Antigen Titration: Prepare serial dilutions of antigen in coating buffer
- Serum Titration: Create serial dilutions of positive and negative control sera
- Conjugate Optimization: Test various conjugate dilutions (typically from 1:400 to 1:32,000)
- Incubation Time Evaluation: Test different substrate incubation times (20 vs. 30 minutes)
- Validation: Read optical density and calculate signal-to-noise ratios for each condition
Research Reagent Solutions
Table 2: Essential Reagents for Coproantigen ELISA Development
| Reagent Category | Specific Examples | Function | Performance Benefit |
|---|---|---|---|
| Protein Stabilizers | StabilCoat, StabilGuard | Minimize non-specific binding, stabilize dried proteins | Extends shelf life up to 2 years; improves assay consistency [26] |
| Blocking Buffers | StabilBlock, skim milk, BSA | Block unused binding sites on plate surface | Reduces background signal; minimizes false positives [26] |
| Sample Diluents | MatrixGuard Diluent | Dilute samples while maintaining antigen integrity | Reduces matrix interferences; decreases false positives [26] |
| Wash Buffers | PBS-Tween (0.05-0.3%) | Remove unbound reagents between steps | Critical for reducing background; improves specificity [72] [74] |
| Detection Substrates | TMB, OPD | Enzyme-mediated color development | Impacts assay sensitivity; optimal signal-to-noise ratio [26] |
| Plate Sealers | Adhesive plate seals | Prevent evaporation and contamination | Reduces edge effects; improves well-to-well consistency [4] |
Workflow and Troubleshooting Diagrams
Coproantigen ELISA Experimental Workflow
ELISA Troubleshooting Decision Tree
Technical Specifications and Best Practices
Critical Parameters for Assay Optimization
Antigen-Antibody Compatibility: Match antigen preparation (native vs. recombinant) with antibody specificity for optimal performance [73] [74]
Sample Preservation: Formalized fecal supernatants maintain antigen stability when frozen at -20°C for up to 270 days [74]
Cut-off Determination: Establish using mean optical density of negative samples plus 2-3 standard deviations [72] [73]
Validation Standards: Include positive controls, negative controls, and heterologous samples to assess cross-reactivity [72] [74]
Quality Control Measures
- Lot-to-Lot Consistency: Use ISO-certified reagents to minimize batch variations [26]
- Temperature Control: Maintain consistent incubation temperatures (typically 37°C) [4]
- Washing Protocol: Implement standardized washing procedures with complete well drainage [4]
- Equipment Calibration: Regularly calibrate pipettes, plate washers, and readers [4]
The species-specific performance of coproantigen ELISAs underscores the importance of tailored approaches for different parasitic infections. By implementing the troubleshooting strategies, optimized protocols, and quality control measures outlined in this technical support center, researchers can significantly enhance the sensitivity, specificity, and reliability of their diagnostic assays. Continued refinement of these methodologies will address current diagnostic limitations and improve detection capabilities for parasitic diseases worldwide.
Troubleshooting Guide: Common CRT Experimental Challenges
FAQ 1: What could cause a false negative result in my Coproantigen Reduction Test (CRT)?
A false negative, where the test indicates treatment success despite an active infection, can occur due to several factors related to the parasite's biology and sample handling.
- Immature Fluke Infections: The most critical factor is the developmental stage of the parasite. Coproantigen ELISAs primarily detect antigens produced by adult parasites. If an infection consists mainly of immature flukes (≤6 weeks old), the test may yield a negative result immediately post-treatment, even if the treatment was ineffective against these juvenile stages. Antigen levels will only become detectable once the survivors reach maturity, around 6 weeks post-infection [75].
- Suboptimal Sample Timing: Collecting the post-treatment fecal sample too early (before antigen clearance) or too late (after immature flukes have repopulated the intestine) can lead to misinterpretation. Adhering to a standardized protocol is essential [76].
- Sample Degradation: While coproantigens are generally stable, prolonged exposure of fecal samples to high temperatures may degrade the target antigens and reduce test sensitivity. It is recommended to process or freeze samples promptly [76].
FAQ 2: My CRT shows a positive result post-treatment. Does this automatically confirm drug resistance?
Not necessarily. A positive coproantigen result after treatment indicates treatment failure, but the underlying cause requires further investigation. Key considerations include:
- Reinfection: In field conditions, the animal may have been reinfected between treatment and the post-treatment sample collection, especially if grazing on contaminated pasture.
- Insufficient Drug Dosage: Incorrect dosing based on body weight or improper administration can lead to sub-therapeutic drug levels.
- True Drug Resistance: After ruling out other factors, consistent failure to reduce coproantigen levels in a group of animals with a known adult infection provides strong evidence for drug-resistant parasite populations [76].
FAQ 3: How does the performance of the coproantigen ELISA compare to traditional fecal egg counts for monitoring treatment efficacy?
The coproantigen ELISA offers several advantages over fecal egg counting methods like the fecal egg sedimentation test, particularly for Fasciola hepatica.
Table 1: Comparison of Diagnostic Methods for Post-Treatment Monitoring
| Feature | Coproantigen ELISA | Fecal Egg Sedimentation |
|---|---|---|
| Sensitivity | Generally higher; can detect pre-patent infections [75] [77]. | Lower; dependent on patent infection and intermittent egg shedding [5]. |
| Correlation with Burden | Strong correlation with adult fluke burden at necropsy [75]. | Weak correlation with actual fluke burden [75]. |
| Detection Post-Treatment | Can indicate success (antigen disappearance) within 1 week for adult flukes [75]. | Requires waiting for the pre-patent period if immature flukes survive [75]. |
| Stage Specificity | Primarily detects adult fluke infections; less reliable for immature stages [75]. | Detects only patent infections (adult, egg-laying flukes). |
Standardized Experimental Protocol for CRT
The following protocol for a Coproantigen Reduction Test in sheep is adapted from published research and is designed to diagnose resistance to triclabendazole (TCBZ) in Fasciola hepatica [76].
Objective: To determine the efficacy of a fasciolicide treatment by measuring the reduction of F. hepatica coproantigens in fecal samples collected before and after treatment.
Materials and Reagents:
- Animals: Sheep with a confirmed, natural or experimental, coproantigen-positive F. hepatica infection.
- ELISA Kit: Commercial Fasciola coproantigen ELISA kit (e.g., BIO K201, Bio-X Diagnostics).
- Sample Collection: Fecal sample containers.
- Equipment: Microplate reader, standard laboratory equipment for ELISA.
Procedure:
- Pre-Treatment Sampling (Day 0): Collect a fecal sample directly from the rectum of each animal. Test the sample using the coproantigen ELISA. Only include animals that test positive in the trial.
- Treatment Administration (Day 0): Administer the anthelmintic treatment (e.g., TCBZ) at the recommended dose, ensuring accurate body weight measurement.
- Post-Treatment Sampling (Day 14): Collect a second fecal sample from each animal 14 days post-treatment [76].
- ELISA Testing: Process all post-treatment samples using the same coproantigen ELISA kit and under identical conditions as the pre-treatment samples.
- Interpretation of Results:
- Treatment Success/Susceptible Parasites: The post-treatment sample tests negative for coproantigens.
- Treatment Failure/Resistant Parasites: The post-treatment sample remains positive for coproantigens.
Critical Considerations for the Protocol:
- Immature Fluke Caveat: This 14-day protocol is reliable for assessing efficacy against adult flukes. If resistance to immature fluke stages is suspected, a second post-treatment sample should be collected at least 6 weeks after treatment to detect antigens from flukes that have survived and matured [75].
- Control Groups: For a robust experimental design, include a group of animals infected with a known TCBZ-susceptible isolate as a negative control.
- Sample Stability: Faecal samples can be stored at -20°C. Studies indicate that moderate temperatures have little impact on antigen stability, but high temperatures should be avoided [76].
Workflow Visualization: CRT Diagnostic Pathway
The following diagram illustrates the logical decision-making pathway for conducting and interpreting a Coproantigen Reduction Test.
Diagram 1: CRT diagnostic pathway for assessing anthelmintic efficacy against Fasciola hepatica.
The Scientist's Toolkit: Essential Research Reagents & Materials
Table 2: Key Reagents and Materials for Coproantigen Reduction Tests
| Item | Function/Description | Example/Reference |
|---|---|---|
| Coproantigen ELISA Kit | Core diagnostic kit containing antibodies, conjugates, and buffers for detecting parasite-specific antigens in feces. | BIO K201 for F. hepatica [76]; NovaTec Immunodiagnostic for Giardia [78]. |
| Polyclonal/Monoclonal Antibodies | Key capture and detection antibodies specific to the target parasite's coproantigens; critical for assay sensitivity and specificity. | MAbEg9 for E. granulosus [77]; Polyclonal anti-A. galli sera [13]. |
| Antigen Preparation | Soluble antigens extracted from adult parasites, used for antibody production, assay standardization, and validation. | Excretion/Secretion (E/S) antigens from E. granulosus [77]; Soluble A. galli antigens [13]. |
| Sample Preservation Solution | Formalin or PBS-based solution to preserve fecal antigens, inactivate biohazards, and facilitate safe transport and storage. | 1-4% Formaldehyde in PBS [77]. |
| DNA Extraction Kit | For parallel molecular analysis (PCR) to confirm infection or perform genotypic characterization of parasites. | QIAamp DNA Stool Mini Kit [78]. |
| tpi Gene Primers | PCR primers for genotyping Giardia lamblia assemblages, adding a molecular epidemiology component to the study. | Assemblage A & B specific primers [78]. |
Conclusion
Coproantigen ELISA represents a significant advancement in parasitic disease diagnostics, offering distinct advantages for detecting current infections, identifying pre-patent periods, and monitoring treatment efficacy. While limitations in sensitivity, specificity, and technical optimization persist, methodological refinements and rigorous validation continue to enhance its diagnostic utility. Future directions should focus on developing point-of-care lateral flow formats, improving species specificity through novel antibody development, standardizing protocols across laboratory settings, and expanding applications to emerging parasitic diseases. For researchers and drug development professionals, coproantigen ELISA provides a valuable tool for epidemiological studies, anthelmintic efficacy trials, and integrated diagnostic approaches that complement rather than replace traditional methods, ultimately strengthening our capacity to combat parasitic infections through improved diagnostic precision.
References
- 1. ELISA Troubleshooting Guide & Principles [https://www.bosterbio.com/protocol-and-troubleshooting/elisa-principle?srsltid=AfmBOop3M4UbWWapjQ9nEp3jfbILCWNvSK-mQENc1ugU1y2C2sFgjP3f]
- 2. What is ELISA: Assay and Applications [https://www.moleculardevices.com/applications/enzyme-linked-immunosorbent-assay-elisa]
- 3. ELISA Troubleshooting Guide [https://www.bio-techne.com/resources/protocols-troubleshooting/elisa-troubleshooting]
- 4. ELISA Troubleshooting Guide [https://www.thermofisher.com/us/en/home/life-science/protein-biology/protein-biology-learning-center/protein-biology-resource-library/pierce-protein-methods/overview-elisa/elisa-troubleshooting-guide.html]
- 5. Can the coproantigen ELISA replace the faecal egg ... [https://www.veterinary-practice.com/article/can-the-coproantigen-elisa-replace-the-faecal-egg-sedimentation-test-for-fasciola-hepatica-in-cattle]
- 6. Field evaluation of the enhanced MM3-COPRO ELISA test for ... [https://pmc.ncbi.nlm.nih.gov/articles/PMC8947386/]
- 7. Challenges in applying W.A.A.V.P. criteria to diagnosing ... [https://www.sciencedirect.com/science/article/pii/S2211320725000417]
- 8. Troubleshooting Guide: ELISA [https://www.rndsystems.com/resources/troubleshooting-guide-elisa-development]
- 9. ELISA Troubleshooting Guide [https://www.thermofisher.com/es/en/home/life-science/protein-biology/protein-biology-learning-center/protein-biology-resource-library/pierce-protein-methods/overview-elisa/elisa-troubleshooting-guide.html]
- 10. ELISA Troubleshooting Guide is Here!_AntibodySystem [https://www.antibodysystem.com/archive/469.html]
- 11. How to Analyze ELISA Data and Calculate Results [https://www.bosterbio.com/blog/post/how-to-analyze-elisa-data-and-calculate-results-step-by-step-guide-with-troubleshooting-tips?srsltid=AfmBOopBF86TdxikMygK0tZ52VgkF0G7CqLawzRHYf6UcQM2A6cIpxke]
- 12. Coproantigen detection and molecular identification of ... [https://pmc.ncbi.nlm.nih.gov/articles/PMC11754770/]
- 13. A copro-antigen ELISA for the detection of ascarid ... [https://www.sciencedirect.com/science/article/pii/S0304401722001492]
- 14. A comparative 'omics' approach for prediction of candidate ... [https://pmc.ncbi.nlm.nih.gov/articles/PMC10138266/]
- 15. Unveiling Novel Insights in Helminth Proteomics [https://www.mdpi.com/2673-8449/4/3/20]
- 16. Fasciola hepatica: can the coproantigen ELISA replace ... [https://veterinaryevidence.org/index.php/ve/article/view/698]
- 17. Diagnostic performance of ELISA kits and expanded ... [https://pmc.ncbi.nlm.nih.gov/articles/PMC12557959/]
- 18. Coproantigen detection and molecular identification of ... [https://amb-express.springeropen.com/articles/10.1186/s13568-024-01817-x]
- 19. ELISA Assay Challenges | MyBioSource Learning Center [https://www.mybiosource.com/learn/troubleshooting-elisa-assay-challenges]
- 20. An overview of ELISA: a review and update on best laboratory ... [https://pmc.ncbi.nlm.nih.gov/articles/PMC11808753/]
- 21. How to Analyze ELISA Data and Calculate Results [https://www.bosterbio.com/blog/post/how-to-analyze-elisa-data-and-calculate-results-step-by-step-guide-with-troubleshooting-tips?srsltid=AfmBOopRv-eRPZWXyR5_qYSowoDBCba8seSyOJeLa857bIPZUcx2cXbq]
- 22. Coproantigens - an overview [https://www.sciencedirect.com/topics/agricultural-and-biological-sciences/coproantigens]
- 23. Polyclonal vs. monoclonal antibodies [https://www.ptglab.com/news/blog/polyclonal-vs-monoclonal-antibodies/?srsltid=AfmBOooeAf2M04OKRsDKYiy2SC0iOQxz2AQnJlUXQWBx5e9HAVbz6AmD]
- 24. monoclonal vs polyclonal antibodies, how to choose [https://www.bosterbio.com/blog/post/monoclonal-vs-polyclonal-antibodies-how-to-choose?srsltid=AfmBOorKexrVNDl7pReRKgYBmuuGpkmQamMg90ip5KgbYG8YOBLgJSsg]
- 25. ELISA Troubleshooting [https://www.antibodies.com/applications/elisa/elisa-troubleshooting]
- 26. What are Some Potential Errors that can Occur in an ELISA? [https://shop.surmodics.com/elisa-test-results-troubleshooting]
- 27. Challenges in applying W.A.A.V.P. criteria to diagnosing ... [https://pmc.ncbi.nlm.nih.gov/articles/PMC12538080/]
- 28. Assessment of accuracy of liver fluke diagnostic tests using ... [https://www.sciencedirect.com/science/article/pii/S240593902400131X]
- 29. Fasciola hepatica: Specificity of a coproantigen ELISA test ... [https://www.sciencedirect.com/science/article/abs/pii/S0304401715003477]
- 30. Diagnosing Human Fascioliasis Using ELISA Immunoassays ... [https://pmc.ncbi.nlm.nih.gov/articles/PMC9147183/]
- 31. Comparison of different diagnostic protocols for the ... [https://pmc.ncbi.nlm.nih.gov/articles/PMC11515329/]
- 32. Fasciola hepatica: can the coproantigen ELISA replace ... [https://veterinaryevidence.org/index.php/ve/article/download/698/1037?inline=1]
- 33. CDC - DPDx - Diagnostic Procedures - Stool Specimens [https://www.cdc.gov/dpdx/diagnosticprocedures/stool/specimencoll.html]
- 34. Comparison of the techniques for isolating immunoassay- ... [https://www.sciencedirect.com/science/article/abs/pii/S0003269724002926]
- 35. How-To Guide: Stool Sample Processing [https://www.mpbio.com/us/how-to-guide-stool-sample-processing?srsltid=AfmBOooJdCx8If0ZGm5Y2r_bmIHh6-3ahiX3xdVijkIIW7aWkqACKBcU]
- 36. On farm evaluation of the coproantigen ELISA and ... [https://www.sciencedirect.com/science/article/abs/pii/S0304401712000817]
- 37. Optimize ELISA Assays with Checkerboard Titration ... [https://www.bosterbio.com/blog/post/how-to-use-checkerboard-titration-to-optimize-your-elisa-immunoassays?srsltid=AfmBOor4LqYHu-fK2LDYryjCOh2lnl426DpEm6p8GlCjXInL_hXxbDoL]
- 38. ELISA Antibody Concentration Optimization [https://www.bosterbio.com/protocol-and-troubleshooting/picokine-elisa-optimization/antibody-concentration?srsltid=AfmBOoovBk4lquzh_FAXgknh6LM8Cvdxe6bMkOtMdWKhdnMhPsG5bHI3]
- 39. How To Optimize Your ELISA Experiments [https://www.ptglab.com/news/blog/how-to-optimize-your-elisa-experiments/?srsltid=AfmBOopz_FJZ1ZQ9xFtfWqSVTqPNSj7pO64ZDMbsPQ4Y7eQaK3R07R8w]
- 40. ELISA Troubleshooting Guide: Solutions for Common ... [https://product.atagenix.com/archive/1073.html]
- 41. ELISA Optimization [https://www.cytodiagnostics.com/pages/elisa-optimization?srsltid=AfmBOop4YAZVwB5Ej7Azin5rNGH5jr3JmOmZEM4LTfwknMcxnzH9v4GN]
- 42. ELISA Guide; Part 3: ELISA Optimization [https://www.jacksonimmuno.com/secondary-antibody-resource/immuno-techniques/elisa-guide-part-3-elisa-optimization/]
- 43. ELISA Development and Optimization [https://www.thermofisher.com/us/en/home/life-science/protein-biology/protein-biology-learning-center/protein-biology-resource-library/pierce-protein-methods/overview-elisa/elisa-development-optimization.html]
- 44. ELISA Protocol [https://www.rockland.com/resources/elisa-protocol/?srsltid=AfmBOoqkWfqvplLV47ewEktBRTU7rxiEg57qyfzL37DFPllsiifX8Lkp]
- 45. Blocking Buffers for Western Blot and ELISA [https://www.thermofisher.com/us/en/home/life-science/protein-biology/protein-biology-learning-center/protein-biology-resource-library/pierce-protein-methods/blocking-buffers-western-blot-elisa.html]
- 46. Choosing the Right ELISA Blocking Buffer [https://resources.biomol.com/biomol-blog/choosing-the-right-elisa-blocking-buffer]
- 47. Rise in Antibody Interference Post-COVID [https://www.meridianbioscience.com/lifescience-blog/rise-in-antibody-interference-post-covid-impacts-on-diagnostic-assay-developers/]
- 48. Troubleshooting a Faulty ELISA [https://bitesizebio.com/37935/troubleshooting-faulty-elisa/]
- 49. ELISA Guide; Part 4: Troubleshooting [https://www.jacksonimmuno.com/secondary-antibody-resource/immuno-techniques/elisa-guide-part-4-troubleshooting/]
- 50. Troubleshooting common problems during ELISA ... [https://www.mybiosource.com/learn/troubleshooting-common-problems-during-elisa-experiments/]
- 51. ELISA Assay Technique | Thermo Fisher Scientific - US [https://www.thermofisher.com/us/en/home/life-science/protein-biology/protein-biology-learning-center/protein-biology-resource-library/pierce-protein-methods/overview-elisa.html]
- 52. Direct ELISA using fluorescent substrate protocol [https://www.abcam.com/en-us/technical-resources/protocols/direct-elisa-using-fluorescent-substrate]
- 53. How to interpret the dynamic range of an ELISA [https://www.abcam.com/en-us/technical-resources/guides/elisa-guide/elisa-dynamic-range]
- 54. How To Optimize Your ELISA Experiments [https://www.ptglab.com/news/blog/how-to-optimize-your-elisa-experiments/?srsltid=AfmBOopBAaBdkys4fWD48KATVbGQPoD7ksBHd_DgTy8Jvv29JKzEdiBy]
- 55. ELISA Sample Preparation & Collection Guide [https://www.rndsystems.com/resources/protocols/elisa-sample-preparation-collection-guide]
- 56. Best Practices for ELISA Sample Handling [https://www.mybiosource.com/learn/best-practices-for-elisa-sample-handling/]
- 57. Sample Collection And Submission Guidelines [https://www.bosterbio.com/services/sample-collection-guidelines?srsltid=AfmBOop8oc95McPvw5WkNPJsvVMZfClotM3kbsl7NP2QxK1Gq29KwDo4]
- 58. ELISA Kit Troubleshooting [https://www.rockland.com/resources/ELISA-Kit-Troubleshooting/?srsltid=AfmBOoqjD-B_kmvSrgLMeAxfT71w3OxxT6_y4MAhS7mjxPdh4_On-_hu]
- 59. 101 ELISA Troubleshooting Tips for Research in 2024 [https://www.assaygenie.com/101-elisa-troubleshooting-tips?srsltid=AfmBOorLm2yX8AIUWKyQCysTj6oz_sxfYhtEbS_Q0oEn4wrv2-Dqu0O-]
- 60. ELISA Troubleshooting Guide [https://blog.abclonal.com/blog/elisa-troubleshooting-tips]
- 61. Serological tests [https://www.thepigsite.com/disease-and-welfare/managing-disease/serological-tests]
- 62. Serologic Tests for Dengue Virus [https://www.cdc.gov/dengue/hcp/diagnosis-testing/serologic-tests-for-dengue-virus.html]
- 63. Antibody tests for identification of current and past infection ... [https://pmc.ncbi.nlm.nih.gov/articles/PMC7387103/]
- 64. Interim Guidelines for COVID-19 Antibody Testing [https://archive.cdc.gov/www_cdc_gov/coronavirus/2019-ncov/hcp/testing/antibody-tests-guidelines.html]
- 65. Field evaluation of the enhanced MM3-COPRO ELISA test for ... [https://journals.plos.org/plosone/article?id=10.1371/journal.pone.0265569]
- 66. A comparison of four serological assays for detecting anti– ... [https://pmc.ncbi.nlm.nih.gov/articles/PMC7665313/]
- 67. Comparative evaluation of in-house ELISA and two ... [https://www.nature.com/articles/s41598-025-97050-y]
- 68. A Coproantigen Diagnostic Test for Strongyloides Infection [https://pmc.ncbi.nlm.nih.gov/articles/PMC3035667/]
- 69. A Comparison of the Sensitivity and Fecal Egg Counts ... [https://pmc.ncbi.nlm.nih.gov/articles/PMC3114752/]
- 70. The bias, accuracy and precision of faecal egg count ... [https://www.sciencedirect.com/science/article/abs/pii/S0304401712001410]
- 71. Help & FAQs: ELISAs [https://www.rndsystems.com/resources/faqs/elisas]
- 72. Performance of an ELISA and Indirect Immunofluorescence ... [https://pmc.ncbi.nlm.nih.gov/articles/PMC4142716/]
- 73. Comparison of Sensitivity and Specificity of Native ELISA ... [https://brieflands.com/journals/zjrms/articles/91416]
- 74. A Coproantigen Test for Strongyloides Infection Diagnostic [https://journals.plos.org/plosntds/article?id=10.1371/journal.pntd.0000955]
- 75. Application of a coproantigen ELISA as an indicator ... [https://pubmed.ncbi.nlm.nih.gov/28969782/]
- 76. Standardisation of a coproantigen reduction test (CRT) ... [https://pubmed.ncbi.nlm.nih.gov/21093156/]
- 77. A Monoclonal Antibody-Based Copro-ELISA Kit for Canine ... [https://pmc.ncbi.nlm.nih.gov/articles/PMC3542170/]
- 78. Frequency, diagnostic performance of coproantigen ... [https://pmc.ncbi.nlm.nih.gov/articles/PMC5189869/]