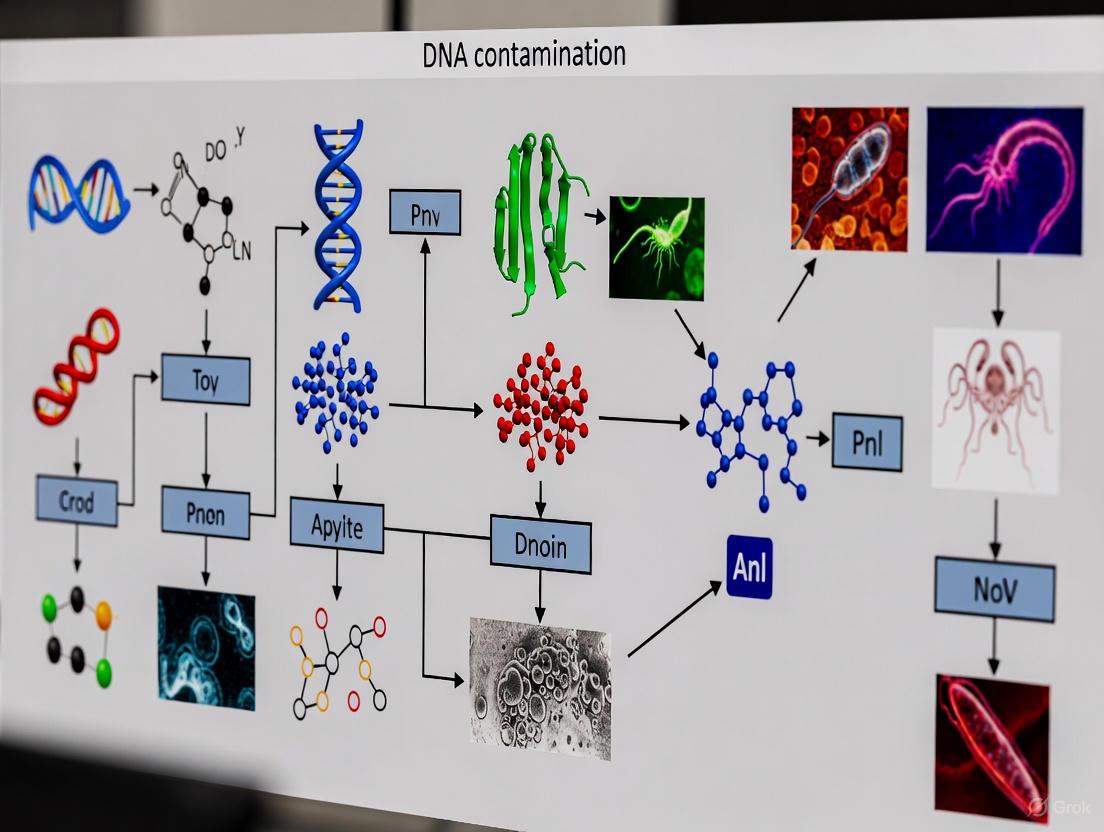
Conquering Contamination: Advanced Strategies for Reliable Ancient Parasite DNA Analysis
The analysis of ancient parasite DNA holds immense potential for understanding the evolutionary history of human pathogens, past disease burdens, and the health of ancient populations.
Conquering Contamination: Advanced Strategies for Reliable Ancient Parasite DNA Analysis
Abstract
The analysis of ancient parasite DNA holds immense potential for understanding the evolutionary history of human pathogens, past disease burdens, and the health of ancient populations. However, this field is critically hampered by two major sources of DNA contamination: the pervasive contamination of reference genome databases and the introduction of exogenous DNA during sample processing. This article synthesizes the latest research to provide a comprehensive guide for overcoming these challenges. We explore the scope of the contamination problem, evaluate cutting-edge decontamination methodologies for both reference databases and ancient sediments, and outline rigorous wet-lab and bioinformatic protocols for contamination control. By presenting a validated multimethod framework that integrates microscopy, ELISA, and sedimentary ancient DNA (sedaDNA) with targeted enrichment, this resource equips researchers with the tools to achieve unprecedented accuracy in ancient parasite detection, paving the way for more reliable insights into the history of human-parasite interactions.
The Invisible Adversary: Quantifying the Pervasive Challenge of Contamination in Paleoparasitology
What is systematic database contamination? Systematic contamination in public genome databases occurs when reference sequences contain segments of foreign DNA that do not originate from the biological source organism. This contamination is subsequently propagated when these sequences are used for metagenomic classification, leading to widespread, systematic errors across multiple studies [1] [2].
Why is this particularly problematic for ancient parasite research? Ancient DNA research faces the dual challenge of working with low-biomass samples where contaminating DNA can easily overwhelm the authentic signal, while also relying on reference databases that may themselves be contaminated. This combination can lead to false positives and erroneous conclusions about past parasite diversity [3] [4] [5].
Prevalence of Contamination: Key Statistics
The table below summarizes quantitative findings on contamination prevalence across major public databases:
Table 1: Documented Contamination in Public Sequence Databases
| Database/Study Focus | Contamination Prevalence | Impact |
|---|---|---|
| NCBI GenBank | 2,161,746 contaminated sequences identified [1] [6] | Affects downstream metagenomic analyses relying on these references |
| RefSeq (curated subset) | 114,035 contaminated sequences identified [1] [6] | Even curated databases contain substantial contamination |
| Eukaryotic Genomes (General) | 44% of genomes in GenBank/RefSeq contain contaminants [5] | Eukaryotic parasites are particularly affected |
| Prokaryotic Genomes (General) | 5% of genomes contain contaminants [5] | Lower but still significant contamination rate |
| Parasite Genomes (Specific) | 818 of 831 screened genomes contained contamination [5] | Extreme prevalence in parasite references |
| Extreme Case Example | Elaeophora elaphi genome: entirely consisted of Brucella anthropium bacteria [5] | Demonstrates complete misrepresentation |
Troubleshooting Guide: Common Issues & Solutions
Issue: False Positive Detections
Problem: Detection of organisms that are not actually present in your sample, but appear due to database contamination.
Symptoms:
- Inconsistent identification of organisms unlikely in your sample context (e.g., turtles and bullfrogs in human gut samples) [1] [6]
- Detection of common laboratory contaminants (e.g., Cutibacterium acnes) across multiple samples [7]
Solutions:
- Use decontaminated reference databases such as ParaRef, a curated database for parasite detection where contaminants have been systematically removed [5].
- Apply bioinformatic contamination screening tools like NCBI's Foreign Contamination Screen (FCS) tools, Conterminator, or GUNC to identify and filter contaminated references [1] [5].
- Implement methods like SIFT-seq that chemically tag sample-intrinsic DNA before isolation, allowing bioinformatic separation from contamination introduced during sample processing [7].
Issue: Taxonomic Misannotation
Problem: Incorrect taxonomic labels on reference sequences lead to misclassification of your metagenomic data.
Symptoms:
- Taxonomic classifications that contradict other lines of evidence
- Inability to differentiate closely related species (e.g., Escherichia coli and Shigella species) [1] [6]
Solutions:
- Compare sequences against type material to verify taxonomic assignments [1] [6].
- Calculate Average Nucleotide Identity (ANI) to identify outliers that may be misannotated (most species follow 95-96% ANI demarcation) [6].
- Validate databases across diverse samples to detect and correct edge cases, particularly for clinical applications [6].
Issue: Low-Biomass Sample Contamination
Problem: Authentic ancient parasite DNA signal is overwhelmed by contamination from reagents, laboratory environment, or handling.
Symptoms:
- High levels of microbial diversity inconsistent with sample type
- Repetitive detection of the "kitome" - contaminating organisms from extraction kits and reagents [4] [8]
Solutions:
- Implement rigorous contamination controls during sample collection and processing:
- Process multiple negative controls alongside samples, including:
- Empty collection vessels
- Swabs exposed to air in sampling environment
- Aliquots of preservation solutions [4]
- Use sedaDNA extraction methods with physical and chemical disruption (bead beating) to improve recovery of authentic ancient DNA [3].
Issue: Host-Associated Contamination
Problem: Parasite reference genomes contaminated with host DNA, or vice versa.
Symptoms:
- Detection of host sequences in supposedly purified parasite samples
- False associations between parasites and hosts
Solutions:
- Screen parasite genomes for host contamination using tools like FCS-GX and Conterminator [5].
- Be aware of common host-parasite contamination pairs:
Frequently Asked Questions (FAQs)
Q1: If I use the curated RefSeq database instead of GenBank, will I avoid contamination issues? A: While RefSeq has lower contamination levels (114,035 contaminated sequences vs. 2,161,746 in GenBank), it still contains substantial contamination. Additional screening is recommended for sensitive applications [1] [6].
Q2: What are the most common sources of contamination in parasite genomes? A: The primary sources include:
- Host DNA (8.4% of contamination is metazoan, primarily from hosts) [5]
- Bacterial DNA (86% of contamination, often from microbiome associates or laboratory reagents) [5]
- Laboratory reagents (common contaminants include Bradyrhizobium spp., Afipia spp., and Caulobacter spp. found in ultra-pure water and DNA kits) [5]
Q3: For ancient parasite analysis, which method is most robust against contamination? A: A multimethod approach provides the most comprehensive reconstruction:
- Microscopy: Most effective for identifying helminth eggs [3]
- ELISA: Most sensitive for detecting protozoa that cause diarrhea [3]
- sedaDNA with targeted enrichment: Can identify additional taxa and confirm species identification [3]
Q4: What computational tools are most effective for identifying contamination? A: Essential tools include:
- NCBI's Foreign Contamination Screen (FCS) suite, including FCS-GX for foreign organisms and FCS-adaptor for adapter/vector contamination [2]
- Conterminator: Effective for identifying cross-kingdom contamination [5]
- VecScreen: Specialized for detecting vector contamination [2]
Experimental Protocols for Contamination Control
Protocol: sedaDNA Extraction for Ancient Parasite Detection
This protocol is adapted from ancient parasite studies that successfully recovered parasite DNA from archeological sediments [3]:
- Subsampling: Weigh 0.25 g of sediment material in a dedicated ancient DNA facility.
- Lysis and Disruption:
- Add subsample to garnet PowerBead tubes containing 750 μL of 181 mM NaPO₄ and 121 mM guanidinium isothiocyanate
- Vortex for 15 minutes for mechanical disruption
- Add Proteinase K after bead beating
- Rotate tubes continuously in oven at 35°C overnight
- DNA Binding and Purification:
- Mix supernatant with high-volume Dabney binding buffer
- Centrifuge at 4500 rpm at 4°C for 6-24 hours to remove inhibitors
- Pass binding buffer through silica columns
- Elute in 50 μL elution buffer
- Library Preparation and Enrichment:
- Use double-stranded library preparation method for Illumina sequencing
- Employ targeted enrichment for parasite DNA using comprehensive parasite bait set
Protocol: SIFT-seq for Contamination-Resistant Metagenomics
SIFT-seq (Sample-Intrinsic microbial DNA Found by Tagging and sequencing) tags sample-intrinsic DNA before isolation [7]:
- DNA Tagging:
- Treat plasma or urine samples with bisulfite salts
- Convert unmethylated cytosines to uracils directly in the original sample
- DNA Isolation and Library Preparation:
- Extract DNA after tagging
- Prepare sequencing libraries using standard protocols
- Bioinformatic Filtering:
- Remove host DNA via mapping and k-mer matching
- Flag and remove sequences with more than three cytosines or one cytosine-guanine dinucleotide
- Perform species-level filtering to remove reads from C-poor regions
Workflow Visualization
Diagram: Impact of Database Contamination on Metagenomic Screening
Research Reagent Solutions
Table 2: Essential Materials and Tools for Contamination Management
| Reagent/Tool | Function | Application Notes |
|---|---|---|
| ParaRef Database [5] | Decontaminated parasite reference database | Contains 831 systematically curated endoparasite genomes; reduces false positives |
| NCBI FCS Tools [2] [5] | Detects contamination in genome sequences | FCS-GX screens for foreign organisms; FCS-adaptor detects adapter/vector contamination |
| Conterminator [5] | Identifies cross-kingdom contamination | Effective for detecting host DNA in parasite genomes and vice versa |
| SIFT-seq Protocol [7] | Tags sample-intrinsic DNA before isolation | Uses bisulfite conversion; effective for blood and urine samples |
| Bisulfite Salts [7] | Chemical tagging of sample-intrinsic DNA | Implemented in SIFT-seq; does not require enzymes or oligos that may be contaminated |
| Garnet PowerBead Tubes [3] | Physical disruption of ancient samples | Improves DNA recovery by breaking parasite eggs in sedaDNA protocols |
| DNA Degrading Solutions [4] | Removes contaminating DNA from surfaces | Sodium hypochlorite (bleach), UV-C exposure, or commercial DNA removal solutions |
FAQs: Contamination Challenges in Ancient DNA Research
What are the primary sources of contamination in low-biomass ancient DNA studies? Contamination in low-biomass ancient DNA (aDNA) research can originate from multiple sources, disproportionately impacting results due to the minimal target DNA. Key sources include:
- Laboratory Environment and Reagents: Microbial DNA present in commercial DNA extraction kits and PCR reagents can be introduced during processing [4].
- Human Operators: Skin cells, hair, or aerosol droplets from researchers can contaminate samples during collection or handling [4].
- Cross-Contamination: DNA can transfer between samples during processing, for instance, through well-to-well leakage in PCR plates [4].
- Sampling Equipment and Storage Vessels: Equipment that is not thoroughly decontaminated can harbor external DNA [4] [9].
How can I distinguish true ancient parasite DNA from modern contamination in my samples? Distinguishing ancient from modern DNA relies on both laboratory techniques and bioinformatic controls:
- Laboratory Techniques: Dedicated aDNA facilities with physical separation of pre- and post-amplification areas are crucial [3] [10]. Work in a cleanroom environment using protective gear (gloves, masks, full-body suits) and rigorously decontaminate surfaces with sodium hypochlorite (bleach) and UV radiation [3] [4].
- Chemical Signatures of aDNA: Authentic ancient DNA exhibits specific damage patterns, such as cytosine deamination, which can be measured to confirm its antiquity [11].
- Use of Controls: Include negative controls (e.g., blank extraction samples) during your workflow. The absence of amplification in these controls helps identify contamination from reagents or the laboratory environment [10] [4].
My negative controls are showing amplification. What should I do? Amplification in No Template Controls (NTCs) indicates contamination.
- Systematic Contamination: If all NTCs show similar amplification, the contamination likely affects a common reagent. Replace all suspect reagents, such as master mixes and water, with new aliquots [10].
- Sporadic Contamination: If only some NTCs are affected with varying intensity, the source is likely aerosolized amplicons or sporadic environmental introduction. Review lab practices, ensure physical separation of workflows, and decontaminate equipment and surfaces [10].
- Enzymatic Decontamination: Use a master mix containing Uracil-N-glycosylase (UNG) with dUTP in your PCR setup. UNG degrades carryover PCR products from previous reactions [10].
What specific methods improve DNA recovery from resilient ancient parasite eggs? Recovering DNA from well-preserved helminth eggs requires specialized extraction protocols:
- Mechanical Disruption: Use vigorous bead beating (e.g., with garnet beads) to physically break down the tough chitinous shell of parasite eggs and release DNA [3].
- Optimized Lysis and Binding: Follow bead beating with an extended incubation with proteinase K in a lysis buffer. Use high-volume binding buffers and extended cold centrifugation to precipitate and remove enzymatic inhibitors common in sediments and paleofeces [3].
- Targeted Enrichment: After library preparation, use targeted enrichment (capture hybridization) with bait sets designed for a comprehensive panel of parasites. This avoids the high cost of deep shotgun sequencing and increases the recovery of target parasite DNA from complex environmental samples [3].
Beyond sequencing, what other methods can confirm parasite infections in ancient samples? A multi-method approach provides the most comprehensive reconstruction of past parasite diversity.
- Microscopy: Light microscopy remains the most effective method for identifying and quantifying the eggs of helminths (e.g., roundworm, whipworm) based on morphological characteristics [3].
- Enzyme-Linked Immunosorbent Assay (ELISA): ELISA is highly sensitive for detecting antigens from protozoan parasites that cause diarrhea, such as Giardia duodenalis and Cryptosporidium spp., which are often missed by microscopy [3].
Troubleshooting Guides
Problem: Consistently Low Yield of Ancient Parasite DNA
Potential Causes and Solutions:
| Potential Cause | Diagnostic Steps | Solution |
|---|---|---|
| Inefficient egg disruption | Check protocol for bead beating step duration and bead composition. | Increase vortexing/bead beating time to 15+ minutes using garnet beads for better physical disruption [3]. |
| Incomplete lysis | Review lysis buffer composition and incubation parameters. | Ensure proper buffer reagents and extend proteinase K incubation with continuous rotation at 35°C overnight [3]. |
| DNA loss during extraction | Confirm binding buffer volumes and centrifugation steps. | Use high-volume Dabney binding buffer and centrifuge for a minimum of 6 hours at 4°C to improve DNA recovery and remove inhibitors [3]. |
Problem: Suspected Cross-Contamination Between Samples
Potential Causes and Solutions:
| Potential Cause | Diagnostic Steps | Solution |
|---|---|---|
| Aerosol contamination during sample handling | Review pipetting technique and lab layout. | Use positive-displacement pipettes or aerosol-resistant filtered tips. Maintain a unidirectional workflow from clean to post-PCR areas [10] [9]. |
| Contaminated equipment | Swab surfaces and equipment (centrifuges, vortexers) and test via PCR. | Decontaminate all work surfaces and equipment before and after use with a fresh 10% bleach solution, allowing 10-15 minutes of contact time [10] [4]. |
| Improper sample storage | Check that samples are stored sealed and separately from PCR products. | Store ancient DNA samples and reagents separately from PCR amplicons and post-PCR materials in dedicated pre-PCR areas [10]. |
Experimental Protocols for Ancient Parasite DNA Analysis
Protocol: Sedimentary Ancient DNA (sedaDNA) Extraction from Paleofeces/Latrine Sediments
This protocol is optimized for the recovery of DNA from complex archeological sediments [3].
- Subsampling: Weigh 0.25 g of sediment material in a sterile tube in a clean, dedicated pre-amplification lab.
- Mechanical Disruption: Place the subsample into a garnet PowerBead tube containing 750 μL of NaPO4 and guanidinium isothiocyanate buffer. Vortex vigorously for 15 minutes.
- Enzymatic Lysis: Add proteinase K to the tube. Continuously rotate the tubes in an oven at 35°C overnight.
- Binding: Transfer the supernatant to a new tube and mix with a high-volume Dabney binding buffer.
- Inhibitor Removal: Centrifuge the mixture at 4500 rpm at 4°C for a minimum of 6 hours (up to 24 hours if needed) until the supernatant is clear.
- Purification: Pass the supernatant through a silica column. Wash the column according to the standard protocol and elute the DNA in 50 μL of elution buffer.
Protocol: Parasite DNA Targeted Enrichment and Sequencing
This protocol follows sedaDNA extraction to enrich for parasite DNA before sequencing [3].
- Library Preparation: Prepare double-stranded DNA libraries for Illumina sequencing from the extracted sedaDNA, incorporating blunt-end repair steps suitable for aDNA [3].
- Targeted Enrichment: Perform targeted enrichment using an in-solution capture hybridization approach with biotinylated RNA baits designed to target a comprehensive set of parasite genomes.
- Sequencing: Sequence the enriched libraries on an Illumina platform. A subset of libraries can be sequenced via shallow shotgun sequencing first to assess general content.
Data Presentation
Table 1: Efficacy of Different Paleoparasitological Methods
This table summarizes the strengths of different methods used in a multi-method approach for detecting parasites in ancient samples [3].
| Method | Optimal For | Key Advantage | Limitations |
|---|---|---|---|
| Light Microscopy | Helminth eggs (e.g., roundworm, whipworm) | Most effective for morphological identification and quantification of helminth eggs [3]. | Cannot detect protozoa; requires intact, recognizable eggs. |
| ELISA | Protozoa (e.g., Giardia, Entamoeba) | Highest sensitivity for detecting protozoan antigens [3]. | Targets specific organisms; depends on antigen survival. |
| sedaDNA with Targeted Enrichment | Broad-spectrum parasite DNA, species confirmation | Can identify additional taxa, confirm species, and detect DNA even when eggs are not visible via microscopy [3]. | High cost; requires specialized aDNA facilities; risk of modern DNA contamination. |
Research Reagent Solutions
Table 2: Essential Materials for Ancient Parasite DNA Research
This table lists key reagents and materials used in sedaDNA workflows for ancient parasite analysis [3] [4] [9].
| Item | Function | Consideration |
|---|---|---|
| Garnet PowerBead Tubes | Physical disruption of tough parasite eggs and sediment matrices during lysis. | Superior to other beads for breaking down chitinous egg shells [3]. |
| Guanidinium Isothiocyanate Buffer | A chaotropic salt in the lysis buffer that helps denature proteins and release DNA. | Also helps inactivate nucleases and disrupt cellular membranes [3]. |
| Proteinase K | An enzyme that digests proteins and degrades nucleases. | Critical for breaking down organic material during extended incubation [3]. |
| Dabney Binding Buffer | A high-volume binding buffer used to bind DNA to silica columns. | Optimized for maximum recovery of ancient DNA from complex samples [3]. |
| Biotinylated RNA Baits | Used in targeted enrichment to selectively capture parasite DNA from total library DNA. | A comprehensive bait set allows for the detection of multiple parasite taxa simultaneously [3]. |
| UNGs (e.g., in Master Mix) | Enzymes that degrade uracil-containing DNA (PCR carryover contamination). | Essential for preventing false positives from amplicons of previous PCR runs [10]. |
| Sodium Hypochlorite (Bleach) | A chemical decontaminant for surfaces and equipment. | Effective at degrading contaminating DNA; use fresh dilutions (10-15%) weekly [10] [4]. |
Workflow Diagrams
Ancient Parasite DNA Analysis Workflow
The accurate detection of parasites in biological samples using shotgun metagenomics is critically hampered by a pervasive issue: widespread contamination in publicly available reference genomes [5]. This contamination, when present in the very databases used for identification, leads to false-positive detections, misdiagnoses in clinical settings, and faulty scientific conclusions about horizontal gene transfer or evolutionary history [5]. Eukaryotic genomes are especially vulnerable; one analysis found that 44% of eukaryotic genomes in GenBank and RefSeq contain contaminant sequences, compared to just 5% of prokaryotic genomes [5]. Parasite genomes are particularly prone to this problem, as samples often contain host DNA or DNA from associated microorganisms [5].
To address this, a 2025 study systematically quantified and removed contamination from 831 published endoparasite genomes to create ParaRef, a curated reference database for species-level parasite detection in both ancient and modern metagenomic datasets [5] [12]. This case study details the quantification process, the creation of the database, and provides a technical resource for researchers facing similar contamination challenges.
Quantifying the Contamination
Key Findings from the Genome Screening
The study screened 831 endoparasite genomes using two specialized tools: FCS-GX and Conterminator [5]. The combined results revealed the extensive scale of the problem, as summarized in the table below.
Table 1: Summary of Contamination Detected in 831 Parasite Genomes
| Screening Metric | FCS-GX Results | Conterminator Results | Combined Results |
|---|---|---|---|
| Contaminant Bases | 346,990,249 bases | 365,285,331 bases | 528,479,404 bases |
| Contaminated Genomes | 430 genomes | 801 genomes | 818 genomes |
| Genomes with >1% Contamination | Information Not Specified | Information Not Specified | 64 genomes |
| Most Extreme Case | Information Not Specified | Information Not Specified | Elaeophora elaphi genome: 100% contaminant (Brucella anthropium) |
Correlations and Trends in Contamination
The analysis revealed several important correlations. The quality of the genome assembly was a major factor. Only 17% of complete or chromosome-level assemblies were contaminated, with a maximum of 0.5% contaminant bases in the worst case. In contrast, over 50% of scaffold-level and contig-level assemblies were contaminated, with 18 genomes containing 10% or more contamination [5]. Furthermore, shorter contigs were disproportionately affected, with more than 75% of all contamination found in contigs shorter than 100 kb, even though such contigs comprise only 30% of the total genome data [5]. While genomes submitted after 2018 had a lower proportion of contaminant bases, the number of new contaminated submissions has continued to rise alongside total submissions [5].
Experimental Protocol: Decontaminating the Reference Genomes
The following workflow outlines the methodology for creating the decontaminated ParaRef database.
Decontamination Workflow for ParaRef
Detailed Methodology
Genome Selection and Screening: The study began with 831 published endoparasite genomes (Additional File 1: Table S1) [5]. Each genome was screened independently using two complementary tools:
- FCS-GX: Part of NCBI's Foreign Contamination Screen suite, this tool is optimized for speed and high sensitivity/specificity in identifying cross-kingdom contamination [5].
- Conterminator: This tool uses an all-against-all sequence comparison, breaking sequences into segments to identify foreign sequences even when embedded within scaffolds [5].
Result Combination and Curation: The results from both tools were combined, resulting in a comprehensive list of sequences flagged as contamination. In total, 528,479,404 bases across 818 genomes were identified for removal [5].
Database Compilation: The flagged contaminant sequences were systematically removed from the genomes. The remaining, verified sequences were compiled into the final curated resource, the ParaRef database [5].
Understanding the origin of contaminants is essential for preventing future issues. The analysis in the ParaRef study categorized the primary sources, which are detailed below.
Table 2: Primary Sources of Contamination in Parasite Genomes
| Contaminant Source | Proportion of Total Contamination | Common Examples and Notes |
|---|---|---|
| Bacterial DNA | 86% | Nematode-associated microbes: Stenotrophomonas indicatrix, Sphingomonas spp. (from CeMbio kit). Host gut microbes: Escherichia coli, Morganella morganii. Lab reagents: Bradyrhizobium spp., Afipia spp. (found in ultra-pure water and DNA kits) [5]. |
| Metazoan DNA | 8.4% (29.4 Mb) | Host DNA: A prevalent source. Examples include: - Human DNA in the Mansonella sp. 'DEUX' genome. - Mouse and rabbit DNA in Schistosoma japonicum genomes. - Pig DNA in the Taenia solium genome [5]. |
| Other/Unspecified | 5.6% | Potential sources include fungal DNA, viral DNA, or other unclassified contaminants. |
FAQs and Troubleshooting Guide
This section addresses specific issues researchers might encounter during their own parasite genome studies or when using metagenomic detection methods.
Frequently Asked Questions
Q1: Our metagenomic screening is yielding puzzling false-positive hits for organisms that are ecologically implausible. What could be the cause? This is a classic sign of reference database contamination. The ParaRef study demonstrated that decontaminating reference genomes significantly reduces these false detection rates. If your reference contains a parasite genome contaminated with, for example, rabbit DNA, a sample with rabbit DNA may be misidentified as that parasite [5].
Q2: For ancient parasite analysis, our sedimentary ancient DNA (sedaDNA) yields are low. How can we improve recovery? A protocol optimized for sedaDNA can dramatically improve recovery. Key steps include:
- Bead Beating: Use garnet beads and vortexing to mechanically break down tough parasite eggs and release DNA [3].
- Extended Lysis: Follow bead beating with proteinase K digestion and continuous rotation at 35°C overnight [3].
- Inhibitor Removal: Use high-volume binding buffer and centrifuge at 4°C for 6-24 hours to precipitate and remove enzymatic inhibitors common in sediments and feces [3].
Q3: We are preparing sequencing libraries for ancient parasite DNA. Should we use shotgun sequencing or a targeted approach? For low-abundance targets like ancient parasites, targeted enrichment is highly recommended. While shotgun sequencing can be used, it is often cost-prohibitive at the depths required. Using a parasite-specific bait set for targeted capture prior to high-throughput sequencing allows for the preferential enrichment of parasite DNA, making the process more efficient and sensitive [3].
Q4: When performing DNA cleanup for our samples, we are getting low DNA yields. What are the common causes? Low yield during cleanup (e.g., with kits like Monarch PCR & DNA Cleanup Kit) can result from:
- Incomplete Elution: Ensure elution buffer is delivered directly to the center of the column membrane. Using larger elution volumes, longer incubation times, or multiple elution rounds can increase yield.
- Reagent Error: Confirm that all buffers (especially wash buffers containing ethanol) were reconstituted correctly and added in the proper order [13].
Troubleshooting Common Problems
Problem: Inability to detect protozoan parasites (e.g., Giardia) in ancient samples.
- Cause: Microscopy is ineffective for protozoa that do not form robust cysts, and DNA may be degraded.
- Solution: Integrate a multimethod approach. ELISA (Enzyme-Linked Immunosorbent Assay) is highly sensitive for detecting Giardia duodenalis and other protozoan antigens and should be used alongside microscopy and DNA analysis [3].
Problem: General DNA purification issues (no DNA, low quality, or poor performance in downstream applications).
- Causes and Solutions:
- No DNA: Verify that ethanol was added to wash buffers and that buffers were applied in the correct order [13].
- Low Quality/Genomic DNA Contamination: For plasmid preps, avoid vortexing after cell lysis to prevent shearing of host genomic DNA. Ensure complete neutralization and adequate incubation times [13].
- Poor Performance (Salt Carryover): Centrifuge the final wash step for an additional minute to ensure complete ethanol removal, and ensure the column tip does not contact the flow-through [13].
The Scientist's Toolkit: Essential Research Reagents & Materials
Table 3: Key Reagents and Tools for Parasite DNA Analysis and Decontamination
| Tool or Reagent | Function/Benefit | Application Context |
|---|---|---|
| FCS-GX | Rapidly screens genomes for foreign contamination with high sensitivity and specificity [5]. | Decontaminating new or existing genome assemblies. |
| Conterminator | Identifies mislabelled sequences and contaminants embedded within scaffolds via all-against-all comparison [5]. | Decontaminating new or existing genome assemblies. |
| ParaRef Database | A pre-computed, decontaminated reference database for 831 endoparasite species. | Metagenomic screening for parasites; reduces false positives. |
| Garnet Bead Tubes | Provides mechanical disruption for lysing tough structures like parasite eggs during DNA extraction [3]. | Recovering DNA from sedimentary ancient DNA (sedaDNA) and paleofeces. |
| Targeted Enrichment Baits | Probes designed to capture and enrich parasite DNA from a complex sample background prior to sequencing [3]. | Detecting low-abundance parasite DNA in clinical, environmental, or ancient samples. |
| ELISA Kits (e.g., for Giardia) | Immunological method to detect protozoan antigens that may be missed by microscopy or DNA analysis [3]. | Multimethod paleoparasitology; clinical detection of protozoa. |
| Dabney Binding Buffer | A high-volume binding buffer optimized for the recovery of short, damaged DNA fragments [3]. | Extraction of ancient DNA from complex substrates like sediment. |
Technical Support Center
Troubleshooting Guides
Guide 1: Identifying and Quantifying DNA Contamination in Your Samples
Problem: You suspect your genomic data, especially from low-biomass or valuable samples like ancient parasites, contains contaminating DNA, leading to unusual results or false positives.
Solution: Follow this systematic workflow to detect and measure contamination.
Detailed Protocol:
- Initial Screening: Use tools like VerifyIDintensity or BAFRegress to screen your samples. These methods examine sample-specific shifts in allele intensity clusters for each genotype to flag potentially contaminated samples [14].
- Contamination Estimation: For potentially contaminated samples, fit a linear regression model where the relative intensity of the B-allele probe (Iij) is regressed on the estimated genotype (Gij) and the allele frequency (AFj) from a reference panel to obtain an initial contamination proportion estimate (αiAF) [14].
- Model: E(Iij) = γ[Gij] + αiAF * AFj
- Identify Contaminating Sources: If the initial estimate (αiAF) exceeds a threshold (e.g., >0.005), iteratively search for the specific source samples among other genotyped samples by including their genotypes (Gkj) in the regression model [14].
- Final Estimation: Fit a final joint model including all identified contaminant samples to produce robust estimates of the contamination proportion from each source [14].
- Final Model: E(Iij) = γ[Gij] + αiAF * AFj + Σk αik * Gkj
Guide 2: Decontaminating Reference Databases for Accurate Metagenomic Analysis
Problem: Your metagenomic screening for parasites is yielding false positives due to pre-existing contamination in public reference genomes.
Solution: Create and use a curated, decontaminated reference database.
Experimental Protocol:
- Database Acquisition: Compile the set of parasite reference genomes you intend to use.
- Contamination Screening: Process genomes using specialized tools.
- Tools: Use FCS-GX (optimized for speed) and Conterminator (uses all-against-all sequence comparison) for comprehensive screening. These tools identify foreign sequences, even when embedded within contigs [15].
- Sequence Removal: Remove all sequences or contigs flagged as contamination by the screening tools. Research indicates over 50% of scaffold-level assemblies can be contaminated [15].
- Database Curation: Compile the remaining, verified sequences into a new database (e.g., ParaRef) [15]. Studies show this decontamination significantly reduces false detection rates without sacrificing true-positive sensitivity [15].
Frequently Asked Questions (FAQs)
FAQ 1: What are the most common sources of DNA contamination in ancient parasite research?
Contamination can originate from multiple sources, categorized by timing and vector [16] [15]:
- Sample Collection & Handling: Modern human DNA from archaeologists, laboratory personnel, or contamination during excavation [16] [17].
- Laboratory Reagents: Contaminant DNA present in ultra-pure water or DNA extraction kits. Common bacterial contaminants include Bradyrhizobium spp. and Caulobacter spp [15].
- Associated Organisms:
- Cross-Contamination in Sequencing: Mixing of DNA samples from multiple individuals during genotyping or sequencing [14].
- Reference Database Contamination: Public genomes themselves can contain contaminant sequences, leading to false-positive identifications during metagenomic analysis [15].
FAQ 2: How does contamination specifically lead to false evolutionary inferences?
Contamination distorts evolutionary analyses in several critical ways:
- Inaccurate Genotype Calls: Contamination increases genotyping errors, leading to false positive signals or reduced power in association studies [14]. In somatic mutation detection, even 1.5% human contamination can produce approximately 0.2 erroneous somatic mutation calls per Mb [16].
- Biased Demographic Histories: For ancient DNA, contamination with present-day human DNA introduces a bias towards the contaminant's population, skewing estimates of divergence times, admixture rates, and effective population sizes [17].
- Spurious Evidence of Admixture: Contamination can create the false appearance of gene flow or admixture between populations or species where none exists [17].
- False Phylogenetic Relationships: Incorporating contaminated sequences into phylogenetic analyses can group organisms incorrectly, leading to misleading conclusions about evolutionary relationships and origins [15].
FAQ 3: What is the most effective multi-method approach to minimize contamination issues?
A multi-pronged approach is essential for robust results [18]:
- Primary Screening with Microscopy: Use microscopic analysis as an effective first screen for helminth eggs in paleofecal and sediment samples [18].
- Targeted Detection with ELISA: Apply Enzyme-Linked Immunosorbent Assay (ELISA) for highly sensitive detection of protozoa (e.g., Giardia duodenalis) that are difficult to identify morphologically [18].
- Confirmation and Speciation with DNA: Use sedimentary ancient DNA (sedaDNA) analysis with targeted enrichment to confirm species identity, detect parasites missed by other methods, and distinguish between closely related species (e.g., Trichuris trichiura vs. Trichuris muris) [18].
Quantitative Data on Contamination Impacts
Table 1: Impact of Contamination on Somatic Mutation Calling [16]
| Contamination Level | Erroneous Somatic Mutation Calls (per Mb) | Impact on Analysis |
|---|---|---|
| 0.5% | ~0.07 | Low, but may be significant in low-mutation-rate cancers |
| 1.5% | ~0.2 | Considerable burden; common occurrence in datasets |
| 3.0% | ~0.4 | High; likely to overwhelm true signal in many cancers |
Table 2: Contamination Prevalence in Public Parasite Genomes [15]
| Assembly Quality | Percentage of Genomes Contaminated | Maximum Contamination Observed |
|---|---|---|
| Complete / Chromosome Level | 17% | 0.5% of genome |
| Scaffold Level | >50% | Up to 100% of genome (extreme case) |
| Contig Level | >50% | 10% or more in 18 genomes |
Research Reagent Solutions
Table 3: Essential Tools for Contamination Management
| Reagent / Tool | Function | Application Note |
|---|---|---|
| FCS-GX [15] | Rapid screening of genome assemblies for foreign contaminant sequences. | Part of NCBI's Foreign Contamination Screen suite. Optimized for speed and efficiency. |
| Conterminator [15] | Identifies contamination via all-against-all sequence comparison across taxonomic kingdoms. | Effective at finding contaminants embedded within scaffolds. |
| VerifyIDintensity [14] | Estimates contamination proportion in genotyping array data by examining allele intensity shifts. | Requires genotyping array intensity data. |
| DICE (Demographic Inference with Contamination and Error) [17] | Co-estimates contamination rate, error rate, and demographic parameters from ancient nuclear genome data. | Allows use of moderately contaminated samples (up to ~50%) without discarding them. |
| ParaRef Database [15] | A curated, decontaminated reference database of parasite genomes. | Use for metagenomic alignment to significantly reduce false-positive parasite detection. |
A Multimethod Arsenal: Integrating sedaDNA, Targeted Enrichment, and Decontaminated Databases
Frequently Asked Questions
What is sedimentary ancient DNA (sedaDNA) and how is it used in pathogen research? Sedimentary ancient DNA (sedaDNA) is genetic material from once-living organisms that has been preserved in sediment archives over time. In pathogen research, it enables scientists to reconstruct past parasite and microbial communities from archaeological contexts such as latrine fill, coprolites, and burial soils, providing insights into historical diseases and human health [19] [20]. Unlike traditional methods that rely on visible fossils, sedaDNA can detect a broader range of organisms, including fragile species that do not fossilize, such as the protozoa that cause dysentery [21] [3].
My sedaDNA yields are low from paleofecal samples. How can I improve recovery? Low DNA yield is a common challenge. An optimized extraction protocol that combines physical and chemical disruption can significantly improve recovery:
- Mechanical Disruption: Use bead-beating with garnet beads in PowerBead tubes to break down tough parasite eggs and sediment [3] [22].
- Chemical Lysis: Follow bead-beating with an incubation step using a lysis buffer and proteinase K, with continuous rotation at 35°C overnight [3].
- Enhanced Binding: Use a phosphate-based buffer (e.g., 181 mM NaPO4) and a high-volume Dabney binding buffer with silica columns to maximize recovery of short DNA fragments [3] [23]. This combined method has been shown to increase aDNA recovery by 7- to 20-fold compared to commercial kits [3].
How can I authenticate that my DNA sequences are truly ancient and not modern contaminants? Authenticating ancient DNA relies on assessing post-mortem damage patterns and using rigorous lab controls:
- Damage Pattern Analysis: Use bioinformatic tools like
mapDamageto verify the presence of characteristic ancient DNA damage, such as cytosine deamination at fragment ends [21] [23]. - Fragment Length: Authentic sedaDNA is highly fragmented, with average lengths often below 100 base pairs [23].
- Rigorous Controls: Include extraction blank controls and sample the inner part of sediment cores to minimize surface contamination. The use of chemical tracers (e.g., PFMD) in drilling fluid can help track potential contamination during coring [21] [20].
What is the most effective method for detecting a broad range of parasites from a single sample? A multimethod approach is most effective, as each technique has complementary strengths:
- Microscopy: Best for identifying helminth eggs based on morphology [3].
- ELISA (Enzyme-Linked Immunosorbent Assay): Most sensitive for detecting protozoan antigens (e.g., Giardia duodenalis, Entamoeba histolytica) [3].
- sedaDNA with Targeted Capture: Can identify additional taxa, confirm species, and detect organisms that do not produce visible fossils [3]. One study found that while microscopy identified 8 helminth taxa, sedaDNA additionally detected whipworm at a site where only roundworm was visible, and even revealed the presence of two different whipworm species [3].
Troubleshooting Guides
Problem: Inability to Distinguish Closely Related Pathogen Species Solution: Employ a targeted hybridization capture approach with bespoke probe sets.
- Methodology: Design RNA probe arrays (e.g., "HABbaits") to target taxonomic marker genes of interest (e.g., 18S rRNA, ITS, CO1) [21]. This method enriches for specific pathogens prior to high-throughput sequencing, dramatically increasing the coverage of target DNA and allowing for finer taxonomic resolution [21] [3]. This is particularly useful for distinguishing between genetically similar species, such as different Trichuris (whipworm) species [3].
Problem: High Sequencing Costs for Low-Abundance Targets Solution: Implement a pooled testing approach to screen samples efficiently.
- Methodology: After individual DNA extraction, pool multiple extracts together for subsequent library preparation and capture. Samples with detectable aDNA signals can then be analyzed individually, while empty pools are discarded. This strategy can reduce costs by up to 70% and hands-on laboratory time to one-fifth [22].
- Validation: One study demonstrated that an aDNA signal remains discernible even when an positive extract is pooled with four negative extracts, and can sometimes yield a 1.36-fold increase in target DNA [22].
Problem: Modern DNA Contamination Overwhelms Authentic Ancient Signal Solution: Enforce stringent, multi-stage contamination controls from field to lab.
- Field Sampling: Wear full personal protective equipment (disposable coveralls, gloves, masks, hairnets). Decontaminate tools and surfaces with bleach (3-6%) and ethanol (70%). Sample from the center of a sediment core after removing the outer layer [21] [20].
- Laboratory Work: Process samples in dedicated, ultraclean ancient DNA facilities that follow a unidirectional workflow (from clean reagent preparation to extraction and amplification rooms). Use UV irradiation and regular decontamination of surfaces [21] [3] [23].
Table: Key Contamination Control Measures Across the Workflow
| Stage | Risk | Preventive Measure |
|---|---|---|
| Field Sampling | Surface contamination, human DNA | Remove outer sediment layer; use PPE; chemical tracers in drill fluid [20] |
| Transport & Storage | Microbial growth, DNA degradation | Store samples frozen; avoid freeze-thaw cycles; anoxic conditions ideal [20] |
| DNA Extraction | Lab contaminants, cross-contamination | Use dedicated clean-room facilities; include extraction blank controls [21] [3] |
| Data Analysis | Misidentification | Bioinformatic assessment of DNA damage patterns; use of robust reference databases [21] [20] |
Experimental Protocols
Detailed Methodology: Multimethod Parasite Analysis from Archeological Sediments This protocol is adapted from recent paleoparasitology studies that successfully reconstructed parasite diversity from latrines, coprolites, and burial soils [3].
1. Sample Preparation and Subsampling
- Wear appropriate PPE and decontaminate workspaces. Subsampling should be performed in a controlled, clean environment.
- For each archaeological sediment sample (latrine fill, coprolite, pelvic soil), take three separate subsamples for the three methods:
- 0.2 g for microscopy.
- 1.0 g for ELISA.
- 0.25 g for sedaDNA analysis [3].
2. Parallel Analysis with Three Methods
- Microscopy:
- Disaggregate the 0.2 g subsample in 0.5% trisodium phosphate.
- Microsieve to collect material between 20 and 160 µm.
- Mix the fraction with glycerol and identify helminth eggs via light microscope at 200x and 400x magnification based on morphological characteristics [3].
- ELISA for Protozoa:
- Disaggregate the 1.0 g subsample and microsieve it.
- Collect the material in the catchment container below the 20 µm sieve for analysis.
- Use commercial ELISA kits (e.g., TECHLAB's GIARDIA II, E. HISTOLYTICA II) following the manufacturer's protocols to detect protozoan antigens [3].
- sedaDNA Extraction and Analysis:
- Lysis: Add the 0.25 g subsample to a garnet PowerBead tube containing 750 µL of a lysis buffer (e.g., 181 mM NaPO4, 121 mM guanidinium isothiocyanate). Vortex for 15 minutes.
- Digestion: Add proteinase K and rotate tubes continuously at 35°C overnight.
- Binding and Purification: Mix supernatant with high-volume Dabney binding buffer. Centrifuge at 4°C for a minimum of 6 hours (up to 24) to precipitate inhibitors. Pass the buffer through a silica column and elute in 50 µL of elution buffer [3].
- Library Preparation & Sequencing: Prepare double-stranded DNA libraries. For broad screening, use a targeted hybridization capture approach with probes designed for a comprehensive set of parasite DNA to enrich for targets before sequencing [3].
The following workflow diagram summarizes this multi-method approach:
Workflow: Multimethod Paleoparasitology
Protocol for Contamination Tracking During Coring Operations For studies involving sediment cores from water-logged contexts, tracking fluid ingress is critical.
- Tracer Introduction: Infuse a non-toxic, inert chemical tracer (Perfluoromethyldecalin - PFMD) at a constant rate into the drill fluid (seawater) during the coring process [20] [23].
- Post-Coring Analysis: Test sediment subsamples along the core for the presence of PFMD.
- Interpretation: If PFMD is detected in a sedaDNA sample, it indicates potential contamination with modern drill fluid, and the results from that sample should be interpreted with extreme caution or discarded [20].
The Scientist's Toolkit
Table: Essential Research Reagents and Materials for sedaDNA Pathogen Research
| Reagent / Material | Function | Example Use Case |
|---|---|---|
| Garnet PowerBead Tubes | Physical disruption of sediment and robust parasite eggs during lysis. | Essential for breaking open tough Trichuris and Ascaris eggs in coprolites [3]. |
| Phosphate-Based Lysis Buffer | Creates a competitive environment to keep fragmented DNA in solution, improving yield. | Optimized recovery of short (<100 bp) sedaDNA fragments from complex clay-rich sediments [23]. |
| Silica Column/Binding Buffer | Selective binding of DNA based on size and charge, purifying it from inhibitors. | Part of the Dabney protocol, effective for binding very short DNA fragments (down to ~27 bp) [3] [23]. |
| Custom RNA Probes (e.g., HABbaits) | Targeted enrichment of pathogen DNA from total sedaDNA prior to sequencing. | Used to specifically capture DNA from dinoflagellate pathogens; applicable to human parasites [21] [3]. |
| Chemical Tracer (PFMD) | Tracks potential contamination from drill fluid during sediment coring. | Used in IODP expeditions to validate the authenticity of sedaDNA recovered from marine cores [20] [23]. |
| ELISA Kits (e.g., GIARDIA II) | Immunological detection of specific protozoan antigens. | Effectively identified Giardia duodenalis in Roman-era latrine samples where microscopy failed [3]. |
Advanced Techniques & Data Interpretation
Leveraging DNA Damage for Authentication Beyond being a challenge, DNA damage is a tool for authentication. Ancient DNA exhibits characteristic post-mortem damage, primarily cytosine deamination, which results in C-to-T substitutions at the ends of DNA fragments [21]. Bioinformatic pipelines are used to quantify this damage pattern. A high frequency of such misincorporations is a positive indicator of sequence authenticity, helping to distinguish ancient DNA from modern contaminants [22] [23].
Understanding Taphonomic Biases The sedaDNA record is a biased snapshot of the past biological community. The composition of your data is influenced by:
- Preservation Bias: DNA from organisms with robust resting cysts (e.g., some dinoflagellates) or eggs (e.g., helminths) preserves better than that from fragile cells [21] [23].
- Adsorption Bias: DNA binds preferentially to certain mineral surfaces, like clay, which can protect it from degradation but also make it harder to extract [20].
- Transport Bias: The DNA in a sediment sample may originate from local organisms or be transported from elsewhere by water or wind.
Being aware of these biases is crucial for accurate ecological and pathological interpretation of your sedaDNA datasets [20].
In the field of ancient parasite analysis, often called paleoparasitology, researchers face the unique challenge of detecting and identifying pathogens from highly degraded samples that may be thousands of years old. No single method can provide a complete picture of past parasitic infections. This technical guide explores how integrating microscopy, Enzyme-Linked Immunosorbent Assay (ELISA), and molecular tools creates a powerful, multi-faceted approach that maximizes detection sensitivity and specificity while controlling for the limitations of each individual technique. This synergistic methodology is particularly crucial for overcoming the pervasive challenge of DNA contamination and obtaining reliable results from precious archaeological materials.
Frequently Asked Questions (FAQs)
1. Why is a multi-method approach necessary in ancient parasite analysis? A multi-method approach is essential because no single technique can detect all types of parasites in ancient samples. Each method has unique strengths:
- Microscopy is highly effective for identifying the eggs of helminths (worms) based on their distinct morphological characteristics [3].
- ELISA is exceptionally sensitive for detecting protozoa that cause diarrheal illnesses, such as Giardia duodenalis, by targeting their antigens [3].
- Molecular tools (e.g., PCR, sedaDNA) can confirm species identification, detect parasites when no visible eggs remain, and reveal hidden diversity, such as differentiating between Trichuris trichiura and Trichuris muris [3]. Using these methods in combination provides the most comprehensive reconstruction of past parasite diversity [3].
2. What is the biggest advantage of using sedimentary ancient DNA (sedaDNA) analysis? The primary advantage of sedaDNA is its ability to recover pathogen DNA from minimal material (as little as 0.25 g of sediment) and provide species-specific identification, even in cases where microscopy findings are ambiguous or incomplete [3]. For instance, one study identified whipworm DNA at a site where only roundworm eggs were visible under microscopy [3].
3. My ELISA results show high background signal. How can I troubleshoot this? High background often stems from incomplete washing or non-specific binding. To resolve this:
- Ensure you are using the exact volume of wash buffer specified in the protocol. Using less volume, even with more wash cycles, may not cleanse the well completely due to capillary action [24].
- Verify that all incubation times and temperatures are adhered to precisely.
- Confirm the specificity of your antibodies to avoid cross-reactivity with non-target antigens [25].
4. How can I minimize modern DNA contamination during ancient DNA analysis? Preventing contamination requires a strict unidirectional workflow in dedicated ancient DNA facilities. Key precautions include:
- Working in physically separated, UV-irradiated cleanrooms.
- Wearing full suits, gloves, and masks.
- Regularly decontaminating surfaces with 6% sodium hypochlorite (bleach) [3].
- Using extraction and PCR reagent controls to detect any contamination that does occur.
Troubleshooting Common Experimental Issues
Table 1: Troubleshooting Guide for Integrated Parasite Detection
| Problem | Possible Causes | Solutions |
|---|---|---|
| Low Signal in ELISA [24] | Analyte concentration too low; suboptimal detection conditions. | Increase antibody incubation times (e.g., overnight at 4°C); Increase concentration of secondary antibody-enzyme conjugate by 50-100%; Protect light-sensitive substrate (e.g., TMB) from light. |
| Parasite DNA Not Recovered [3] | Inhibitory compounds in sediment/fecal samples; inefficient lysis of tough parasite eggs. | Incorporate prolonged, refrigerated centrifugation (6-24 hours) to precipitate inhibitors; Use garnet beads and extended vortexing (15+ minutes) for mechanical disruption of eggs. |
| Discrepant Results Between Methods [3] [25] | Method-specific limitations and target differences (e.g., DNA vs. protein vs. physical structure). | Expect and interpret differences. For example, PCR may detect DNA from non-infective parasite stages, while ELISA detects sporozoite-specific protein. Use the results complementarily. |
| Unexpected Data in ELISA [24] | Incorrect standard curve model; degraded or interfered-with samples. | Double-check the standard curve calculation (linear vs. 4/5-parametric); Dilute samples to minimize interference from substances like hemoglobin or detergents. |
Comparative Method Performance and Data Integration
Table 2: Comparison of Paleoparasitological Detection Techniques
| Method | Primary Target | Key Strengths | Key Limitations | Ideal Sample Type |
|---|---|---|---|---|
| Microscopy [3] | Helminth eggs | Gold standard for helminths; identifies taxa based on egg morphology; cost-effective. | Cannot identify protozoa; requires well-preserved, intact eggs. | Coprolites, latrine sediments, pelvic soil [3] [26]. |
| ELISA [3] [27] | Specific antigen proteins | Highly sensitive for protozoa (e.g., Giardia); high-throughput; quantitative potential. | Cannot distinguish between related species; may detect antigens after infection has cleared. | Sediment sieved to <20µm to capture protozoan cysts [3]. |
| sedaDNA / PCR [3] [28] | Pathogen DNA | High specificity; can detect low-abundance and non-viable parasites; allows species/genus-level ID. | Highly susceptible to contamination; DNA is fragmented; requires specialized facilities. | Paleofeces, latrine sediment, coprolites [3] [28]. |
Detailed Experimental Protocols
Protocol 1: Multi-Method Analysis of Archaeological Sediments
This protocol, adapted from a 2025 study, outlines a comprehensive workflow for analyzing ancient sediments [3].
I. Sample Subsampling and Parallel Processing
- Subdivide the archaeological sediment (e.g., from a latrine, pelvic bone soil) into three portions:
- 0.2 g for microscopy.
- 1.0 g for ELISA.
- 0.25 g for sedimentary ancient DNA (sedaDNA) analysis.
II. Microscopy for Helminths [3]
- Disaggregation: Soak the 0.2 g subsample in 0.5% trisodium phosphate solution.
- Microsieving: Sieve the mixture to collect material between 20 and 160 µm.
- Microscopy: Mix the resulting fraction with glycerol and examine under a light microscope at 200x and 400x magnification. Identify helminth eggs based on morphological characteristics.
III. ELISA for Protozoan Antigens [3]
- Disaggregation and Sieving: Disaggregate the 1.0 g subsample in 0.5% trisodium phosphate and microsieve it.
- Collection of Fine Fraction: Retain the material in the catchment container below the 20 µm sieve, as this contains protozoan cysts.
- Antigen Detection: Concentrate this fine fraction and analyze it using commercial ELISA kits (e.g., TECHLAB's GIARDIA II, E. HISTOLYTICA II) according to the manufacturer's protocols.
IV. Sedimentary Ancient DNA (sedaDNA) Analysis with Targeted Enrichment [3] Work in a dedicated ancient DNA facility.
- Lysis and DNA Extraction:
- Place the 0.25 g subsample in a garnet PowerBead tube with a lysis buffer containing guanidinium isothiocyanate.
- Vortex for 15 minutes for mechanical disruption of parasite eggs.
- Add Proteinase K and rotate tubes at 35°C overnight.
- Bind DNA using a high-volume binding buffer and centrifuge at 4°C for a minimum of 6 hours (up to 24 hours) to precipitate inhibitors.
- Purify DNA using silica columns and elute in a small volume (e.g., 50 µL).
- Library Preparation and Sequencing:
- Prepare double-stranded DNA libraries for Illumina sequencing.
- Use a targeted enrichment approach (e.g., with parasite-specific baits) to preferentially sequence parasite DNA and reduce sequencing costs.
This protocol uses modern molecular diagnostics on ancient, desiccated feces.
- Grinding and Extraction:
- Carefully break off 25–50 mg of paleofeces and grind it into a powder using a sterile tissue grinding tube.
- Extract DNA using a method optimized for paleofeces, taking extreme precautions to prevent contamination (e.g., using sterile, single-use materials and dedicated biosafety cabinets) [28].
- Highly Sensitive Pathogen Profiling:
- Utilize a pre-amplification step followed by multi-parallel quantitative PCR (qPCR) to screen for a wide panel of enteric pathogens (e.g., Blastocystis spp., pathogenic E. coli, Entamoeba spp.).
Research Reagent Solutions
Table 3: Essential Reagents for Ancient Parasite Detection
| Reagent / Kit | Function / Target | Brief Explanation |
|---|---|---|
| Trisodium Phosphate (0.5%) [3] | Sample Rehydration | Disaggregates and rehydrates ancient sediment and fecal samples without damaging fragile parasite eggs. |
| Garnet PowerBead Tubes [3] | Mechanical Lysis | The tough, irregular garnet beads provide superior physical disruption of hardy parasite egg shells during vortexing, releasing internal DNA. |
| Parasite-Specific ELISA Kits (e.g., TECHLAB GIARDIA II) [3] | Antigen Detection | These commercial kits contain antibodies that bind to specific proteins from protozoa like Giardia, enabling highly sensitive immunodetection. |
| Silica Column DNA Purification [3] | DNA Isolation | Silica matrices selectively bind DNA in the presence of chaotropic salts, allowing for purification and removal of PCR inhibitors common in sediments. |
| Parasite-Specific Baits for Targeted Enrichment [3] | DNA Capture | Biotinylated RNA or DNA strands complementary to known parasite genomes are used to "pull down" and enrich ancient parasite DNA from a total DNA library before sequencing. |
Workflow Visualization
The following diagram illustrates the integrated multi-method workflow for analyzing ancient samples, from subsampling to final data integration.
Targeted enrichment and capture methods have revolutionized the sequencing of low-abundance parasite DNA, especially in challenging samples like ancient remains, formalin-fixed paraffin-embedded (FFPE) tissues, and clinical specimens. These techniques enable researchers to overcome limitations posed by low target DNA concentration, high host DNA background, and degraded genetic material. This technical support center provides comprehensive guidance for implementing these strategies effectively in parasite genomics research, with particular emphasis on addressing DNA contamination issues prevalent in ancient parasite analysis.
Core Methodologies
Hybridization Capture for Parasite DNA Enrichment
Hybridization capture, often called target enrichment, uses biotinylated probes to selectively isolate genomic regions of interest [29] [30]. This method involves designing probes complementary to target parasite DNA sequences, which are then hybridized to the DNA library. The probe-bound fragments are captured using streptavidin-coated magnetic beads, purified, and sequenced [30].
Key Applications:
- Exome sequencing of parasite genomes
- Genotyping single nucleotide polymorphisms (SNPs) or insertions/deletions (indels) in parasite populations
- Pan-cancer or inherited disease research in host-parasite interactions
- Identification of rare variants in parasite populations [30]
This approach provides data for discovering novel variants because it targets higher total gene content and enables comprehensive profiling of variant types, allowing thorough characterization of newly identified genetic variations in parasites [30].
Region-Specific Extraction (RSE) for Long DNA Fragments
RSE represents an advanced target capture methodology capable of producing sequencing templates exceeding 20 kbp in length [31]. This technique relies on specific hybridization of short (20-25 base) oligonucleotide primers to selected sequence motifs within parasite DNA target regions. These capture primers are enzymatically extended on the 3'-end, incorporating biotinylated nucleotides into the DNA. Streptavidin-coated beads then pull-down the original, long DNA template molecules via the newly synthesized, biotinylated DNA bound to them [31].
The utility of RSE has been demonstrated by capturing and sequencing complex genomic regions like the major histocompatibility complex (MHC) with 99.94% total coverage and >99.99% accuracy [31]. This method is particularly valuable for assembling complex parasite genomes and determining regional genomic variation of high complexity.
Selective Restriction Digestion for Parasite DNA Enrichment
For universal parasite detection in blood samples, researchers have developed a nested PCR approach that incorporates restriction enzyme digestion to selectively reduce host DNA amplification [32]. This method targets an ~200-bp region of 18S rDNA with restriction cut sites present in vertebrates but absent in blood protozoa and helminths.
The workflow involves:
- Initial restriction digestion of total DNA extracts using enzymes that cut host 18S rDNA
- First PCR amplification with pan-eukaryotic primers
- Secondary restriction digestion of PCR products
- Nested PCR amplification with internal primers [32]
This approach has demonstrated approximately 10-fold higher sensitivity than previous methods, with a limit of detection falling within the range of most qPCR methods [32]. It successfully detects and differentiates major human malaria parasites along with other clinically important blood parasites including Babesia, various kinetoplastids, and filarial nematodes.
Troubleshooting Guides
Common Experimental Challenges and Solutions
Table 1: Troubleshooting Common Issues in Parasite DNA Enrichment
| Problem | Possible Causes | Solutions |
|---|---|---|
| Low on-target rate | Inefficient hybridization | Optimize hybridization time and temperature; verify probe design covers entire target region [30] |
| High host DNA background | Insufficient host DNA depletion | Incorporate additional restriction digestion steps; use unique molecular identifiers (UMIs) for error correction [30] [32] |
| Uneven coverage | Poor probe design or degradation | Tile probes across entire region of interest; ensure proper storage of biotinylated probes [30] |
| Inconsistent results between samples | Variable DNA quality/quantity | Standardize input DNA quantification methods; use fluorometric quantification and capillary electrophoresis for quality assessment [30] |
| Limited parasite DNA recovery | Suboptimal sampling strategy | Sample multiple skeletal elements (especially teeth); increase number of replicates per individual [33] |
Addressing Contamination in Reference Databases
Contamination in reference genomes represents a significant challenge in parasite detection, leading to false-positive identifications [15]. Eukaryotic genomes are particularly prone to contamination, with 44% of eukaryotic genomes in GenBank and RefSeq containing contaminant sequences [15].
Solutions:
- Implement systematic decontamination using tools like FCS-GX and Conterminator to identify and remove contaminant sequences [15]
- Use curated databases such as ParaRef, which includes 831 decontaminated endoparasite genomes [15]
- Verify findings against multiple reference databases when possible
- Screen for common contaminants including bacterial DNA (86% of contaminants) and metazoan DNA (8.4% of contaminants) [15]
Overcoming Limitations in Ancient Parasite DNA Recovery
Ancient parasite DNA presents unique challenges including low abundance, fragmentation, and potential modern contamination [34] [33]. A recent study on Plasmodium falciparum demonstrated considerable variability in DNA recovery across different teeth from the same individual, with merely 7 of 38 libraries contributing to 72% of total unique fragments recovered [33].
Optimization Strategies:
- Sample multiple skeletal elements, particularly teeth, which often preserve pathogen DNA better than other tissues [33]
- Process sufficient replicates to account for random preservation patterns
- Utilize hybridization capture with baits covering target parasite genomes to enrich for specific sequences [33]
- Authenticate ancient DNA by examining characteristic deamination patterns (22% at 5' ends, 18% at 3' ends in verified ancient Plasmodium DNA) [33]
Experimental Protocols
Detailed Methodology: Nested Universal Parasite Diagnostic (UPDx) Test
This protocol enables sensitive detection of blood parasites through selective pathogen-DNA enrichment and deep amplicon sequencing [32].
Step 1: DNA Extraction and Quality Control
- Extract DNA from blood specimens using kits designed for the specific sample type (e.g., cfDNA kits for plasma)
- Quantify DNA using fluorometric methods (e.g., Qubit dsDNA BR Assay Kit)
- Assess quality via capillary electrophoresis (e.g., Bioanalyzer HS DNA chip) or qPCR (e.g., KAPA hgDNA Quantification and QC Kit) [30]
Step 2: Primary Restriction Digestion
- Digest total DNA extracts with PstI restriction enzyme to target host 18S rDNA
- Use 1-10μL of DNA extract in 20μL reaction volume with appropriate buffer conditions
- Incubate at 37°C for 1-2 hours [32]
Step 3: First PCR Amplification
- Amplify using pan-eukaryotic outer primers targeting 18S rDNA
- Set up 25-50μL reactions with 2-5μL digested DNA template
- Use high-fidelity DNA polymerase to minimize errors
- Cycling conditions: Initial denaturation 95°C for 2 min; 15 cycles of 95°C for 30s, 55°C for 30s, 72°C for 45s; final extension 72°C for 5 min [32]
Step 4: Secondary Restriction Digestion
- Digest first PCR products with BamHI-HF and BsoBI restriction enzymes
- Target vertebrate-specific restriction sites within the amplicon
- Incubate at 37°C for 1 hour [32]
Step 5: Nested PCR Amplification
- Amplify using inner primers flanking the original target
- Use 2-5μL of digested first PCR product as template
- Incorporate unique dual indexes (UDIs) to prevent sample misassignment
- Cycling conditions: Initial denaturation 95°C for 2 min; 25-30 cycles of 95°C for 30s, 55°C for 30s, 72°C for 45s; final extension 72°C for 5 min [32]
Step 6: Library Preparation and Sequencing
- Purify amplified products using magnetic beads
- Quantify libraries and pool in equimolar ratios
- Sequence on Illumina platforms (e.g., NextSeq 500) with 150bp paired-end reads [30] [32]
Step 7: Bioinformatics Analysis
- Process reads using tools like BWA for mapping and Picard or fgbio for duplicate marking and error correction [30]
- Utilize unique molecular identifiers to group sequencing data into read families representing individual DNA fragments [30]
Multimethod Approach for Comprehensive Parasite Detection
For ancient samples, a combination of techniques provides the most complete parasite detection:
Table 2: Comparison of Parasite Detection Methods
| Method | Best For | Advantages | Limitations |
|---|---|---|---|
| Microscopy | Helminth eggs in sediment samples and coprolites | Direct visualization, identifies 8+ taxa | Cannot detect protozoa, requires intact morphological features [18] |
| ELISA | Protozoa causing diarrhea (e.g., Giardia duodenalis) | High sensitivity for specific pathogens, quantitative | Targeted approach, may miss unexpected parasites [18] |
| Sedimentary Ancient DNA (sedaDNA) with Targeted Capture | Comprehensive parasite diversity, species identification | Detects multiple taxa simultaneously, confirms species identification | Requires specialized bait sets, more complex workflow [18] |
Implementing this multimethod approach revealed temporal trends in parasite diversity, showing a marked change during Roman and medieval periods with increasing dominance of parasites transmitted by ineffective sanitation [18].
Workflow Visualization
Target Enrichment Workflow for Parasite DNA
This diagram illustrates the fundamental workflow for targeted enrichment of parasite DNA, highlighting key steps where optimization can significantly improve outcomes for low-abundance targets.
Research Reagent Solutions
Table 3: Essential Research Reagents for Parasite DNA Enrichment
| Reagent/Category | Specific Examples | Function in Parasite DNA Enrichment |
|---|---|---|
| Library Prep Kits | xGen cfDNA & FFPE DNA Library Prep Kit; Illumina DNA Prep with Enrichment | Prepares sequencing libraries from challenging samples (cfDNA, FFPE) with low DNA input [30] |
| Hybridization Panels | xGen Custom Hyb Panels; Illumina Viral Surveillance Panel v2 | Target-specific biotinylated probes that capture parasite genomic regions of interest [29] [30] |
| Enzymes | BamHI-HF, XmaI, BsoBI, PstI restriction enzymes; High-fidelity PCR mixes | Selective digestion of host DNA; accurate amplification of target parasite sequences [32] |
| Capture Beads | Streptavidin-coated magnetic beads | Isolation of biotinylated probe-target DNA complexes during hybridization capture [30] [31] |
| Quantification Tools | Qubit dsDNA BR Assay; Bioanalyzer HS DNA chip; KAPA hgDNA Quantification kit | Accurate assessment of DNA quality and quantity before and during library preparation [30] |
| Unique Molecular Identifiers | xGen UDI primers; Unique dual indexes | Tagging individual DNA molecules to enable bioinformatic identification of PCR duplicates and error correction [30] |
Frequently Asked Questions
Q1: What is the minimum amount of parasite DNA required for successful targeted enrichment?
While requirements vary by parasite and sample type, successful hybridization capture has been achieved with as little as 25 ng of cfDNA from plasma samples [30]. For ancient samples, the key factor is often the proportion of parasite DNA to host DNA rather than absolute quantity. Even with low overall DNA preservation, sufficient sequencing depth can be achieved through appropriate enrichment techniques.
Q2: How can I distinguish true ancient parasite DNA from modern contamination?
Authentic ancient DNA displays characteristic damage patterns including cytosine deamination at fragment ends, resulting in C→T substitutions at 5' ends and G→A substitutions at 3' ends [33]. In verified ancient Plasmodium DNA, typical deamination rates are 22% at 5' ends and 18% at 3' ends [33]. Additionally, ancient DNA fragments are typically shorter than modern DNA.
Q3: Why does my parasite DNA enrichment show uneven coverage across the target region?
Uneven coverage can result from several factors: (1) uneven probe distribution across the target region - ensure probes tile across the entire region of interest; (2) GC bias - optimize hybridization conditions to accommodate variable GC regions; (3) target secondary structure - consider probe design that accounts for difficult-to-sequence regions [30].
Q4: What strategies are most effective for increasing sensitivity in parasite detection from complex samples?
A nested PCR approach with sequential restriction digestion has demonstrated 10-fold higher sensitivity compared to single-step methods [32]. Incorporating unique molecular identifiers enables bioinformatic error correction and improves detection of rare variants. For ancient samples, processing multiple replicates from different skeletal elements (particularly teeth) significantly increases detection success due to random preservation patterns [33].
Q5: How prevalent is contamination in public parasite genome databases, and how does this affect my analyses?
Contamination is widespread in public databases, with one study finding contamination in 818 of 831 screened parasite genomes [15]. Over half of contig- or scaffold-level assemblies were contaminated, and in 64 cases the contaminated fraction exceeded 1% of the genome. This can lead to false-positive detections and faulty conclusions. Using decontaminated resources like ParaRef significantly reduces false detection rates [15].
Q6: What is the advantage of hybridization capture over amplicon sequencing for parasite detection?
Hybridization capture supports larger gene content (typically >50 genes) and more comprehensive profiling of all variant types, making it ideal for discovering novel variants [29]. Amplicon sequencing is better suited for smaller gene content (typically <50 genes) and primarily detects single nucleotide variants and small insertions/deletions. Hybridization capture also doesn't require PCR primer design, reducing the likelihood of missing mutations [29] [30].
Q7: Can targeted enrichment be applied to sedimentary ancient DNA from archaeological contexts?
Yes, sedimentary ancient DNA (sedaDNA) analysis with targeted enrichment has successfully identified parasite DNA from archaeological sediment samples [18]. This approach can detect parasite taxa missed by microscopy and provide species-level identification, such as distinguishing between Trichuris trichiura and Trichuris muris [18]. Combined with microscopy and ELISA, it creates a powerful multimethod approach for comprehensive paleoparasitology.
Implementing Decontaminated Reference Databases (ParaRef) to Minimize False Positives
ParaRef is a decontaminated reference database specifically designed for accurate species-level parasite detection in both ancient and modern metagenomic datasets. It was created through systematic quantification and removal of contamination from 831 published endoparasite genomes. Contamination in public reference genomes occurs when DNA from other organisms is inadvertently incorporated during genome assembly. This can originate from biologically associated organisms (e.g., host tissue, microbiome) or be introduced during sample processing via reagents, handling, or packaging. This contamination significantly hinders accurate parasite detection by causing false-positive identifications, faulty conclusions about horizontal gene transfer, and potential misdiagnoses in clinical settings.
Eukaryotic genomes are especially prone to contamination, with one study finding that 44% of eukaryotic genomes in GenBank and RefSeq contain contaminant sequences compared to just 5% of prokaryotic genomes. Parasite genomes are particularly vulnerable since parasite samples frequently contain host DNA, and conversely, parasite DNA is sometimes present in host genome assemblies. The ParaRef database directly addresses this pervasive issue to enhance the reliability of metagenomic parasite screening in ecological, clinical, and archaeological settings [5].
Technical Specifications and Validation Data
Quantitative Analysis of Contamination in Parasite Genomes
Table 1: Comprehensive Contamination Analysis in 831 Parasite Genomes
| Metric | FCS-GX Tool Results | Conterminator Tool Results | Combined Results |
|---|---|---|---|
| Total Contaminant Bases | 346,990,249 | 365,285,331 | 528,479,404 |
| Number of Contaminated Genomes | 430 | 801 | 818 |
| Percentage of Contaminated Genomes | 51.7% | 96.4% | 98.4% |
Table 2: Contamination by Genome Assembly Quality
| Assembly Quality | Percentage Contaminated | Maximum Contamination Level |
|---|---|---|
| Complete/Chromosome Level | 17% | 0.5% of genome |
| Scaffold Level | >50% | ≥10% in 18 genomes |
| Contig Level | >50% | Up to 100% (one case) |
Analysis revealed that shorter contigs were significantly more contaminated, with over 75% of all detected contamination found in contigs shorter than 100 kb, even though such contigs constitute just 30% of the genomes. Furthermore, genomes submitted to NCBI from 2018 onward contained a lower proportion of contaminant bases than earlier submissions, though the number of contaminated submissions continues to rise with total submissions [5].
Table 3: Primary Sources of Contamination in Parasite Genomes
| Contaminant Source | Percentage of Total | Common Examples | Likely Origin |
|---|---|---|---|
| Bacterial DNA | 86% | Stenotrophomonas indicatrix, Sphingomonas spp. | Nematode microbiome kits, lab reagents |
| Metazoan DNA | 8.4% | Human, mouse, pig, rabbit | Host tissue from sampled specimens |
| Other Sources | 5.6% | Various unclassified | Laboratory contaminants, reagents |
Notable examples of host contamination include the human filarial parasite Mansonella sp. 'DEUX' containing 653,059 bases of human DNA, Schistosoma japonicum genomes containing mouse and rabbit DNA, and Taenia solium containing pig DNA. In many cases, the identified contaminant matched the host information provided in the genome metadata [5].
Experimental Workflow for Database Implementation
The following diagram illustrates the complete workflow for creating and implementing the ParaRef database, from initial contamination screening to final application in metagenomic studies:
Troubleshooting Guides
Common Issues and Solutions for Paleoparasitology Analysis
Issue 1: High False Positive Rates in Metagenomic Screening
- Symptoms: Detection of parasite species inconsistent with archaeological context; identification of species from geographical regions not connected to the sample site.
- Root Cause: Contaminated reference genomes in public databases causing misalignment of sequencing reads.
- Solution:
- Replace standard reference databases with ParaRef for all alignment steps.
- Validate suspicious findings against multiple databases.
- Cross-reference detected species with historical and archaeological records for contextual plausibility.
- Prevention: Implement ParaRef as primary reference database; maintain version control for database updates.
Issue 2: Low Recovery of Parasite DNA in Ancient Samples
- Symptoms: Low number of parasite-derived reads despite microscopic evidence of eggs; failed amplification of target sequences.
- Root Cause: Inhibitors in ancient samples; suboptimal DNA extraction methods; DNA fragmentation.
- Solution:
- Prevention: Optimize extraction protocols specifically for ancient samples; use sedimentation techniques to concentrate parasite material prior to extraction.
Issue 3: Host DNA Interference in Sensitive Samples
- Symptoms: High percentage of host reads obscuring parasite signal; inability to detect low-abundance parasites.
- Root Cause: Overwhelming host DNA presence in samples; non-specific amplification.
- Solution:
- Prevention: Incorporate host DNA depletion steps in library preparation; use targeted enrichment approaches.
Issue 4: Inconsistent Results Across Different Methodologies
- Symptoms: Discrepancies between microscopic, molecular, and immunological findings; variable detection success across samples from same context.
- Root Cause: Different methods have varying sensitivities to specific parasite types; preservation biases.
- Solution:
- Prevention: Establish standardized multimodal protocols; use appropriate negative controls for each method.
DNA Sequencing Preparation Troubleshooting
Issue 5: Poor Library Yield or Quality
- Symptoms: Low final library concentrations; adapter dimer peaks in electropherograms; high duplication rates.
- Root Cause: Degraded input DNA; enzyme inhibition from sample contaminants; suboptimal adapter ligation.
- Solution:
- Re-purify input DNA using clean columns or beads to remove inhibitors.
- Verify DNA quality using fluorometric methods (Qubit) rather than UV spectrophotometry.
- Titrate adapter:insert molar ratios to optimize ligation efficiency.
- Adjust bead cleanup parameters to improve recovery of target fragments.
- Prevention: Implement quality control checks at each preparation step; use fresh reagents and calibrated pipettes [36].
Frequently Asked Questions (FAQs)
Q1: What makes ParaRef superior to conventional genomic databases for parasite detection?
ParaRef provides systematically decontaminated reference genomes specifically curated for parasite detection. While conventional databases contain widespread contamination (affecting 98.4% of parasite genomes in one study), ParaRef removes these contaminant sequences, significantly reducing false-positive detections without sacrificing true-positive sensitivity. This is particularly crucial for ancient DNA studies where DNA is fragmented and present in low concentrations [5].
Q2: How does decontamination impact detection sensitivity for low-abundance parasites?
Proper decontamination actually improves overall detection accuracy by reducing background noise and competitive alignment. In validation studies, decontamination significantly reduced false detection rates while maintaining or improving true-positive sensitivity. For low-abundance parasites, this means clearer signals and more reliable identification, especially when combined with targeted enrichment approaches [5] [3].
Q3: What methods were used to decontaminate the genomes in ParaRef?
The ParaRef database was created using a dual-method approach: FCS-GX (from NCBI's Foreign Contamination Screen suite) and Conterminator. Both tools employ sophisticated algorithms to identify contaminant sequences across taxonomic kingdoms. FCS-GX is optimized for speed and efficiency, while Conterminator uses all-against-all sequence comparison to identify contaminants, even when embedded within scaffolds. The combined approach provides comprehensive contamination removal [5].
Q4: Can ParaRef be integrated with multimodal paleoparasitology approaches?
Yes, ParaRef is ideally suited for integration with multimodal approaches. Studies have shown that combining microscopy, ELISA, and sedimentary ancient DNA (sedaDNA) analysis provides the most comprehensive reconstruction of parasite diversity. ParaRef enhances the molecular component of this approach by ensuring reference database reliability, while microscopy effectively identifies helminth eggs and ELISA detects protozoan antigens [3].
Q5: What are the most common sources of contamination in parasite genomes?
The vast majority (86%) of contamination originates from bacterial DNA, often from organisms biologically associated with the parasite (e.g., nematode microbiomes) or laboratory reagents. Metazoan contamination (8.4%) frequently derives from host tissue—for example, human DNA in human parasites or mouse DNA in parasites isolated from laboratory mice. Common laboratory contaminants include bacteria such as Bradyrhizobium spp. and Afipia spp., which have been detected in ultra-pure water and DNA extraction kits [5].
Q6: How does assembly quality relate to contamination levels?
Higher-quality assemblies show significantly lower contamination rates. Only 17% of complete genomes or genomes assembled to chromosome level were contaminated, with a maximum of 0.5% contamination. In contrast, over 50% of scaffold-level and contig-level genomes were contaminated, with some containing 10% or more contamination. This relationship underscores the importance of both initial assembly quality and subsequent decontamination processes [5].
The Scientist's Toolkit: Essential Research Reagents and Materials
Table 4: Key Reagents and Materials for Reliable Paleoparasitology Analysis
| Reagent/Material | Function | Application Notes |
|---|---|---|
| ParaRef Database | Decontaminated reference for metagenomic alignment | Species-level parasite detection; reduces false positives [5] |
| Restriction Enzymes (BsoBI, PstI) | Selective host DNA degradation | Used prior to PCR to reduce host background in blood samples [35] |
| Garnet PowerBead Tubes | Mechanical disruption of parasite eggs | Critical for ancient DNA recovery from resilient parasite structures [3] |
| High-Volume Binding Buffer | DNA binding and inhibitor removal | Essential for ancient sediment and coprolite extracts [3] |
| Targeted Enrichment Baits | Selective capture of parasite DNA | Increases sensitivity for low-abundance ancient parasites [3] |
| Tri-Sodium Phosphate (TSP) | Rehydration of paleofeces | Standard solution for microscopic analysis of ancient samples [3] [37] |
| DNA Extraction Kits (QIAamp Power Fecal) | DNA isolation from complex samples | Effective for ancient coprolites and sediments [37] |
| NEBNext DNA Library Prep Master Set | Library preparation for Illumina | Reliable performance with ancient DNA [37] |
Methodological Protocols
Standardized Sedimentary Ancient DNA (sedaDNA) Extraction Protocol
This protocol is optimized for recovery of parasite DNA from ancient sediments and coprolites, based on methods that increase aDNA recovery by 7-20 fold compared to commercial kits [3]:
Subsampling: Weigh 0.25g of sediment/coprolite material in dedicated ancient DNA facilities.
Mechanical Disruption:
- Transfer to garnet PowerBead tubes containing 750μL of 181mM NaPO₄ and 121mM guanidinium isothiocyanate.
- Vortex for 15 minutes to mechanically break down organo-mineralized content and parasite eggs.
Enzymatic Digestion:
- Add Proteinase K after bead beating.
- Continuously rotate tubes in an oven at 35°C overnight.
Inhibitor Removal:
- Mix supernatant with high-volume Dabney binding buffer.
- Centrifuge at 4500 rpm at 4°C for 6-24 hours until supernatant is clear.
DNA Purification:
- Pass binding buffer through silica columns.
- Elute in 50μL elution buffer.
Quality Control:
- Assess DNA quality using QUBIT fluorometer.
- Include extraction blanks as negative controls.
Multimodal Parasite Detection Workflow
For comprehensive analysis of ancient samples, implement this integrated approach:
Microscopy (0.2g subsample):
- Disaggregate in 0.5% trisodium phosphate.
- Microsieved to collect material between 20-160μm.
- Examine under light microscope at 200× and 400× magnification for helminth eggs based on morphological characteristics [3].
ELISA (1g subsample):
- Disaggregate in 0.5% trisodium phosphate and microsieved.
- Collect material below 20μm sieve for protozoan cyst detection.
- Use commercial kits (e.g., GIARDIA II, E. HISTOLYTICA II, CRYPTOSPORIDIUM II) following manufacturer's protocols [3].
sedimentary Ancient DNA (0.25g subsample):
- Follow extraction protocol above.
- Prepare libraries using double-stranded method with modifications for blunt end repair.
- Implement targeted enrichment using comprehensive parasite bait sets.
- Sequence and align against ParaRef database [3].
From Sample to Sequence: A Rigorous Protocol for Contamination Control and Data Fidelity
Within the field of ancient parasite analysis, the recovery of short, fragmented ancient DNA (aDNA) is a foundational challenge. The success of downstream genetic analyses, crucial for understanding past infections and disease evolution, is entirely dependent on the initial extraction step. Silica-based purification is the established standard, yet the specific composition and handling of the binding buffers can significantly impact the yield and authenticity of the recovered aDNA. This guide addresses the specific experimental issues researchers face when optimizing silica-based binding buffers for the recovery of trace amounts of parasitic aDNA from complex substrates like coprolites, sediments, and soft tissue.
FAQs & Troubleshooting Guides
How does the composition of a silica binding buffer affect aDNA recovery?
The efficacy of a silica binding buffer is primarily determined by the type and concentration of its chaotropic salt. These salts disrupt the hydrogen-bonding network of water, making it energetically favorable for DNA to bind to silica. For aDNA, the optimal buffer must facilitate the binding of very short, damaged molecules.
- Problem: Low endogenous DNA yield from ancient soft tissues or sediment samples.
- Cause: The commercial binding buffer may be inefficient at recovering ultrashort DNA fragments (<100 base pairs), which are characteristic of aDNA.
- Solution: Use a high-concentration, laboratory-made binding buffer. Research has demonstrated that a custom laboratory-prepared binding buffer consistently outperformed a commercial kit buffer in recovering aDNA from historical and ancient skin, hair, and sediment samples. The laboratory method led to a higher DNA yield and quality, primarily due to the superior performance of its binding buffer [38] [3].
- Preventive Measure: For sediment samples rich in inhibitors, combine the binding step with a lengthy, refrigerated centrifugation (e.g., 6-24 hours at 4°C) after adding the binding buffer to the lysate. This step precipitates enzymatic inhibitory compounds, significantly improving aDNA recovery [3].
Why is my extracted aDNA still contaminated with inhibitors, even after silica purification?
Co-purification of inhibitors like humic acids from sediments or polyphenols from plant remains is a common issue that can block subsequent enzymatic reactions in library preparation and PCR.
- Problem: PCR amplification failure or poor library preparation efficiency despite successful DNA binding and elution.
- Cause: Standard silica purification may not remove all organic and chemical contaminants present in complex ancient samples.
- Solution: Integrate an inhibitor-removal step into your lysis procedure. For sediment and plant samples, using a lysis buffer containing guanidinium isothiocyanate and a physical disruption step with garnet beads (e.g., PowerBead tubes) has proven effective at breaking down organo-mineralized content and releasing DNA while mitigating inhibitors [3] [39].
- Troubleshooting Step: Quantify DNA using a fluorometer (e.g., Qubit) rather than a spectrophotometer (e.g., Nanodrop), as the latter can overestimate yield due to residual contaminants. A high fluorometer reading with a low spectrophotometer 260/280 ratio is a strong indicator of co-extracted inhibitors.
How can I improve aDNA recovery from ancient soft tissues compared to hair?
Sample type itself is a critical variable. The same protocol can yield different results from different tissues due to their inherent preservation biases.
- Problem: Higher aDNA yield from skin samples than from hair samples from the same museum specimen.
- Cause: Apart from sample-specific taphonomic history, skin has been shown to yield more endogenous DNA than hair in direct comparisons of decades-old museum specimens [38].
- Solution: If multiple tissue types are available, prioritize skin samples over hair for aDNA extraction. If hair must be used, ensure it is thoroughly cleaned with a series of ethanol washes and vortexing to remove surface contaminants and inhibitors before digestion [38].
Experimental Data & Protocol Comparison
The following table summarizes key findings from studies that quantitatively compared DNA extraction methods, highlighting the performance of different binding buffer approaches.
Table 1: Comparative Performance of Silica-Based DNA Extraction Methods
| Study Context | Methods Compared | Key Finding on Buffer Performance | Impact on aDNA Recovery |
|---|---|---|---|
| Historical & Ancient Soft Tissues [38] | Lab protocol (Dabney) vs. Qiagen DNeasy Kit | Laboratory-made binding buffer outperformed commercial kit buffer. | Higher DNA yield and quality from skin samples; more efficient recovery of short, fragmented DNA. |
| Forensic Bone & Teeth [40] | FADE method (forensic-optimized Dabney) vs. standard forensic kits | Optimized lysis and silica purification enhanced recovery of degraded DNA. | STR peak heights improved by 30–45%; increased allele recovery in heat-treated samples. |
| Archaeological Plant Seeds [39] | Silica-Power Beads (S-PDE) vs. CTAB & Commercial Kits | Sediment-optimized method (S-PDE) recovered more endogenous aDNA. | Higher and more consistent DNA yields across challenging sites; better suitability for library construction. |
| Ancient Soil Microbes [41] | Five DNA extraction methods (various silica & commercial) | Silica-based methods for aDNA recovered more short, damaged reads (<100 bp). | Significantly higher recovery of authentic, fragmented microbial aDNA compared to phenol-chloroform or commercial kits. |
Detailed Methodology: An Optimized Extraction Protocol
Below is a detailed protocol for DNA extraction from complex ancient samples, such as coprolites or sediments, incorporating the optimized binding buffer and inhibitor removal steps discussed in the FAQs. This protocol is synthesized from multiple studies [38] [3] [41].
Sample Preparation & Lysis:
- In a dedicated aDNA clean room, subsample 250 mg of material (e.g., sediment, ground coprolite, or soft tissue).
- Add the sample to a garnet PowerBead tube containing 750 µL of a lysis buffer (e.g., 181 mM NaPO₄, 121 mM guanidinium isothiocyanate).
- Vortex for 15 minutes for mechanical disruption.
- Add Proteinase K and incubate with continuous rotation at 35°C overnight.
Inhibitor Removal & Binding:
Silica Purification:
- Pass the supernatant through a silica column or use a silica suspension to bind the DNA.
- Wash the column twice with an ethanol-based wash buffer (e.g., 80% ethanol, 10 mM Tris-HCl pH 7.5).
- Elute the DNA in a low-salt elution buffer (e.g., 10 mM Tris·Cl, pH 8.5).
Research Reagent Solutions
The following table lists key reagents and their critical functions in optimizing silica-based aDNA extraction, based on protocols from the cited literature.
Table 2: Essential Reagents for aDNA Extraction from Complex Samples
| Reagent / Component | Function in aDNA Extraction | Example from Literature |
|---|---|---|
| Chaotropic Salts (e.g., Guanidine HCl, Guanidine isothiocyanate) | Enable DNA binding to silica by disrupting water molecules. A high concentration is vital for recovering short fragments. | Core component of the high-performance laboratory-made binding buffer [38] [3]. |
| Silica Columns/Membranes | The solid phase to which DNA binds in the presence of chaotropic salts. | PureLink columns; various brands can be used interchangeably, though binding capacity may vary [42] [43]. |
| Binding Buffer Additives (e.g., Isopropanol, Ethanol) | Adjusts solution conditions to promote binding; concentration can be tuned to exclude primers or very small fragments. | Qiagen Buffer PB contains 30% isopropanol; other variants use ethanol [42]. |
| Wash Buffer (e.g., 80% Ethanol, Tris-HCl) | Removes salts and impurities without eluting the bound DNA. Often contains Tris and sometimes EDTA. | Qiagen Buffer PE (80% ethanol, 10 mM Tris-HCl pH 7.5) [42]. |
| Elution Buffer (e.g., Tris-Cl, pH 8.0-8.5) | A low-salt, slightly alkaline buffer that disrupts DNA-silica interaction, releasing purified DNA. | Qiagen Buffer EB (10 mM Tris·Cl, pH 8.5) or equivalent [42]. |
| Proteinase K | Digests proteins and degrades nucleases that would otherwise destroy DNA. Essential for efficient lysis. | Used in all cited extraction protocols during the initial lysis step [38] [43]. |
Technical FAQs: Library Preparation Methods
Q1: What is the fundamental difference between double-stranded (dsDNA) and single-stranded (ssDNA) library preparation methods for ancient DNA?
Double-stranded (dsDNA) library preparation is a conventional method that processes both strands of the DNA double helix. In contrast, the single-stranded (ssDNA) method is an innovative technique that uses single-stranded DNA as its starting material. This key difference makes ssDNA library preparation particularly powerful for recovering extremely short and damaged DNA fragments, which are characteristic of ancient and historical samples [44].
Q2: In what scenarios does single-stranded library preparation significantly outperform the double-stranded method?
Single-stranded library preparation substantially increases the yield of endogenous DNA when double-stranded libraries contain very low proportions (less than 3%) of endogenous DNA. However, this enrichment advantage is less pronounced when dsDNA preparations already successfully recover short endogenous DNA fragments with mean sizes below 70 base pairs [44]. The ssDNA method is particularly beneficial for samples with very low endogenous DNA content and highly fragmented material.
Q3: What are the practical considerations when choosing between these two methods for ancient microbial recovery?
The decision involves balancing practical constraints against research goals. While the ssDNA method can provide substantial increases in endogenous DNA content, it is more time-consuming and resource-intensive than conventional dsDNA library preparation [44]. Researchers should reserve the ssDNA method for cases where samples have proven difficult to analyze with standard dsDNA approaches, especially when working with extremely degraded material or samples with very low endogenous DNA content.
Table: Comparison of Double-Stranded vs. Single-Stranded DNA Library Preparation Methods
| Parameter | Double-Stranded (dsDNA) | Single-Stranded (ssDNA) |
|---|---|---|
| Endogenous DNA Recovery with <3% Endogenous DNA | Standard recovery | >20-fold increase in some cases [44] |
| Performance with Short Fragments (<70 bp mean size) | Effective recovery | Less pronounced advantage [44] |
| Resource Intensity | Standard | High (time and resource-intensive) [44] |
| Best Application | Routine ancient DNA analysis | Challenging samples with very low endogenous DNA [44] |
Troubleshooting Guides
Issue 1: Low Endogenous DNA Content in Ancient Samples
Problem: After library preparation and sequencing, the percentage of endogenous DNA in the data is prohibitively low for meaningful analysis.
Solutions:
- Consider switching to single-stranded library preparation, which can increase endogenous DNA content by more than 20-fold in samples where dsDNA libraries contain less than 3% endogenous DNA [44].
- Optimize DNA extraction protocols specifically for ancient microbial recovery, potentially incorporating physical disruption methods like bead beating to break down tough parasite eggs and release DNA [3].
- Implement targeted enrichment approaches using RNA baits designed for specific parasites to increase the proportion of target DNA in sequencing results [3].
Issue 2: Contamination in Low-Biomass Ancient Samples
Problem: Contaminant DNA from modern sources or cross-contamination between samples is obscuring the true ancient microbial signal.
Solutions:
- Decontaminate Sources: Treat equipment, tools, and vessels with 80% ethanol followed by a nucleic acid degrading solution such as sodium hypochlorite (bleach) to remove traces of contaminating DNA [4].
- Use PPE: Implement comprehensive personal protective equipment including gloves, face masks, and clean suits to limit contact between samples and contamination sources from researchers [4].
- Include Controls: Process sampling controls (e.g., empty collection vessels, swabs exposed to air) alongside samples to identify contamination sources [4].
- Chemical Decontamination: For ancient bones and teeth, consider phosphate buffer treatment (removes 64% of microbial DNA on average) or sodium hypochlorite treatment (provides 4.6-fold increase in endogenous DNA on average, though destroys 63% of endogenous DNA) [45].
Issue 3: Inefficient DNA Recovery from Challenging Ancient Specimens
Problem: The amount of microbial DNA recovered from ancient specimens is insufficient for downstream analysis.
Solutions:
- Incorporate agar (0.2% w/v) into sampling solutions or DNA extraction processes, which acts as a co-precipitant to significantly increase microbial DNA recovery from low-biomass specimens [46].
- Use enzymatic lysis with agar, which yields more microbial DNA than conventional commercial kits for low-biomass samples [46].
- Implement specialized sedaDNA extraction methods that include garnet bead beating for physical disruption, extended centrifugation to remove inhibitors (6-24 hours), and silica-column based purification [3].
Workflow: Ancient Parasite DNA Analysis
Research Reagent Solutions for Ancient DNA Studies
Table: Essential Reagents and Materials for Ancient Parasite DNA Research
| Reagent/Material | Function | Application Notes |
|---|---|---|
| Garnet PowerBead Tubes | Physical disruption of samples to release DNA | More effective than other beads for breaking down tough parasite eggs [3] |
| Sodium Hypochlorite (Bleach) | Nucleic acid degrading solution for decontamination | Critical for removing contaminating DNA from equipment and surfaces [4] |
| Agar (0.2% w/v) | Co-precipitant to improve DNA recovery | Significantly increases microbial DNA yield from low-biomass specimens [46] |
| High-Volume Dabney Binding Buffer | Improved DNA binding to silica columns | Enhances sedaDNA recovery from complex environmental samples [3] |
| Parasite-Specific RNA Baits | Targeted enrichment of parasite DNA | Allows preferential sequencing of parasite DNA of interest; reduces sequencing costs [3] |
| Trisodium Phosphate Solution | Disaggregation of sediment samples | Standard solution for rehydrating and disaggregating ancient coprolites and sediments [3] |
| Proteinase K | Enzyme digestion of proteins | Used overnight to break down proteins and release DNA from ancient samples [3] |
| Personal Protective Equipment (PPE) | Contamination prevention | Clean suits, masks, multiple glove layers to minimize human-derived contamination [4] |
Workflow: Contamination Prevention Protocol
Advanced Methodologies: Multimethod Approaches
Integrated Protocol for Ancient Parasite Recovery
Recent advances in paleoparasitology emphasize a multimethod approach that combines microscopy, ELISA, and sedimentary ancient DNA (sedaDNA) analysis. This integrated protocol provides the most comprehensive reconstruction of parasite diversity in past populations:
Microscopy Analysis: Begin with 0.2g subsample disaggregation in 0.5% trisodium phosphate, microsieving to collect material between 20-160μm, and examination under light microscope at 200x and 400x magnification. This remains the most effective technique for identifying helminth eggs based on morphological characteristics [3].
ELISA for Protozoa: Process 1g subsamples similarly but collect material below the 20μm sieve for commercial ELISA kits targeting Giardia duodenalis, Entamoeba histolytica, and Cryptosporidium spp. This method shows highest sensitivity for detecting protozoa that cause diarrheal illnesses [3].
sedaDNA with Targeted Capture: Use 0.25g of material with specialized lysis buffer in garnet PowerBead tubes, vortex for 15 minutes, add proteinase K with overnight rotation at 35°C. After binding with high-volume Dabney buffer, centrifuge for 6-24 hours at 4°C to remove inhibitors, then proceed with silica column purification [3].
This tripartite approach leverages the strengths of each method: microscopy for helminth eggs, ELISA for protozoa, and sedaDNA for species confirmation and discovering additional taxa through high-throughput sequencing [3].
Troubleshooting Guides
Guide 1: Addressing Low Endogenous DNA Yield in Ancient Samples
Problem: Despite processing a sample, the resulting sequencing data shows an unexpectedly low proportion of endogenous DNA, making subsequent analysis difficult.
Solution:
- Re-evaluate Sample Selection: Not all skeletal elements are equal. The petrous bone of the skull has consistently been shown to yield the highest endogenous DNA content [47]. If available, prioritize this element. Other recommended skeletal elements include certain tooth roots and specific sections of the vertebral arch and talus bone [47].
- Optimize DNA Extraction Protocol: The choice of DNA extraction method significantly impacts the recovery of short, degraded DNA fragments typical of ancient samples [48].
- If your target DNA is expected to be very short (<50 bp), consider switching to a silica-based binding buffer protocol optimized for short fragments, such as the PB method [48].
- For a broader fragment size distribution, the QG method, which uses a guanidinium thiocyanate-based binding buffer, may be appropriate [48].
- Verify Cleanroom Integrity: Contamination from modern DNA can overwhelm the trace amounts of ancient DNA. Ensure all work is conducted in a dedicated clean room with specific protocols: personnel must wear full protective gear (hazmat suits, double gloves, masks, hair nets), and all equipment and surfaces must be frequently decontaminated with bleach and UV light [49]. The clean room should be under positive air pressure with HEPA-filtered air [49].
Guide 2: Managing Microbial Contamination in Dental Calculus or Coprolite Samples
Problem: Metagenomic sequencing of ancient dental calculus results in a high proportion of environmental microbial reads, obscuring the true ancient oral microbiome signature.
Solution:
- Adjust Laboratory Workflow: The combination of DNA extraction and library preparation methods can selectively impact microbial community recovery [48]. Systematically test different protocol combinations (e.g., PB extraction with SSL library preparation) on a sub-sample to see which maximizes endogenous microbial content.
- Implement Rigorous Surface Decontamination: Enhance your routine cleaning with a "clean to dirty" workflow. Clean low-touch surfaces before high-touch surfaces, and always proceed from high to low (e.g., top to bottom) to prevent re-contamination of cleaned areas [50]. Use fresh cleaning cloths for each surface or patient zone to avoid cross-contamination [50].
- Supplement Manual Cleaning with Whole-Room Disinfection: After manual cleaning, use a no-touch technology like Ultraviolet (UV) radiation to disinfect the entire cleanroom environment [51]. This is particularly effective for reaching exposed surfaces and eliminating microorganisms that manual cleaning might miss [51].
Guide 3: Resolving Inconsistent Biocontainment in Engineered Probiotics
Problem: A genetic safeguard designed to eliminate engineered genes from a probiotic in a non-permissive environment fails to function consistently.
Solution:
- Circuit Optimization: The performance of a genetic circuit is highly dependent on the expression levels of its components. If the transcriptional or translational rates of regulators are too low or too high, the circuit may not switch reliably [52]. Systematically test different ribosomal binding sites (RBSs) with varying strengths to balance the expression of critical regulator proteins [52].
- Ensure Stable Signal Supply: For circuits dependent on an external permissive signal (e.g., the disaccharide cellobiose), verify that the signal is consistently available in the environment at a sufficient concentration to maintain repression of the biocontainment mechanism [52]. A fluctuating signal can lead to partial activation and unpredictable results.
- Validate CRISPR Target Specificity: For circuits that use a CRISPR system to degrade target DNA, ensure the guide RNA (gRNA) is highly specific and efficient against the intended engineered genetic elements. Inefficient cleavage will result in incomplete elimination of the target genes [52].
Frequently Asked Questions (FAQs)
FAQ 1: Why is a dedicated clean room non-negotiable for ancient DNA work? Ancient DNA (aDNA) exists in tiny, fragmented amounts and is easily contaminated by modern DNA. A dedicated clean room, often a positive-pressure lab with HEPA-filtered air, provides a sterile environment where the risk of introducing contemporary DNA is minimized. Personnel must wear full-body suits, masks, and double gloves to ensure their DNA does not compromise the samples [49].
FAQ 2: What is the difference between UV light and Far-UVC technology for decontamination? Traditional UV germicidal irradiation (UVGI) is effective for no-touch room disinfection but can be harmful to human skin and eyes, requiring the room to be vacant [51]. Far-UVC technology operates at a wavelength (207-222 nm) that is claimed to efficiently inactivate microorganisms while being safe for continuous exposure in occupied spaces, offering potential for ongoing decontamination [53].
FAQ 3: How does the choice of DNA extraction method impact my ancient DNA results? Different DNA extraction methods have varying efficiencies in recovering DNA fragments of different sizes. The Rohland and Hofreiter (QG) method and the Dabney et al. (PB) method are both common. The PB method is specifically modified to enhance the recovery of very short DNA fragments (under 50 bp), which are abundant in degraded ancient samples [48]. The optimal method can depend on the preservation state of your sample.
FAQ 4: What are the most reliable skeletal elements for sampling ancient DNA? The pars petrosa (the dense part of the temporal bone) consistently yields the highest endogenous DNA [47]. Other productive elements include the root of the molar tooth, the core of the vertebral spinous process, and the neck of the talus bone [47].
FAQ 5: We have a robust manual cleaning process. Why should we invest in whole-room disinfection technology? Manual cleaning processes, while essential, are susceptible to human error. Whole-room disinfection systems (e.g., UV robots, hydrogen peroxide misters) provide a supplemental, standardized layer of protection [51]. They help eliminate pathogens from hard-to-reach areas and on exposed surfaces, ensuring a more consistently decontaminated environment and reducing the risk of contamination impacting your results [51].
Data Presentation
Table 1: Comparison of Ancient DNA Extraction Methods
| Method Name | Key Features | Ideal Use Case | Impact on Microbial Recovery |
|---|---|---|---|
| QG Method [48] | Silica-based binding buffer with guanidinium thiocyanate; effective at removing PCR inhibitors. | Samples with moderate preservation and potential for co-extracted inhibitors. | Can influence the observed microbial composition; performance is sample-dependent [48]. |
| PB Method [48] | Binding buffer with sodium acetate, isopropanol, and guanidinium hydrochloride; enhances recovery of fragments <50 bp. | Highly degraded samples where ultra-short DNA fragments are the primary target. | Can significantly impact microbial community profile; often recovers shorter fragments more efficiently [48]. |
Table 2: Comparison of Library Preparation Methods for Ancient Metagenomics
| Method Name | Principle | Advantages | Disadvantages |
|---|---|---|---|
| Double-Stranded Library (DSL) [48] | Ends of double-stranded DNA molecules are repaired and ligated to adapters. | Widely used protocol; less expensive and faster than early SSL methods [48]. | May have lower conversion efficiency of single-stranded fragments; can increase clonality [48]. |
| Single-Stranded Library (SSL) [48] | DNA is denatured into single strands before adapter ligation. | Higher conversion efficiency of damaged DNA fragments; often outperforms DSL for poorly preserved samples [48]. | Historically more expensive and time-consuming; though newer versions (e.g., SCR) have addressed this [48]. |
Experimental Protocols
Protocol 1: Optimized Bone Powder Sampling for DNA Extraction
This protocol outlines best practices for generating bone powder from various skeletal elements for downstream ancient DNA analysis [47].
- Clean Room Setup: Perform all work in a dedicated ancient DNA clean room under a PCR hood or biosafety cabinet equipped with UV lights. Spread sterile aluminum foil on the work surface to collect powder and fragments [47].
- Sample Decontamination: Hold the decontaminated bone element (e.g., a molar) with a handheld clamp. Using a dental drill with a diamond-edged cutting wheel at medium speed, remove and discard the outermost layer of the bone to decontaminate the surface [47] [49].
- Powder Collection: For a molar tooth, angle the drill at ~20 degrees and scrape the root surface downward, collecting the yellow outermost material. Stop when the lighter dentin becomes visible [47]. For a vertebra, drill upward into the center of the V-shaped notch where the spinous process fuses with the lamellae. Continue until ~50-100 mg of powder is collected or a drop in resistance is felt [47].
- Powder Handling: Transfer the bone powder from the weigh paper to a 2 mL LoBind Safe-Lock tube. Store at -20°C until DNA extraction [47].
- Decontamination Between Samples: Change the aluminum foil and decontaminate all reusable equipment with bleach and UV light between each sample to prevent cross-contamination [47] [49].
Protocol 2: Cleanroom Entry and Environmental Decontamination
This protocol ensures the integrity of the cleanroom is maintained by personnel.
- Anteroom Preparation: Before entry, sign in and leave all personal items (coats, bags, phones) outside [49].
- Donning Personal Protective Equipment (PPE): In the prep room, put on a disposable lab coat with stretch cuffs, a hair net, a face mask, and shoe covers. Put on a first pair of plastic gloves [49].
- Entering the Clean Room: Pass through the vinyl strip-shield curtain into the main lab. The positive air pressure should cause the curtain to flap outward [49].
- Final Gloving: Inside the clean room, put on a second, outer pair of gloves over the first. This allows for safe removal of the outer layer if it becomes contaminated while the inner layer remains sterile [49].
- Routine Surface Decontamination: Wipe all work surfaces and equipment with a fresh cloth saturated with a fresh bleach solution. Wipe in a systematic, "clean to dirty" and "high to low" manner [50]. After manual cleaning, expose the entire room to UV light for a defined cycle to eliminate residual contaminants [49] [51].
Workflow and Pathway Diagrams
Ancient DNA Research Workflow
Genetic Safeguard Circuit for Probiotics
The Scientist's Toolkit: Key Research Reagent Solutions
Table 3: Essential Materials for Ancient DNA and Contamination Control
| Item | Function | Application Note |
|---|---|---|
| HEPA-Filtered Clean Room | Provides a sterile, positive-pressure environment to prevent the ingress of modern DNA contaminants [49]. | The foundation of all ancient DNA work; non-negotiable for sample processing. |
| Full-Body PPE Suit | Creates a barrier between the researcher's DNA and the ancient sample [49]. | Includes suit, mask, hair net, and double gloves. |
| Dental Drill with Cutting Wheel | Used to decontaminate the outer bone surface and generate fine bone powder from specific skeletal elements [47]. | Must be sterilizable with bleach and UV light between samples. |
| Guanidinium-Based Binding Buffers | Key component in silica-based DNA extraction protocols that facilitates DNA binding while removing inhibitors [48]. | Choice between QG (guanidinium thiocyanate) and PB (guanidinium hydrochloride) impacts fragment recovery. |
| Double-Stranded (DSL) or Single-Stranded (SSL) Library Kits | Prepares the short, fragmented ancient DNA for next-generation sequencing on platforms like Illumina [48]. | SSL methods often provide better results for highly degraded samples. |
| UV Disinfection Robot | Provides a no-touch, whole-room decontamination method to augment manual cleaning processes [51]. | Used after manual cleaning to inactivate microorganisms on all exposed surfaces. |
| CRISPR/Cas9 System | A genetic tool used in biocontainment circuits to specifically target and degrade engineered DNA sequences in probiotics [52]. | Allows for elimination of genetic material without killing the host cell, reducing selective pressure. |
Frequently Asked Questions (FAQs)
Q1: What is the primary purpose of the Foreign Contamination Screen (FCS) tool suite? The NCBI Foreign Contamination Screen (FCS) is a tool suite designed to identify and remove contaminant sequences in genome assemblies. Contaminants are sequences that do not originate from the biological source organism and can arise from various environmental and laboratory sources. Using FCS before submission to GenBank helps increase the quality of your genome submissions [54].
Q2: How does FCS-GX differ from Conterminator in detecting contamination? FCS-GX and Conterminator use different detection logics and have varying sensitivities. A study screening 831 parasite genomes found that while Conterminator flagged contamination in nearly twice as many genomes as FCS-GX, the total number of contaminant bases detected was comparable. FCS-GX is optimized for speed and efficiency, screening genomes in minutes, while Conterminator uses an all-against-all sequence comparison to identify contaminants across taxonomic kingdoms [15].
Q3: I'm getting a "/dev/null: Permission denied" error while running FCS-GX in Galaxy. How can I fix this? This error often relates to tool versions rather than your data or parameters. The recommended solution is to ensure you are using the most current version of the tool. On UseGalaxy.org, for example, the most current version is 0.5.5+galaxy1 for the relevant FCS-GX tools. Update the tool version in your workflow editor, double-check that the parameters are correct, save, and re-run the job [55].
Q4: Why is decontaminating reference genomes like ParaRef critical for ancient parasite DNA studies? Contamination in public reference genomes is a pervasive issue that leads to false-positive detections in metagenomic screening. A curated, decontaminated database significantly reduces these false detection rates and improves overall detection accuracy. This is especially vital in ancient DNA research, where distinguishing authentic ancient parasite DNA from modern contaminants is essential for accurate evolutionary and anthropological insights [15].
Q5: What are the most common sources of contamination in eukaryotic parasite genomes? The vast majority (86%) of contaminant sequences in eukaryotic genomes are of bacterial origin. Other significant sources include:
- Metazoans (8.4%): Often traceable to the host organism (e.g., human DNA in a filarial parasite genome).
- Fungi and Plants Common bacterial contaminants include lab-associated strains (e.g., from microbiome kits) and common gut microbes [15].
Troubleshooting Guides
Issue 1: High False Positive Rates in Contamination Screening
Problem: Your contamination screening tool (e.g., FCS-GX, Conterminator) is flagging an unexpectedly high number of sequences as potential contaminants, including some you believe to be authentic.
Solution:
- Verify Taxonomic Assignment: FCS-GX classifies sequences as contaminants when their taxonomic assignment differs from the user-provided taxonomic ID. Double-check that you have supplied the correct taxonomic identifier for your source organism [54].
- Cross-validate with Multiple Tools: Use a consensus approach. Run both FCS-GX and Conterminator and compare the results. A study on parasite genomes found that while both tools are effective, they don't always flag the same sequences. Sequences identified by multiple tools are highly likely to be true contaminants [15].
- Review Contig Length and Quality: Contamination is disproportionately found in shorter contigs. One analysis found over 75% of all contamination was in contigs shorter than 100 kb. Consider a more conservative approach with shorter contigs or implement a length filter prior to screening [15].
Issue 2: Tool Failure in a Galaxy or Containerized Environment
Problem: The FCS tool fails to run or complete in a Galaxy workflow or containerized environment, often with cryptic permission or system errors.
Solution:
- Update Tool Version: As a first step, always update to the latest available version of the FCS tool within your platform. This is often the solution to fixed bugs [55].
- Check Container Access: Errors like "/dev/null: Permission denied" may indicate a misconfiguration in the Docker or Singularity container. Ensure your environment has appropriate permissions and that the container is being correctly retrieved and executed [54] [55].
- Consult Logs and Documentation: Check the tool's log output for more specific error messages. Furthermore, refer to the continuously improved documentation on the NCBI FCS GitHub wiki for platform-specific guidance [56].
Issue 3: Different Tools Provide Conflicting Results
Problem: After screening your genome, FCS-GX and Conterminator (or another tool like ContScout) provide different lists of contaminant sequences.
Solution:
- Understand Tool Methodologies: This is expected, as tools use different algorithms. FCS-GX uses genome cross-species alignment via modified k-mer seeds [54], while Conterminator employs an all-against-all sequence comparison [15]. ContScout uses a protein-based approach combined with contig consensus labeling [57].
- Create a Consensus Hit-List: Rely on sequences flagged by at least two independent tools. Benchmarking shows that over 96% of proteins tagged by one tool are also identified by at least one other, indicating high confidence in the overlapping set [57].
- Prioritize by Confidence Metrics: Use built-in confidence scores where available. For instance, tools often provide a taxon support ratio; sequences with very low support (e.g., < 0.25) for the expected taxon are high-confidence contaminants [57].
Tool Comparison & Performance Data
The table below summarizes key performance metrics from a study screening 831 published endoparasite genomes, providing a quantitative comparison of FCS-GX and Conterminator [15].
Table 1: Contamination Screening Results from 831 Parasite Genomes
| Screening Metric | FCS-GX | Conterminator | Combined Results |
|---|---|---|---|
| Total Contaminant Bases Identified | 346,990,249 | 365,285,331 | 528,479,404 |
| Number of Genomes Flagged | 430 | 801 | 818 |
| Notable Strengths | Rapid screening (minutes per genome); high specificity [54] | Flags contamination in a larger number of genomes [15] | Most comprehensive coverage of contaminants |
Experimental Protocols
Protocol 1: Decontaminating a Parasite Genome Assembly Using FCS-GX
This protocol is adapted from the methodology used to create the decontaminated ParaRef database [15] and NCBI documentation [54].
1. Input Preparation:
- Gather your genome assembly in FASTA format.
- Determine the correct taxonomic ID (TaxID) for your target parasite organism from the NCBI Taxonomy database.
2. Tool Execution:
- Run the FCS-GX command, providing the assembly FASTA file and the target TaxID.
- The tool will retrieve a Docker or Singularity container and execute a pipeline that aligns sequences to a large database of NCBI genomes using modified k-mer seeds [54].
3. Output Analysis:
- FCS-GX will generate a report classifying sequences as contaminants when their taxonomic assignment differs from the provided TaxID.
- Remove the flagged contaminant sequences from your assembly FASTA file to create a decontaminated genome.
Protocol 2: Multi-Tool Validation for High-Confidence Contaminant Detection
For critical applications like building a curated reference database, a multi-tool approach is recommended.
1. Parallel Screening:
- Run both FCS-GX [54] and Conterminator [15] on your genome assembly using their standard parameters.
2. Result Integration:
- Combine the outputs from both tools to generate a non-redundant list of all sequences flagged by either tool.
- To minimize false positives, create a high-confidence contaminant set comprising only sequences identified by both tools.
3. Curation and Removal:
- Manually review the high-confidence contaminants, checking for plausible sources (e.g., host DNA, common lab contaminants).
- Proceed with the removal of these sequences from the assembly.
Workflow Visualization
FCS-GX Screening Workflow
Multi-Tool Contamination Screening Strategy
Research Reagent Solutions
Table 2: Essential Bioinformatics Tools & Resources for Contamination Screening
| Tool / Resource | Primary Function | Key Feature in Parasite Research |
|---|---|---|
| NCBI FCS-GX [54] | Genome cross-species contamination screening | Rapid alignment and taxonomic classification optimized for NCBI genomes; integrates with GenBank submission. |
| Conterminator [15] | All-against-all sequence comparison for contamination | Effectively identifies incorrectly labelled sequences across taxonomic kingdoms, even within scaffolds. |
| ContScout [57] | Protein-based contamination detection and removal | Combines taxonomic classification with gene position data for high sensitivity and specificity; can distinguish HGT from contamination. |
| ParaRef Database [15] | Curated, decontaminated parasite reference genome database | Provides a pre-screened resource that significantly reduces false-positive rates in metagenomic detection studies. |
| Decontaminated GenBank Subsets | High-quality reference data | Using FCS-GX, NCBI has reduced contamination in RefSeq genomes to just 0.01% of total bases, providing more reliable sequences for analysis [15]. |
Proof of Concept: Validating Techniques and Comparative Efficacy in Real-World Studies
In the field of paleoparasitology, accurately identifying parasitic infections in ancient samples is a complex challenge. No single method provides a complete picture, which is why a multimethod approach is now considered essential for comprehensive analysis [58] [59]. This technical guide focuses on benchmarking three core techniques—sedimentary ancient DNA (sedaDNA) analysis, microscopy, and Enzyme-Linked Immunosorbent Assay (ELISA).
Researchers face significant hurdles, particularly the risk of modern DNA contamination when working with ancient genetic material, which can compromise results [60]. This resource provides troubleshooting guides and FAQs to help you design robust experiments, validate findings, and overcome common pitfalls in the detection of ancient parasites.
Technical Comparison: Sensitivity and Specificity at a Glance
The following table summarizes the key performance characteristics of the three primary techniques based on recent comparative studies [58] [59].
Table 1: Benchmarking Sensitivity and Specificity in Paleoparasitology Techniques
| Technique | Optimal Target (Sensitivity) | Key Strengths | Key Limitations |
|---|---|---|---|
| Microscopy | Helminth eggs (e.g., roundworm, whipworm) [58] | - Direct visual identification of intact helminth eggs [58]- High taxonomic specificity when morphology is preserved [58] | - Cannot detect protozoa or fragmented eggs [58]- Sensitivity depends on parasite egg preservation [58] |
| ELISA | Protozoan antigens (e.g., Giardia duodenalis) [58] | - High sensitivity for detecting protozoa that cause diarrhea [58]- Can detect antigens even without intact organisms [58] | - Limited to targets with available antibodies [61]- Potential for cross-reactivity with non-target molecules if validation is insufficient [61] |
| sedaDNA | Single-species parasite DNA (e.g., specific whipworm species) [58] | - Can differentiate between closely related species (e.g., T. trichiura vs. T. muris) [58]- Can detect parasite presence even when microscopy is negative for that taxon [58] | - Highly vulnerable to modern DNA contamination [60]- Cannot distinguish between viable eggs and free DNA fragments [58]- No parasite DNA was recovered from pre-Roman sites in one study, indicating potential limitations with very ancient material [58] |
Experimental Protocols for a Multimethod Workflow
Sample Preparation and Decontamination
Proper sample preparation is the first and most critical defense against contamination.
- Surface Decontamination: For sediment samples and bone fragments, implement a rigorous decontamination protocol before DNA extraction. This typically involves a bleach treatment or exposure to UV light [60]. For bones, the outer 1–2 mm should be removed by shot-blasting or grinding, as contaminant DNA is primarily located on the surface [60].
- Laboratory Setup: All work with ancient DNA, including sedaDNA, must be conducted in a dedicated, physically isolated clean lab with positive air pressure and frequent UV irradiation [60]. Reagent preparation, DNA extraction, and PCR setup should be spatially separated from post-PCR analysis.
- Control Samples: Include multiple negative controls at every stage of the process:
- Extraction controls: Contain all reagents except the ancient sample.
- PCR controls: Contain water instead of DNA template.
- Blank controls: Included during the sampling process in the field or museum [60].
sedaDNA Workflow
The following diagram visualizes the core workflow and contamination control points for sedaDNA analysis.
Microscopy and ELISA Protocols
Microscopy Protocol for Helminth Eggs:
- Rehydration: Suspend 0.5-1.0 g of sediment or coprolite in a 0.5% trisodium phosphate solution for 72 hours.
- Micro-Particle Separation: Vortex the sample and let it settle. Filter the supernatant through a 20 μm mesh to concentrate the parasite eggs.
- Microscopy: Examine the residue on slides under a light microscope (100-400x magnification) for morphological identification of helminth eggs [58] [59].
ELISA Protocol for Protozoan Antigens:
- Coating: Coat a 96-well microplate with a capture antibody specific to the target antigen (e.g., Giardia surface protein).
- Blocking: Block the plate with a protein-based buffer (e.g., BSA) to prevent non-specific binding.
- Incubation: Add the ancient sample extract (liquid fraction) to the plate and incubate to allow antigen-antibody binding.
- Detection: Add an enzyme-linked detection antibody (e.g., HRP-conjugated), followed by a chromogenic substrate (e.g., TMB).
- Stop & Read: Stop the reaction with an acid (e.g., H₂SO₄) and measure the optical density with a spectrophotometer at 450 nm [62] [61].
Troubleshooting Common Experimental Issues
Contamination Control in sedaDNA Analysis
Diagram: Identifying and Mitigating Contamination Sources
Problem: Inconsistent results between sedaDNA replicates, or detection of human DNA in negative controls.
- Cause: Contamination can be introduced at multiple stages. Pre-laboratory contamination occurs during excavation or handling, while laboratory contamination often comes from PCR products or contaminated reagents, including primers themselves [60].
- Solution:
- Implement Rigorous Decontamination: Use bleach treatment or UV irradiation on samples and workspaces [60].
- Validate with Multiple Controls: Include extraction blanks and PCR negatives in every run. The detection of contaminants in these controls is directly related to the number of PCR cycles used, so optimize cycle numbers to minimize this risk [60].
- Screen Reagents: Test all reagents, including primers and enzymes, for the presence of contaminating DNA before use [60].
- Use Bioinformatics Tools: Employ specialized software like FCS-GX, a genome contamination screen tool, to automatically identify and remove contaminant sequences from your sequencing data [63].
Problem: Microscopy identifies one parasite type, but sedaDNA reveals another.
- Cause: Microscopy is excellent for intact helminth eggs but cannot detect protozoa or fragmented eggs. Conversely, sedaDNA can identify species based on genetic markers even when morphological preservation is poor, and can detect multiple species in a mixed infection [58].
- Solution: This is not a technical failure but a reflection of the complementary nature of the techniques. Report findings from both methods to present a more complete picture of the parasite community.
Problem: ELISA shows high background noise or non-specific signal.
- Cause: The antibodies in the assay may be cross-reacting with non-target molecules present in the complex ancient sample [61].
- Solution:
- Use Validated Kits: Select ELISA kits that provide detailed cross-reactivity tables for related compounds [61].
- Optimize Wash Steps: Ensure thorough washing between each step of the ELISA protocol to remove unbound molecules [62].
- Consider Antibody Type: Sandwich ELISAs, which use two antibodies for capture and detection, generally provide higher specificity than indirect or direct ELISAs [61].
The Scientist's Toolkit: Essential Research Reagents and Materials
Table 2: Key Reagents and Materials for Paleoparasitology Research
| Item | Function | Application Notes |
|---|---|---|
| Trisodium Phosphate Solution | Rehydrates and disperses ancient sediments and coprolites for microscopic analysis. | Allows for the release of helminth eggs from the sample matrix [58]. |
| Magnetic Bead-Based Kits | Isolate and purify trace amounts of DNA from complex ancient samples. | Preferred for sedaDNA extraction due to high efficiency in capturing short, fragmented aDNA [58]. |
| Parasite-Specific Biotinylated Probes | Used in targeted capture to enrich sequencing libraries for parasite DNA. | Increases the yield of target sedaDNA relative to environmental background DNA, improving sensitivity [58] [59]. |
| HRP or AP Conjugates & Substrates | Enzyme-linked antibodies and their colorimetric/chemiluminescent substrates are the core detection system in ELISA. | HRP/TMB is a common combination. Signal amplification systems can increase sensitivity up to 50-fold [62] [61]. |
| FCS-GX Software | A bioinformatic tool for rapid identification and removal of contaminant sequences from genome assemblies. | Screens genomes in minutes; demonstrated >95% sensitivity and >99.93% specificity for diverse contaminants [63]. |
Frequently Asked Questions (FAQs)
Q1: Can I use sedaDNA if my samples have been handled without gloves during excavation? A1: This is a high-risk scenario. Pre-laboratory handling is a major source of contamination [60]. You must implement aggressive surface decontamination (e.g., removing the outer layer of a bone or sediment piece) and be prepared for a high likelihood of modern human contamination in your results. The use of multiple negative controls is non-negotiable in this case.
Q2: Which technique is the most sensitive for detecting ancient parasites? A2: There is no single answer, as sensitivity is target-dependent. Microscopy is highly sensitive for intact helminth eggs. ELISA is the most sensitive for specific protozoa like Giardia. sedaDNA is highly sensitive for genetically identifying specific parasite species, especially with targeted capture enrichment, but may fail with extremely ancient or poorly preserved samples [58]. The most sensitive approach is to use all three in concert.
Q3: My negative controls are showing contamination, but my sample results look good. Should I proceed? A3: No. Contamination in negative controls invalidates the experiment. You must identify the source of the contamination (e.g., reagents, labware, aerosols) and repeat the analysis. Proceeding with data from a contaminated experiment leads to unreliable and non-reproducible results [60].
Q4: How can I improve the sensitivity of my ELISA for detecting low-abundance proteins? A4: Consider switching to a digital ELISA platform, such as Simoa, which can be up to 1000x more sensitive than conventional ELISA [64] [65]. For standard ELISA, using signal amplification systems (e.g., biotin-streptavidin) or high-affinity monoclonal antibodies can also significantly lower the detection limit [61].
Q5: Why would I use sedaDNA if microscopy is cheaper and faster? A5: While microscopy is an excellent first pass, sedaDNA provides a different level of taxonomic resolution. For example, it can distinguish between the human whipworm (Trichuris trichiura) and the mouse whipworm (Trichuris muris), which have morphologically identical eggs, thus providing crucial insights into zoonotic transmission and sanitation in past populations [58].
Technical Support Center: Troubleshooting Ancient Parasite DNA Analysis
This technical support resource addresses common challenges faced by researchers utilizing multimethod approaches in paleoparasitology, with a specific focus on mitigating DNA contamination and optimizing experimental protocols.
Troubleshooting Guides
Issue 1: Low Yield of Ancient Parasite DNA (aDNA) from Sediment Samples
- Problem: Inability to recover sufficient parasite DNA for sequencing from archaeological sediments.
- Solution: Implement a rigorous sedaDNA extraction protocol designed for complex environmental samples.
- Step 1: Use a lysis buffer with garnet PowerBead tubes for mechanical disruption via vortexing for 15 minutes to break down organo-mineralized content and hardy parasite eggs [18] [3].
- Step 2: Add Proteinase K and rotate tubes continuously at 35°C overnight to digest proteins and release DNA [3].
- Step 3: Centrifuge at 4500 rpm at 4°C for 6-24 hours to precipitate enzymatic inhibitory compounds common in sediments and feces, a critical step for improving DNA recovery [18] [3].
- Step 4: Purify DNA using silica columns with a high-volume Dabney binding buffer to maximize aDNA binding [3].
Issue 2: Incomplete Parasite Taxonomic Profile
- Problem: Microscopy identifies helminth eggs but fails to detect protozoa or confirm species.
- Solution: Adopt a multimethod diagnostic workflow.
- For helminths (e.g., roundworm, whipworm): Continue using microscopy as it is the most effective screening tool [18] [3].
- For protozoa causing diarrhea (e.g., Giardia duodenalis): Supplement with Enzyme-Linked Immunosorbent Assay (ELISA), which is the most sensitive method for these pathogens [18] [3].
- For species confirmation and detection of low-abundance taxa: Apply sedimentary ancient DNA (sedaDNA) analysis with a parasite-specific targeted capture approach prior to high-throughput sequencing [18] [3].
Issue 3: Contamination with Modern DNA
- Problem: Sequencing results show modern DNA sequences, compromising aDNA authenticity.
- Solution: Enforce strict aDNA facility protocols.
Frequently Asked Questions (FAQs)
Q1: What is the minimum sediment sample weight required for a comprehensive multimethod analysis? A1: The protocols can be successfully applied to small quantities. For microscopy, a 0.2 g subsample is used. For ELISA, a 1 g subsample is recommended. For sedaDNA, recovery is possible from as little as 0.25 g of sediment [18] [3].
Q2: How do I choose between shotgun sequencing and targeted capture for my sedaDNA analysis? A2: Targeted enrichment is recommended for parasite aDNA. It preferentially sequences parasite DNA of interest, avoiding the high sequencing costs associated with deep shotgun sequencing for low-abundance pathogenic organisms [18] [3].
Q3: Can this approach distinguish between different species within the same genus? A3: Yes, a key advantage of sedaDNA with targeted sequencing is its high resolution. For example, it can reveal that whipworm eggs at a site belong to two different species, Trichuris trichiura (human-specific) and Trichuris muris (mouse-specific), which is not possible with microscopy alone [18] [3].
Q4: What are the primary factors affecting parasite DNA preservation in archaeological contexts? A4: DNA preservation is influenced by time, environmental conditions (e.g., temperature, moisture, pH), and the mineralization of fecal material. The study found no parasite DNA recovered from pre-Roman sites (dating back to c. 6400 BCE), while successful recovery was achieved from Roman and medieval period samples [18] [3].
Experimental Protocols
Multimethod Paleoparasitology Workflow for Temporal Trend Analysis
Table 1: Sample Requirements and Diagnostic Focus for Paleoparasitology Techniques
| Technique | Sample Type | Subsample Weight | Primary Diagnostic Target |
|---|---|---|---|
| Microscopy | Latrine sediment, coprolites, pelvic soil | 0.2 g | Helminth eggs (e.g., roundworm, whipworm) |
| ELISA | Latrine sediment, coprolites, pelvic soil | 1.0 g | Protozoan antigens (e.g., Giardia duodenalis, Entamoeba histolytica) |
| sedaDNA | Latrine sediment, coprolites, pelvic soil | 0.25 g | Parasite DNA for species identification and diversity |
Detailed Protocol: Sedimentary Ancient DNA (sedaDNA) Extraction and Library Preparation [18] [3]
- Subsampling: In a dedicated aDNA cleanroom, subsample 0.25 g of sediment.
- Lysis and Disruption: Add the subsample to a garnet PowerBead tube containing 750 µL of NaPO4 and guanidinium isothiocyanate buffer. Vortex for 15 minutes.
- Digestion: Add Proteinase K to the supernatant and rotate tubes continuously in a 35°C oven overnight.
- Binding and Purification: Mix the supernatant with a high-volume Dabney binding buffer. Pass the solution through a silica column to bind DNA.
- Inhibitor Removal: Centrifuge at 4500 rpm at 4°C for a minimum of 6 hours to remove PCR inhibitors. Repeat until the supernatant is clear (up to 24 hours total).
- Elution: Elute the purified DNA in 50 µL of elution buffer.
- Library Preparation: Prepare double-stranded DNA libraries for Illumina sequencing using a blunt-end repair method [3].
- Targeted Enrichment: Use a custom-designed set of RNA baits to perform in-solution targeted capture of parasite DNA, enriching for pathogen sequences before high-throughput sequencing [18] [3].
Experimental Workflow and Contamination Control
The following diagram illustrates the integrated multimethod workflow and the parallel, critical contamination control measures required for authentic ancient DNA analysis.
The Scientist's Toolkit: Research Reagent Solutions
Table 2: Essential Research Reagents and Materials for Paleoparasitology
| Item Name | Function / Application | Key Characteristic |
|---|---|---|
| Garnet PowerBead Tubes (Qiagen) | Physical and chemical disintegration of sediment and parasite eggs during DNA lysis. | Garnet beads provide superior mechanical disruption for tough environmental samples [3]. |
| Dabney Binding Buffer | Binds released DNA to silica columns during purification, maximizing aDNA recovery. | High-volume formulation optimized for ancient and degraded DNA [3]. |
| NaPO4 & Guanidinium Isothiocyanate Lysis Buffer | Lysis buffer for sedaDNA extraction, working in concert with bead-beating. | Effective at releasing DNA from complex organo-mineral sediments while stabilizing it [3]. |
| Parasite-Specific RNA Baits | In-solution targeted capture to enrich for parasite DNA sequences prior to sequencing. | A comprehensive set of baits allows detection of multiple ancient human parasite taxa simultaneously [18] [3]. |
| Commercial ELISA Kits (e.g., TECHLAB, Inc.) | Immunological detection of protozoan antigens (e.g., Giardia, Entamoeba, Cryptosporidium). | Validated for use with ancient human fecal samples; detects proteins not visible via microscopy [18] [3]. |
| Trisodium Phosphate (0.5%) | Disaggregation solution for rehydrating and dissolving ancient sediment samples for microscopy and ELISA. | Standard paleoparasitology reagent for preparing samples for microscopic examination [3]. |
This technical support center is designed for researchers and scientists applying modern molecular diagnostics, specifically quantitative PCR (qPCR), to ancient fecal material (paleofeces) for pathogen profiling. The core challenge in this field is the highly degraded nature of ancient DNA (aDNA) and its susceptibility to contamination from modern sources, which can lead to misleading results and false positives. This guide provides targeted troubleshooting advice and detailed protocols to overcome these hurdles, ensuring the authenticity and reliability of your findings within the broader context of ancient parasite analysis research.
Frequently Asked Questions (FAQs)
Q1: Why is contamination control especially critical when working with ancient feces compared to modern samples? Ancient DNA from paleofeces is scarce, highly fragmented, and present in low copy numbers [66] [67]. This low-biomass state means that even minuscule amounts of contaminating modern DNA can be amplified instead of the authentic ancient target, completely distorting results [68] [4]. The extreme sensitivity of qPCR, while beneficial, makes it particularly vulnerable to amplifying these contaminants [10] [69].
Q2: My No Template Control (NTC) shows amplification. What does this mean and what should I do? Amplification in your NTC is a clear indicator of contamination [10] [69]. The pattern of amplification can help identify the source:
- Consistent amplification across all NTC wells at similar Ct values: Suggests a contaminated reagent. You should replace all suspect reagents, starting with the master mix and water [10].
- Random amplification in only some NTC wells with variable Ct values: Indicates aerosol contamination in the lab environment, likely from amplified PCR products [10]. You must review your lab workflows, decontaminate surfaces and equipment with a 10% bleach solution followed by 70% ethanol, and ensure physical separation of pre- and post-PCR areas [10] [4].
Q3: What are the best practices for physically setting up a lab for ancient DNA work? A rigorous spatial separation is non-negotiable. The workflow should move unidirectionally from clean to dirty areas:
- Dedicated Pre-PCR Lab: This should be a clean, isolated space for sample preparation, DNA extraction, and qPCR setup. It must have dedicated equipment, lab coats, and consumables [10] [67].
- Dedicated Post-PCR Lab: A separate room for all activities involving amplified DNA products. Equipment (pipettes, centrifuges) must not be shared with the pre-PCR lab [10].
- One-Way Workflow: Personnel should not enter the pre-PCR lab after working in the post-PCR area on the same day [10].
Q4: How can I authenticate that the DNA I've amplified is truly ancient and not a modern contaminant? Beyond contamination controls, you can use biochemical and bioinformatic methods:
- DNA Damage Patterns: Authentic aDNA exhibits characteristic damage patterns, including cytosine-to-thymine (C-to-T) misincorporations near the ends of fragments [39]. Specialized library preparation methods for single-stranded DNA and computational tools like
metaDMGcan quantify this damage to authenticate hits [48] [70]. - Fragment Length Analysis: Ancient DNA is highly fragmented. Successful amplification of short targets (e.g., <100 bp) with a failure to amplify longer fragments from the same gene is a good indicator of working with degraded aDNA [67].
Troubleshooting Guides
Guide: Low or No Amplification Signal
| Symptom | Possible Cause | Solution |
|---|---|---|
| No amplification in sample and positive control. | PCR inhibitors co-extracted from paleofeces (e.g., humic acids). | - Add a purification step using a silica-based binding buffer [39] or an inhibitor removal spin column.- Use a master mix designed to be inhibitor-resistant [69]. |
| Positive control amplifies, but samples do not. | - Inhibitors present.- DNA concentration too low. | - Dilute the extract to dilute inhibitors.- Concentrate the DNA extract and re-quantify.- Use a pre-amplification step to increase the number of target molecules before qPCR [66]. |
| High Cq values (low DNA yield). | - Poor aDNA recovery during extraction.- Target fragment size too long. | - Optimize extraction protocol for short fragments (e.g., using a silica-based method with a binding buffer optimized for short fragments) [48] [39].- Design primers to amplify very short targets (<100 bp) [67]. |
Guide: Inconsistent or Erratic Replicates
| Symptom | Possible Cause | Solution |
|---|---|---|
| High variation between technical replicates. | - Pipetting error with viscous or low-volume samples.- Inhomogeneous sample (e.g., debris). | - Use positive-displacement pipettes or filtered aerosol-resistant tips [10].- Centrifuge samples briefly and vortex thoroughly before use.- Ensure a homogeneous suspension of the extract. |
| Amplification in some replicates but not others. | - Low copy number of the target is near the detection limit.- Random environmental contamination. | - Increase the number of replicates (e.g., from 3 to 5 or more).- Re-evaluate lab cleanliness and technique. Ensure tubes are kept closed whenever possible [10]. |
Detailed Experimental Protocols
Protocol: DNA Extraction from Paleofeces Optimized for Short Fragments
This protocol is adapted from methods successfully used to recover pathogen DNA from 8th-century paleofeces [66] and archaeological plant remains [39], emphasizing the recovery of short, fragmented aDNA.
Principle: To efficiently liberate and purify trace amounts of highly degraded DNA while removing PCR inhibitors commonly found in ancient samples.
Key Research Reagent Solutions:
| Reagent | Function |
|---|---|
| Proteinase K | Digests proteins and degrades nucleases that could destroy DNA. |
| EDTA Buffer | Chelates divalent cations, inhibiting nucleases and aiding decalcification. |
| Guanidinium Thiocyanate (GuSCN) Buffer | A chaotropic salt that denatures proteins and facilitates binding of DNA to silica. |
| Silica Magnetic Beads | Selectively binds DNA in the presence of chaotropic salts, allowing for purification and concentration. |
| Power Beads Solution (Qiagen) | A reagent optimized for lysis and removal of inhibitors from complex samples like soil and sediment [39]. |
| Uracil-N-Glycosylase (UNG) | An enzyme added to the qPCR master mix to destroy carryover contamination from previous PCR amplifications [10] [69]. |
Workflow:
- Surface Decontamination: To remove external contamination, briefly submerge the paleofeces sample in a weak (5-10%) bleach solution, followed by rinsing with DNA-free water and exposure to UV light for 20 minutes per side [39].
- Grinding: Grind the sample to a fine powder in a sterile mortar and pestle cooled with liquid nitrogen.
- Digestion: Digest the powder in a buffer containing EDTA, Proteinase K, and SDS (or Power Beads Solution) for 12-24 hours with agitation [39].
- Binding: Add a binding buffer containing GuSCN and combine with silica magnetic beads. This step is crucial for capturing short DNA fragments [48].
- Purification: Wash the beads with an ethanol-based buffer to remove impurities and inhibitors.
- Elution: Elute the purified DNA in a low-EDTA TE buffer or DNA-free water.
Protocol: Targeted Pathogen Detection via Multi-parallel qPCR
This protocol outlines the method used to detect 30 different enteric pathogens in a single study of ancient feces [66].
Principle: To use pre-amplification of multiple targets followed by highly specific qPCR to sensitively detect a broad panel of pathogens from a limited aDNA sample.
Workflow:
- DNA Extract QC: Quantify the extracted DNA using a fluorescence-based method (e.g., Qubit HS DNA assay) [39].
- Pre-amplification PCR (Optional but Recommended): Perform a limited-cycle (e.g., 14-cycle) multiplex PCR using a pool of all primer pairs for the target pathogens. This pre-amplification step enriches the low-copy-number targets, increasing the sensitivity of the subsequent qPCR [66].
- qPCR Setup:
- Use a master mix containing UNG to prevent amplicon carryover contamination [10] [69].
- Include mandatory controls:
- No Template Control (NTC): To detect reagent or environmental contamination.
- Positive Control: Synthetic oligonucleotides or control DNA for each target.
- Negative Extraction Control: A blank carried through the entire extraction process.
- Use a 96-well or 384-well plate format for multi-parallel analysis.
- Data Analysis: Analyze amplification curves and Ct values. A pathogen is considered detected if it amplifies with a Ct value below a predefined threshold and its corresponding NTC shows no amplification.
Workflow Visualization
Ancient DNA Analysis Workflow
Title: aDNA Analysis and Contamination Control Workflow
Laboratory Setup for Contamination Prevention
Title: Physical Lab Separation for aDNA Work
The analysis of ancient parasite DNA presents a unique set of challenges. Researchers regularly work with minute quantities of degraded DNA, where the risk of false positives from modern contamination can severely compromise data integrity. Decontamination is not merely a routine laboratory procedure; it is a fundamental requirement for generating reliable, reproducible results. For scientists and drug development professionals, understanding and implementing rigorous decontamination protocols directly translates to increased confidence in findings, whether for evolutionary studies, diagnostic development, or therapeutic target identification. This guide provides actionable, evidence-based strategies to quantify and improve the success of your decontamination procedures.
Quantifying the Problem: The Pervasiveness of Contamination
Before implementing solutions, it is crucial to understand the scope of the contamination problem. Systematic studies across various fields of molecular research have quantified the high prevalence of contaminating sequences, especially in public databases and laboratory environments.
Contamination in Reference Databases
The reliability of any metagenomic study depends on the purity of its reference databases. A 2025 study systematically screened 831 published endoparasite genomes to quantify contamination levels. The results, summarized in the table below, highlight a widespread issue [5].
Table 1: Quantified Contamination in Published Parasite Genomes
| Metric | Finding | Implication for Research |
|---|---|---|
| Genomes Contaminated | 818 out of 831 (98.4%) | The vast majority of available genomes are unreliable for sensitive detection without prior decontamination. |
| Total Contaminant Bases Identified | 528,479,404 bases | A significant proportion of genetic data in public resources is not of the target organism. |
| Genomes with >1% Contamination | 64 genomes | In severe cases, contamination constitutes a major portion of the assembled sequence. |
| Most Extreme Case | Elaeophora elaphi genome was 100% contaminant | Reliance on a single contaminated genome can lead to complete misdirection, falsely identifying an entirely different organism. |
| Primary Source of Contamination | Bacterial DNA (86% of contaminants) | Contamination often arises from associated microbiomes, laboratory reagents, or the host organism. |
This large-scale analysis demonstrated that using decontaminated reference databases significantly reduces false detection rates and improves overall detection accuracy [5]. After decontamination, the curated ParaRef database provided a more reliable foundation for species-level parasite detection in both ancient and modern metagenomic datasets.
Laboratory and Environmental Contamination
Beyond database issues, laboratory workflows are perpetually at risk. One study performing environmental surveillance in a clinical PCR laboratory collected 72 air samples and 129 surface samples to identify contamination sources [71]. The findings confirmed that DNA contamination on laboratory surfaces and in the air is a major cause of false-positive PCR results, necessitating a robust and monitored decontamination protocol [71].
Experimental Protocols for Effective Decontamination
Implementing a multistrategy approach is key to successful decontamination. The following protocols, derived from published studies, can be integrated into your standard operating procedures (SOPs).
Protocol: Environmental Surveillance and Surface Decontamination
This protocol is adapted from a step-by-step evaluation of DNA decontamination methods in a clinical PCR laboratory, which was verified over a two-week period [71].
Step 1: Environmental Sampling for Monitoring. To ensure the elimination of carry-over contamination, systematically sample the air and surfaces.
- Air Sampling: Leave open a plate (9-cm diameter) containing 2 mL of 0.9% sodium chloride solution for 30 minutes in key locations (e.g., biosafety cabinets, reagent preparation areas) [71].
- Surface Sampling: Use sterile swabs moistened with saline to swab a defined area (e.g., 10 cm x 10 cm). Place the swab into a sterile tube containing 2 mL of 0.9% sodium chloride solution [71].
- Analysis: Use 200 µL of the collected sample as a template for a sensitive, relevant PCR assay (e.g., qPCR for a common parasite target) to determine the presence and level of contamination [71].
Step 2: Execute Multistep Surface Decontamination. Perform the following sequence of decontamination steps twice daily for optimal results [71]:
- Spray a 75% ethyl alcohol solution into the air before cleaning the rooms [71].
- Irradiate rooms with UV light for 1 hour. Note that UV's effectiveness can be inconsistent and may not eliminate short DNA fragments [71] [72].
- Wipe objects and equipment with a hypochlorite solution (e.g., freshly made 1:10 bleach solution) to remove settled particles. Ensure a minimum contact time of 30 minutes, but note that bleach can corrode some surfaces [71] [73].
- Wipe sensitive equipment, such as disassembled centrifuge rotors or PCR instruments, with absolute ethyl alcohol [71].
- Use separate sets of cleaning tools for each room to prevent cross-contamination [71].
Protocol: Multistrategy Reagent Decontamination
Contamination of PCR reagents is a major problem for hypersensitive applications. A 2010 study developed an efficient, multistrategy procedure that remains highly relevant [72]. The workflow involves treatments adapted to different reagent categories to avoid compromising PCR efficiency.
- Path A (Thermostable Reagents): Treat buffers and salts with a combination of γ-irradiation (to degrade high-molecular-weight DNA) followed by UV-irradiation (to cross-link shorter DNA fragments). Optimal performance requires precise calibration, as the reagents themselves can shield contaminants from irradiation [72].
- Path B (Thermolabile Reagents): Treat dNTPs with UV-irradiation only, as γ-irradiation could damage their chemical structure [72].
- Path C (Enzymes): Treat the Taq polymerase or other enzymes with a recombinant heat-labile double-strand specific DNase (dsDNase) from the Antarctic shrimp Pandalus borealis. This enzyme efficiently digests contaminating DNA but is easily inactivated by a subsequent heat step (e.g., 65°C for 10-15 minutes) before the PCR, leaving the Taq polymerase active [72].
This combined procedure allows for efficient reagent decontamination while preserving the efficiency of PCR amplification of minute quantities of DNA, which is critical for ancient DNA work [72].
The Scientist's Toolkit: Essential Reagents & Materials
Table 2: Key Research Reagent Solutions for Decontamination
| Item | Function/Brief Explanation | Key Considerations |
|---|---|---|
| Double-Strand Specific DNase (dsDNase) | A heat-labile enzyme that degrades contaminating double-stranded DNA in PCR reagents; can be inactivated prior to PCR setup to avoid degrading the sample DNA [72]. | Prefer a recombinant, heat-labile form for easy inactivation. |
| Hypochlorite Solution (Bleach) | A high-level disinfectant that oxidizes and fragments DNA; effective for wiping down surfaces and equipment [71] [73]. | Can be corrosive; use a 1:10 dilution with a 30-minute contact time; rinse with water if needed [73]. |
| UV Irradiation Cabinet | Used to cross-link DNA contaminants on surfaces and in some liquid reagents (like dNTPs), rendering them unamplifiable [71] [72]. | Inconsistent for eliminating very short DNA fragments; efficacy depends on exposure and shielding [72]. |
| γ-Irradiation Source | Effectively degrades long-fragment contaminating DNA in thermostable reagents (e.g., buffers) by inducing strand breaks [72]. | Access may require a specialized facility; not suitable for all reagents. |
| FCS-GX & Conterminator Software | Bioinformatics tools used to systematically identify and remove contaminant sequences from genomic assemblies, enabling the creation of curated reference databases [5]. | Essential for in-silico decontamination of public or in-house genome databases. |
| Validated Sampling Swabs | Sterile swabs for environmental monitoring; used with saline to collect surface samples for subsequent PCR analysis to assess decontamination efficacy [71]. | Critical for quality control and validating that surface decontamination protocols are working. |
FAQs and Troubleshooting Guide
Q1: Our negative controls are consistently positive in a sensitive parasite PCR. We use UV and bleach routinely. What are we missing?
A: This is a common issue. First, review your Environmental Surveillance data. If you are not routinely sampling your surfaces and air, you may be operating blind. Second, consider that UV and bleach have limitations; UV does not effectively eliminate very low-molecular-weight DNA fragments, and bleach can be inactivated by organic matter or improperly diluted [72] [71]. Implement the Multistrategy Reagent Decontamination protocol described in Section 3.2, as the contamination is likely embedded in your PCR reagents themselves. Furthermore, ensure you are using a decontaminated reference database like ParaRef to rule out false positives arising from contaminated genome assemblies [5].
Q2: We generated a metagenomic dataset from ancient coprolites, but the results are dominated by modern bacteria. How can decontamination protocols help future studies?
A: This pattern strongly suggests reagent or laboratory contamination. The sources you identified (laboratory surfaces, airborne nucleic acids, personnel) are well-documented [74]. For future work, you must:
- Decontaminate all reagents using a method proven to remove short bacterial DNA fragments, such as the dsDNase treatment [72].
- Process extraction blanks and PCR negatives in parallel with all your samples. These controls are non-negotiable for identifying the source of contamination.
- Use a curated, decontaminated database for taxonomic assignment. As shown in Table 1, public genomes are frequently contaminated with bacterial DNA, which directly leads to the false detection you describe [5].
Q3: A reviewer questioned the specificity of our PCR-based parasite detection, suggesting our amplicons could be from non-target nematodes. How can we prove specificity?
A: This highlights the critical need for assay validation. You must:
- Test Against Related Non-Targets: As in the pinworm study, validate your PCR assay against a panel of genetically similar parasites and common environmental nematodes (e.g., rhabditid nematodes found in bedding) to confirm it does not cross-amplify [75].
- Confirm with Orthogonal Methods: When possible, confirm PCR-positive results with a different method, such as microscopic examination or a PCR targeting a different gene region [75].
- Provide Sequencing Evidence: Do not rely solely on amplification; Sanger sequence all positive PCR products to confirm the identity of the amplicon.
Q4: What is the single most important step to improve decontamination in a lab working with low-biomass ancient samples?
A: While there is no single solution, the most impactful step is often the implementation of a rigorous, multistrategy approach that includes reagent decontamination. No single method is valid for all contamination sources. Relying solely on UV or bleach is insufficient. Combining physical (UV, γ-irradiation), chemical (bleach), and enzymatic (dsDNase) methods, tailored to different parts of your workflow (surfaces, air, reagents), is essential for success [72] [71]. Furthermore, instituting a regular, quantitative environmental surveillance program is critical for monitoring the effectiveness of your decontamination procedures and catching contamination early [71].
Conclusion
The fight against contamination in ancient parasite DNA analysis is being won through a synergistic, multi-layered strategy. The foundational recognition of widespread database contamination has led to the creation of curated resources like ParaRef, while methodological advances in sedaDNA extraction and targeted enrichment have dramatically improved the recovery of authentic ancient sequences. Crucially, the implementation of rigorous, contamination-aware wet-lab protocols and bioinformatic authentication is non-negotiable for data integrity. The validation of a multimethod approach—leveraging the unique strengths of microscopy, ELISA, and sedaDNA—provides the most comprehensive and reliable pathway to reconstructing past parasite diversity. These advancements collectively form a new gold standard, enabling more confident explorations of parasite evolution, the history of infectious disease, and the health of past human populations. Future directions must focus on standardizing these protocols across laboratories, expanding decontaminated reference databases, and further refining functional paleogenomic applications to unlock the full biomedical potential of ancient pathogens.
References
- 1. Ten common issues with reference sequence databases ... [https://pmc.ncbi.nlm.nih.gov/articles/PMC10978663/]
- 2. Contamination in Sequence Databases - NCBI - NIH [https://www.ncbi.nlm.nih.gov/tools/vecscreen/contam]
- 3. Sedimentary ancient DNA as part of a multimethod ... [https://pmc.ncbi.nlm.nih.gov/articles/PMC12151383/]
- 4. Guidelines for preventing and reporting contamination in ... [https://www.nature.com/articles/s41564-025-02035-2]
- 5. ParaRef: a decontaminated reference database for parasite ... [https://genomebiology.biomedcentral.com/articles/10.1186/s13059-025-03818-w]
- 6. Ten common issues with reference sequence databases ... [https://www.frontiersin.org/journals/bioinformatics/articles/10.3389/fbinf.2024.1278228/full]
- 7. A metagenomic DNA sequencing assay that is robust ... [https://www.nature.com/articles/s41467-022-31654-0]
- 8. Contamination Issue in Viral Metagenomics [https://pmc.ncbi.nlm.nih.gov/articles/PMC8564396/]
- 9. How to Avoid DNA Contamination: 10 Essential Tips [https://bento.bio/resources/bento-lab-advice/10-essential-tips-to-avoid-dna-contamination-during-extraction-and-amplification/]
- 10. Avoiding Contamination | Thermo Fisher Scientific - ES [https://www.thermofisher.com/us/en/home/life-science/pcr/real-time-pcr/real-time-pcr-learning-center/real-time-pcr-basics/good-laboratory-practice-avoid-contamination-qpcr-experiments.html]
- 11. What Ancient Poop Reveals About Our Ancestors [https://time.com/7327906/ancient-poop-dna-history/]
- 12. a decontaminated reference database for parasite ... [https://pubmed.ncbi.nlm.nih.gov/41131579/?utm_source=FeedFetcher&utm_medium=rss&utm_campaign=None&utm_content=0C9sSr4rCnG5qW8eu_6UKZXSjgER-LOzC4SwV1MLqZl&fc=None&ff=20251027105935&v=2.18.0.post22+67771e2]
- 13. Troubleshooting Guide for DNA Cleanup and Plasmid ... [https://www.neb.com/en-us/tools-and-resources/troubleshooting-guides/troubleshooting-guide-for-dna-cleanup-and-plasmid-purification?srsltid=AfmBOor0DtZB7zoHSHpx-HNTV4vCxHBeC4vgew9ycCx9LeyeFdGW9uUm]
- 14. Estimation of DNA contamination and its sources in genotyped ... [https://pmc.ncbi.nlm.nih.gov/articles/PMC6829038/]
- 15. ParaRef: a decontaminated reference database for parasite ... [https://pmc.ncbi.nlm.nih.gov/articles/PMC12548146/]
- 16. DNA Contamination - an overview [https://www.sciencedirect.com/topics/biochemistry-genetics-and-molecular-biology/dna-contamination]
- 17. Joint Estimation of Contamination, Error and Demography ... [https://pmc.ncbi.nlm.nih.gov/articles/PMC4822957/]
- 18. Sedimentary ancient DNA as part of a multimethod ... [https://journals.plos.org/plosntds/article?id=10.1371/journal.pntd.0013135]
- 19. The sedaDNA revolution and archaeology [https://www.sciencedirect.com/science/article/pii/S0305440324002000]
- 20. Unearthing sedimentary ancient DNA (sedaDNA) with ... [https://pastglobalchanges.org/publications/pages-magazines/pages-magazine/138074]
- 21. Recovering sedimentary ancient DNA of harmful ... [https://pmc.ncbi.nlm.nih.gov/articles/PMC11334580/]
- 22. Maximizing efficiency in sedimentary ancient DNA analysis [https://www.nature.com/articles/s41598-024-69741-5]
- 23. The Potential of Sedimentary Ancient DNA to Reconstruct ... [https://tos.org/oceanography/article/the-potential-of-sedimentary-ancient-dna-to-reconstruct-past-ocean-ecosystems]
- 24. Troubleshooting a Faulty ELISA [https://bitesizebio.com/37935/troubleshooting-faulty-elisa/]
- 25. A comparison of PCR and ELISA methods to detect different ... [https://parasitesandvectors.biomedcentral.com/articles/10.1186/s13071-021-04976-z]
- 26. Ancient parasite analysis: Exploring infectious diseases in ... [https://www.sciencedirect.com/science/article/pii/S0305440324001353]
- 27. Comparative evaluation of real-time PCR and ELISA for the ... [https://www.nature.com/articles/s41598-024-54602-y]
- 28. Targeted pathogen profiling of ancient feces reveals ... [https://pmc.ncbi.nlm.nih.gov/articles/PMC12543138/]
- 29. | NGS-based hybrid Target method Enrichment capture [https://www.illumina.com/techniques/sequencing/dna-sequencing/targeted-resequencing/target-enrichment.html]
- 30. Target Enrichment With Hybridization Capture | IDT [https://www.idtdna.com/pages/products/next-generation-sequencing/methods/targeted-dna-sequencing/xgen-hybridization-capture]
- 31. The next generation of target technologies - large capture ... DNA [https://pubmed.ncbi.nlm.nih.gov/27393338/]
- 32. Sensitive universal detection of blood parasites by selective... [https://microbiomejournal.biomedcentral.com/articles/10.1186/s40168-020-00939-1]
- 33. Intra-individual variability in ancient plasmodium DNA ... [https://www.nature.com/articles/s41598-024-85038-z]
- 34. Advancements and Challenges in Ancient DNA Research [https://pmc.ncbi.nlm.nih.gov/articles/PMC9956214/]
- 35. Sensitive universal detection of blood parasites by ... [https://pmc.ncbi.nlm.nih.gov/articles/PMC7778815/]
- 36. How to Troubleshoot Sequencing Preparation Errors (NGS ... [https://www.cd-genomics.com/resource-sequencing-preparation-troubleshooting.html]
- 37. Genomic palaeoparasitology traced the occurrence of ... [https://www.nature.com/articles/s41598-022-10690-2]
- 38. Comparative analysis of DNA extraction protocols for ... [https://pmc.ncbi.nlm.nih.gov/articles/PMC8175948/]
- 39. Optimizing ancient DNA recovery from archaeological plant ... [https://www.nature.com/articles/s41598-025-21743-7]
- 40. Development and evaluation of an optimized Ancient DNA ... [https://www.sciencedirect.com/science/article/abs/pii/S1872497325001516]
- 41. A Case Study for the Recovery of Authentic Microbial ... [https://www.mdpi.com/2076-2607/10/8/1623]
- 42. Don’t throw leftover silica DNA purification columns/ buffers away! [https://pipettejockey.com/2017/06/16/dont-throw-those-silica-dna-purification-columnsbuffers-away-use-them-up/]
- 43. Purification of Genomic DNA Using PureLink Silica Columns [https://www.thermofisher.com/sg/en/home/references/protocols/nucleic-acid-purification-and-analysis/dna-extraction-protocols/purification-of-genomic-dna.html]
- 44. New insights on single - stranded versus double - stranded ... DNA [https://pubmed.ncbi.nlm.nih.gov/26651516/]
- 45. Reducing microbial and human contamination in DNA extractions... [https://pubmed.ncbi.nlm.nih.gov/26260087/]
- 46. of Recovery by agar-containing solution from... microbial DNA [https://www.nature.com/articles/s41598-023-46890-7?error=cookies_not_supported&code=df6ce8ad-77ae-4aab-9033-c53ad0a8e633]
- 47. Optimized Bone Sampling Protocols for the Retrieval of ... [https://www.jove.com/v/63250/optimized-bone-sampling-protocols-for-retrieval-ancient-dna-from]
- 48. Wet Lab Protocols Matter: Choice of DNA Extraction and ... [https://pmc.ncbi.nlm.nih.gov/articles/PMC12550470/]
- 49. Safety Suit Up: New Clean Room Allows Scientists to Study ... [https://www.smithsonianmag.com/blogs/national-museum-of-natural-history/2018/04/26/safety-suit-new-clean-room-allows-scientists-study-fragile-ancient-dna/]
- 50. Environmental Cleaning Procedures | HAIs [https://www.cdc.gov/healthcare-associated-infections/hcp/cleaning-global/procedures.html]
- 51. Best Practices in Whole Room Disinfection [https://www.aorn.org/outpatient-surgery/article/best-practices-in-whole-room-disinfection]
- 52. A genetic safeguard for eliminating target genes in ... [https://pmc.ncbi.nlm.nih.gov/articles/PMC12274907/]
- 53. Annex 1, Contamination Control Strategies, and Far-UVC ... [https://uvmedico.com/en-nz/news/annex-1-contamination-control-strategies-and-far-uvc-technology-in-2025]
- 54. ncbi/fcs: Foreign Contamination Screening caller scripts ... [https://github.com/ncbi/fcs]
- 55. Correcting errors with NCBI FCS GX Foreign ... [https://help.galaxyproject.org/t/correcting-errors-with-ncbi-fcs-gx-foreign-contamination-screening-assembled-genomes/15987]
- 56. Foreign Contamination Screen Tool: Now Available in Galaxy! [https://ncbiinsights.ncbi.nlm.nih.gov/2024/03/07/foreign-contamination-screen/]
- 57. ContScout: sensitive detection and removal of ... [https://www.nature.com/articles/s41467-024-45024-5]
- 58. Sedimentary ancient DNA as part of a multimethod paleoparasitology... [https://pubmed.ncbi.nlm.nih.gov/40493646/]
- 59. (PDF) ( ) Sedimentary ancient DNA as part of a multimethod... [https://www.academia.edu/129898142/_2025_Sedimentary_ancient_DNA_as_part_of_a_multimethod_paleoparasitology_approach_reveals_temporal_trends_in_human_parasitic_burden_in_the_Roman_period]
- 60. Analysis of ancient human DNA and primer contamination [https://www.sciencedirect.com/science/article/abs/pii/S0379073811000727]
- 61. Why are Sensitivity and Specificity Important Parameters for... - Enzo [https://www.enzo.com/note/why-are-sensitivity-and-specificity-important-parameters-for-an-elisa/]
- 62. An overview of ELISA: a review and update on best laboratory ... [https://pmc.ncbi.nlm.nih.gov/articles/PMC11808753/]
- 63. Rapid and sensitive detection of genome contamination at ... [https://pmc.ncbi.nlm.nih.gov/articles/PMC10246020/]
- 64. Digital ELISAs: Pushing the Detection Limits for Proteins [https://bitesizebio.com/82482/digital-elisa-assays/]
- 65. Multiplex Assays vs ELISA in Complex Disease States [https://www.quanterix.com/what-you-need-to-know-about-multiplex-assays-vs-elisa-when-assessing-complex-disease-states/]
- 66. Targeted pathogen profiling of ancient feces reveals common ... [https://journals.plos.org/plosone/article?id=10.1371/journal.pone.0318140]
- 67. Estimation of DNA Degradation in Archaeological Human ... [https://pmc.ncbi.nlm.nih.gov/articles/PMC10298407/]
- 68. Real-time quantitative PCR to assess the authenticity of ... [https://www.sciencedirect.com/science/article/abs/pii/S0305440304000615]
- 69. Controlling for contamination in qPCR testing - LGC [https://blog.biosearchtech.com/how-to-control-for-contamination-in-qpcr-testing]
- 70. The spatiotemporal distribution of human pathogens in ... [https://www.nature.com/articles/s41586-025-09192-8]
- 71. DNA decontamination methods for internal quality ... [https://pmc.ncbi.nlm.nih.gov/articles/PMC6816905/]
- 72. An Efficient Multistrategy DNA Decontamination Procedure of ... [https://journals.plos.org/plosone/article?id=10.1371/journal.pone.0013042]
- 73. Laboratory Equipment Decontamination Procedures [https://research.wayne.edu/oehs/hazardous/equipment-decon-procedures]
- 74. How Surface Contamination Affects Sequencing Accuracy [https://micronbrane.com/removing-surface-contamination/]
- 75. False-Positive Results after Environmental Pinworm PCR ... [https://pmc.ncbi.nlm.nih.gov/articles/PMC4253587/]