Addressing Common Problems in FEA Concentration Techniques: A Guide for Enhanced Diagnostic Accuracy
This article provides a comprehensive examination of the Formalin-Ethyl Acetate (FEA) concentration technique, a cornerstone procedure in parasitology for diagnosing intestinal parasites.
Addressing Common Problems in FEA Concentration Techniques: A Guide for Enhanced Diagnostic Accuracy
Abstract
This article provides a comprehensive examination of the Formalin-Ethyl Acetate (FEA) concentration technique, a cornerstone procedure in parasitology for diagnosing intestinal parasites. Aimed at researchers, scientists, and drug development professionals, the content explores the foundational principles of FEA, details methodological variations and their applications, identifies common pitfalls with targeted troubleshooting strategies, and reviews validation protocols and comparative efficacy against other diagnostic methods. The goal is to equip laboratory professionals with the knowledge to optimize procedural accuracy, improve recovery rates of parasites, and ensure reliable diagnostic outcomes in both clinical and research settings.
Understanding FEA Concentration: Principles, Applications, and Core Challenges
In engineering design, stress concentration refers to the localization of high stress in a material due to geometric discontinuities, material defects, or abrupt changes in cross-section [1]. If overlooked, these concentrations can lead to premature failure, especially in components subjected to cyclic loading and fatigue, such as turbine blades or engine parts [1].
The Stress Concentration Factor (Kt) is a dimensionless parameter used to quantify this effect. It is defined as the ratio of the maximum stress (σmax) at a discontinuity to the nominal stress (σnominal) in the gross cross-section [1]: Kt = σmax / σnominal
The Finite Element Analysis (FEA) concentration technique is the computational methodology used to predict these stress concentration factors and the associated localized stress fields. By simulating the behavior of a structure under load, FEA helps engineers identify potential weaknesses and mitigate failure risks [1].
Historical Context and Fundamental Principles
Historical Development
The theoretical understanding of stress concentration was well-established prior to the advent of FEA. The problem was addressed through analytical solutions for simple geometries and empirical data compiled in reference books like "Peterson’s Stress Concentration Factors" [1]. The development of FEA as a numerical method in the latter half of the 20th century provided a powerful tool to analyze stress concentrations in complex, real-world geometries that were previously intractable. The technique has since become a cornerstone of computational engineering.
The Basic Principle of FEA for Stress Concentration
FEA works by dividing a complex geometry into a finite number of small, simple sub-domains called elements. The process can be broken down into key steps as shown in the workflow below:
The connections between these elements are defined by nodes. Mathematical equations governing the physical behavior (e.g., elasticity) are then applied to this mesh to approximate the stress and strain across the entire structure [2]. In regions of expected stress concentration, such as near holes or sharp corners, the mesh is typically refined (made denser with smaller elements) to capture the high stress gradient accurately [1].
Troubleshooting Common Problems in FEA Concentration Research
Frequently Asked Questions (FAQs)
Q1: My FEA model shows unexpectedly low stress concentrations. What could be the cause?
- Insufficient Mesh Refinement: The most common cause is a mesh that is too coarse around geometric discontinuities. The stress gradient in these areas is very steep, and a coarse mesh will not capture the peak stress accurately [2].
- Incorrect Boundary Conditions: Applying constraints or loads in a way that does not reflect the real-world scenario can lead to an unrealistic stress distribution and an artificially low concentration factor.
- Geometry Simplification: Over-simplifying the model by removing small fillets or radii can eliminate actual stress raisers, while under-simplification (e.g., not ignoring tiny, irrelevant features) can lead to meshing problems.
Q2: How can I validate the accuracy of my FEA-predicted stress concentration factor?
- Mesh Convergence Study: Systematically refine the mesh in the area of interest and observe the change in the maximum stress (σ_max). The solution is considered converged when further refinement results in a negligible change (e.g., <2-5%) in the predicted stress [3].
- Comparison with Empirical Data: Compare your results with established data from trusted sources like "Peterson’s Stress Concentration Factors" for standard geometries [1].
- Experimental Validation: Use physical testing methods like photoelasticity (which reveals stress patterns in transparent models using polarized light) or strain gauges (which measure surface deformation) to validate the FEA results [1].
Q3: What is the difference between a Stress Concentration Factor (Kt) and a Stress Intensity Factor (KI)? These are often confused but address different problems:
- Stress Concentration Factor (Kt): Applies to uncracked components with geometric features like holes or notches. It is a dimensionless ratio used to predict where cracks might initiate [1].
- Stress Intensity Factor (KI): Applies to cracked components within the field of fracture mechanics. It quantifies the severity of the stress field near a crack tip and is used to determine if an existing crack will propagate [1].
Troubleshooting Guide: Mitigating Numerical Errors
| Problem Symptom | Potential Root Cause | Corrective Action |
|---|---|---|
| Unrealistically high stress at a singularity (e.g., sharp corner) | Mathematical singularity in the model; stress theoretically approaches infinity. | Redesign the geometry to include a small, realistic fillet radius instead of a perfectly sharp corner [1]. |
| No convergence in nonlinear analysis involving plasticity. | Material model is too complex or element distortion is excessive. | Review material property data, use a finer mesh in plastic zones, and adjust solver parameters for convergence. |
| Poor agreement with experimental strain gauge data. | Inaccurate material properties or mislocated boundary conditions. | Verify the input values for Elastic Modulus and Poisson's ratio. Reassemble the test setup to ensure FEA constraints match physical reality. |
Experimental Protocols for Validation
To ensure the reliability of FEA concentration studies, validation through experimental protocols is essential. The following methodology, inspired by research on additively manufactured structures, provides a robust framework [4].
Protocol: Validating FEA Models with Quasi-Static Compression Testing
1. Objective: To validate the deformation characteristics and stress distribution predicted by an FEA model of a lattice structure under compressive load.
2. Materials and Equipment:
- Specimen: Ti6Al4V lattice structures (e.g., FCC-Z or BCC-Z configurations) fabricated via Laser Powder Bed Fusion (L-PBF) [4].
- Equipment: Universal testing machine (for compression tests), Digital Imaging Correlation (DIC) system for full-field strain measurement [4].
- Software: FEA software (e.g., ANSYS, Abaqus) with capabilities for nonlinear static structural analysis [4].
3. Experimental Procedure:
- Specimen Preparation: Fabricate lattice specimens with defined porosity levels. Measure actual dimensions and surface morphology.
- Mechanical Testing: Mount the specimen in the testing machine and apply a quasi-static compressive load at a constant displacement rate until failure is observed. Record the force-displacement data.
- Data Acquisition: Use the DIC system to capture the deformation mechanism and strain distribution throughout the loading process.
4. Numerical Simulation (FEA):
- Model Setup: Create a 3D CAD model of the lattice structure's exact geometry.
- Mesh Generation: Perform a mesh convergence study to determine the optimal element size, particularly at the strut junctions where stress concentrations are expected [4].
- Material and Boundary Conditions: Assign measured material properties (e.g., Ti6Al4V: Elastic modulus = 113.8 GPa, Poisson's ratio = 0.342) [3]. Apply boundary conditions and loads that mirror the experimental setup.
- Analysis: Run a static structural simulation and extract data on stress distribution, deformation patterns, and the force-displacement response.
5. Validation and Data Analysis:
- Compare the experimental and FEA-predicted force-displacement curves.
- Correlate the deformation mechanisms (e.g., layer-by-layer fracture vs. shear banding) observed in the test with those predicted by the simulation [4].
- Quantify the agreement for key metrics like peak force and stiffness.
The logical relationship between the components of this validation protocol is summarized below:
The Researcher's Toolkit: Essential Reagents and Materials
The following table details key materials and tools used in advanced FEA concentration research, particularly for projects involving additive manufacturing and biomechanical applications [4] [3].
| Research Reagent / Material | Function in FEA Concentration Research |
|---|---|
| Ti6Al4V (Titanium Alloy) Powder | Primary material for fabricating test specimens (e.g., lattice structures, screws) via L-PBF. Its high strength-to-weight ratio and biocompatibility make it relevant for aerospace and biomedical studies [4]. |
| Finite Element Software (e.g., ANSYS, Abaqus) | The core computational platform for building models, applying physics, meshing, solving, and post-processing results to identify stress concentrations [4] [3]. |
| 20-node Tetrahedral Solid Elements | A type of higher-order finite element used for accurate meshing of complex geometries. They provide better resolution of stress gradients in concentration zones [3]. |
| Isotropic Linear Elastic Material Model | A foundational material model that assumes identical properties in all directions and a linear stress-strain relationship. It is often used for initial stress concentration screening before applying more complex models [3]. |
| Strain Gauges / DIC System | Experimental tools for measuring surface strains on a physical specimen. The data is crucial for validating the strain and stress fields predicted by the FEA model [1] [4]. |
Quantitative Data in FEA Concentration Analysis
Presenting quantitative data clearly is vital. The table below summarizes typical stress concentration factors for common geometric features, a key output of the technique [1].
| Geometric Feature | Loading Condition | Typical Stress Concentration Factor (Kt) | Notes |
|---|---|---|---|
| Circular hole in a wide plate | Tension | ~3.0 | A classic benchmark case; independent of hole size for an infinite plate. |
| Transverse hole in a round bar | Tension | 2.5 - 6.5 | Factor depends heavily on the ratio of hole diameter to bar diameter. |
| Fillet in a stepped bar | Bending | Up to ~3.8 | Factor is highly sensitive to the ratio of fillet radius to bar thickness. |
| Sharp corner (notch) | Tension | Theoretically infinite | Demonstrates why sharp corners are design failures; stress rises drastically as radius decreases [1]. |
Troubleshooting Guide: Common Issues with the Formalin-Ether Acetate Sedimentation Technique
Q: My sediment yield is low, and I'm struggling to identify parasites. What could be going wrong? A: Low yield can stem from several factors in the concentration process. First, ensure your formalin solution is fresh and properly concentrated; typically, a 10% solution is used as a fixative [5]. Second, confirm the centrifugation steps—common protocols specify emulsifying about 1 gram of stool with 7 mL of 10% formol saline, a 10-minute fixation period, followed by centrifugation at 1500 rpm for 5 minutes after adding the solvent [5]. Inconsistent speed or time will reduce pellet quality. Finally, check that you are thoroughly discarding the supernatant after centrifugation without disturbing the sediment containing the parasites [5].
Q: The solvents in my lab are a safety concern. Are there safer alternatives to diethyl ether? A: Yes, ethyl acetate is a widely accepted and recommended substitute. Comparative studies have found it to be equally effective or superior for concentrating organisms without distorting their morphology [6]. Crucially, ethyl acetate is less flammable and presents fewer general hazards than diethyl ether, making it safer for routine laboratory use [6]. Another alternative noted in the literature is Hemo-De, which is also less toxic, less flammable, and avoids the disposal problems associated with ethyl acetate [7].
Q: How do the different concentration techniques compare in terms of diagnostic performance? A: Research consistently shows that concentration methods are significantly more sensitive than direct examination. One recent hospital-based study provides the following quantitative comparison for parasite detection [5]:
| Diagnostic Technique | Detection Rate |
|---|---|
| Direct Wet Mount | 41% (45/110 samples) |
| Formalin-Ether Concentration (FEC) | 62% (68/110 samples) |
| Formalin-Ethyl Acetate Concentration (FAC) | 75% (82/110 samples) |
The Formalin-Ethyl Acetate Concentration (FAC) technique is the most sensitive and is particularly effective for detecting protozoan cysts and helminth eggs, as well as dual infections [5].
Experimental Protocol: Formalin-Ethyl Acetate Concentration (FAC) Technique
This is a detailed methodology for the FAC technique, as cited in contemporary literature [5].
- Specimen Emulsification: Approximate 1 gram of stool is added to a clean conical centrifuge tube containing 7 mL of 10% formol saline.
- Fixation: The mixture is allowed to stand for a 10-minute fixation period.
- Filtration: The fixed specimen is strained through three folds of gauze or a sieve into a new 15 mL conical centrifuge tube to remove large debris.
- Solvent Addition: 3 mL of ethyl acetate is added to the formalin filtrate.
- Centrifugation: The tube is centrifuged at 1500 rpm for 5 minutes. This creates four layers: a sediment of parasites at the bottom, a layer of formalin-fixed stool, a plug of debris, and a top layer of ethyl acetate.
- Supernatant Removal: The supernatant layers (the top three layers) are carefully decanted or separated from the sediment.
- Microscopy: Two drops of the remaining sediment are placed on a microscope slide, covered with a cover slip, and examined first at 10× magnification, then at 40× for parasite identification.
The Scientist's Toolkit: Essential Research Reagents & Materials
| Item | Function & Application |
|---|---|
| 10% Formalin (Formol Saline) | Acts as a fixative and preservative; kills microbes and stabilizes parasite morphology for examination [5]. |
| Ethyl Acetate | A solvent used in the concentration technique; it acts as a fat and debris extractor, clearing the solution and concentrating parasites into a pellet [6]. |
| Diethyl Ether | The traditional solvent in sedimentation techniques; largely replaced by safer alternatives like ethyl acetate due to high flammability and hazard [6]. |
| Hemo-De | A commercial xylene substitute and solvent; functions as a less toxic and less flammable alternative to both diethyl ether and ethyl acetate in concentration procedures [7]. |
| Microscope Slides & Coverslips | For preparing samples for microscopic examination to identify and differentiate parasitic elements [5]. |
| Centrifuge | A critical piece of lab equipment used to separate the dense parasite cysts and eggs from other stool components via centrifugal force [5]. |
Workflow Diagram: Parasite Concentration and Analysis
Frequently Asked Questions (FAQs)
Q: Why is the Formalin-Ethyl Acetate (FAC) technique recommended for rural or field settings? A: The FAC technique is highlighted for its higher recovery rate, safety, and feasibility in settings with minimal infrastructure. It requires relatively basic equipment (centrifuge, microscope) and the reagents, particularly ethyl acetate, are less hazardous to transport and store than alternatives like diethyl ether [5].
Q: What are the primary health hazards associated with handling formalin, and what precautions should I take? A: Formalin is a known carcinogen and can cause acute symptoms like eye, nose, and throat irritation, difficulty breathing, and skin irritation at concentrations above 0.1 ppm [8]. Always handle formalin within a properly functioning fume hood and wear complete personal protective equipment (PPE), including chemical goggles and gloves. Adhere to permissible exposure limits (PEL), which is 0.75 ppm as an 8-hour time-weighted average [8].
Q: Can these techniques detect multiple parasitic infections in a single sample? A: Yes, concentration techniques, especially the FAC method, are superior to direct mounts for detecting dual infections. Studies have shown FAC's ability to identify samples with co-infections, such as Entamoeba histolytica cysts with Ascaris lumbricoides eggs [5].
Primary Applications in Clinical and Research Laboratories for Detecting Intestinal Parasites
Intestinal parasitic infections (IPIs) remain a significant global health challenge, particularly affecting children in tropical and subtropical regions, impacting physical and intellectual development [5]. Accurate and efficient detection of these parasites in clinical and research laboratories is crucial for timely diagnosis, effective treatment, and improved patient outcomes. Traditional diagnostic methods include direct microscopic examination and stool concentration techniques, while molecular diagnostics represent a transformative advancement in the field [9]. This technical support center addresses common challenges and provides troubleshooting guidance for professionals working with these detection methods.
Frequently Asked Questions (FAQs)
1. What is the primary advantage of concentration techniques over direct wet mount examination? Concentration techniques significantly increase the detection yield of intestinal parasites. A recent hospital-based study demonstrated that the Formol-Ethyl Acetate Concentration (FAC) method detected parasites in 75% of cases, compared to only 41% for the direct wet mount technique [5]. This enhanced sensitivity is due to the process concentrating parasitic elements from a larger stool sample and removing obscuring debris.
2. Which concentration technique offers the highest recovery rate for parasites? Research indicates that the Formol-Ethyl Acetate Concentration (FAC) technique has a superior recovery rate. In a comparative study, FAC detected 82 out of 110 positive samples, outperforming both the Formol-Ether Concentration (FEC) method (68/110) and direct wet mount (45/110) [5].
3. When should molecular diagnostics be considered for GI parasite testing? Molecular methods, such as multiplex real-time PCR, are recommended when traditional microscopy yields suboptimal sensitivity (reported as less than 50% for single samples) or when laboratory workflow efficiency is a priority [9]. These methods are particularly valuable for detecting specific, clinically relevant parasites from a single sample with a streamlined, automated workflow.
4. How does the fixation process in concentration techniques ensure biosafety? Fixation with agents like formaldehyde inactivates infectious pathogens in the stool sample, making it safer for laboratory handling. Effective protocols, such as using 2% buffered formaldehyde, have been shown to completely inactivate stable viruses, thereby improving biosafety for diagnostic procedures [10].
Troubleshooting Common Experimental Issues
Problem: Low Parasite Recovery in Concentration Techniques
Possible Cause 1: Inadequate Fixation Time or Temperature
- Issue: Incomplete fixation can lead to poor recovery and potential biosafety risks. A protocol applying 2% buffered formaldehyde for 60 minutes with a temperature-shift from 25°C to 37°C after 30 minutes was efficient for complete inactivation of test viruses, ensuring both safety and structural integrity for diagnosis [10].
- Solution: Ensure strict adherence to recommended fixation times and temperatures. Avoid low-temperature (e.g., 4°C) fixation, which carries a high risk of incomplete inactivation [10].
Possible Cause 2: Improper Filtration or Centrifugation
- Issue: Failure to properly strain the sample through gauze or incorrect centrifugation speed and time can result in the loss of parasitic elements.
- Solution: Follow the standardized procedure meticulously [5]:
- Emulsify approximately 1 gram of stool with 7 mL of 10% formol saline.
- Strain the mixture through three folds of gauze to remove large debris.
- Combine the filtrate with the appropriate solvent (3 mL of ethyl acetate for FAC) and centrifuge at 1500 rpm for 5 minutes.
Problem: Suboptimal Sensitivity with Direct Microscopy
Possible Cause: Low Parasite Load or Operator Error
- Issue: Direct wet mount examination is less sensitive, especially in cases of low parasite burden, and is more susceptible to missing infections due to human error.
- Solution:
- Implement Concentration Methods: Routinely use FAC or FEC to increase detection sensitivity [5].
- Adopt Molecular Methods: For critical diagnostics or when traditional methods are inconclusive, transition to FDA-cleared multiplex PCR panels that can detect multiple parasites from a single sample with higher precision [9].
Problem: Inconsistent Results in Detecting Dual Infections
Possible Cause: Limitations of the Diagnostic Method
- Issue: Direct wet mount and even some concentration methods can miss concurrent infections with multiple parasite species.
- Solution: Use the Formol-Ethyl Acetate Concentration (FAC) technique. Studies show that FAC can detect dual infections (e.g., E. histolytica cyst with Ascaris lumbricoides eggs) that other methods may miss, proving its increased sensitivity in complex cases [5].
Comparison of Diagnostic Techniques
The table below summarizes the performance and characteristics of different diagnostic methods for intestinal parasites.
Table 1: Comparison of Intestinal Parasite Detection Methods
| Method | Principle | Key Parasites Detected | Relative Sensitivity* | Key Advantage | Key Limitation |
|---|---|---|---|---|---|
| Direct Wet Mount [5] | Microscopic examination of fresh stool | Blastocystis hominis, E. histolytica, Giardia lamblia | 41% | Rapid, low cost, minimal equipment | Low sensitivity, operator dependent |
| Formol-Ether Concentration (FEC) [5] | Sedimentation via centrifugation | E. histolytica, Giardia lamblia, Taenia sp. | 62% | Higher yield than wet mount | Uses diethyl ether |
| Formol-Ethyl Acetate Concentration (FAC) [5] | Sedimentation via centrifugation | Blastocystis hominis, A. lumbricoides, Strongyloides stercoralis | 75% | Highest recovery rate, safer solvent | Requires centrifuge |
| Multiplex PCR [9] | Amplification of genetic material | Giardia, Cryptosporidium, Cyclospora, E. histolytica, D. fragilis | >90% (vs. traditional methods) | High sensitivity & specificity, automated | Higher cost, requires specialized equipment |
Sensitivity values are based on a comparative study of 110 samples [5]. PCR sensitivity is a general estimate from literature [9].
Experimental Protocols
Detailed Methodology: Formol-Ethyl Acetate Concentration (FAC) Technique
The following is a standardized protocol for the FAC method, which has demonstrated high recovery rates for intestinal parasites [5].
1. Sample Preparation:
- Collect stool samples in sterile, wide-mouth plastic containers.
- Transport to the laboratory and examine on the same day of collection.
2. Macroscopic Examination:
- Visually inspect the specimen without magnification to assess consistency, color, and the presence of blood, mucus, or adult worms.
3. Emulsification and Fixation:
- Take approximately 1 gram of stool and emulsify it with 7 mL of 10% formol saline in a tube.
- Allow the mixture to fix for 10 minutes.
4. Filtration:
- Strain the fixed mixture through three folds of gauze into a clean conical centrifuge tube. This step removes large particulate matter.
5. Solvent Addition and Centrifugation:
- Add 3 mL of ethyl acetate to the filtrate in the centrifuge tube.
- Securely cap the tube and shake it vigorously for 30 seconds.
- Centrifuge the mixture at 1500 rpm (approximately 500 g) for 5 minutes.
6. Examination:
- After centrifugation, four distinct layers will form. Carefully decant the top three layers (ethyl acetate, plug of debris, and formol saline).
- Use a pipette to transfer a drop of the final sediment (the fourth layer) onto a microscope slide and place a cover slip over it.
- Examine the entire cover slip systematically under the microscope, first at 10x magnification to locate potential parasitic forms, and then at 40x magnification for identification and confirmation.
The Scientist's Toolkit: Essential Research Reagents & Materials
Table 2: Key Reagents and Materials for Stool Parasitology
| Item | Function in the Protocol |
|---|---|
| 10% Formol Saline | Acts as a fixative and preservative; kills infectious agents and stabilizes parasitic structures for microscopic examination [5] [10]. |
| Ethyl Acetate | A solvent used in concentration techniques to dissolve fecal fats and debris, forming a plug that traps unwanted material away from the parasitic elements in the sediment [5]. |
| Diethyl Ether | An alternative solvent used in the Formol-Ether Concentration (FEC) method for similar purposes as ethyl acetate [5]. |
| Microscope Slides & Cover Slips | Essential for preparing samples for microscopic examination. |
| Conical Centrifuge Tubes | Used for the concentration steps, allowing for efficient separation of layers during centrifugation. |
| Gauze | Used to filter and remove large, coarse debris from the fecal sample before centrifugation. |
| Multiplex PCR Panel | A molecular biology reagent kit designed to simultaneously detect multiple specific parasite DNA targets from a single sample, offering high throughput and accuracy [9]. |
Diagnostic Workflow and Parasite Prevalence
The following diagram illustrates a streamlined diagnostic workflow for detecting intestinal parasites, incorporating key decision points and methods.
Diagram 1: Diagnostic Workflow for Intestinal Parasites
The chart below shows the prevalence of common protozoan parasites identified in a recent study, highlighting which pathogens are most frequently encountered.
Diagram 2: Common Protozoa Prevalence Ranking
Frequently Asked Questions (FAQs)
Errors in standard parasitological concentration techniques often stem from reagent choice, procedural limitations, and interpretative challenges. Key issues include:
Reagent Performance Variations: Different concentration reagents show significantly variable efficacy for detecting helminth ova versus protozoan cysts [11]. Formalin-Tween (FTC) and Formalin-Acetone (FAC) techniques demonstrate superior sensitivity for helminth ova (71.7% and 70.0% respectively), while Formalin-Ether (FEC) and Formalin-Gasoline (FGC) perform better for protozoan cysts [11].
Technical Skill Dependence: Accurate morphological identification requires substantial expertise that is being lost as laboratories transition to molecular methods [12]. This expertise gap can lead to missed or inaccurate diagnoses.
Methodological Limitations: No single concentration technique detects all parasites with high sensitivity, necessitating the combined use of multiple parasitological techniques for comprehensive diagnosis [11].
Q2: How does the choice of concentration reagent affect diagnostic sensitivity?
The selection of concentration reagent significantly impacts diagnostic sensitivity, with different reagents showing preferential affinity for specific parasite types. The table below summarizes the quantitative performance of four common concentration techniques:
Table 1: Performance Comparison of Diagnostic Concentration Techniques [11]
| Concentration Technique | Overall Sensitivity | Negative Predictive Value (NPV) | Relative Strength | κ Agreement |
|---|---|---|---|---|
| Formalin-Tween (FTC) | 71.7% | 70.2% | Helminth ova | Substantial |
| Formalin-Ether (FEC) | 55.8% | 60.2% | Protozoan cysts | Moderate |
| Formalin-Acetone (FAC) | 70.0% | 69.0% | Helminth ova | Substantial |
| Formalin-Gasoline (FGC) | 56.7% | 60.6% | Protozoan cysts | Moderate |
Q3: What are the inherent limitations of molecular diagnostics compared to morphological methods?
While molecular techniques offer advantages, they present several limitations that can contribute to diagnostic errors:
Insufficient Parasite Coverage: Commercial molecular tests exist for only a limited number of parasite species, missing many of the approximately 90 species that commonly infect humans [12].
Specimen Compatibility Issues: Fecal inhibitors and formalin fixation of specimens can degrade DNA, making molecular analysis difficult or impossible [12].
Database Limitations: Accurate sequence identification requires comprehensive reference databases, which are incomplete for many parasitic pathogens [12].
Inability to Detect Novel Pathogens: Molecular assays targeting known pathogens cannot identify emerging or previously undescribed parasitic agents, whereas microscopy can detect unexpected organisms [12].
Q4: How can diagnostic errors be systematically defined and categorized in laboratory medicine?
The National Academies of Sciences, Engineering, and Medicine (NASEM) defines diagnostic error as "the failure to (a) establish an accurate and timely explanation of the patient's health problem(s) or (b) communicate that explanation to the patient" [13] [14]. This framework encompasses:
- Accuracy Failures: Incorrect identification of the patient's health condition.
- Timeliness Failures: Delayed diagnosis that affects treatment efficacy.
- Communication Failures: Breakdown in conveying the diagnosis to the patient.
Q5: What methodologies can improve diagnostic accuracy in parasitology?
Implementing comprehensive diagnostic workflows can significantly reduce errors:
Diagram 1: Comprehensive Parasite Diagnostic Workflow
Research Reagent Solutions
Table 2: Key Reagents for Parasite Concentration Techniques
| Reagent | Primary Function | Advantages | Limitations |
|---|---|---|---|
| Formalin-Tween (FTC) | Concentration medium | High sensitivity for helminths (71.7%); safer alternative to ether [11] | Lower efficacy for protozoan cysts |
| Formalin-Ether (FEC) | Concentration medium | Better performance for protozoan cysts [11] | Flammability concerns; lower overall sensitivity (55.8%) |
| Formalin-Acetone (FAC) | Concentration medium | High sensitivity for helminths (70.0%); good stability [11] | Moderate κ agreement |
| Formalin-Gasoline (FGC) | Concentration medium | Improved protozoan cyst recovery [11] | Lower overall sensitivity (56.7%); safety considerations |
| 70% Pure Ethanol | Specimen preservation | Preserves morphology while allowing DNA extraction [12] | Not suitable for all downstream applications |
| Commercial Fixatives | Specimen preservation | Optimized for both morphology and molecular testing [12] | Higher cost than traditional fixatives |
Troubleshooting Guide
Problem: Consistently Low Sensitivity for Protozoan Cysts
Potential Causes and Solutions:
- Cause: Suboptimal concentration technique selection [11]
- Solution: Implement Formalin-Ether (FEC) or Formalin-Gasoline (FGC) techniques specifically for protozoan detection
- Verification: Compare recovery rates using control specimens with known parasite loads
Problem: Inconsistent Morphological Identification
Potential Causes and Solutions:
- Cause: Erosion of microscopy expertise in laboratory staff [12]
- Solution: Implement ongoing morphological training and proficiency testing
- Verification: Establish internal validation procedures with expert review
Problem: False Negative Results in Molecular Testing
Potential Causes and Solutions:
- Cause: PCR inhibition from fecal contaminants or improper fixation [12]
- Solution: Divide specimens with one aliquot in molecular-friendly fixatives
- Verification: Implement inhibition controls in molecular assays
Experimental Protocol: Comparative Evaluation of Concentration Techniques
Objective: To systematically compare the efficiency of four concentration techniques for intestinal parasite diagnosis [11].
Methodology:
Specimen Preparation:
- Prepare 800 suspension specimens with equal distribution across techniques
- Process 200 samples in parallel for each concentration method
Technique Comparison:
- Formalin-Tween (FTC)
- Formalin-Ether (FEC)
- Formalin-Acetone (FAC)
- Formalin-Gasoline (FGC)
Evaluation Metrics:
- Calculate sensitivity for each technique
- Determine negative predictive values (NPV)
- Assess κ agreement between methods
- Compare recovery rates for helminth ova versus protozoan cysts
Statistical Analysis:
- Perform statistical testing to determine significant differences in sensitivity
- Evaluate diagnostic agreement between techniques
Expected Outcomes: Establish technique-specific performance characteristics to guide appropriate method selection based on diagnostic needs.
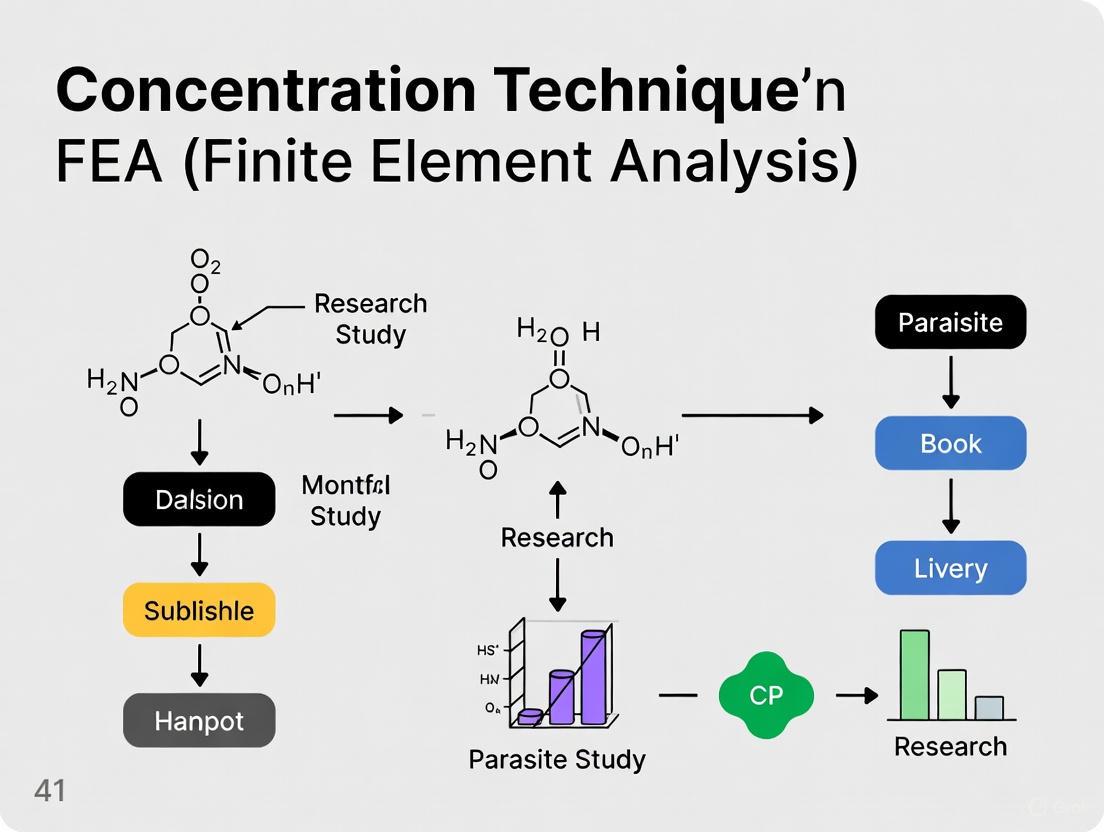
Executing the FEA Method: Standard Protocols, Modifications, and Step-by-Step Procedures
Step-by-Step Breakdown of the Standard FEA Sedimentation Technique
Related Technical FAQs & Troubleshooting Guides
What is the purpose of the FEA sedimentation technique?
The faecal sedimentation technique is a qualitative method used specifically for the detection of trematode (fluke) eggs in faeces [15]. Its primary purpose is to recover these heavier eggs, which do not float reliably in standard flotation techniques due to their high density [16]. This makes it an essential diagnostic tool for identifying parasites like Paragonimus spp. [17].
Why might my sedimentation results be inaccurate?
Several factors can compromise the accuracy of your sedimentation results. The table below outlines common issues and their solutions.
| Common Issue | Potential Consequence | Recommended Solution |
|---|---|---|
| Insufficient Sedimentation Time [16] | Incomplete settling of trematode eggs, reducing yield. | Allow mixture to sediment for recommended time (e.g., 30 minutes per cycle) [16]. |
| Inadequate Sample Size [18] | False-negative results due to low parasite concentration. | Use at least 5g of faeces for the test [16] [17]. |
| Improper Filtration | Large debris obstructs view or traps eggs. | Filter the faecal suspension through a tea strainer or double-layer cheesecloth [16] [17]. |
| Not Using a Stain | Difficulty distinguishing clear eggs from debris. | Add a drop of methylene blue to stain the faecal background, leaving eggs unstained [19] [17]. |
How does sedimentation compare to flotation techniques?
Sedimentation and flotation are both concentration procedures, but they operate on different principles and are suited for different parasites.
- Principle: Sedimentation uses solutions with a lower specific gravity, allowing heavier parasite eggs to sink to the bottom (sediment) while debris is washed away [20]. In contrast, flotation uses higher specific gravity solutions to make parasite eggs float to the top [18].
- Primary Use: Sedimentation is recommended for recovering trematode eggs [16] [20]. Flotation is better for detecting common helminth eggs like roundworms and hookworms, as well as protozoal cysts [21] [18].
- Advantage of Sedimentation: It is less prone to technical errors and is the only reliable way to find many trematode eggs that are too dense to float [20].
- Advantage of Centrifugal Flotation: For most common parasites, the centrifugal flotation technique is consistently more sensitive than passive flotation methods and is highly recommended for routine screening [21] [18].
The following workflow illustrates the general procedure for the formalin-ethyl acetate sedimentation technique, a standard method used in diagnostic laboratories [20]:
What are the essential reagents and materials for this technique?
The table below lists the key materials and reagents needed to perform a standard faecal sedimentation test.
| Item | Function/Use |
|---|---|
| Conical Test Tubes | Used to hold the sample during sedimentation; conical shape facilitates the formation of a sediment pellet [17]. |
| Tea Strainer or Cheesecloth | Filters out large particulate matter from the faecal suspension to provide a cleaner sample for examination [16] [17]. |
| Distilled Water (dH₂O) | The primary liquid medium for creating the faecal suspension [17]. |
| 5% Aqueous Methylene Blue | A stain used to color the background faecal material blue, making the unstained trematode eggs easier to identify [19] [17]. |
| Pipette | For carefully removing supernatant (liquid above the sediment) after sedimentation [16]. |
| Microscope Slides & Coverslips | To hold a sample of the final sediment for microscopic examination [17]. |
| Light Microscope | Essential for visualizing the parasite eggs in the sediment [17]. |
My supernatant is not clearing, even after multiple washes. What should I do?
If the supernatant remains cloudy, it indicates that fine particulate matter is still in suspension. The solution is to continue the cycle of adding water, mixing, and sedimenting until the supernatant is clear [16]. This process may need to be repeated three or more times. Ensuring that the initial filtration step is thorough can also help reduce the amount of fine debris.
What safety precautions should I take when performing this technique?
When handling faecal samples, always adhere to standard biosafety protocols:
- Wear a lab coat and disposable gloves to prevent personal contamination [17].
- Wash hands thoroughly after the procedure is complete [17].
- Dispose of used slides and coverslips in a sharps container [17].
- Clean all reusable equipment (e.g., strainers, glassware) with a 10% bleach solution and wipe down the work area with 70% Ethanol [17].
Frequently Asked Questions
How do centrifugal force and time interact to affect cell recovery? Centrifugal force and duration have a reciprocal relationship; the total cell yield generally increases as the product of duration × force increases, but only up to a point. Once full sedimentation is achieved, further increases in force or time can damage the pelleted cells, reducing the yield of viable and motile cells [22].
My cell recovery rates are low, what is the most common mistake? A common source of high cell loss is the resuspension step following centrifugation. Intense resuspension can damage a significant portion of cells that survived the initial centrifugation unharmed. Using controlled, low-stress resuspension methods is critical for maximizing recovery [23].
Why do I get inconsistent recovery rates between different experiments? Inconsistent recovery can stem from variations in factors other than just force and time. Key variables include:
- Tube geometry and fill volume (column height): A shorter column height reduces the distance particles must travel, improving sedimentation rate and recovery [22].
- Initial cell concentration: Higher concentrations can lead to lower recovery rates [22].
- Properties of the centrifugation medium: The density and viscosity of the medium directly impact sedimentation rate [22].
How can I theoretically predict recovery rates before running an experiment? Theoretical models based on multiphase flow phenomena and kinematic wave theory can predict the positions of interfaces (supernatant/suspension/sediment) in a tube. These models account for particle-particle interactions, tube geometry, and initial blood volume to estimate recovery rates of platelets and white blood cells under various centrifugal conditions [24].
Troubleshooting Guides
| Possible Cause | Diagnostic Steps | Recommended Solution |
|---|---|---|
| Overly aggressive resuspension | Check cell membrane integrity (e.g., via trypan blue exclusion) before and after resuspension. | Implement a controlled, low-stress resuspension protocol. Use electronic pipettes for reproducible, gentle mixing [23]. |
| Suboptimal centrifugal force or time | Conduct a sweep of RCF and time values, measuring the total and viable yield in the pellet for each condition. | Identify the force/time product that maximizes yield before causing damage. For example, for equine sperm, 900 × g for 5 min in a 20-mL column provided ~94% recovery [22]. |
| Excessive column height | Compare recovery rates between different fill volumes in the same tube type. | Centrifuge volumes of ≤ 20 mL in standard 50-mL tubes to minimize sperm losses. For larger volumes, increase centrifugal force [22]. |
Problem: Low Recovery of Viable or Motile Cells
| Possible Cause | Diagnostic Steps | Recommended Solution |
|---|---|---|
| Excessive centrifugal force or duration | Compare viability and motility yields (not just total yield) across different protocols. | Reduce the RCF or spin time once full sedimentation is reached to prevent damage from close packing in the pellet [22]. |
| Incompatible centrifugation medium | Test different, well-established media for your cell type and compare recovery and survival rates. | Avoid extenders not suited for centrifugation. Use milk- or fractionated milk-based media for equine semen, for example [22]. |
| Long cell suspension hold times | Measure cell viability after holding the suspension for different durations before centrifugation. | Minimize the time between sample preparation and the start of centrifugation [23]. |
Experimental Data and Protocols
Quantitative Data on Centrifugation Parameters
The following table summarizes optimal conditions from specific studies for maximizing recovery rates.
Table 1: Experimentally Determined Optimal Centrifugation Conditions
| Cell / Particle Type | Objective | Optimal First Spin Conditions | Optimal Second Spin Conditions | Key Outcome | Source |
|---|---|---|---|---|---|
| Canine Platelets (for PRP) | Maximize platelet recovery and concentration | 1000 × g for 5 min | 1500 × g for 15 min | Recovered 80% of platelets, achieving a six-fold concentration increase. | [25] |
| Equine Sperm | Maximize total sperm yield | Not Applicable (Single Spin) | 900 × g for 5 min (20-mL column) | Achieved a 93.8% total sperm recovery rate. | [22] |
| Human Cells (OnyCap23, P4E6) | Maintain cell membrane integrity post-resuspension | Not Applicable (Single Spin) | Up to 10,000 × g for 30 min (with gentle resuspension) | High cell recovery possible even at extreme forces if resuspension stress is minimized. | [23] |
Detailed Experimental Protocol: Double-Centrifugation for PRP
This protocol, adapted from a canine study, outlines a method to prepare Platelet-Rich Plasma (PRP) with high recovery [25].
- Materials: Whole blood collected in citrate blood collection tubes, conical centrifuge tubes, a centrifuge capable of applying specified RCF, and an automated haematology analyser for cell counts.
- Method:
- First Centrifugation: Aliquot whole blood into conical tubes. Centrifuge at 1000 × g for 5 minutes at room temperature. After this spin, the blood separates into three layers: red blood cells at the bottom, a thin buffy coat (containing white blood cells), and platelet-rich plasma (PRP1) on top.
- Harvest PRP1: Carefully transfer the upper plasma layer (PRP1) and the buffy coat to a new, empty conical tube. Avoid disturbing the underlying red blood cell layer.
- Second Centrifugation: Centrifuge the collected PRP1 at 1500 × g for 15 minutes at room temperature. This will form a platelet pellet at the bottom of the tube.
- Concentrate Platelets: Remove and discard approximately 700 μL of the supernatant (platelet-poor plasma). Gently resuspend the remaining pellet in the ~300 μL of residual plasma to create the final PRP2 concentrate.
- Validation: Use a haematology analyser to perform a complete blood count (CBC) on the original whole blood and the final PRP2 to calculate the platelet recovery rate and concentration factor.
The Scientist's Toolkit
Table 2: Essential Research Reagents and Materials
| Item | Function in Centrifugation Recovery | Example from Literature |
|---|---|---|
| Acid Citrate Dextrose (ACD-A) Tubes | Anticoagulant for blood collection; prevents clotting and preserves platelet function. | Used for collecting whole canine blood for PRP preparation [25]. |
| Semen Extenders (e.g., INRA96, EZ-Mixin CST) | Provides nutrients and protects sperm cells from cold shock and physical stress during centrifugation and storage. | INRA96 was found suitable for centrifuging equine semen without detrimental effects on recovery [22]. |
| TrypLE Select Solution | Enzyme solution used to gently dissociate adherent cells from culture flasks prior to centrifugation. | Used for harvesting OnyCap23 and P4E6 cells before centrifugation studies [23]. |
| Hank's Balanced Salt Solution (HBSS) | A balanced salt solution used as a physiological buffer for washing and resuspending cells. | Used to replace growth medium for cell resuspension in centrifugation stress studies [23]. |
| Enzyme-Linked Immunosorbent Assay (ELISA) Kits | Quantifies specific biomarkers (e.g., growth factors like PDGF-BB) to assess the functionality of recovered cells. | Used to measure platelet-derived growth factor in activated PRP to confirm platelet quality [25]. |
Process Visualization
Centrifugation Optimization Workflow
Sedimentation Process Theory
Quantitative Comparison of Diagnostic Techniques
The table below summarizes the performance of four different concentration techniques for diagnosing intestinal parasites, as evaluated in a comparative study. The data allows for a direct comparison of the formalin-Tween (FTC) and formalin-acetone (FAC) techniques against the traditional formalin-ether (FEC) method [11].
| Technique | Full Name | Sensitivity | Negative Predictive Value (NPV) | Overall Diagnostic Agreement (κ) |
|---|---|---|---|---|
| FTC | Formalin-Tween Concentration | 71.7% | 70.2% | Substantial |
| FAC | Formalin-Acetone Concentration | 70.0% | 69.0% | Substantial |
| FEC | Formalin-Ether Concentration | 55.8% | 60.2% | Moderate |
| FGC | Formalin-Gasoline Concentration | 56.7% | 60.6% | Moderate |
The study concluded that Tween, acetone, and gasoline reagents are "more stable, safer, less flammable and of lower cost than that of ether" and represent useful alternatives [11].
Experimental Protocol: Formalin-Tween Concentration Technique
This is a detailed methodology for the Formalin-Tween Concentration (FTC) technique, one of the evaluated alternatives to the traditional formalin-ether method [11].
- Sample Preparation: Begin with a stool suspension specimen.
- Centrifugation: Process the specimen in parallel with the other techniques for comparison.
- Key Reagent: Use Tween as the reagent in the concentration step instead of diethyl ether.
- Efficiency Assessment: The diagnostic efficiency is determined by calculating the technique's sensitivity and negative predictive value (NPV) for identifying various intestinal parasites.
The Scientist's Toolkit: Research Reagent Solutions
The table below lists key reagents used in the featured diagnostic techniques and explains their function [11] [26].
| Item | Function & Rationale |
|---|---|
| Tween | A surfactant used as a safer, less flammable, and lower-cost alternative to diethyl ether in concentration techniques for parasitological diagnosis [11]. |
| Acetone | An organic solvent used as an alternative to ethyl acetate in diagnostic techniques and chromatography. It offers good solubility for organic molecules and is a lower-cost option, though it has high UV absorbance [11] [26]. |
| Gasoline | A reagent evaluated as a substitute for diethyl ether in formalin-based concentration methods for stool samples, offering benefits in safety and cost [11]. |
| Ethyl Acetate (EtOAc) | A common solvent for liquid-liquid extraction and a polar modifier in normal-phase chromatography. It is a good solvent for many organic compounds and has low UV absorbance, but is more expensive than alternatives like acetone [26]. |
Frequently Asked Questions (FAQs)
Q1: Are Tween and acetone truly effective replacements for ether and ethyl acetate in the lab? Yes, research has demonstrated that the formalin-Tween (FTC) and formalin-acetone (FAC) techniques are significantly more sensitive for diagnosing helminth ova than the traditional formalin-ether (FEC) method. Furthermore, reagents like Tween, acetone, and gasoline are generally more stable, safer, less flammable, and of lower cost than ether [11]. In chromatography, acetone is in the same solvent selectivity class as ethyl acetate and can provide sharper peaks and improved resolution, though its strong UV absorbance must be accounted for by modern instrumentation [26].
Q2: What is the main challenge when using acetone as a substitute in liquid-liquid extraction? The primary challenge is its strong UV absorbance above 250 nm, which can interfere with the UV detection of analytes, particularly aromatic compounds. This can mask peak detection during fractionation. However, some modern chromatography systems have algorithms that can subtract this solvent absorption in real-time [26].
Q3: A common problem in liquid-liquid extraction is emulsion formation. How can this be addressed? Emulsion formation is a frequent issue, especially with samples high in surfactant-like compounds (e.g., phospholipids, fats). To troubleshoot [27]:
- Prevention: Gently swirl the separatory funnel instead of shaking it vigorously.
- Disruption: If an emulsion forms, you can try:
- Salting Out: Add brine or salt water to increase the ionic strength of the aqueous layer.
- Filtration: Filter the mixture through a glass wool plug or specialized phase separation filter paper.
- Centrifugation: Use centrifugation to isolate the emulsion material.
- Solvent Adjustment: Add a small amount of a different organic solvent to change the solvent properties and break the emulsion.
- Alternative Technique: Consider using Supported Liquid Extraction (SLE), a technique much less prone to emulsion formation [27].
Experimental Workflow for Reagent Evaluation
The following diagram illustrates a logical workflow for evaluating an alternative reagent in a laboratory technique, based on the processes used in the cited research.
Troubleshooting Guides & FAQs
Q1: My fluorescent signal during antibody staining is much dimmer than expected. What should I do? [28]
A: A dim signal can stem from protocol errors or biological reality. Follow this systematic approach:
- Repeat the Experiment: Simple mistakes like incorrect antibody volumes or extra wash steps can occur. Unless cost or time-prohibitive, a repeat is the first step. [28]
- Question the Result: Consult the literature. A dim signal might indicate low protein expression in that tissue type, not a protocol failure. [28]
- Check Your Controls: Include a positive control (e.g., staining a protein known to be highly expressed in the tissue). If this control also fails, a protocol issue is likely. [28]
- Inspect Equipment and Reagents: Ensure reagents have been stored correctly and are not expired. Visually inspect solutions for cloudiness or other signs of degradation. Verify antibody compatibility. [28]
- Change One Variable at a Time: Isolate and test key variables. Generate a list (e.g., fixation time, antibody concentration, number of washes) and test the easiest ones first, such as microscope light settings, before moving to others like secondary antibody concentration. [28]
Q2: I am not detecting any eggs in a specimen from a known endemic area. What could be wrong? [29]
A: A false negative can occur even in heavy infections due to several factors:
- Inhomogeneous Egg Distribution: Parasite eggs are not evenly distributed throughout the feces. Sub-sampling can miss them. [29]
- Low Egg Shedding: The number of eggs in the specimen may be below the detection limit of the technique used. [29]
- Incorrect Specimen Handling: Improper storage or transport can degrade parasitic elements. [29]
- Insufficient Sensitivity of the Method: The chosen diagnostic technique may not be sensitive enough, particularly for light-intensity infections. Consider using a more sensitive concentration technique or performing multiple slides from different parts of the sample. [29]
Q3: My formalin-ethyl acetate sedimentation results are inconsistent. Where should I look for errors? [20]
A: Inconsistencies often arise from technical steps in the concentration procedure:
- Incomplete Mixing: The specimen must be mixed thoroughly before straining to ensure a representative sample. [20]
- Inadequate Centrifugation: Ensure the centrifuge is calibrated and you are using the correct relative centrifugal force (500 × g) and time (10 minutes). [20]
- Improper Decanting: After centrifugation, the supernatant must be decanted completely without disturbing the sediment pellet containing the parasites. "Ringing" the debris plug with an applicator stick before decanting is crucial. [20]
Q4: When using the McMaster technique, the egg counts are lower than expected. What are potential causes? [30]
A: The McMaster technique has inherent limitations that can affect its sensitivity:
- High Detection Limit: This technique is less sensitive than others. Each egg seen under the etched areas represents 100 eggs per gram (EPG). Infections with lower than 100 EPG may not be detected. [30]
- Flotation Solution Issues: The specific gravity (S.G.) of the flotation solution is critical for eggs to rise. Ensure the Saturated NaCl solution is prepared correctly to a 1.20 S.G. [30]
- Microscope Focus: Eggs can be difficult to find. First, focus on the etched grid lines, then focus slightly downward, as the eggs will be floating just below the coverslip. [30]
Comparison of Diagnostic Techniques
The table below summarizes key microscopic techniques for detecting soil-transmitted helminths (STHs), aiding in the selection of the most appropriate method for your research goals. [29]
Table 1: Comparison of Common Microscopic Diagnostic Techniques for STHs
| Technique | Principle | Primary Advantage | Primary Disadvantage | Best Suited For |
|---|---|---|---|---|
| Direct Examination [29] | Direct microscopic exam of a fresh saline emulsion. | Rapid, inexpensive, allows observation of motile larvae (e.g., Strongyloides). [29] | Only semi-quantitative; low sensitivity. [29] | Detecting high-concentration infections and motile trophozoites/larvae. [29] |
| Kato-Katz [29] | Quantitative; glycerol-cleared smear of a defined fecal sample. | WHO gold standard; allows egg quantification and intensity measurement; cost-effective. [29] | Sensitivity drops in low-intensity infections; clearing time critical. [29] | Large-scale epidemiological studies to assess prevalence and infection intensity. [29] |
| Formol-Ether Sedimentation [20] [29] | Concentration via sedimentation using formalin and ethyl acetate. | Concentrates a wide range of parasites; can use preserved specimens; reduces biohazard. [29] | Requires a centrifuge and multiple steps; not truly quantitative. [29] | General diagnostic labs for comprehensive parasite screening. |
| McMaster Flotation [30] | Quantitative flotation using a counting chamber. | Provides exact eggs-per-gram (EPG) count; floats eggs free of debris. [30] | Lower sensitivity (detection limit ~100 EPG); requires special slides. [30] | Quantitative assessment of infection intensity in veterinary and research settings. |
| FLOTAC [29] | Advanced flotation and translation technique. | Very high sensitivity, can detect low egg counts. [29] | Expensive; requires specialized equipment; not widely available in resource-limited settings. [29] | Research settings and surveillance programs where high sensitivity is critical. |
Experimental Workflow for Parasite Concentration
The following diagram illustrates the general decision-making workflow for processing a stool specimen based on its consistency and the target parasite forms.
Figure 1: Workflow for the initial handling and examination of stool specimens based on CDC guidelines. [20]
Research Reagent Solutions Toolkit
Table 2: Essential Reagents and Materials for Parasite Concentration Techniques
| Reagent / Material | Function / Purpose | Example Protocol / Note |
|---|---|---|
| 10% Formalin [20] | Preservative; inactivates organisms and fixes parasitic elements for safe handling and later processing. | Used in the Formol-Ether Sedimentation technique. [20] [29] |
| Ethyl Acetate [20] | Solvent; used in concentration techniques to extract fats and debris from the fecal suspension, resulting in a cleaner sediment. | Used as a substitute for the more flammable diethyl ether in the formalin-ethyl acetate technique. [20] |
| Saturated Sodium Chloride (NaCl) Solution [30] | Flotation solution (S.G. ~1.20); creates a high-specific-gravity medium that allows parasite eggs/cysts to float to the top. | Used in the McMaster technique and other flotation methods. [30] |
| Polyvinyl Alcohol (PVA) [20] | Preservative and adhesive; preserves parasitic structures and helps the specimen adhere to the glass slide for permanent staining. | Specimens preserved in PVA are primarily used for permanent staining (e.g., Trichrome). [20] |
| Glycerol [29] | Clearing agent; clears away fecal debris in the Kato-Katz technique, making the parasite eggs more visible under the microscope. | The slide must clear for a specific time (30 min for hookworm, 1-24h for others) before reading. [29] |
| Merthiolate-Iodine-Formaldehyde (MIF) [29] | Combined preservative and stain; preserves specimens and stains protozoan cysts to aid in identification. | One of several solutions used for staining and preserving fecal specimens. [29] |
Troubleshooting FEA Failures: Identifying Pitfalls and Implementing Optimization Strategies
Troubleshooting Guide: Enhancing FEA Concentration Technique Performance
This guide addresses frequent challenges encountered with the Formalin-Ethyl Acetate (FEA) stool concentration technique, a critical method for diagnosing parasitic infections in clinical and research settings. Below are common issues and their evidence-based solutions.
FAQ 1: My FEA procedure consistently yields false-negative results, especially for Cryptosporidium. How can I improve detection?
False negatives often stem from suboptimal centrifugation protocols or the inherent difficulty of detecting low numbers of parasites.
Solution: Modify Centrifugation Parameters. A study comparing two centrifugation procedures found that increasing the relative centrifugal force and duration significantly improved sensitivity.
Solution: Employ a Two-Step Sedimentation-Flotation Technique. For challenging specimens, particularly formed stools, a more advanced method can be used. This involves performing standard FEA sedimentation followed by layering the sediment over a hypertonic sodium chloride solution for flotation. This second step separates oocysts from dense stool debris, drastically improving detection rates in formed stools compared to standard FEA alone [32].
FAQ 2: The overall sensitivity of my diagnostic process is low. What factors can I optimize beyond centrifugation?
Sensitivity is affected by multiple steps in the concentration process. A systematic evaluation of the Ridley-Allen method (a formol-ether sedimentation technique similar to FEA) identified key optimizations [33]:
- Fixative: Use 10% formalin diluted in water, not saline [33].
- Solvent: Use ethyl acetate with the surfactant Triton X-100 (at 0.1% concentration) instead of ether. This helps break up fecal matter and results in a less dense deposit, facilitating microscopic examination [33].
- Sieve Pore Size: Use a sieve with a smaller pore size (425μm or 0.35mm) to prevent the loss of smaller parasite stages [33].
- Centrifugation: Use a force of 1,200 G (approximately 3,000 rpm for a standard bench-top centrifuge) for 3 minutes [33].
The table below summarizes the impact of these variables on parasite recovery, based on the UKNEQAS study [33].
Table 1: Effect of Methodology on Parasite Recovery in Fecal Concentration
| Variable | Suboptimal Choice | Optimal Choice | Impact of Optimal Choice |
|---|---|---|---|
| Fixative | Formalin in Saline | Formalin in Water | Higher number of parasite stages recovered [33]. |
| Solvent | Ether | Ethyl Acetate + 0.1% Triton X-100 | Better recovery and a cleaner deposit for examination [33]. |
| Sieve Pore Size | 800μm / 1,500μm | 425μm (0.35mm) | Prevents loss of smaller cysts and oocysts [33]. |
| Centrifugation Force | < 1,200 G | 1,200 G (≈3,000 rpm) | Improves sedimentation of parasite elements [33]. |
| Centrifugation Time | 1 minute | 3 minutes | Increases recovery yield [33]. |
FAQ 3: I get inconsistent results between different operators or batches. How can I improve reproducibility?
Inconsistency often arises from subtle variations in technique. Standardization is key.
Solution: Standardize the Wet-Sieving Step. Inconsistent handling during the filtration or wet-sieving step can qualitatively and quantitatively bias results. One study demonstrated that different operators, even with the same instructions, produced significantly different macroremain concentrations. Intensive or aggressive washing can destroy fragile biological structures [34]. Implement a controlled, gentle washing protocol and ensure all staff are trained to perform it identically.
Solution: Control Sample Viscosity and Fat Content. The efficiency of FEA can vary with stool consistency. The two-step sedimentation-flotation technique was shown to be particularly superior to standard FEA for non-fatty, formed stools, where conventional methods often fail [32]. For diarrheal stools, standard FEA may be sufficient, but for formed stools, the modified method is recommended.
Experimental Protocol: Optimized FEA Concentration Technique
This protocol incorporates the troubleshooting solutions above for maximal sensitivity and consistency [32] [33].
Principle: To separate parasitic elements (ova, cysts, larvae) from fecal debris through formalin fixation, filtration, and sedimentation using ethyl acetate as an extractor of fat and debris.
Reagents and Materials:
- 10% Formalin (in water)
- Ethyl Acetate
- Triton X-100
- Hypertonic Sodium Chloride Solution (for modified method, specific gravity ~1.20)
- Centrifuge Tubes (15 mL conical tubes)
- Sieve or Filter (425μm pore size)
- Centrifuge (capable of 500 g and 1,200 g)
- Disposable Pipettes
Table 2: Research Reagent Solutions
| Item | Function |
|---|---|
| 10% Formalin | Fixative and preservative; kills pathogenic organisms and preserves parasite morphology [33]. |
| Ethyl Acetate | Solvent; extracts fats, oils, and unwanted debris into an upper layer, leaving parasites in the sediment [32] [33]. |
| Triton X-100 | Surfactant; helps emulsify fecal matter when using ethyl acetate, improving debris removal and deposit clarity [33]. |
| Hypertonic NaCl Solution | Flotation medium; allows parasites to float away from heavier debris in the modified two-step technique [32]. |
| 425μm Sieve | Removes large, coarse debris from the sample to prevent clogging and allow for a smoother centrifugation process [33]. |
Procedure:
- Emulsification: Emuls 1-2 grams of feces in 10 mL of 10% formalin (with 0.1% Triton X-100 if used) in a centrifuge tube.
- Filtration: Filter the suspension through a 425μm sieve into a second centrifuge tube to remove large particles.
- Solvent Addition: Add 4-5 mL of ethyl acetate to the filtered suspension. Cap the tube tightly.
- Shaking: Shake the tube vigorously for 60 seconds. Release pressure by carefully loosening the cap.
- Centrifugation: Centrifuge at 500 g for 10 minutes [31].
- Separation:
- Loosen the debris plug at the interface.
- Carefully decant the top three layers (ethyl acetate, debris plug, formalin supernatant).
- The sediment at the bottom contains the concentrated parasites.
- Examination: Re-suspend the sediment in a small amount of formalin or saline. Prepare a wet mount for microscopic examination.
Workflow Diagram: Standard vs. Optimized FEA Protocol
Centrifugation is a critical step in numerous research and diagnostic protocols, particularly in pharmaceutical development where the accurate separation of phases is essential for determining key properties like drug solubility. The arbitrary adjustment of centrifugal forces and durations poses a significant threat to the reproducibility and reliability of experimental results [35]. This guide provides evidence-based troubleshooting and protocols to optimize centrifugation parameters, ensuring data integrity and operational efficiency. The principles of controlled parameter optimization discussed here are equally vital in computational fields like Finite Element Analysis (FEA), where analogous issues of mesh concentration and solution accuracy must be systematically managed to prevent errors.
Troubleshooting Guides & FAQs
Q1: My centrifuge is vibrating excessively. What should I check first?
Excessive vibration is most frequently caused by an unbalanced load [36] [37] [38].
- Primary Cause: Uneven distribution of sample tubes in the rotor [38].
- Immediate Action:
- Stop the run and turn off the centrifuge.
- Inspect and balance the load: Ensure all tubes are of equal weight and are positioned opposite each other in the rotor. For an odd number of tubes, create a balance tube with equivalent mass [37].
- Check the rotor: Verify that the rotor is correctly seated and aligned. Inspect it for visible signs of damage or wear [36].
Q2: The centrifugation results in poor sample separation. How can I optimize this?
Poor separation can stem from incorrect parameter selection or sample preparation issues [38].
- Primary Cause: Insufficient relative centrifugal force (RCF) or centrifugation time [38].
- Optimization Action:
- Adjust parameters: Increase the speed (RPM/RCF) and/or duration according to your protocol. Refer to established guidelines for your sample type.
- Review sample prep: Ensure samples are prepared correctly and tubes are not overfilled [38].
- Consider other factors: Temperature, fluid osmolarity, and viscosity also play crucial roles in achieving optimal sedimentation [35].
Q3: After centrifugation for solubility measurement, my results are consistently overestimated. Why?
Overestimation can occur when centrifugation parameters disrupt the equilibrium between solid and dissolved phases, forcing colloidal or fine particles to remain in the supernatant [39].
- Primary Cause: Excessive centrifugal force or duration [39].
- Evidence-Based Solution:
- Softer centrifugation: A systematic study found that lower speeds and shorter times (e.g., 5 minutes at 5000 rpm) yielded solubility values closest to the reference sedimentation method [39].
- Incorporate a sedimentation step: Sample preparation that includes 6 hours of stirring followed by 18 hours of sedimentation before centrifugation can significantly improve accuracy compared to continuous stirring [39].
Q4: The centrifuge door won't close. What is the likely issue?
A door that fails to close is often a safety feature being activated.
- Primary Causes: Physical obstruction, a misaligned or damaged door latch, or a worn-out sealing gasket [36].
- Troubleshooting Steps:
Q5: The centrifuge is overheating. What are the common causes?
Overheating is common in high-speed centrifuges and can damage both the machine and your samples.
- Primary Causes: Blocked ventilation vents, a failed cooling system, or running the centrifuge for extended periods without breaks [37] [38].
- Resolution:
Experimental Protocol for Determining Optimal Centrifugation Parameters
The following protocol, derived from current research, outlines a method to determine the optimal RCF and time for cell sedimentation, maximizing efficiency while minimizing damage [35]. This systematic approach is crucial for ensuring reproducible results.
Detailed Methodology
Define Test Matrix: Create a experimental grid testing a range of Relative Centrifugal Forces (RCF) and durations. For instance, test RCF values (e.g., 500 x g, 1000 x g, 2000 x g) against time points (e.g., 5, 10, 15 minutes) [35].
Prepare Identical Samples: Aliquot a homogeneous cell suspension into multiple centrifuge tubes. It is critical to control for factors known to affect sedimentation:
Centrifuge Samples: Process the samples according to the defined test matrix using a balanced rotor.
Analyze Supernatant and Pellet: After centrifugation, evaluate the outcomes.
- Supernatant Clarity: Measure turbidity or analyze for the presence of target cells, which indicates incomplete sedimentation.
- Pellet Integrity and Cell Viability: Resuspend the pellet and assess cell health using a viability stain (e.g., Trypan Blue) and overall yield [35].
Compare Results and Identify Optimal Parameters: The optimal (RCF, Time) pair is the one that achieves the desired outcome—such as clear supernatant and a high-viability pellet—with the least force and shortest duration, minimizing potential cell damage.
Validate and Document: Confirm the selected parameters in a final validation run. Then, document the finalized protocol in detail to ensure future reproducibility [35].
The following table summarizes experimental data on how centrifugation parameters can impact measured equilibrium solubility, highlighting the risk of overestimation with higher forces and longer times [39].
Table 1: Impact of Centrifugation Parameters on Apparent Solubility
| Model Compound | Sample Prep Protocol | Centrifugation Parameters | Resultant Solubility vs. Reference | Standard Deviation |
|---|---|---|---|---|
| Papaverine HCl | Continuous stirring (24h) | 10,000 rpm for 20 min | 60-70% higher | Higher |
| Papaverine HCl | 6h stir + 18h sedimentation | 10,000 rpm for 20 min | Closer to reference | Lower |
| Various Compounds | Continuous stirring (24h) | 5000 rpm for 5 min | Closest to reference | Lowest |
Key Finding: Centrifuging pre-sedimented samples at lower speeds and for shorter durations (e.g., 5 minutes at 5000 rpm) produces solubility values most consistent with the sedimentation-only gold standard, while also yielding lower standard deviations and thus better reproducibility [39].
The Scientist's Toolkit: Essential Research Reagents & Materials
Table 2: Essential Materials for Centrifugation Experiments
| Item | Function in Experiment |
|---|---|
| Britton-Robinson Buffer (BRB) | A universal buffer used to maintain specific pH levels during solubility studies, ensuring the chemical environment is controlled and reproducible [39]. |
| Model Compounds (APIs) | Well-characterized Active Pharmaceutical Ingredients (e.g., Diclofenac sodium, Papaverine HCl) used as standards to test and validate centrifugation protocols [39]. |
| Isotonic Solution | A solution with the same osmotic pressure as cellular fluid (e.g., saline). It is critical for preparing cell suspensions to prevent osmotic stress and maintain cell viability during centrifugation [35]. |
| Centrifuge Tubes | Specially designed tubes that can withstand high G-forces. Must be matched to the sample volume and chemical compatibility, and must be balanced by mass before a run [37] [38]. |
| Viability Stain (e.g., Trypan Blue) | A dye used to distinguish between live and dead cells after centrifugation, allowing researchers to assess the impact of centrifugal force on cell health [35]. |
Within the critical field of intestinal parasitic infection (IPI) research, the Formol-Ethyl Acetate Concentration (FEC) technique is a cornerstone diagnostic method. The reliability of this technique is fundamentally dependent on the quality and stability of its key chemical reagents. This guide addresses common challenges related to reagent management, providing targeted troubleshooting and FAQs to ensure the integrity of your experimental results and the accuracy of your research data.
Troubleshooting Guides
Problem 1: Inconsistent Parasite Recovery Rates
Issue: Variable or unexpectedly low recovery of parasitic structures (cysts, oocysts, eggs, larvae) during concentration procedures.
Possible Causes & Solutions:
Cause: Degraded or Contaminated Reagents
- Solution: Formalin (10% buffered formalin) is a common fixative and preservative. Ensure it is stored in a tightly sealed, dark glass container away from light and at room temperature. Check for the formation of white paraformaldehyde precipitate, which indicates degradation and necessitates reagent replacement [20].
- Solution: Ethyl Acetate is a solvent. It should be stored in a tightly sealed, flame-resistant container away from heat and ignition sources. If evaporation is suspected or the volume decreases significantly, replace it to maintain the correct phase separation during centrifugation [20].
Cause: Incorrect Specific Gravity of Solutions
- Solution: The efficacy of sedimentation techniques relies on the specific gravity of the liquid medium being lower than that of the parasitic organisms [40]. Ensure that formalin and ethyl acetate are measured accurately and that solutions are prepared to the exact specifications. Avoid using distilled water if looking for Blastocystis hominis, as it can deform or destroy the organism [20].
Problem 2: Poor Sample Preservation and Staining
Issue: Degradation of parasitic morphology in stored samples, leading to difficult identification.
Possible Causes & Solutions:
Cause: Inadequate Sample Preservation
- Solution: For fresh specimens that cannot be examined immediately, preservation is critical. Liquid specimens should be examined within 30 minutes of passage, and soft specimens within one hour [20]. If delays are unavoidable, preserve the specimen immediately using appropriate preservatives like 10% formalin or polyvinyl alcohol (PVA) at a recommended 3:1 ratio of preservative to fecal material [40].
Cause: Suboptimal Staining of Permanent Mounts
- Solution: For samples preserved in PVA, which are used for permanent staining, ensure the PVA is stored correctly and that smears are heat-fixed properly on a slide warmer set at 60°C for 5 minutes or air-dried completely before staining [20].
Frequently Asked Questions (FAQs)
Q1: What is the single most critical factor for ensuring high sensitivity in the FEC technique? The most critical factor is using a validated concentration technique with high-quality reagents. Studies show that the Formol-Ethyl Acetate Concentration (FAC) technique has a significantly higher detection rate (75%) compared to the Formol-Ether Concentration (FEC) method (62%) and direct wet mount (41%) [5]. The quality of the formalin and ethyl acetate directly impacts this performance.
Q2: How does reagent quality directly impact diagnostic sensitivity? Reagent quality is paramount for the physicochemical principles of the technique. The formalin-ethyl acetate sedimentation method is a diphasic technique that relies on specific gravity and centrifugal force to separate parasites from debris [40] [20]. Compromised reagents will not create the proper environment for this separation, leading to a loss of parasitic structures in the supernatant and a drastic reduction in diagnostic sensitivity.
Q3: Are there safer solvent alternatives to ether in concentration techniques? Yes. The formalin-ethyl acetate technique was developed specifically to avoid the problems of flammability associated with ether, making it safer for routine laboratory use while maintaining high diagnostic performance [20].
Experimental Protocol: Formalin-Ethyl Acetate Sedimentation Concentration
This is the detailed methodology as used in reference laboratories for optimal recovery of intestinal parasites [20].
- Mix the stool specimen thoroughly.
- Strain approximately 5 ml of the fecal suspension through wetted gauze placed over a funnel into a 15 ml conical centrifuge tube.
- Add 0.85% saline or 10% formalin through the debris on the gauze to bring the volume in the tube to 15 ml.
- Centrifuge at 500 × g for 10 minutes.
- Decant the supernatant completely.
- Resuspend the sediment in 10 ml of 10% formalin and mix thoroughly.
- Add 4 ml of ethyl acetate to the tube. Stopper the tube and shake vigorously in an inverted position for 30 seconds.
- Carefully remove the stopper and centrifuge at 500 × g for 10 minutes.
- Free the plug of debris from the top of the tube with an applicator stick and decant the top layers of supernatant.
- Use a cotton-tipped applicator to remove any remaining debris from the sides of the tube.
- Add a few drops of 10% formalin to resuspend the concentrated sediment for examination.
Workflow Visualization
Performance Data
Table 1: Comparison of Parasite Detection Rates by Technique
This data, derived from a recent clinical study, quantitatively demonstrates the superior performance of the FAC method [5].
| Parasite Observed | Wet Mount (n/110) | Formol Ether Concentration (FEC) (n/110) | Formol Ethyl Acetate Concentration (FAC) (n/110) |
|---|---|---|---|
| Protozoal Cysts | |||
| Blastocystis hominis | 4 | 10 | 12 |
| Entamoeba histolytica | 13 | 18 | 20 |
| Giardia lamblia | 9 | 12 | 13 |
| Helminth Eggs/Larvae | |||
| Hymenolepis nana | 2 | 4 | 5 |
| Ascaris lumbricoides | 4 | 4 | 7 |
| Strongyloides stercoralis | 1 | 2 | 4 |
| Total Detection | 45 (41%) | 68 (62%) | 82 (75%) |
The Scientist's Toolkit
Table 2: Key Research Reagent Solutions for FEC Technique
A list of essential materials and their functions in the Formol-Ethyl Acetate Concentration technique.
| Item | Function | Critical Storage & Quality Control |
|---|---|---|
| 10% Buffered Formalin | Fixes and preserves parasitic structures; base medium for sedimentation. | Store in sealed dark glass; check for precipitate (degradation). |
| Ethyl Acetate | Solvent that dissolves fats and debris, forming a plug for removal. | Store in sealed container away from heat/flames; top up/replace if evaporated. |
| 0.85% Saline Solution | Isotonic diluent that preserves parasite morphology. | Use fresh or properly stored solution to avoid contamination. |
| Polyvinyl Alcohol (PVA) | Preservative adhesive for creating permanent stained smears. | Store as per manufacturer's guidelines; ensure proper fixation of smear. |
| Centrifuge Tubes (15mL conical) | Vessel for the concentration procedure. | Ensure they are clean and free of cracks to withstand centrifugation. |
Technique Refinements to Minimize Procedural Losses and Maximize Parasite Yield
Frequently Asked Questions (FAQs)
Q: What is the single most important factor in maximizing parasite yield during concentration? A: The choice of concentration technique is critical. Studies show that the Formalin-Ethyl Acetate Concentration (FAC) technique detects significantly more parasites (75% detection rate) compared to the Formalin-Ether Concentration (FEC) method (62%) and direct wet mount (41%) [5]. FAC is particularly effective for recovering both protozoa and helminths.
Q: How does sample quantity affect detection sensitivity? A: Sample quantity directly impacts sensitivity. One study found that a method using 2g of stool (FECT) detected significantly more positive samples than an automated system using only 0.5g [41]. The larger sample size likely provides more parasite material for examination, improving detection rates, especially in low-intensity infections.
Q: Can automated systems replace manual concentration techniques? A: Automated systems like the Orienter Model FA280 offer advantages in speed, reduced labor, and safety by minimizing hands-on time and exposure [41]. However, they may have lower sensitivity compared to manual concentration techniques and higher per-test costs [41]. Currently, they serve as useful supplements but may not fully replace meticulous manual methods for maximum yield, particularly in research settings.
Q: What are the most common causes of procedural loss during staining and examination? A: Common issues include insufficient mixing of stool samples leading to uneven distribution, improper smear thickness, inadequate drying of smears, and incomplete rinsing of stains that can leave debris obscuring parasites. These technical inconsistencies can significantly reduce the number of parasites visible for identification.
Troubleshooting Common Experimental Issues
Problem: Low Parasite Recovery in Concentrated Samples
Symptoms
- Few or no parasites observed in sediment despite positive direct smear
- Inconsistent results across samples processed simultaneously
Root Causes
- Incomplete Emulsification: Large fecal particles not fully broken down
- Inadequate Centrifugation: Speed or time insufficient to form proper sediment
- Improper Filtering: Gauze mesh clogged or too coarse, retaining parasites
- Supernatant Removal: Accidentally discarding sediment during decanting
Solutions
- Ensure thorough emulsification of 1g stool in 7mL of 10% formol saline before filtering [5]
- Use standardized centrifugation protocols: 1500 rpm for 5 minutes for FAC [5]
- Employ appropriate filtering materials (3 layers of gauze) and check for clogging [5]
- Leave sufficient sediment after supernatant decanting; avoid disturbing the pellet
Problem: Poor Detection of Dual Infections
Symptoms
- Only one parasite species detected when multiple are present
- Inconsistent identification of co-infections across different techniques
Root Causes
- Technique Sensitivity Limitations: Some methods lack sensitivity for lower abundance parasites
- Differential Recovery: Varying efficiency for different parasite types (cysts vs. eggs vs. larvae)
- Observer Bias: Technician may stop searching after finding first parasite
Solutions
- Implement FAC technique, which demonstrated better detection of dual infections compared to FEC and wet mount [5]
- Establish standardized microscopic examination protocols with minimum field review requirements
- Utilize concentration methods that preserve diverse parasite forms equally well
Problem: Inconsistent Results Between Technicians
Symptoms
- Variable detection rates among staff with similar experience
- Discrepancies in species identification
Root Causes
- Non-standardized Procedures: Variations in technique execution
- Differing Diagnostic Criteria: Inconsistent identification standards
- Variable Sample Processing: Differences in sample preparation timing and methods
Solutions
- Implement standardized protocols with detailed, step-by-step instructions
- Provide regular proficiency testing with reference samples
- Establish quality control measures including random re-examination of negative samples
- Conduct regular training on parasite morphology and identification criteria
Comparative Performance of Diagnostic Techniques
Table 1: Detection Rates of Common Parasites by Different Techniques (n=110 samples) [5]
| Parasite Observed | Wet Mount n (%) | Formol Ether Concentration (FEC) n (%) | Formol Ethyl Acetate Concentration (FAC) n (%) |
|---|---|---|---|
| Protozoal Cysts | |||
| Blastocystis hominis | 4 (9%) | 10 (15%) | 12 (15%) |
| Entamoeba histolytica | 13 (31%) | 18 (26%) | 20 (24%) |
| Giardia lamblia | 9 (20%) | 12 (18%) | 13 (16%) |
| Helminth Eggs/Larvae | |||
| Hymenolepis nana | 2 (1%) | 4 (6%) | 5 (6%) |
| Ascaris lumbricoides | 4 (10%) | 4 (6%) | 7 (8%) |
| Strongyloides stercoralis | 1 (2%) | 2 (3%) | 4 (5%) |
| Overall Detection | 45 (41%) | 68 (62%) | 82 (75%) |
Table 2: Comparison of Manual vs. Automated Detection Systems [41]
| Parameter | Formalin-Ethyl Acetate Concentration Technique (FECT) | Automated FA280 with AI | Automated FA280 with User Audit |
|---|---|---|---|
| Sample Volume | 2g stool | ~0.5g stool | ~0.5g stool |
| Hands-on Time | High | Low | Low |
| Processing Time | 15-20 minutes per sample | ~30 minutes for 40 samples | ~30 minutes for 40 samples |
| Sensitivity | High (reference) | Lower than FECT | Moderate |
| Species Identification | Comprehensive | Fair agreement with FECT (κ=0.367) | Strong to perfect agreement with FECT (κ=0.857-1.00) |
| Cost per Test | Low | Higher | Higher |
| Advantages | High sensitivity, standardized | High-throughput, reduced labor | Combines automation with expert verification |
Experimental Protocols
Principle This method combines the preservative properties of formalin with the concentration power of ethyl acetate extraction to separate parasites from fecal debris.
Reagents and Equipment
- 10% formol saline
- Ethyl acetate
- Centrifuge with sealed buckets
- Gauze (3 layers)
- Conical centrifuge tubes (15mL)
- Applicator sticks
Procedure
- Emulsify approximately 1g of stool in 7mL of 10% formol saline in a centrifuge tube
- Fix for 10 minutes at room temperature
- Strain the mixture through 3 layers of gauze into a clean centrifuge tube
- Add 3mL of ethyl acetate to the filtrate
- Centrifuge at 1500 rpm for 5 minutes
- Four layers will form: ethyl acetate, plug of debris, formalin, sediment
- Loosen debris plug with applicator stick and decant top three layers
- Examine sediment microscopically (10X and 40X) for parasites
Principle Similar to FAC but uses diethyl ether as the extraction solvent to separate parasites from fecal debris.
Reagents and Equipment
- 10% formalin
- Diethyl ether
- Centrifuge
- Gauze (2 layers)
- Conical centrifuge tubes (15mL)
Procedure
- Mix 2g of stool with 10mL of 10% formalin
- Strain through 2 layers of gauze into a 15mL conical centrifuge tube
- Add 3mL of ethyl acetate (or 4mL diethyl ether) to the mixture
- Tightly close and shake vigorously in inverted position for 1 minute
- Centrifuge at 2500 rpm for 2 minutes
- Ring sides of tube with applicator stick to free debris plug
- Decant top layer of supernatant
- Remove debris from tube sides with cotton-tipped applicator
- Examine sediment microscopically for ova and parasites
Experimental Workflow Visualization
Sample Processing Workflow for Parasite Concentration
Research Reagent Solutions
Table 3: Essential Reagents and Materials for FEA Concentration Techniques
| Reagent/Material | Function | Specification Notes |
|---|---|---|
| 10% Formalin/Formol Saline | Fixative and preservative | Maintains parasite morphology; 10% concentration optimal |
| Ethyl Acetate | Extraction solvent | Separates parasites from fecal debris; alternative to ether |
| Diethyl Ether | Extraction solvent | Traditional solvent; more volatile than ethyl acetate |
| Gauze | Filtration medium | 2-3 layers; removes large particulate matter |
| Conical Centrifuge Tubes | Sample processing | 15mL capacity with secure lids to prevent leakage |
| Centrifuge | Sedimentation | Capable of 1500-2500 rpm with sealed buckets for safety |
| Microscope Slides & Coverslips | Examination | Standard slides (75x25mm) and #1.5 thickness coverslips |
| Iodine Solution | Staining | Enhances visibility of internal structures of cysts |
| Saline (0.9% NaCl) | Diluent | Isotonic solution for direct wet mount preparations |
Validating and Comparing FEA: Performance Metrics, Alternative Methods, and Gold Standards
Frequently Asked Questions (FAQs)
Q1: What is the practical difference between Sensitivity and Specificity? A1: Sensitivity measures a test's ability to correctly identify individuals with a condition (true positive rate), while Specificity measures its ability to correctly identify those without the condition (true negative rate) [42]. They are inversely related and must be considered together for a complete picture of a diagnostic test's accuracy [42].
Q2: Why are my FEA stress results changing when I make the mesh finer? A2: This indicates your mesh may not be converged. A mesh convergence study is a fundamental step to ensure results are not significantly affected by element size [43] [44]. You should refine the mesh in regions of interest until the change in key results (like peak stress) falls below an acceptable threshold [45].
Q3: How does disease prevalence impact Predictive Values? A3: Positive Predictive Value (PPV) and Negative Predictive Value (NPV) are highly dependent on disease prevalence [42]. When a disease is highly prevalent, the test is better at 'ruling in' the disease (higher PPV) and worse at 'ruling it out' (lower NPV). You must consider the population's prevalence when interpreting these values [42].
Q4: How can I efficiently perform a mesh convergence study? A4: Run your analysis with several different mesh sizes and track a key outcome (e.g., peak stress, displacement) [45]. Plot this outcome against the number of nodes or element size. The solution converges when further refinement causes negligible change. To save time, refine the mesh primarily in regions with high stress gradients or deformations [45].
Troubleshooting Guides
Problem: Unrealistically High Stress Values in FEA Model
Possible Causes and Solutions:
- Mesh Not Converged: The mesh is too coarse to capture the true stress distribution accurately.
- Geometric Singularity: Presence of sharp corners, re-entrant corners, or points where boundary conditions are applied, leading to theoretically infinite stress.
- Solution: Add small fillets to sharp internal corners. Recognize that stresses at singularities are not physically meaningful; instead, evaluate stresses a small distance away from the singularity or use average stresses [1].
- Incorrect Boundary Conditions: Constraints or loads are applied in an unrealistic way, creating artificial stress risers.
- Solution: Review and validate all boundary conditions for realism. Ensure constraints do not over-idealize the real-world support conditions [43].
Problem: Low Sensitivity in a Diagnostic Test
Possible Causes and Solutions:
- Suboptimal Test Threshold: The cutoff value for a positive test is set too strictly, missing true positive cases.
- Solution: Re-evaluate the test's Receiver Operating Characteristic (ROC) curve to select a threshold that balances Sensitivity and Specificity appropriately.
- Pre-analytical Errors: Issues with sample collection, handling, or storage degrade the target analyte.
- Solution: Implement and standardize sample collection protocols. The use of affinity enrichment techniques can help concentrate low-abundance biomarkers and improve detection sensitivity [46].
- Inherent Test Limitations: The test itself cannot detect the target effectively.
Experimental Protocols
Protocol 1: Calculating Diagnostic Test Accuracy Metrics
This protocol outlines the steps to calculate key validation metrics from a 2x2 contingency table [42].
Materials:
- Results from a diagnostic test (positive/negative)
- Results from a reference standard or gold standard (disease present/absent)
Methodology:
- Construct a 2x2 table comparing the new test results against the gold standard.
- Populate the table with the following values:
- True Positives (A): Number of diseased individuals correctly identified by the test.
- False Positives (B): Number of healthy individuals incorrectly identified as positive.
- False Negatives (C): Number of diseased individuals incorrectly identified as negative.
- True Negatives (D): Number of healthy individuals correctly identified as negative.
- Calculate the metrics using the formulas in Table 1.
Protocol 2: Finite Element Mesh Convergence Study
This protocol ensures that FEA results are accurate and not dependent on element size [45] [44].
Materials:
- Validated FEA software (e.g., ANSYS, COMSOL)
- CAD model of the geometry
Methodology:
- Initial Analysis: Start with a relatively coarse mesh and run the analysis.
- Refine Mesh: Create at least three progressively finer meshes by globally reducing the element size or using local refinement in critical areas.
- Run Simulations: Solve the model for each mesh density.
- Track Metric: Select a key outcome metric (e.g., maximum von Mises stress, maximum displacement, natural frequency).
- Check Convergence: Plot the selected metric against the number of nodes or element size. The mesh is considered converged when the change in the metric between successive refinements is insignificant (e.g., <2-5%) for your application.
Data Presentation
| Metric | Formula | Example Calculation from Provided Data |
|---|---|---|
| Sensitivity | A / (A + C) |
369 / (369 + 15) = 0.961 or 96.1% |
| Specificity | D / (D + B) |
558 / (558 + 58) = 0.906 or 90.6% |
| Positive Predictive Value (PPV) | A / (A + B) |
369 / (369 + 58) = 0.864 or 86.4% |
| Negative Predictive Value (NPV) | D / (D + C) |
558 / (558 + 15) = 0.974 or 97.4% |
| Positive Likelihood Ratio (LR+) | Sensitivity / (1 - Specificity) |
0.961 / (1 - 0.906) = 10.22 |
| Negative Likelihood Ratio (LR-) | (1 - Sensitivity) / Specificity |
(1 - 0.961) / 0.906 = 0.043 |
The example data is based on a sample of 1000 individuals where 427 tested positive and 573 tested negative. The actual number of diseased individuals was 384 [42].
Table 2: Essential Research Reagent Solutions for Diagnostic Validation
| Reagent / Material | Function in Experiment |
|---|---|
| Reference Standard (Gold Standard) | Provides the definitive diagnosis against which the new test is compared to calculate accuracy metrics like sensitivity and specificity [42] [47]. |
| Affinity Enrichment Particles | Used to capture, concentrate, and preserve low-abundance biomarkers (e.g., from urine) prior to detection, dramatically improving test sensitivity [46]. |
| Monoclonal Antibodies | Highly specific antibodies used in immunoassays (e.g., lateral flow tests, ELISA) to detect target antigens with high specificity [46]. |
| Mass Spectrometry Reagents | Used for the discovery and identification of novel pathogen-specific peptides and biomarkers in complex biological samples [46]. |
Workflow Visualization
Validation Workflow for FEA and Diagnostics
Calculating Sensitivity Specificity and NPV
This technical support center addresses common methodological challenges in research involving Finite Element Analysis (FEA) and related concentration and analysis techniques. The content is framed within a broader thesis on improving the reliability and applicability of FEA in scientific research, particularly for drug development professionals and researchers who rely on computational models and binding assays.
A critical foundation for any analysis is selecting the appropriate technique for your research question. The table below compares the core principles and common applications of FEA, FGC, and FAC.
| Technique | Core Principle | Primary Application Context |
|---|---|---|
| FEA (Finite Element Analysis) | Numerical method for approximating solutions to partial differential equations by dividing a complex system into smaller, simpler elements [49]. | Simulating physical behavior (stress, strain, heat transfer) in engineering structures and biomechanical systems [43] [50]. |
| FGC (Frontal Gel Chromatography) | Separation method to obtain the free ligand fraction from a protein-ligand mixture without disturbing the binding equilibrium [51]. | Directly measuring free ligand concentration ([L]f) to determine binding parameters (e.g., for serum albumins and drugs) [51]. |
| FAC (Fluorescence-Activated Cell Sorting) | Flow cytometry-based technology that analyzes and physically sorts cells based on their fluorescent properties [52] [53]. | Isolating and enriching specific cell populations from a heterogeneous mixture for downstream analysis [52]. |
Troubleshooting Guides
FEA Common Workflow & Problem Identification
The following diagram outlines a generalized FEA workflow, highlighting stages where common errors occur.
Detailed FEA Troubleshooting
Problem 1: Unrealistic Boundary Conditions and Loads
- Symptoms: Unexpected rigid body motion, stress patterns that defy physical intuition, or reaction forces that do not balance applied loads.
- Causes: Over-constraining or under-constraining the model; applying loads in a non-representative way (e.g., point loads on large areas instead of distributed pressure) [43] [49].
- Solutions:
- Perform a simple hand calculation to verify the reaction forces and moments are in equilibrium.
- Test boundary conditions for sensitivity; small changes should not cause disproportionately large changes in results [49].
Problem 2: Ignoring Mesh Convergence
- Symptoms: Significant shifts in key results (like peak stress) when the mesh is refined or coarsened.
- Causes: Using a mesh that is too coarse to capture critical phenomena [43] [54].
- Solutions:
Problem 3: Using the Wrong Solution Type
- Symptoms: Solver fails to converge, or results are physically impossible (e.g., excessive penetration in contact).
- Causes: Applying a linear static analysis to an inherently nonlinear problem (large deformations, material plasticity, or changing contact conditions) [54].
- Solutions:
Problem 4: Misinterpreting Stress Results
- Symptoms: Averaged stress contours appear acceptable, but unaveraged results show extreme local values; singularities at sharp corners.
- Causes: Relying solely on averaged nodal stress without checking raw values at integration points [54].
- Solutions:
FGC (Frontal Gel Chromatography) Troubleshooting
Problem: Large Sample Consumption
- Symptoms: Impractically large sample volumes required to obtain a single data point, limiting application for precious proteins or ligands.
- Causes: Use of traditional, large columns with low efficiency [51].
- Solutions:
Problem: Lack of Elution Plateaus
- Symptoms: Chromatogram does not show clear, flat plateau regions (p1 and p2) necessary for determining [L]f.
- Causes: Sample injection volume (Vs) may be too large relative to the column's internal volume (Vi) and void volume (V0) [51].
- Solutions:
- Optimize the sample volume. Theoretical simulation can help determine the optimal Vs for a given column and binding system to ensure distinct plateaus are formed [51].
Frequently Asked Questions (FAQs)
Q1: What is the single most critical step to ensure a reliable FEA? A1: Verification and Validation (V&V). Verification (solving the equations correctly) involves steps like mesh convergence studies [43]. Validation (solving the correct equations) requires correlating FEA results with experimental data to ensure the model accurately represents reality [43] [49].
Q2: My FEA model runs but I don't trust the results. What is a quick sanity check? A2: Use your engineering judgment and knowledge of physics. Check the overall deformation and stress patterns—do they make sense? For example, does a cantilever beam bend as expected? Also, check reaction forces to ensure they are in equilibrium with the applied loads [43] [52].
Q3: How does FEA fundamentally differ from techniques like FGC and FAC? A3: FEA is a computational/numerical method for simulating physical phenomena (e.g., stress, heat transfer) based on approximated geometry and material properties [49]. FGC and FAC are experimental/analytical techniques used in life sciences to measure molecular binding and sort cell populations, respectively [52] [51]. They operate in different domains (computational vs. wet-lab).
Q4: When should I choose FGC over other methods to study protein-ligand binding? A4: FGC is particularly valuable when you need to directly measure the free ligand concentration ([L]f) in a mixture without disturbing the binding equilibrium, and when dealing with relatively weak binding systems (Kd of 1–1000 μM) [51]. It is experimentally simple but was historically limited by sample volume.
Q5: What is a common misconception about FEA software? A5: A major misconception is that modern software is so advanced that it can be used reliably without deep theoretical knowledge. This is false. Users must understand the underlying mechanics, numerics, and material science to correctly interpret results and avoid "garbage in, garbage out" scenarios [49].
Essential Research Reagent Solutions
The following table lists key materials and their functions for the experimental techniques discussed.
| Item | Technique | Function |
|---|---|---|
| Microbore Column (e.g., TSKgel SuperSW2000) | FGC | Packed with fine gel matrix (4 μm) to separate protein-ligand complexes from free ligands, enabling major sample volume reduction [51]. |
| Gel Filtration Matrix (e.g., Sephadex G-25, Superdex peptide) | FGC | Porous beads that exclude large proteins while allowing small ligands to enter pores, facilitating the separation based on size [51]. |
| Fluorescently-Labeled Antibodies | FAC / Flow Cytometry | Bind specifically to cell surface or intracellular markers, allowing for the detection and sorting of specific cell populations based on fluorescence [52]. |
| Validated Material Model | FEA | A mathematical description of material behavior (e.g., linear elastic, hyperelastic) input into the software; its accuracy is critical for result reliability [50] [49]. |
Core FGC Experimental Protocol
This protocol details the improved FGC method for determining protein-ligand binding parameters, significantly reducing sample consumption [51].
Objective
To determine the average number of bound ligands per protein molecule (r) as a function of free ligand concentration ([L]f) for a system like serum albumin binding warfarin or dabsyl amino acids.
Methodology
Sample Preparation:
- Prepare a series of solutions with a constant total protein concentration ([P]t) and varying total ligand concentrations ([L]t). The ratio [P]t/[L]t should be adjusted to ensure that for some samples, a significant fraction (at least 10%) of the ligand is bound [51].
- Use an appropriate buffer system. Note that binding parameters can be sensitive to conditions like pH and temperature.
Chromatography Setup:
- Pack a microbore column (e.g., 1.0 mm × 70 mm) with a suitable gel filtration matrix, such as TSKgel SuperSW2000 (4 μm silica particles with 12.5 nm pores) which excludes proteins larger than 150 kDa [51].
- Connect the column to an HPLC or chromatography system with a UV/Vis or fluorescence detector, and an automated injector.
Chromatography Execution:
- Equilibrate the column with buffer.
- Inject a substantial volume (e.g., 100 μL) of the protein-ligand mixture onto the column. This volume is critical to form the characteristic frontal elution profile with two plateaus [51].
- Force the sample through the column using an isocratic flow of buffer. The protein and protein-ligand complexes elute first, followed by the free ligand.
Data Analysis:
- The resulting chromatogram will show two plateau regions for the ligand (p1 and p2). The height of the second plateau (p2) corresponds directly to the free ligand concentration ([L]f) in the original mixture [51].
- Calculate the bound ligand concentration using Equation 1:
[L]b = [L]t - [L]f[51]. - Calculate the average number of ligands bound per protein molecule (r) using Equation 2:
r = [L]b / [P]t[51]. - By repeating this process for multiple mixtures with different [L]t, you can plot r versus [L]f to generate a binding curve and estimate binding constants.
Correlation with Gold Standard Diagnostics and the Role of Multi-Method Approaches
Troubleshooting Guides and FAQs
Troubleshooting Guide: FEA Model Failure and Unexpected Results
This guide addresses common Finite Element Analysis (FEA) failures and unexpected outcomes, particularly when correlating results with gold standard experimental data.
Problem: The FEA model fails to solve or aborts unexpectedly.
- Check 1: Verify Input Parameters
- Action: Scrutinize all input data for consistency and realism. Ensure geometry, material properties, boundary conditions, and loads are compatible with your solver and represent the physical reality of your validation experiment [55].
- Example: If a load is applied to a node, confirm it aligns with the node's coordinate system and degrees of freedom [55].
- Check 2: Review Mesh Quality and Convergence
- Action: A poor mesh is a common source of failure. Perform a mesh convergence study to ensure your results are not dependent on element size [43].
- Protocol: Refine the mesh in critical regions and observe if the solution changes significantly. A converged mesh produces stable results upon further refinement [56].
- Check 3: Inspect Contact Definitions
- Action: If your model contains multiple parts, ensure contact conditions are correctly defined. Inconsistent contact can cause non-convergence and unrealistic stress concentrations [43].
- Protocol: Check contact parameters and conduct robustness studies to assess the sensitivity of your results to small parameter changes [43].
Problem: FEA results show unrealistic stress concentrations or do not match experimental (gold standard) data.
- Check 1: Identify and Handle Singularities
- Action: Stress singularities occur at sharp re-entrant corners, point loads, or abrupt constraints, where stress values theoretically become infinite and mesh-dependent [56].
- Protocol: Model sharp corners with realistic fillets. For a strength analysis on ductile materials, localized peak stresses may self-relieve through yielding; the nominal stress or a converged stress away from the singularity may be more relevant than the peak value [56].
- Check 2: Validate with Multi-Method Approach
- Action: Do not rely solely on FEA. Use a combination of analytical and experimental methods to validate your model [57].
- Protocol:
- Analytical: Use methods like Whitney-Nuismer to establish a baseline stress concentration factor for simple geometries [57].
- Experimental: Employ Digital Image Correlation (DIC) to obtain full-field strain measurements on physical specimens for direct comparison with FEA strain contours [57].
- FEA: Correlate your simulated results with both analytical and experimental data. Consistent results across all three methods reinforce model quality [57].
- Check 3: Re-examine Boundary Conditions
- Action: Unrealistic boundary conditions are a frequent source of error. They must accurately represent the physical restraints and loading environment of the validation test [43].
- Protocol: Follow a strategy to test and validate boundary conditions. Ensure they do not over-constrain the model or create artificial stress risers [43].
Frequently Asked Questions (FAQs)
Q1: What is a stress concentration factor (Kt) and how is it calculated?
The stress concentration factor (Kt) is a dimensionless number that quantifies how much a geometric feature (like a hole or notch) amplifies stress in a material. It is calculated as the ratio of the maximum stress (σmax) at the feature to the nominal stress (σnominal) in the gross cross-section [1].
Formula: Kt = σ_max / σ_nominal [1].
Typical values range from 1.5 to 6.5, depending on the geometry and loading [1].
Q2: How do I know if my FEA model is accurate enough? Accuracy is ensured through a process of Verification and Validation [43].
- Verification: Ask, "Am I solving the equations correctly?" This involves mathematical checks and mesh convergence studies [43] [56].
- Validation: Ask, "Am I solving the right equations?" This requires correlating your FEA results with experimental (gold standard) test data from a comparable physical specimen [43]. A model is not truly accurate until it has been validated against reality.
Q3: My FEA shows very high stress at a sharp corner. Is this real? Possibly not. Abrupt geometric changes can create stress singularities, where FEA predicts ever-increasing stress with mesh refinement, a mathematical artifact not found in real-world components [56]. In ductile materials, local yielding often relieves these peaks. To obtain physically meaningful results, model the corner with a realistic fillet radius and perform a mesh convergence study [56].
Q4: What is the difference between the Stress Concentration Factor (Kt) and the Stress Intensity Factor (KI)? These factors address different problems:
- Stress Concentration Factor (Kt): Applies to uncracked components with geometric features (holes, notches). It quantifies the local stress amplification in elastic materials and helps predict where cracks might start [1].
- Stress Intensity Factor (KI): Applies to components with existing cracks. It quantifies the severity of the stress field at the crack tip and determines whether the crack will propagate [1].
Experimental Protocols for Method Correlation
Protocol 1: Multi-Method Validation of Stress Concentrations
This protocol outlines a methodology for validating FEA-predicted stress concentrations using analytical and experimental gold standards, as demonstrated in the study of photosensitive resin samples [57].
1. Objective To correlate and validate FEA results for stress concentration factors using analytical (Whitney-Nuismer) calculations and experimental Digital Image Correlation (DIC) data.
2. Materials and Reagent Solutions
- Test Specimens: Fabricate flat plates with centrally located holes using your manufacturing process (e.g., mSLA 3D printing) [57].
- DIC System: A 2D or 3D DIC setup including a high-resolution camera, appropriate lens, and software (e.g., Ncorr for Matlab) [57].
- Tensile Testing Machine: To apply axial or eccentric load to the specimen.
- Software: FEA software (e.g., Abaqus, ANSYS) and analytical calculation tools (e.g., MATLAB, Python).
3. Step-by-Step Procedure
- Step 1: Analytical Prediction.
- Calculate the gross stress concentration factor (Ktg) for your plate geometry using Equation (1) [57]:
Kt∞ / Ktg = 3 / [ (2 + (1 - d/w)^3 ) * (1 - d/w) ]wheredis the hole diameter andwis the plate width. - Calculate the net stress concentration factor (Ktn) using Equation (2) [57]:
Ktn = Ktg / (1 - d/w)
- Calculate the gross stress concentration factor (Ktg) for your plate geometry using Equation (1) [57]:
- Step 2: Experimental DIC Validation.
- Prepare the specimen surface with a stochastic speckle pattern for DIC [57].
- Mount the specimen in the tensile tester and set up the DIC camera(s) perpendicular to the specimen surface.
- Apply a monotonic tensile load. The DIC system will capture images and calculate the full-field strain distribution.
- From the DIC strain field, identify the maximum strain (ε_max) near the hole and compute the maximum stress as
σ_max = E * ε_max, whereEis the material's elastic modulus. The nominal stress isσ_nominal = F / A, whereFis the applied force andAis the gross cross-sectional area. - Compute the experimental Kt:
Kt_exp = σ_max / σ_nominal.
- Step 3: Finite Element Analysis.
- Develop an FEA model of the test specimen, ensuring the mesh is sufficiently refined around the hole [57].
- Apply boundary conditions and loads that match the experimental setup.
- Solve the model and extract the maximum stress value from the results.
- Compute the FEA Kt:
Kt_fea = σ_max_fea / σ_nominal.
- Step 4: Correlation and Validation.
- Compare the Kt values from all three methods (Analytical, DIC, FEA).
- A successful validation shows close agreement between the methods. The study by Oliveira et al. reported variations between 0.42% and 5.25% for axial loading conditions [57].
The workflow for this multi-method validation is summarized in the following diagram:
Protocol 2: Numerical Parametric Study for SCF Prediction
This protocol describes a method for generating a database of Stress Concentration Factors (SCFs) for complex joints using validated FEA models, which can then be used for design via interpolation methods [58].
1. Objective To conduct a Numerical Parametric Study (NPS) to determine the variation of SCF over a range of geometrical parameters for a tubular joint.
2. Materials and Software
- FEA Software: With capabilities for parametric modeling and scripting.
- Validated FE Model: A base finite element model whose correctness has been confirmed through comparison with experimental results [58].
3. Step-by-Step Procedure
- Step 1: Define Geometrical Parameters and Ranges.
- Identify all geometrical parameters (e.g., θ, α, γ, β, τ) that define the joint [58].
- Set the minimum, maximum, and interval values for each parameter to cover the domain of interest.
- Step 2: Automate Model Generation and Analysis.
- Use a scripting language to automatically generate and solve FE models for every combination of parameters in the defined matrix [58].
- Step 3: Extract and Store Results.
- For each solved model, extract the maximum SCF and hot spot stress (HSS) values [58].
- Compile all results into a structured database.
- Step 4: Implement an Interpolation Method.
- Instead of traditional parametric regression, use a Multi-dimensional Lagrangian Interpolation (MLI) function to predict SCF for any geometrical combination within the studied range [58].
- The MLI method uses the NPS results directly as inputs, often leading to higher reliability and accuracy than regression-based equations [58].
The table below summarizes key quantitative findings from the referenced studies on method correlation and accuracy.
Table 1: Correlation Accuracy Between FEA, Analytical, and Experimental Methods
| Study Focus / Method Comparison | Key Metric | Result / Correlation Accuracy | Context / Notes |
|---|---|---|---|
| mSLA Specimens (Axial Load) [57] | Variation in Stress Concentration Factor | 0.42% to 5.25% | Comparison between Whitney-Nuismer analytical method, DIC, and FEA. |
| Multi-dimensional Lagrangian Interpolation (MLI) [58] | Reliability & Accuracy vs. Parametric Regression | More reliable and accurate | MLI used NPS data for SCF prediction in tubular joints. |
| Fillet Model Convergence [56] | Converged Stress Concentration Factor (Kt) | 1.97 | Achieved with ~10 elements on a 45° fillet arc. Mesh convergence is critical. |
| Fatigue Life Sensitivity [56] | Predicted Fatigue Life | 221,000 cycles (accurate mesh) vs. >1 million cycles (coarse mesh) | Demonstrates critical impact of mesh convergence on fatigue-sensitive results. |
The Scientist's Toolkit: Essential Research Reagents & Materials
Table 2: Key Materials and Solutions for Experimental-Experimental Correlation
| Item | Function in Protocol | Example / Specification |
|---|---|---|
| DIC System | Non-contact optical method to measure full-field surface deformation and strain on a test specimen [57]. | Includes high-resolution camera, lens, and software (e.g., Ncorr, py2DIC). |
| Speckle Pattern | Creates a random, high-contrast pattern on the specimen surface necessary for the DIC software to track displacements [57]. | Can be applied using spray paint or airbrush. |
| Tensile Testing Machine | Applies a controlled, measurable uniaxial load to the specimen to induce deformation [57]. | Must have sufficient force capacity and control for the specimen being tested. |
| Formalin-Ethyl Acetate Solution | Used in the FECT (Gold Standard) diagnostic protocol to concentrate parasites in stool samples for microscopic examination [59]. | Preserves and prepares the sample. |
| Merthiolate-Iodine-Formalin (MIF) | A fixation and staining solution used in a coprological technique to preserve and highlight parasites for identification under a microscope [59]. | Aids in morphological differentiation. |
Implementing Quality Control Measures and Proficiency Testing in the Laboratory
Troubleshooting Guide: Common FEA Errors and Solutions
Frequently Asked Questions
1. My FEA model shows unrealistically high stresses that increase with mesh refinement. What is wrong? This is a classic sign of a stress singularity [60], which occurs due to the FEA methodology itself when stresses concentrate on an infinitesimally small area [60]. Common causes include:
- Point loads or point supports [61] [60]
- Sharp re-entrant corners in the geometry [61] [60]
- Solutions:
2. How can I verify that my FEA results are mathematically correct? Verification ensures the mathematical solution of your FEA model is accurate [63].
- Perform a mesh convergence study: Refine the mesh in areas of interest until the key results (like peak stress) do not change significantly [43]. A lack of convergence often indicates a singularity [62] [61].
- Check against simple problems with known solutions: Start with simple load cases, like a cantilever beam or an axially loaded bar, where deflection and stress can be calculated by hand. Compare your FEA results to these closed-form solutions [63].
- Use a consistent unit system throughout the model to avoid errors [43].
3. My model solves, but how do I know it accurately represents real-world physics? This process is called validation [63]. The most reliable method is correlation with physical test data.
- Use strain gauges: Attach strain gauges to a physical prototype at locations corresponding to high-stress areas in the FEA model. Subject the prototype to known loads and compare the measured strains with the FEA predictions [64].
- Follow a validation pyramid: Begin by validating material models with simple test coupons. Then, validate individual components before moving to complex assemblies [63].
- Correlate with any available test data: When test data exists, correlation is essential to ensure modeling assumptions do not hide real physical problems [43].
4. When should I model contact between parts in an assembly? Contacts are critical for understanding load transfer and realistic behavior in assemblies [43].
- Model contact when the load path or pressure distribution between parts is unknown or critical to your analysis goals [43].
- Be aware that contact introduces computational complexity and can lead to longer solve times and convergence difficulties [43]. Conduct sensitivity studies to check the robustness of your contact parameters [43].
Proficiency Testing for FEA Competency
Proficiency Testing (PT) is a valuable tool for ensuring the quality and reliability of analytical results, whether in a wet lab or an FEA simulation environment. The core principle involves comparing your results against a known standard or the results of other analysts.
The following table summarizes a framework for an internal FEA proficiency exercise, inspired by laboratory practices [65].
| Proficiency Exercise Component | Description & Objective | Performance Metric |
|---|---|---|
| Reference Problem | A standardized problem with a well-documented, validated solution (e.g., a benchmark beam deflection or a stress concentration factor from a handbook). | Comparison of key results (max stress, deflection) against the reference value. |
| Blinded Analysis | Analysts are given the geometry and loads but not the expected outcome, preventing bias. | The ability to produce results within an acceptable error margin (e.g., ±5%) of the reference solution. |
| Method Documentation | Analysts must document their entire process, including mesh strategy, boundary conditions, and element choices. | Completeness and justification of the modeling methodology. |
| Root Cause Analysis | If results are outside the acceptance criteria, the analyst must perform a root cause analysis to identify and correct errors [65]. | Identification and implementation of effective corrective actions. |
Example Protocol for a Proficiency Test:
- Sample Distribution: Provide all participants with the same CAD geometry, material properties, and loading conditions.
- Analysis: Participants build their own FEA models and submit results for maximum displacement and von Mises stress.
- Evaluation: Compare all submissions against the pre-determined master solution.
- Feedback and Improvement: Provide individual reports and, if necessary, require additional training for analysts who do not meet the proficiency standards [65].
The Researcher's Toolkit: Essential FQA Procedures
Table: Key Reagents for a Reliable FEA Analysis
| Tool or 'Reagent' | Function in the FEA 'Experiment' |
|---|---|
| Mesh Convergence Study | A fundamental step to ensure numerical accuracy. It confirms that the solution is not dependent on element size [43]. |
| Simple Benchmark Problems | Used to verify the FEA software and the analyst's setup against known analytical solutions, building confidence in the model [63]. |
| Nonlinear Material Models | Essential for simulating realistic material behavior beyond the elastic limit, such as plasticity, which can also help mitigate stress singularities [62] [61]. |
| Elastic Foundation / Spring Supports | Replaces unrealistic rigid boundary conditions with a more physical representation of support stiffness, reducing artificial stress concentrations [62] [60]. |
| Strain Gauge Data | Provides empirical data from physical tests, serving as the ground truth for validating the FEA model's predictions [64]. |
| Proficiency Testing Exercise | A quality control process to evaluate and ensure the competency of the FEA analyst or the entire simulation team [65]. |
Conclusion
The FEA concentration technique remains a vital, yet improvable, tool in parasitological diagnosis. A thorough understanding of its foundational principles, coupled with meticulous attention to methodological execution—particularly centrifugation parameters—is paramount for maximizing diagnostic yield. Evidence indicates that procedural modifications, such as adjusted centrifugation force and time, can significantly enhance sensitivity. Furthermore, a comparative understanding of alternative concentration methods allows laboratories to select the most effective technique based on the target parasite. The key to reliability lies not in relying on FEA alone, but in its judicious application within a broader diagnostic strategy that includes validation against other methods and rigorous internal quality control. Future directions should focus on standardizing optimized protocols, developing even safer and more effective reagents, and integrating molecular assays to confirm and speciate findings from conventional concentration methods, thereby advancing both clinical diagnostics and pharmaceutical research.
References
- 1. Stress Concentration Factor: Minimizing Its Effects in ... [https://www.neuralconcept.com/post/stress-concentration-mitigating-risk-factors-in-design-engineering]
- 2. Understanding Finite Element Analysis: A Beginner's Guide to ... [https://vocal.media/education/understanding-finite-element-analysis-a-beginner-s-guide-to-fea]
- 3. Engagement and Stress Concentration Evaluation of a ... [https://pmc.ncbi.nlm.nih.gov/articles/PMC12108918/]
- 4. An experimental and FEA investigation of deformation ... [https://www.sciencedirect.com/science/article/abs/pii/S0997753825000919]
- 5. Evaluation of different concentration techniques for ... [https://pmc.ncbi.nlm.nih.gov/articles/PMC11922389/]
- 6. Ethyl acetate as a substitute for diethyl ether in the formalin ... [https://pubmed.ncbi.nlm.nih.gov/574877/]
- 7. Hemo-De as substitute for ethyl acetate in formalin- ... [https://pmc.ncbi.nlm.nih.gov/articles/PMC265914/]
- 8. The Toxic Effects of Formalin and How to Contain It [https://www.escolifesciences.com/news/the-toxic-effects-of-formalin-and-how-to-contain-it]
- 9. Precision in Gastrointestinal Parasitology Testing [https://geneticsignatures.com/us/precision-in-gastrointestinal-parasitology-testing/]
- 10. Evaluation of Virus Inactivation by Formaldehyde to ... [https://pmc.ncbi.nlm.nih.gov/articles/PMC4353909/]
- 11. Comparing the efficiency of four diagnostic concentration ... [https://www.sciencedirect.com/science/article/pii/S2090506817302580]
- 12. Where Have All the Diagnostic Morphological Parasitologists ... [https://pmc.ncbi.nlm.nih.gov/articles/PMC9667774/]
- 13. Defining Diagnostic Error: A Scoping Review to Assess the ... [https://pmc.ncbi.nlm.nih.gov/articles/PMC9698189/]
- 14. Diagnostic Errors - Making Healthcare Safer III - NCBI [https://www.ncbi.nlm.nih.gov/books/NBK555525/]
- 15. Faecal sedimentation: Purpose [https://www.rvc.ac.uk/static/review/parasitology/FaecalSedimentation/Purpose.htm]
- 16. Fecal Sedimentation - Learn About Parasites [https://wcvm.usask.ca/learnaboutparasites/diagnostics/faecal-sedimentation.php]
- 17. SOP 4: Sedimentation Technique [https://www.troccap.com/feline-guidelines/standard-operating-procedures/sop4-sedimentation-technique/]
- 18. Microscopic Fecal Exam Procedures [https://capcvet.org/articles/fecal-exam-procedures/]
- 19. Faecal sedimentation: Procedure step 9 [https://www.rvc.ac.uk/static/review/parasitology/FaecalSedimentation/Step9.htm]
- 20. CDC - DPDx - Diagnostic Procedures - Stool Specimens [https://www.cdc.gov/dpdx/diagnosticprocedures/stool/specimenproc.html]
- 21. The Veterinary Nurse's Guide to Fecal Flotation Techniques [https://todaysveterinarynurse.com/clinical-pathology/the-veterinary-nurses-guide-to-fecal-flotation-techniques/]
- 22. Factors affecting sperm recovery rates and survival after ... [https://www.sciencedirect.com/science/article/abs/pii/S0093691X12004116]
- 23. An Ultra Scale-Down Analysis of the Recovery by Dead- ... [https://pmc.ncbi.nlm.nih.gov/articles/PMC4402021/]
- 24. Theoretical prediction and validation of cell recovery rates in ... [https://journals.plos.org/plosone/article?id=10.1371/journal.pone.0187509]
- 25. Optimisation of a double-centrifugation method for ... [https://pmc.ncbi.nlm.nih.gov/articles/PMC5485745/]
- 26. Acetone – a lower cost alternative to EtOAc in normal ... [https://www.biotage.com/blog/acetone-a-lower-cost-alternative-to-etoac-in-normal-phase-flash-column-chromatography]
- 27. Tips for Troubleshooting Liquid–Liquid Extractions [https://www.chromatographyonline.com/view/tips-troubleshooting-liquid-liquid-extractions]
- 28. Troubleshooting Protocols - Biological Sciences: Summer ... [https://guides.library.cmu.edu/biologicalsciencesSRI/troubleshooting]
- 29. Diagnostic Techniques of Soil-Transmitted Helminths [https://pmc.ncbi.nlm.nih.gov/articles/PMC7344795/]
- 30. McMaster Egg Counting Technique - Learn About Parasites [https://wcvm.usask.ca/learnaboutparasites/diagnostics/quantitative-faecal-flotation-mcmaster.php]
- 31. Comparison of 2 centrifugation procedures in the formalin- ... [https://www.sciencedirect.com/science/article/abs/pii/0020751996000574]
- 32. Improved stool concentration procedure for detection of ... [https://pmc.ncbi.nlm.nih.gov/articles/PMC270544/]
- 33. Faecal Parasitology: Concentration Methodology Needs to ... [https://pmc.ncbi.nlm.nih.gov/articles/PMC4830587/]
- 34. The influence of inconsistent wet-sieving procedures on ... [https://www.sciencedirect.com/science/article/abs/pii/S0305440302002637]
- 35. Guidelines for an optimized differential centrifugation of cells [https://www.sciencedirect.com/science/article/pii/S2405580823001668]
- 36. A (Mini) Guide to Centrifuge Troubleshooting [https://www.marathonls.com/a-mini-guide-to-centrifuge-troubleshooting/?srsltid=AfmBOorWIGS9Y7CsCSQyampXFo1Bj4BMHNet0Y4a2Gu3YeUXHLMNkdZ6]
- 37. Common Centrifuge Issues and How to Fix Them [https://newlifescientific.com/blogs/new-life-scientific-blog/centrifuge-troubleshooting?srsltid=AfmBOor_BTMzWlv7q3uXHhdb9fdASIeCwaiBY4sE2I6hQ-T4ztV6KODD]
- 38. Top 10 Common Centrifuge Problems and ... [https://aelabgroup.com/top-10-common-centrifuge-problems-and-troubleshooting-tips/]
- 39. Effects of Different Centrifugation Parameters on ... [https://www.mdpi.com/2409-9279/8/5/116]
- 40. A historical review of the techniques of recovery ... [https://pmc.ncbi.nlm.nih.gov/articles/PMC7269538/]
- 41. High-throughput detection of parasites and ova in stool using ... [https://parasitesandvectors.biomedcentral.com/articles/10.1186/s13071-023-06108-1]
- 42. Diagnostic Testing Accuracy: Sensitivity, Specificity, Predictive ... [https://www.ncbi.nlm.nih.gov/books/NBK557491/]
- 43. 15 Common Mistakes in FEA - FEA Academy [https://fea-academy.com/index.php/component/content/article/27-blog/fea-generalities/70-15-common-mistakes-in-fea?Itemid=101]
- 44. Finite Element Mesh Refinement Definition and Techniques [https://www.comsol.com/multiphysics/mesh-refinement]
- 45. Correct mesh size - a quick guide! [https://enterfea.com/correct-mesh-size-quick-guide/]
- 46. Mass spectrometry-based discovery and diagnostic validation ... [https://journals.plos.org/plosntds/article?id=10.1371/journal.pntd.0013082]
- 47. Systematic review and meta-analysis protocol: Diagnostic ... [https://www.sciencedirect.com/science/article/pii/S2215016124004448]
- 48. Risk prediction and effect evaluation of complicated ... [https://bmcgastroenterol.biomedcentral.com/articles/10.1186/s12876-025-03847-6]
- 49. Failure potential: FEA (Finite Element Analysis) - 9 criteria [https://maschinenkanzlei.de/en/finite-element-analysis-error-expert/]
- 50. 6+ Best Finite Element Software Comparison Guide [https://ddg.wcroc.umn.edu/finite-element-software-comparison/]
- 51. Improved Frontal Gel Filtration Chromatography to ... [https://pmc.ncbi.nlm.nih.gov/articles/PMC12044467/]
- 52. Flow Cytometry vs. FACS: Understanding the Differences [https://www.bosterbio.com/blog/post/flow-cytometry-vs-facs-understanding-the-differences?srsltid=AfmBOorkWpw1AZjvr7VatwmteOOGIUyhPpFjEUnQnSll2NlavNoROTal]
- 53. Flow Cytometry vs FACS: Understanding the Differences in ... [https://contractlaboratory.com/flow-cytometry-vs-facs-understanding-the-differences-in-cell-sorting/]
- 54. Warning! Are You Making Any Of These 8 Common FEA ... [https://caendkoelsch.wordpress.com/2020/02/27/warning-are-you-making-any-of-these-8-common-mistakes-that-fe-analysts-make/]
- 55. Troubleshooting and Debugging Your FEA Model [https://www.linkedin.com/advice/0/how-do-you-troubleshoot-debug-your-fea]
- 56. Dealing with Stress Concentration and Singularities [https://www.digitalengineering247.com/article/dealing-stress-concentrations-singularities]
- 57. Analytical, Experimental, and Finite Element Study of ... [https://www.mdpi.com/2673-3161/6/1/21]
- 58. Stress concentration factor prediction by the multi ... [https://www.sciencedirect.com/science/article/abs/pii/S0013794410004881]
- 59. Performance validation of deep-learning-based approach in ... [https://parasitesandvectors.biomedcentral.com/articles/10.1186/s13071-025-06878-w]
- 60. Common Causes of Calculation Errors in FEA Models [https://www.dlubal.com/en/support-and-learning/support/faq/003336?srsltid=AfmBOoqKZn9OcCskdvgbU-mjXsQO34yBMlA4eXAu1BiWDTlyrX_NiyM3]
- 61. Stress singularity - an honest discussion [https://enterfea.com/stress-singularity-an-honest-discussion/]
- 62. Stress concentration problem in FEA [https://www.eng-tips.com/threads/stress-concentration-problem-in-fea.237265/]
- 63. Validation and Verification in Finite Element Analysis (FEA) [https://control.com/technical-articles/validation-and-verification-in-finite-element-analysis-fea/]
- 64. How to Validate your next Finite Element Analysis (FEA ... - ITM [https://itestsystem.com/posts/how-to-validate-you-next-finite-element-analysis-fea-model-using-strain-gauges/]
- 65. A review of proficiency exercises offered by the Veterinary ... [https://link.springer.com/article/10.1007/s00769-021-01471-x]